You can rollback the VMware Telco Cloud Service Assurance patch to the base version or the previous version of the patch using the helm rollback command.
Prerequisites
To rollback the patch, you must install the Helm package on the Deployment Host. Run the below commands to install Helm.
curl -fsSL -o get_helm.sh https://raw.githubusercontent.com/helm/helm/main/scripts/get-helm-3
chmod 700 get_helm.sh
 ./get_helm.sh
Rollback of Patch on VMware Tanzu Kubernetes Grid and AKS
For example, in CLI based patch rollback, Revision number 1 refers to VMware Telco Cloud Service Assurance 2.3 GA and Revision number 2 refers to VMware Telco Cloud Service Assurance 2.3 Patch x.
Export Kubeconfig file using the below command::
export KUBECONFIG=<Kubeconfig file location>
root [ ~/.kube ]# helm list
NAME    NAMESPACE       REVISION        UPDATED                                   STATUS     CHART          APP VERSION
tcsa    default         2               2023-07-17 18:59:03.569762668 +0000 UTC   deployed   tcsa-2.3.0.2   0.0.0
root [ ~/.kube ]# helm history tcsa
REVISION        UPDATED                         STATUS          CHART           APP VERSION     DESCRIPTION
1               Mon Jul 17 16:50:20 2023        superseded      tcsa-2.3.0      0.0.0           Install complete
2               Mon Jul 17 18:59:03 2023        deployed        tcsa-2.3.0-2    0.0.0           Upgrade complete
- If you want to rollback to the base version, you must select Revision number 1. For example:
root [ ~/tcx-deployer/scripts ]# helm rollback tcsa 1
- Verify the successful execution of the helm rollback command.
- Verify that all apps are successfully reconciled by running the
kubectl get appscommand.Note: After the patch is rolledback, you can view the VMware Telco Cloud Service Assurance version in the About page.
Rollback of Patch through VMware Telco Cloud Automation
To rollback, perform the following steps:
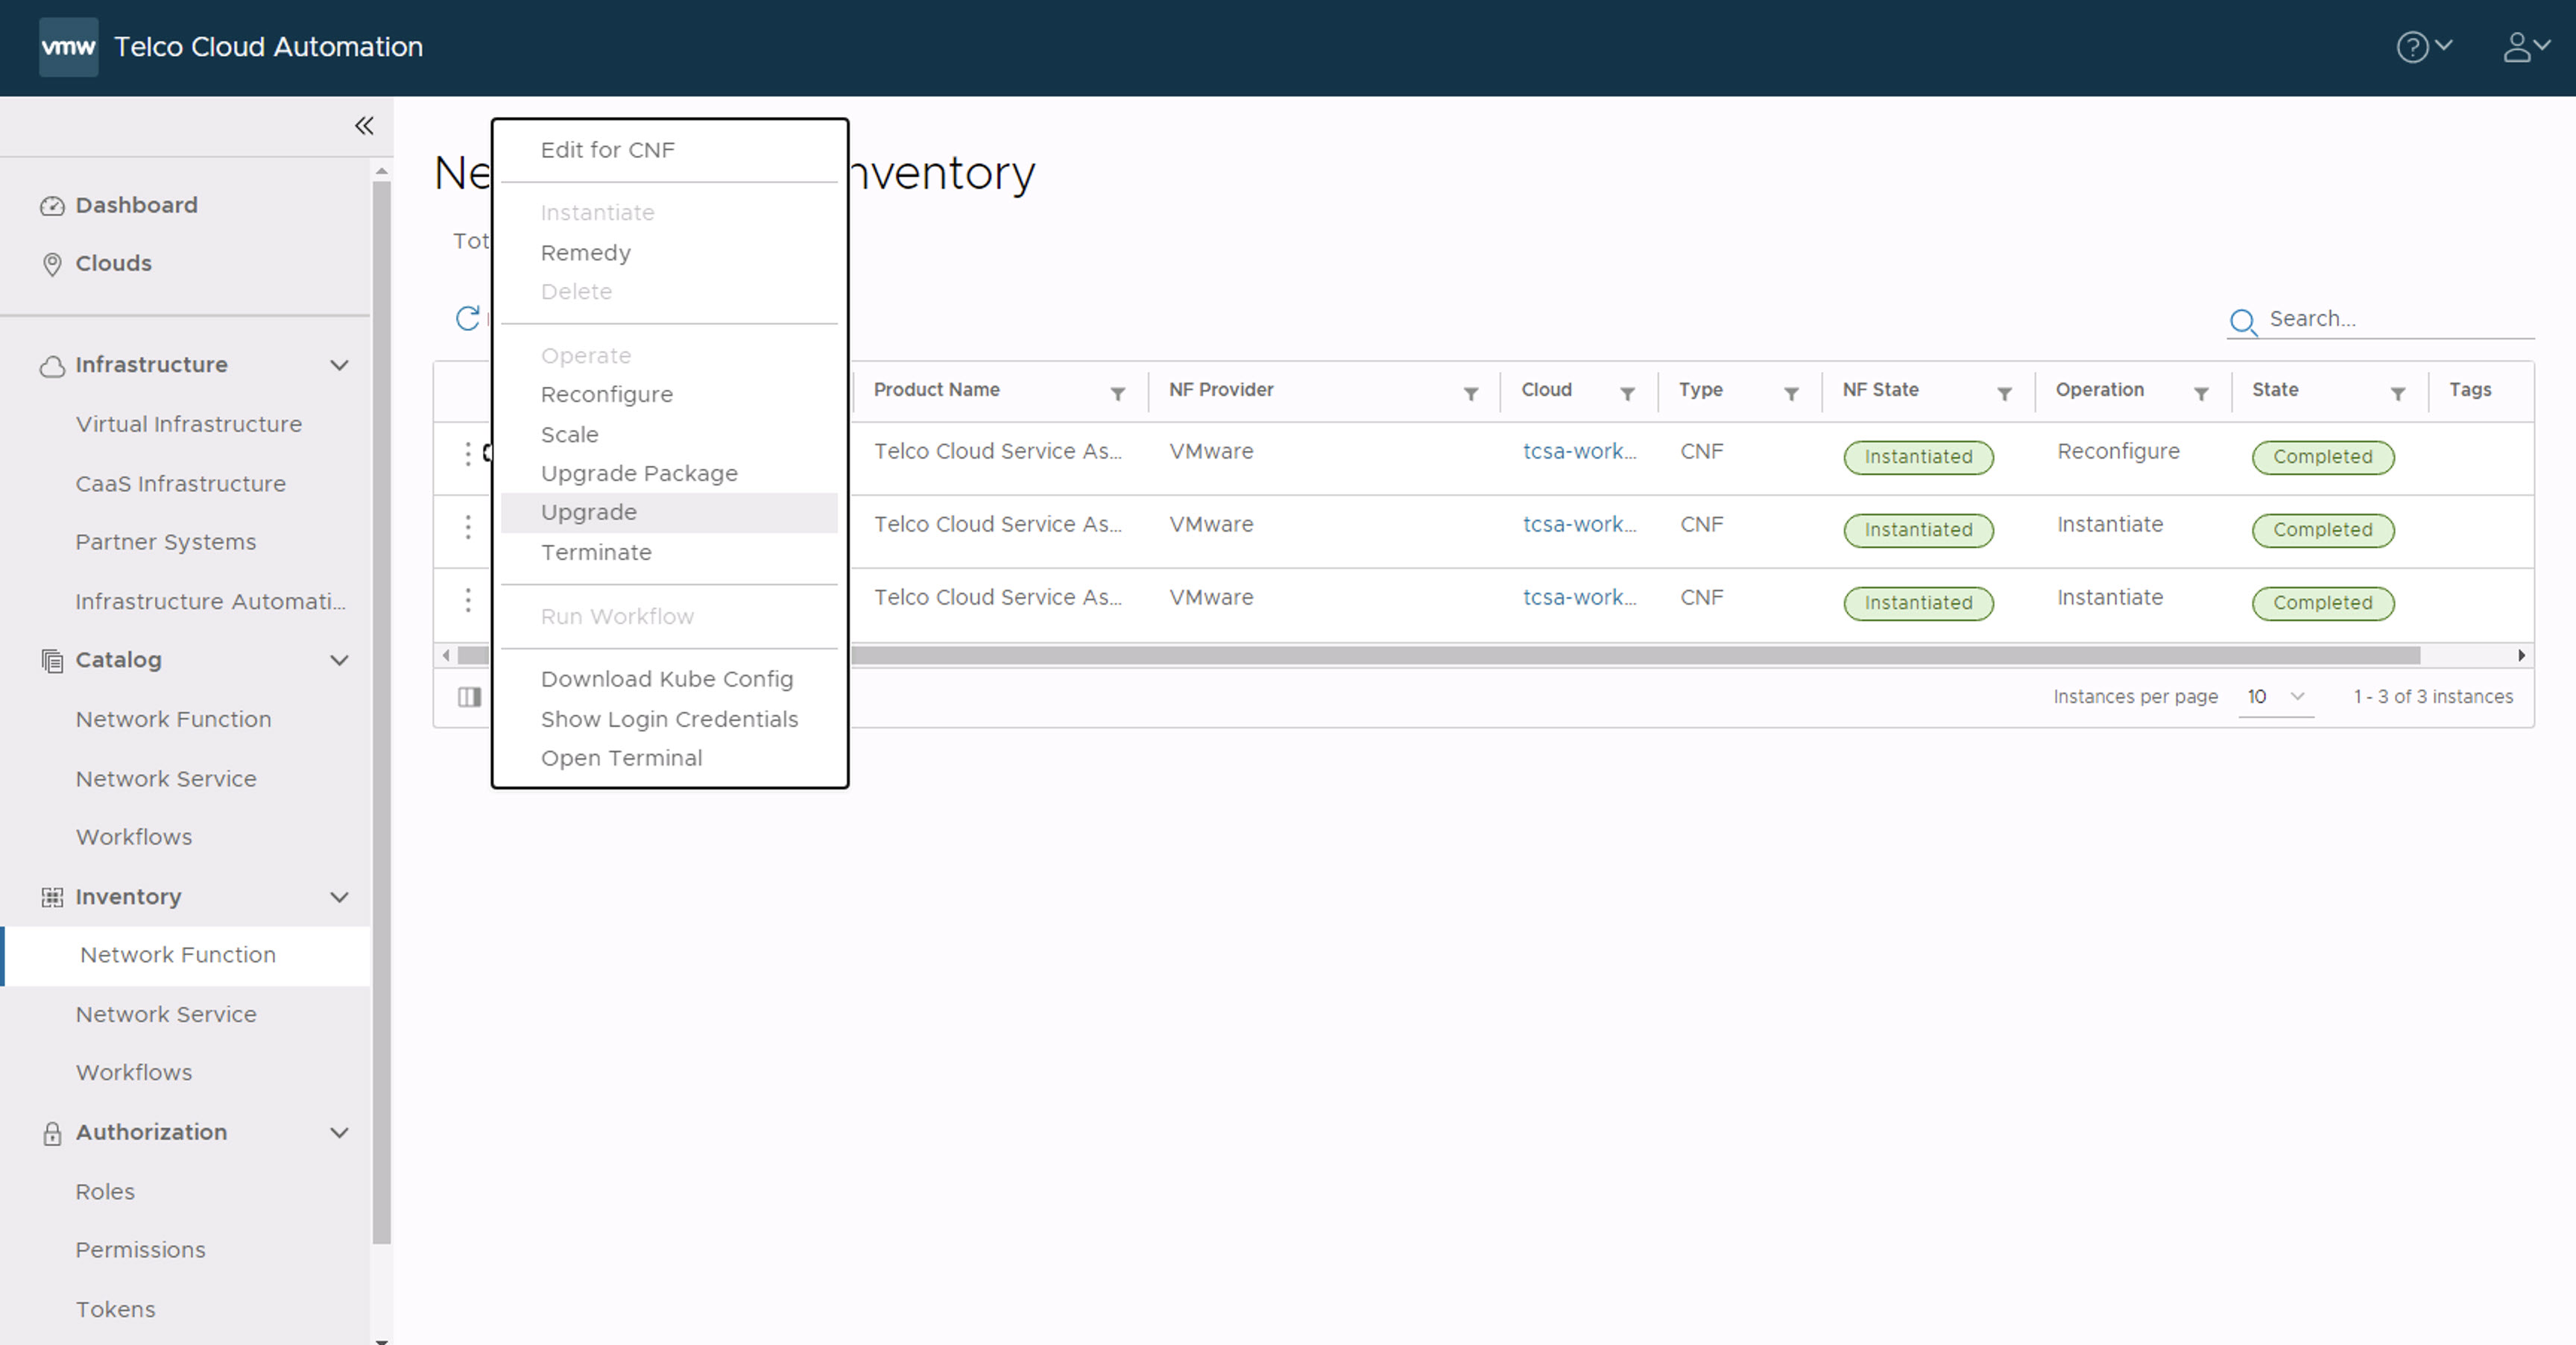
- To rollback the changes, navigate to , click the three dots against the CNF to rollback as part of the patch and select Upgrade. Select the older CSAR file (for example,
tcsa.csar)that you onboarded and update the parameters same as the initial VMware Telco Cloud Service Assurance deployment. - Select Upgrade.
- In the Upgrade Revision section, select the old CSAR file that you onboarded. For example,
tcsa.csar. Click Next.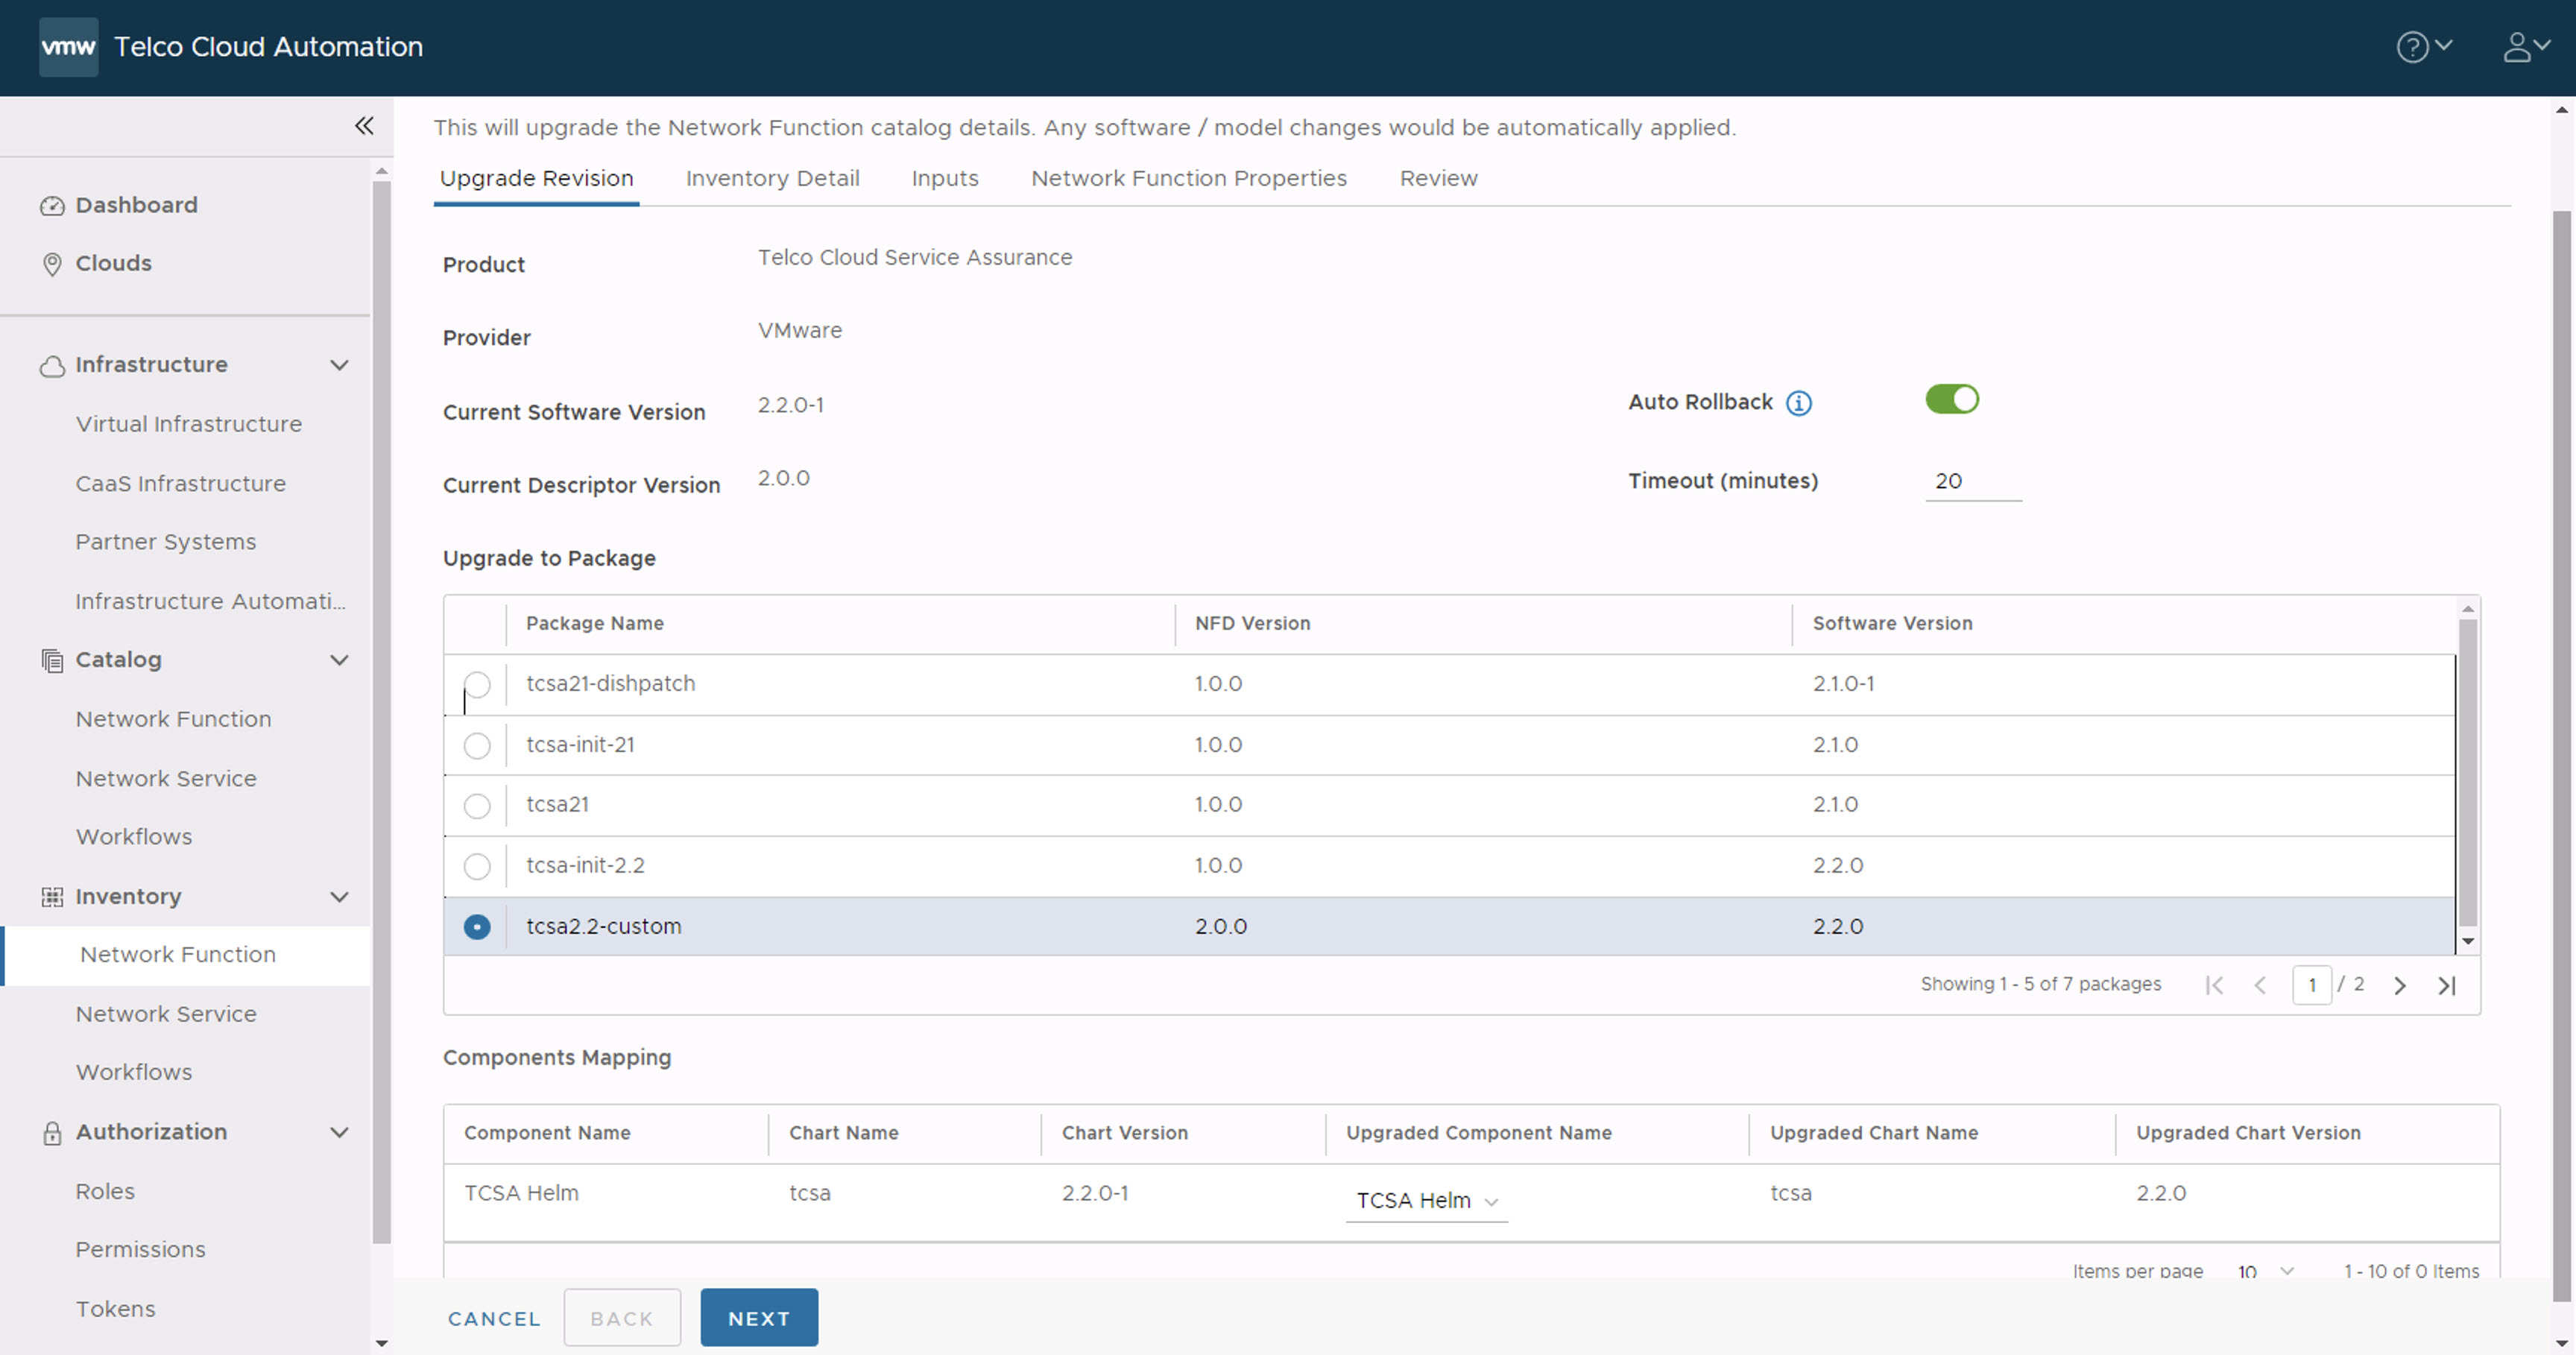
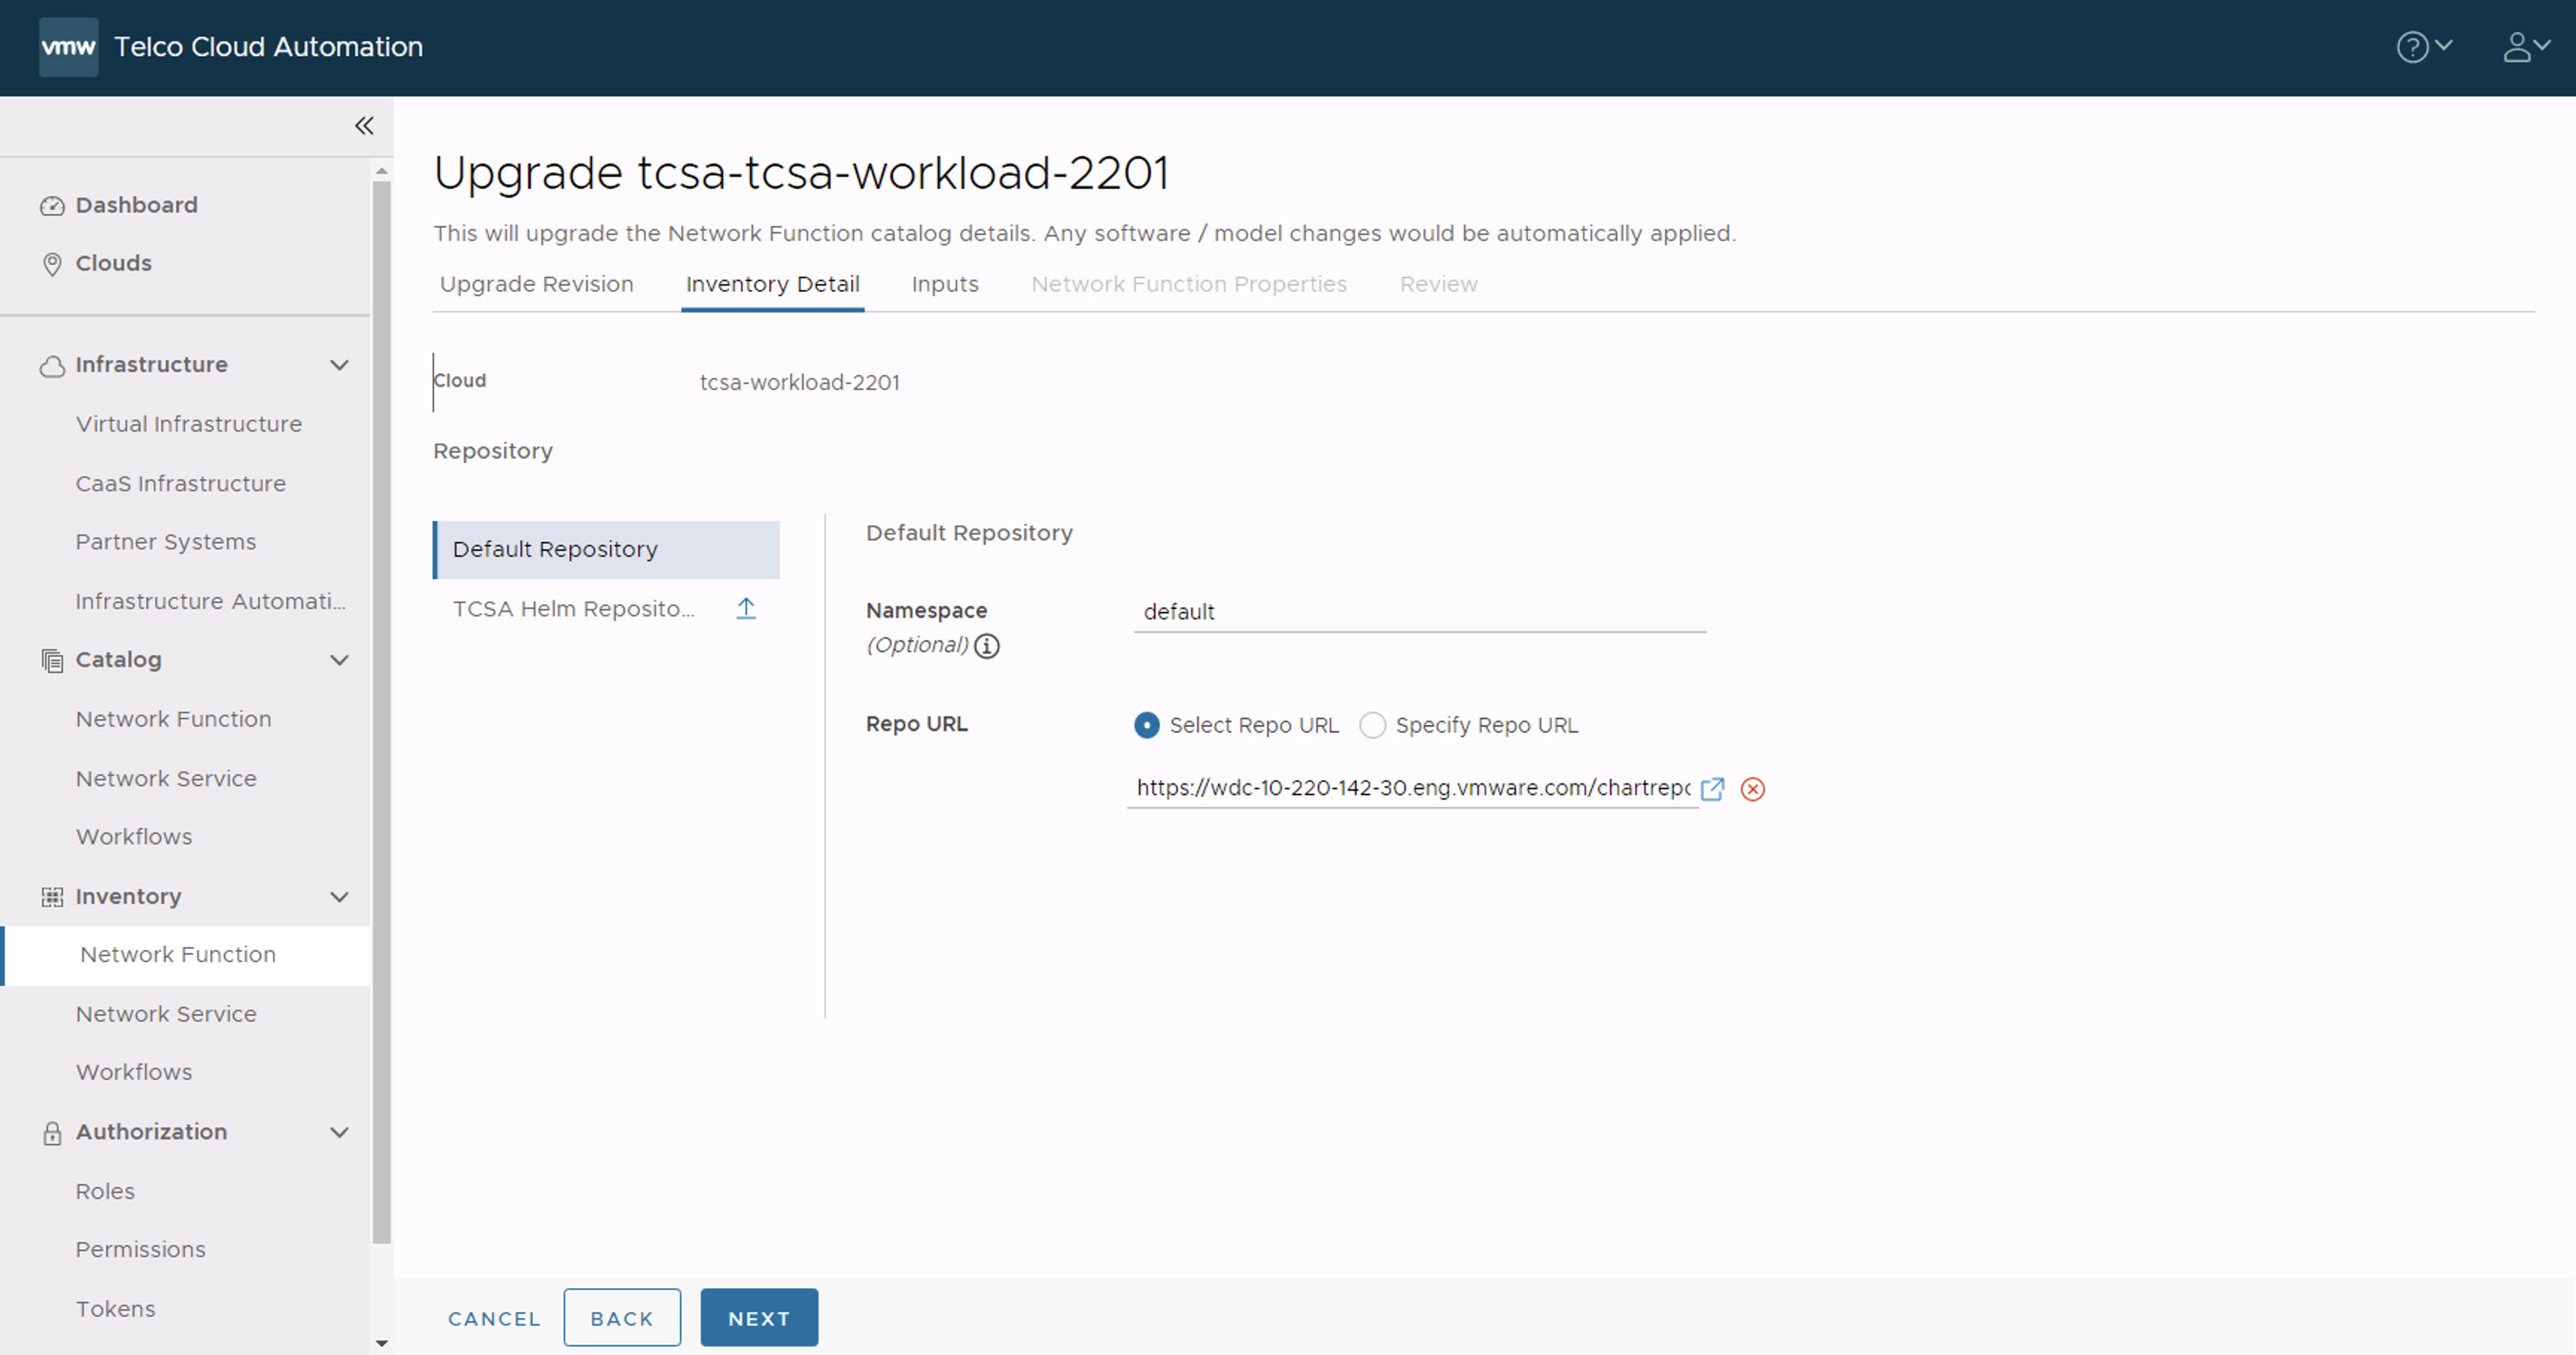
- In the Inventory Detail section, ensure that the Namespace is set to default and select the default library chart repository, that is, the https://<harbor-registry-fqdn>/chartrepo/library endpoint of the associated registry, and click Next.
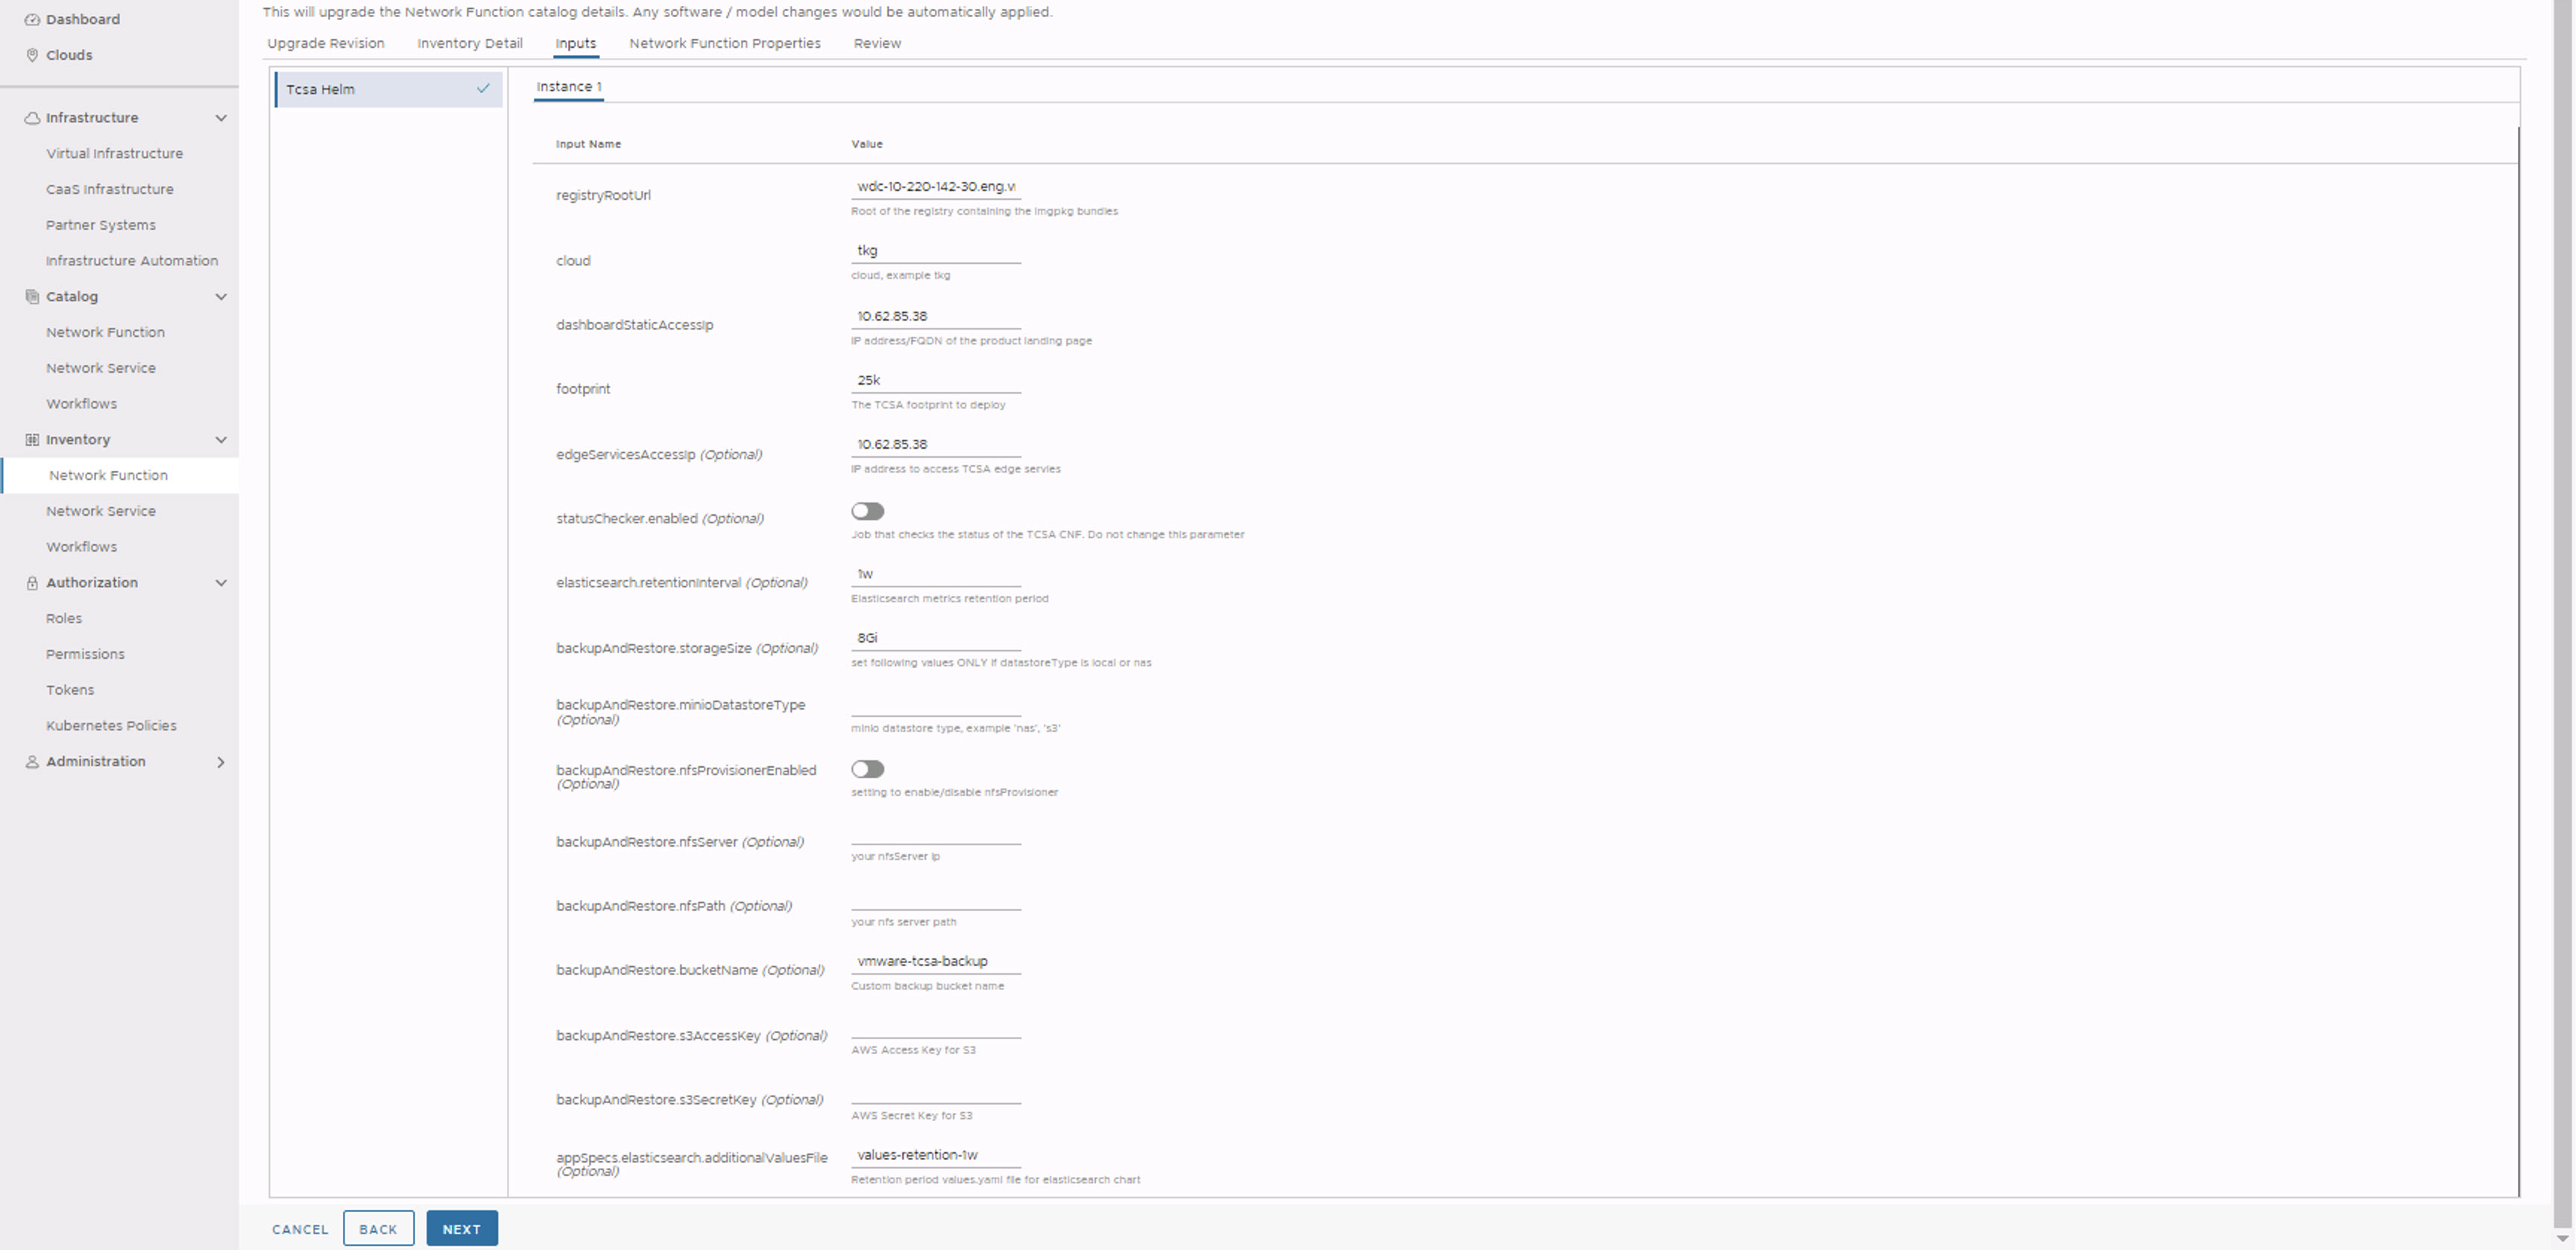
- In the Inputs section, update the following parameters:
Note: Run the below command from the
DeployerHost populateTcsaValuesYaml.shscrip to get the previously configured VMware Telco Cloud Service Assurance base install parameters invalues.yamlfile. This can be used as a reference to fill the VMware Telco Cloud Service Assurance deployment parameters in VMware Telco Cloud Automation UI during Patch upgrade:export KUBECONFIG=<Kubeconfig file location> root [ ~/patch/tcx-deployer/scripts ]# TCA_BASED_DEPLOYMENT=true;./populateTcsaValuesYaml.sh <your-kubeconfig-file-path>
- Set registryRootUrl to the registry URL used while pushing the artifacts.
- Set dashboardStaticAccessIp to the same value specified during the base VMware Telco Cloud Service Assurance deployment.
- Set footprint same as the base version.
- (Optional) Set edgeServicesAccessIp to the same value specified during the base VMware Telco Cloud Service Assurance deployment.
- Set elasticsearch.retentionInterval to the same value specified during the base VMware Telco Cloud Service Assurance deployment.
- All the Backup and Restore values must be same as specified during the earlier VMware Telco Cloud Service Assurance deployment.
For flexible configuration parameters, ensure that you update the values for all the below flexible configuration parameters, with the same value as provided when the
populateTcsaValuesYaml.shscript was run.- flexibleConfig.managedDevices
- flexibleConfig.incomingEvents
- flexibleConfig.incomingMetrics
- flexibleConfig.percentMetricsForAnomaly
- flexibleConfig.percentMetricsForAlarms
- flexibleConfig.retentionInterval
- skipKafkaEdgeRawTopicCreation is set to false.
- Click Next.
- The Network Function Properties page appears. Click Next.
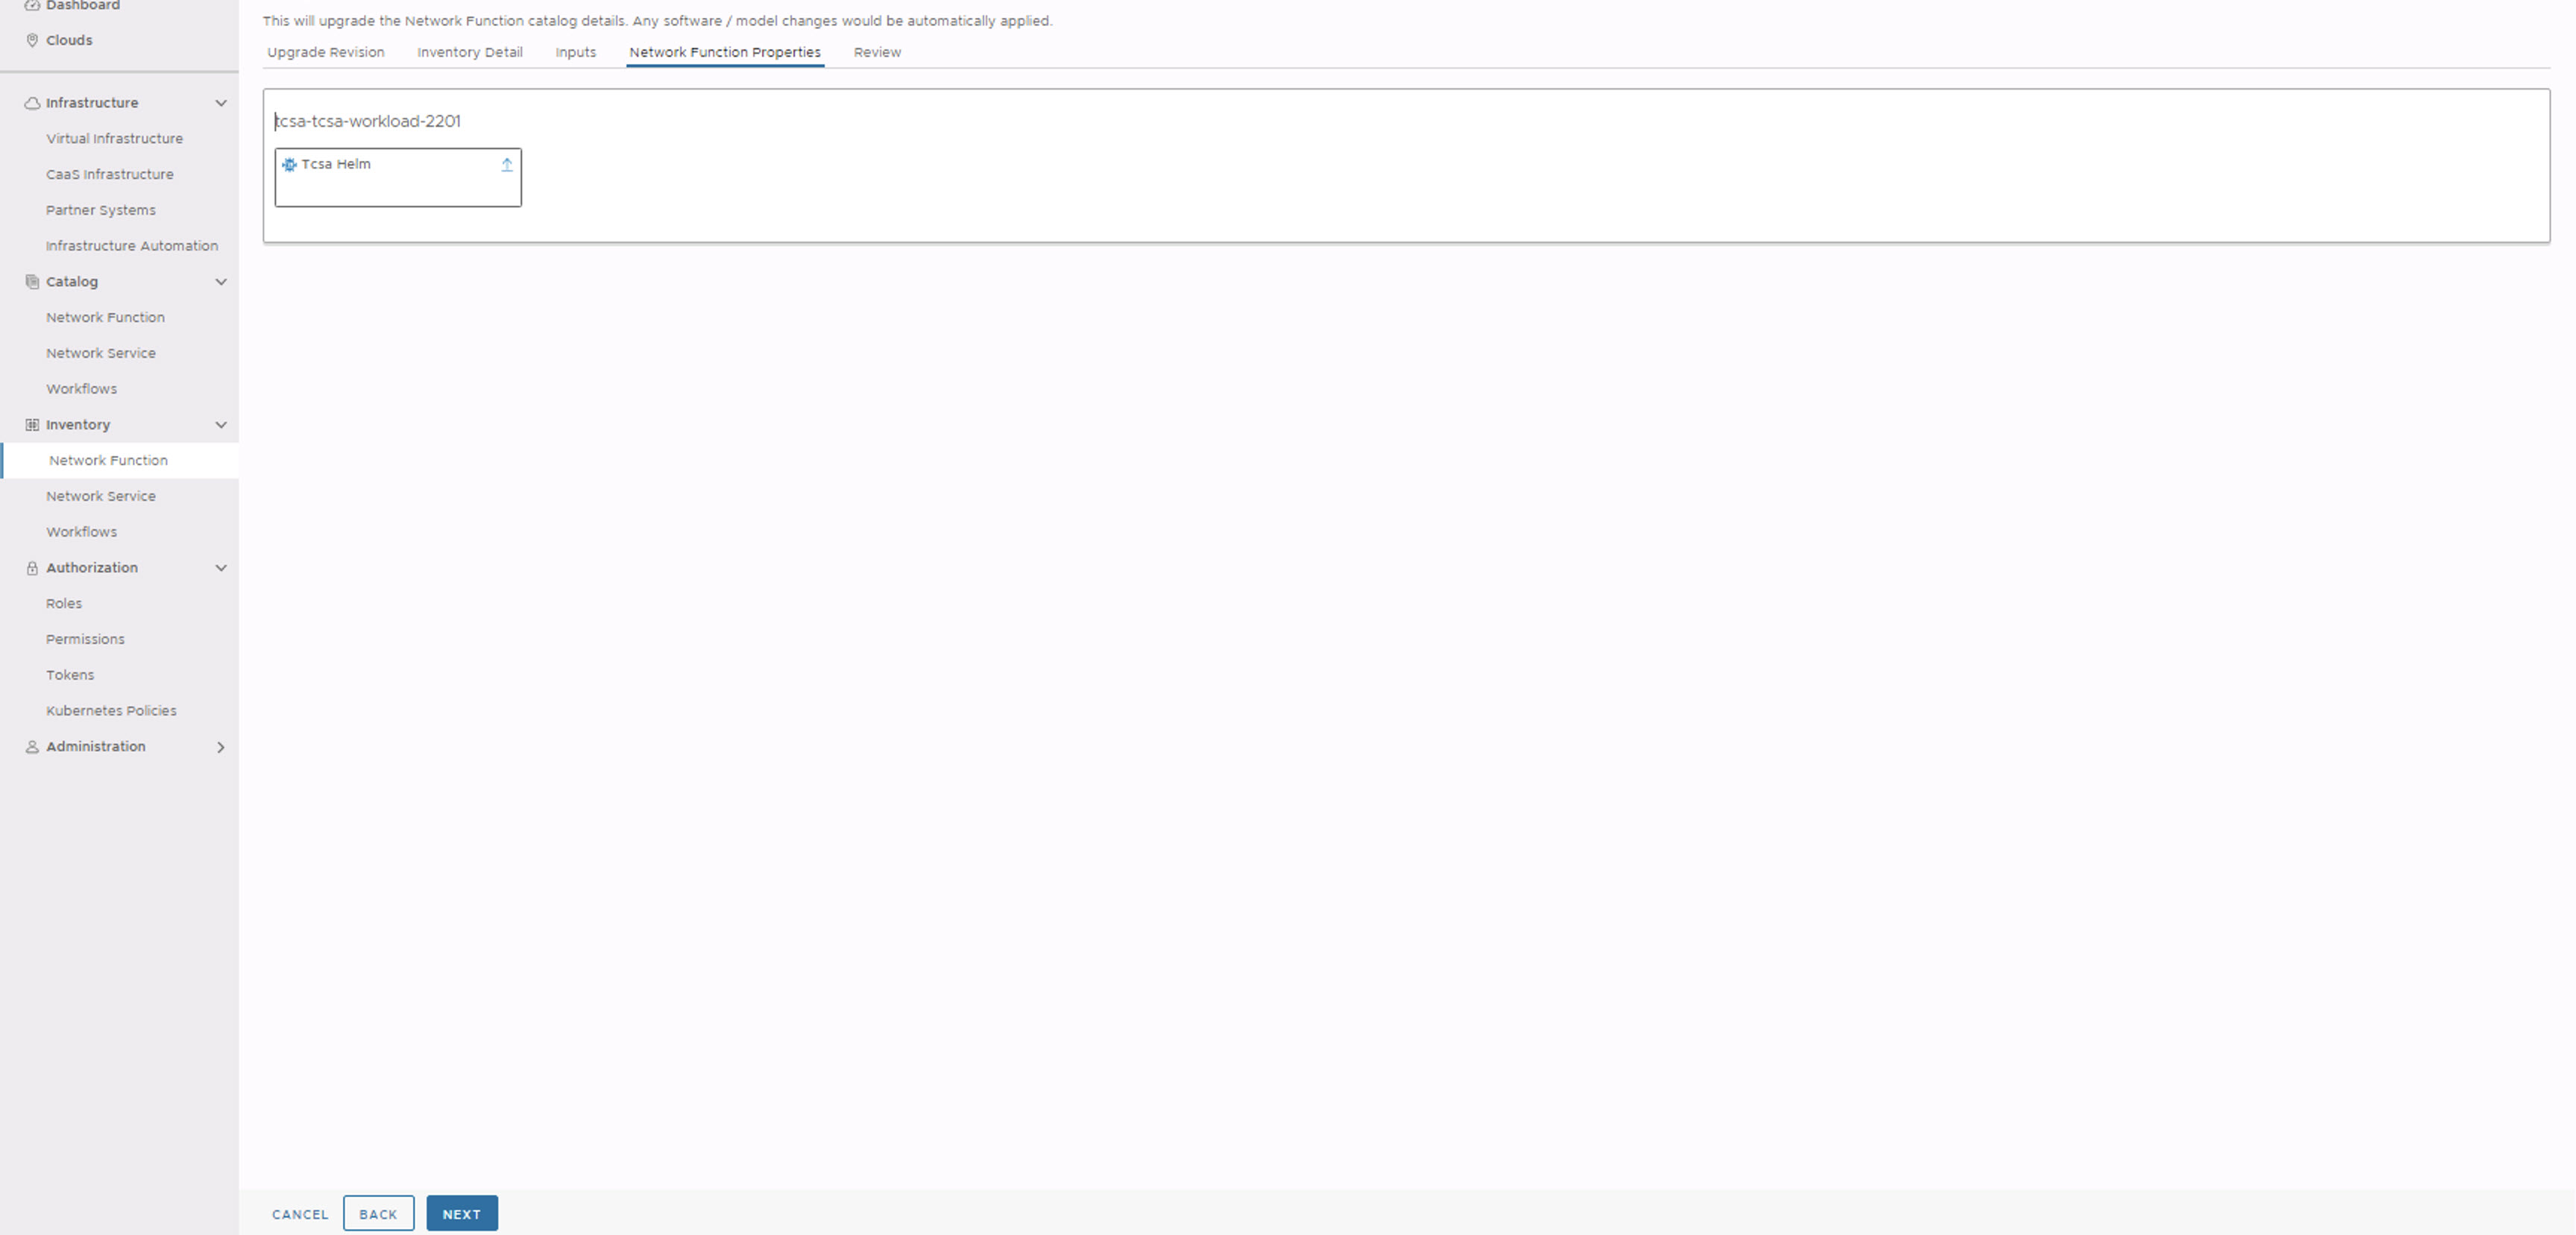
- In the Review section, click Upgrade.
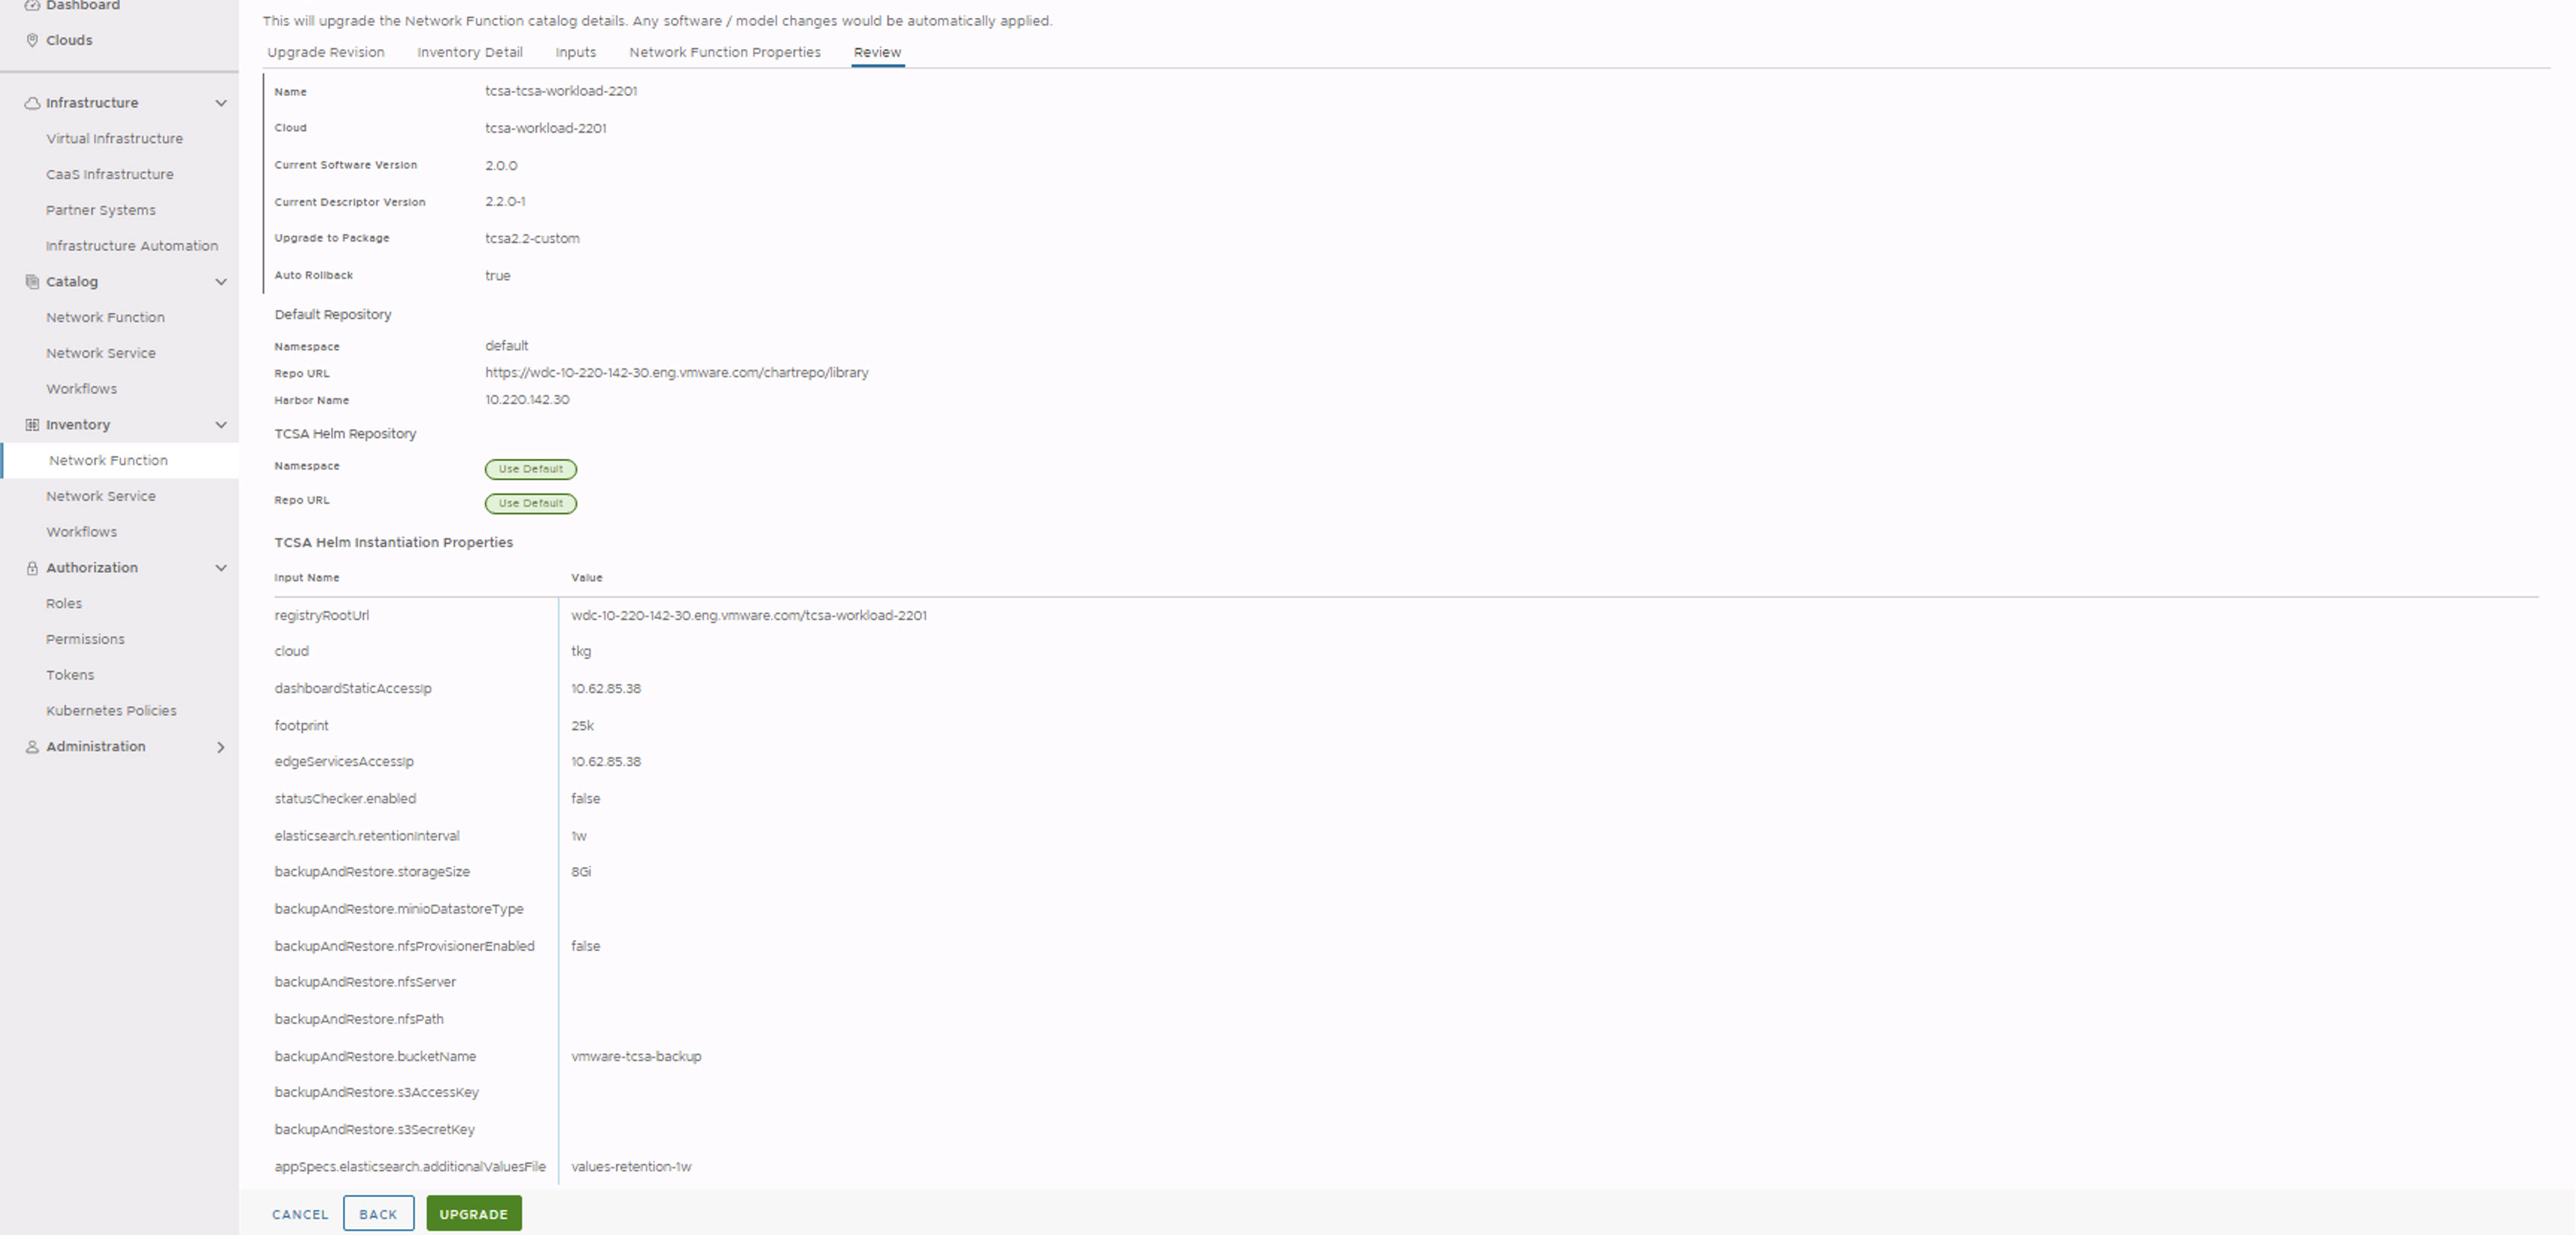
After the upgrade is successful, you can see the CNF rolled back to the original state.
Manually check the VMware Telco Cloud Service Assurance patch rollback status by running the following command from deployment VM:
root [ ~/patch/tcx-deployer/scripts ]# kubectl get tcxproduct
 OR
root [ ~/patch/tcx-deployer/scripts ]# kubectl get apps
For all the apps, the reconcilation status must be successful.
Note: After the patch is rolled back, you can view the
VMware Telco Cloud Service Assurance version in the
About page of VMware Telco Cloud Service Assurance UI.
Rollback of Patch on VM Based VMware Telco Cloud Service Assurance Deployment with Native Kubernetes
For example, in CLI based patch rollback, Revision number 1 refers to
VMware Telco Cloud Service Assurance 2.3 GA and Revision number 2 refers to
VMware Telco Cloud Service Assurance 2.3 Patch x.
export KUBECONFIG=<Kubeconfig file location>
root [ ~/.kube ]# helm list
NAME    NAMESPACE       REVISION        UPDATED                                   STATUS     CHART          APP VERSION
tcsa    default         2               2023-07-17 18:59:03.569762668 +0000 UTC   deployed   tcsa-2.3.0-2   0.0.0
root [ ~/.kube ]# helm history tcsa
REVISION        UPDATED                         STATUS          CHART           APP VERSION     DESCRIPTION
1               Mon Jul 17 16:50:20 2023        superseded      tcsa-2.3.0      0.0.0           Install complete
2               Mon Jul 17 18:59:03 2023        deployed        tcsa-2.3.0-2    0.0.0           Upgrade complete
- If you want to rollback to the base version, you must select Revision number 1. For example:
root [ ~/tcx-deployer/scripts ]# helm rollback tcsa 1
- Verify the successful execution of the helm rollback command.
- Verify that all apps are successfully reconciled by running the
kubectl get appscommand.
Note: After the patch is rolled back, you can view the
VMware Telco Cloud Service Assurance version in the
About page of VMware Telco Cloud Service Assurance UI.