The main objective of the Ansible Playbook is to automate the pre-condition checks and simplify the VMware Telco Cloud Service Assurance Domain Manager installation. Each playbook is based on a specific OS flavor. You must have basic knowledge of Ansible scripts and its working. You must be quite familiar with the variables used in the playbook and how to change them.
Prerequisite
- Ensure that you have 2 VM's:
- Ansible Manager VM where Ansible playbook is installed and from where the Ansible scripts are going to be run.
- Target VM where the VMware Telco Cloud Service Assurance Domain Managers will be deployed.
- Ensure that the TAR package installed in the target VM.
- Install Python version 3 in the target VM
- Download/Copy Ansible tar files which will be available in the respective binary,
utilsfolder (for example: IP Domain Manager, the tar file is named like this:IP_NETWORK_SUITE-ansible.tar). - Ansible Playbook installation is supported on Photon and Oracle OS, for the Domain Managers.
Note: The SAM Console installation through Ansible is not supported. Also, upgrade of domain managers through Ansible scripts are not supported.
Ansible Playbook
You must navigate to the relevant folder to run the playbook. For example, if you are inside the sam-aggr folder, navigate to that folder and run the prerequisites command to start the playbook. When prompted, provide password of the target VM.
Ensure that you place files such as response.txt, bootend.conf, .bash_profile, clientConnect.conf, and so on inside the relevant folder. Without these files, your playbook will not run as expected. Make appropriate changes to the necessary files.
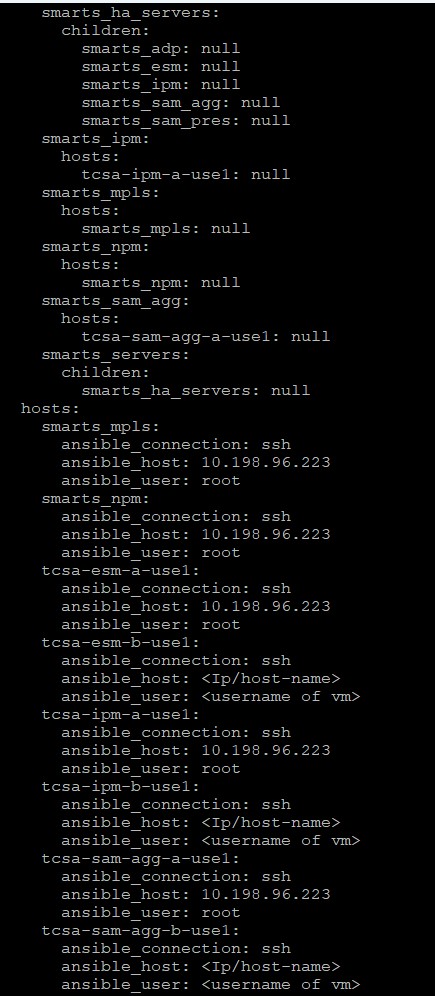
- For the hosts.yml, navigate to the inventory folder and you can find the hosts.yml file where you must provide details of the target VM. In the hosts.yml file, you must modify the ansible_host, ansible_connection, and ansible_user variables. The ansible_host is your target machine.
- For the .bash_profile file, you must provide appropriate path for the aliases.
- For the IP_NETWORK_SUITE.response file, you do not have to change the response file as it is generated by the ISO.
Getting Started
- Untar the Ansible .tar file (for example
IP_NETWORK_SUITE-ansible.tar) of the specific product which you want to install.
- Copy ISO and SHA files to Ansible Manager VM at the relevant location (for example path location for IP Domain Manager for Photon:
/root/IP_NETWORK_SUITE-ansible/photon/ip-mngr). - Update
hosts.yml( for example location of the IP Domain Manager hosts yaml file:/root/IP_NETWORK_SUITE-ansible/inventory) which is located in inventory directory, with the Target VM IP address and username for the products which user wants to install.
- You may have to export the
ANSIBLE_HOMEvariable present in theansible.cfgfile:For example: For IP Domain Manager,
export ANSIBLE_HOME=/root/IP_NETWORK_SUITE-ansible/photon.
- Navigate to the relevant untared folder location (for example, for IP Domain Manager:
/root/IP_NETWORK_SUITE-ansible/photon/ip-mngr) and - Run the
ip_mngr_prereq.yml, this script verify and install prereq packages of the relevant Domain Manager.And,
ip-mngr-install.yml, installs the relevant Domain Manager of the respective product.To run theprereqof the relevant IP Domain Manager as an example use below command:ansible-playbook -i inventory/hosts.yml playbooks/smarts/ip-mngr/ip_mngr_prereq.yml --ask-pass
- Provide the password of the target VM.
- Run the following Ansible Playbook install file, then provide the password of the target VM.
ansible-playbook -i inventory/hosts.yml playbooks/smarts/ip-mngr/ip-mngr-install.yml --ask-pass