You can add masks manually or import xml files to upload masks in bulk.
Procedure
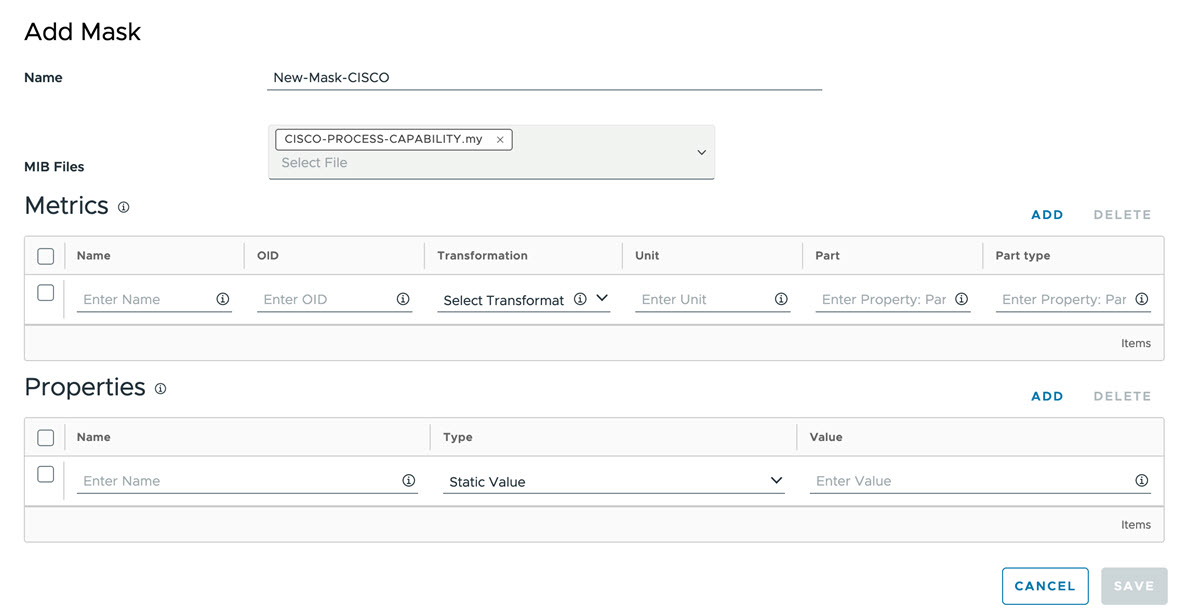
- In the Masks tab, click Actions > Add Mask, to discover the device capabilities. The capability is the same as an SNMP Mask.
- Provide the name of the mask in the Name field.
- Select the management information base (MIB) file from the MIB files drop down.

- To add the metric details, click Add, and enter the parameters as displayed in the following table:
Input Parameter Description Default Value Name Metric name NA OID Provide the object identifier (OID). NA Transformation Specifies how the polled values must be handled, Possible values are: - None
- Delta
- Positive Delta
- Rate
- Positive Rate
None Unit Specifies the unit to apply to the polled value.
NA Property: Part Specifies the part property in the resulting raw value. NA Property: Parttype Specifies the parttype property in the resulting raw value NA - To add the property details, click Add, and enter the parameters as displayed in the following table:
Input Parameter Description Default Value Name Name of the property for use in any filter in the web portal. NA Type Type of the property. Static Value Static Value / OID Value Static value or OID. None - To upload the xml snmp-masks file, click Import > Browse > Save.
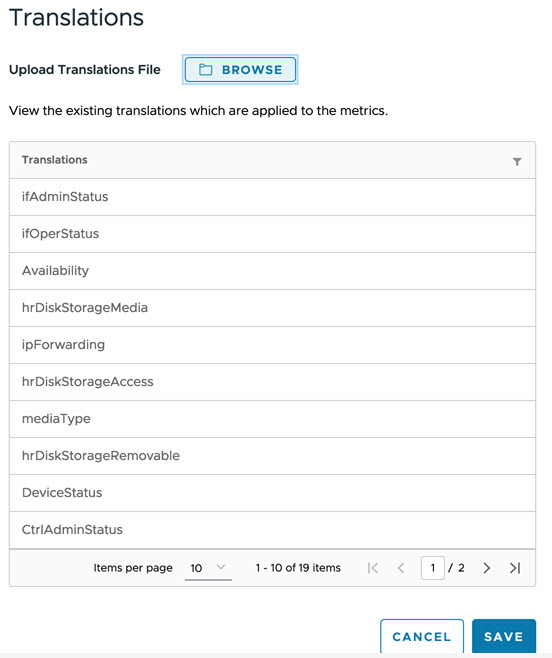
- To add or view the translations file, click Action > Translation in the Mask tab.
A pop up appears, where you can view the existing translation as well as you can import new transaction xml file.

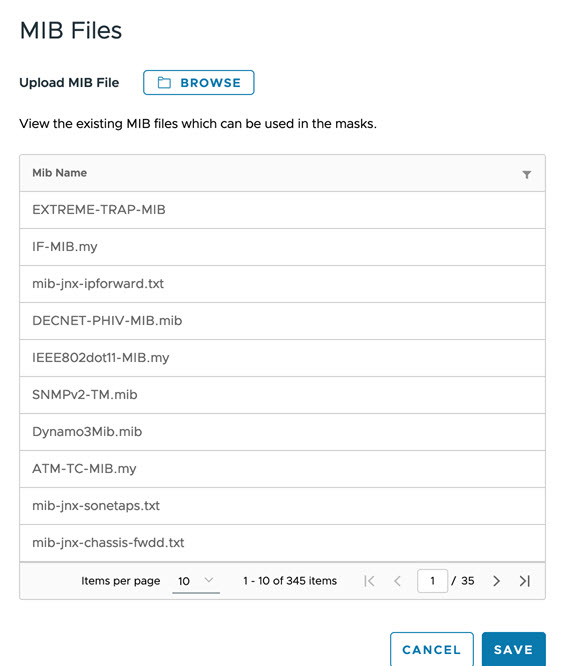
- To add or view the MIB file, click Action > MIB Files in the Mask tab.
A pop up appears, where you can view the existing MIB files as well as you can import new MIB file.

- Click Save > Next.
Note:
- Deleting a mask modies the polling groups associated with it. If the resulting polling group does not have any mask, it will be deleted.
- Default masks cannot be edited or deleted.
- The list of pre-loaded masks and their load factors are:
Action Load factor CISCO-ENHANCED-MEMORY-POOL 2 CISCO-MEMORY 4 CISCO-MEMORY-OLD 2 CISCO-PROCESS 2 CISCO-PROCESS-POST12.2(3.5) 4 EXTREME-NETWORKS-CPU-MEMORY 2 FOUNDRY-PROCESS 1 GENERIC-HOST-RESOURCES-PROCESSOR 2 GENERIC-HOST-RESOURCES-STORAGE 6 GENERIC-INTERFACES 40 GENERIC-INTERFACES-NO-IFXTABLE 20 GENERIC-INTERFACES-SAME-IFDESC 5 GENERIC-INTERFACES-SAME-IFDESC-SAME-IFNAME-IFXTABLE 40 GENERIC-INTERFACES-SAME-IFDESC-UNIQUE-IFNAME-IFXTABLE 40 GENERIC-SYSUPTIME 1 HP-PROCESS 1 JUNIPER-INTERFACES 20 JUNIPER-RESOURCES 5 NORTEL-PROCESS 2 CISCO-IPSLA-STATSTABLE 5 CISCO-IPSLA-JITTER-LATEST 5 CISCO-IPSLA-INVENTORY 5 CISCO-IPSLA-HTTP-LATEST 5 CISCO-IPSLA-HTTP-STATSTABLE 5 CISCO-IPSLA-HISTORY 5 CISCO-IPSLA-JITTER-STATSTABLE 5 GENERIC-ENTITY-FRU 1 GENERIC-INTEGRFACES-NO-IFXTABLE-NO-LOOPBACK 1 CISCO-ENHANCED-MEMORY-POOL 1 GENERIC-INTERFACES-NO-LOOPBACK 1 GENERIC-INTERFACES-SAME-IFDESC-NO-LOOPBACK 1