This option retrieves a specific named *.ncf file from the remote server’s configuration directories (that is, from the BASEDIR/smarts/conf/<config> or BASEDIR/smarts/local/conf/<config> directories). When you select this option:
-
The Connect to a Server dialog box appears. Choose the remote server from which you want to retrieve the specific *.ncf file and click OK.
-
The Directory dialog box appears. Choose a directory on the remote server from which you want to retrieve the *.ncf file and click OK.
-
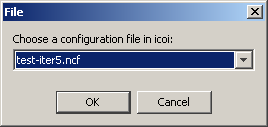
The File dialog box appears. This dialog provides a drop-down list of the *.ncf files in the selected directory.
Note:If you are retrieving an *.ncf file from a remote server, and you have existing *.ncf file(s) on your local system, be careful to ensure that there are no conflicting configurations within multiple *.ncf files as the order in which these files are read is undetermined.
Select the *.ncf file you want to retrieve from the remote server and click OK.
Figure 1. File dialog box 
-
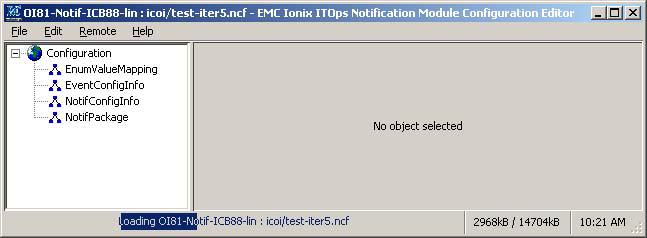
A progress bar at the bottom of the screen indicates that the selected remote *.ncf file is being loaded into the Smarts NOTIF Editor on the local server. In this example, the *.ncf file being retrieved is a configuration file named test-iter5.ncf on a remote Adapter Platform server named OI81-Notif-ICB88-lin.
Figure 2. Loading an .ncf file from a remote server 
-
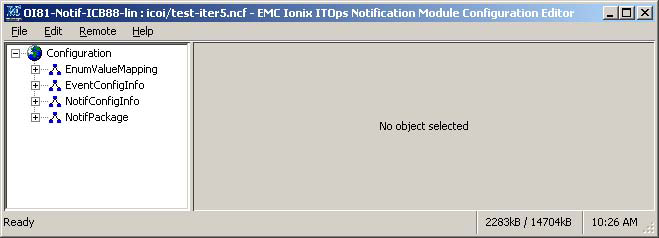
When the *.ncf file from the remote server is imported into the Smarts NOTIF Editor on the local server:
-
The Smarts NOTIF configuration objects in the topology tree are populated (that is, there are now EnumValueMapping, EventConfigInfo, NotifConfigInfo, and NotifPackage objects in the tree), and
-
The word “Ready” appears in the bottom-left corner of the Smarts NOTIF Editor.
Figure 3. .ncf file from a remote server is now loaded into the Smarts NOTIF Editor 
-
-
-
To save the configuration to your local server:
-
Select File > Save Configuration As...
-
Name the .ncf file and select the directory on your local server where you want to store the configuration in the Save dialog box.