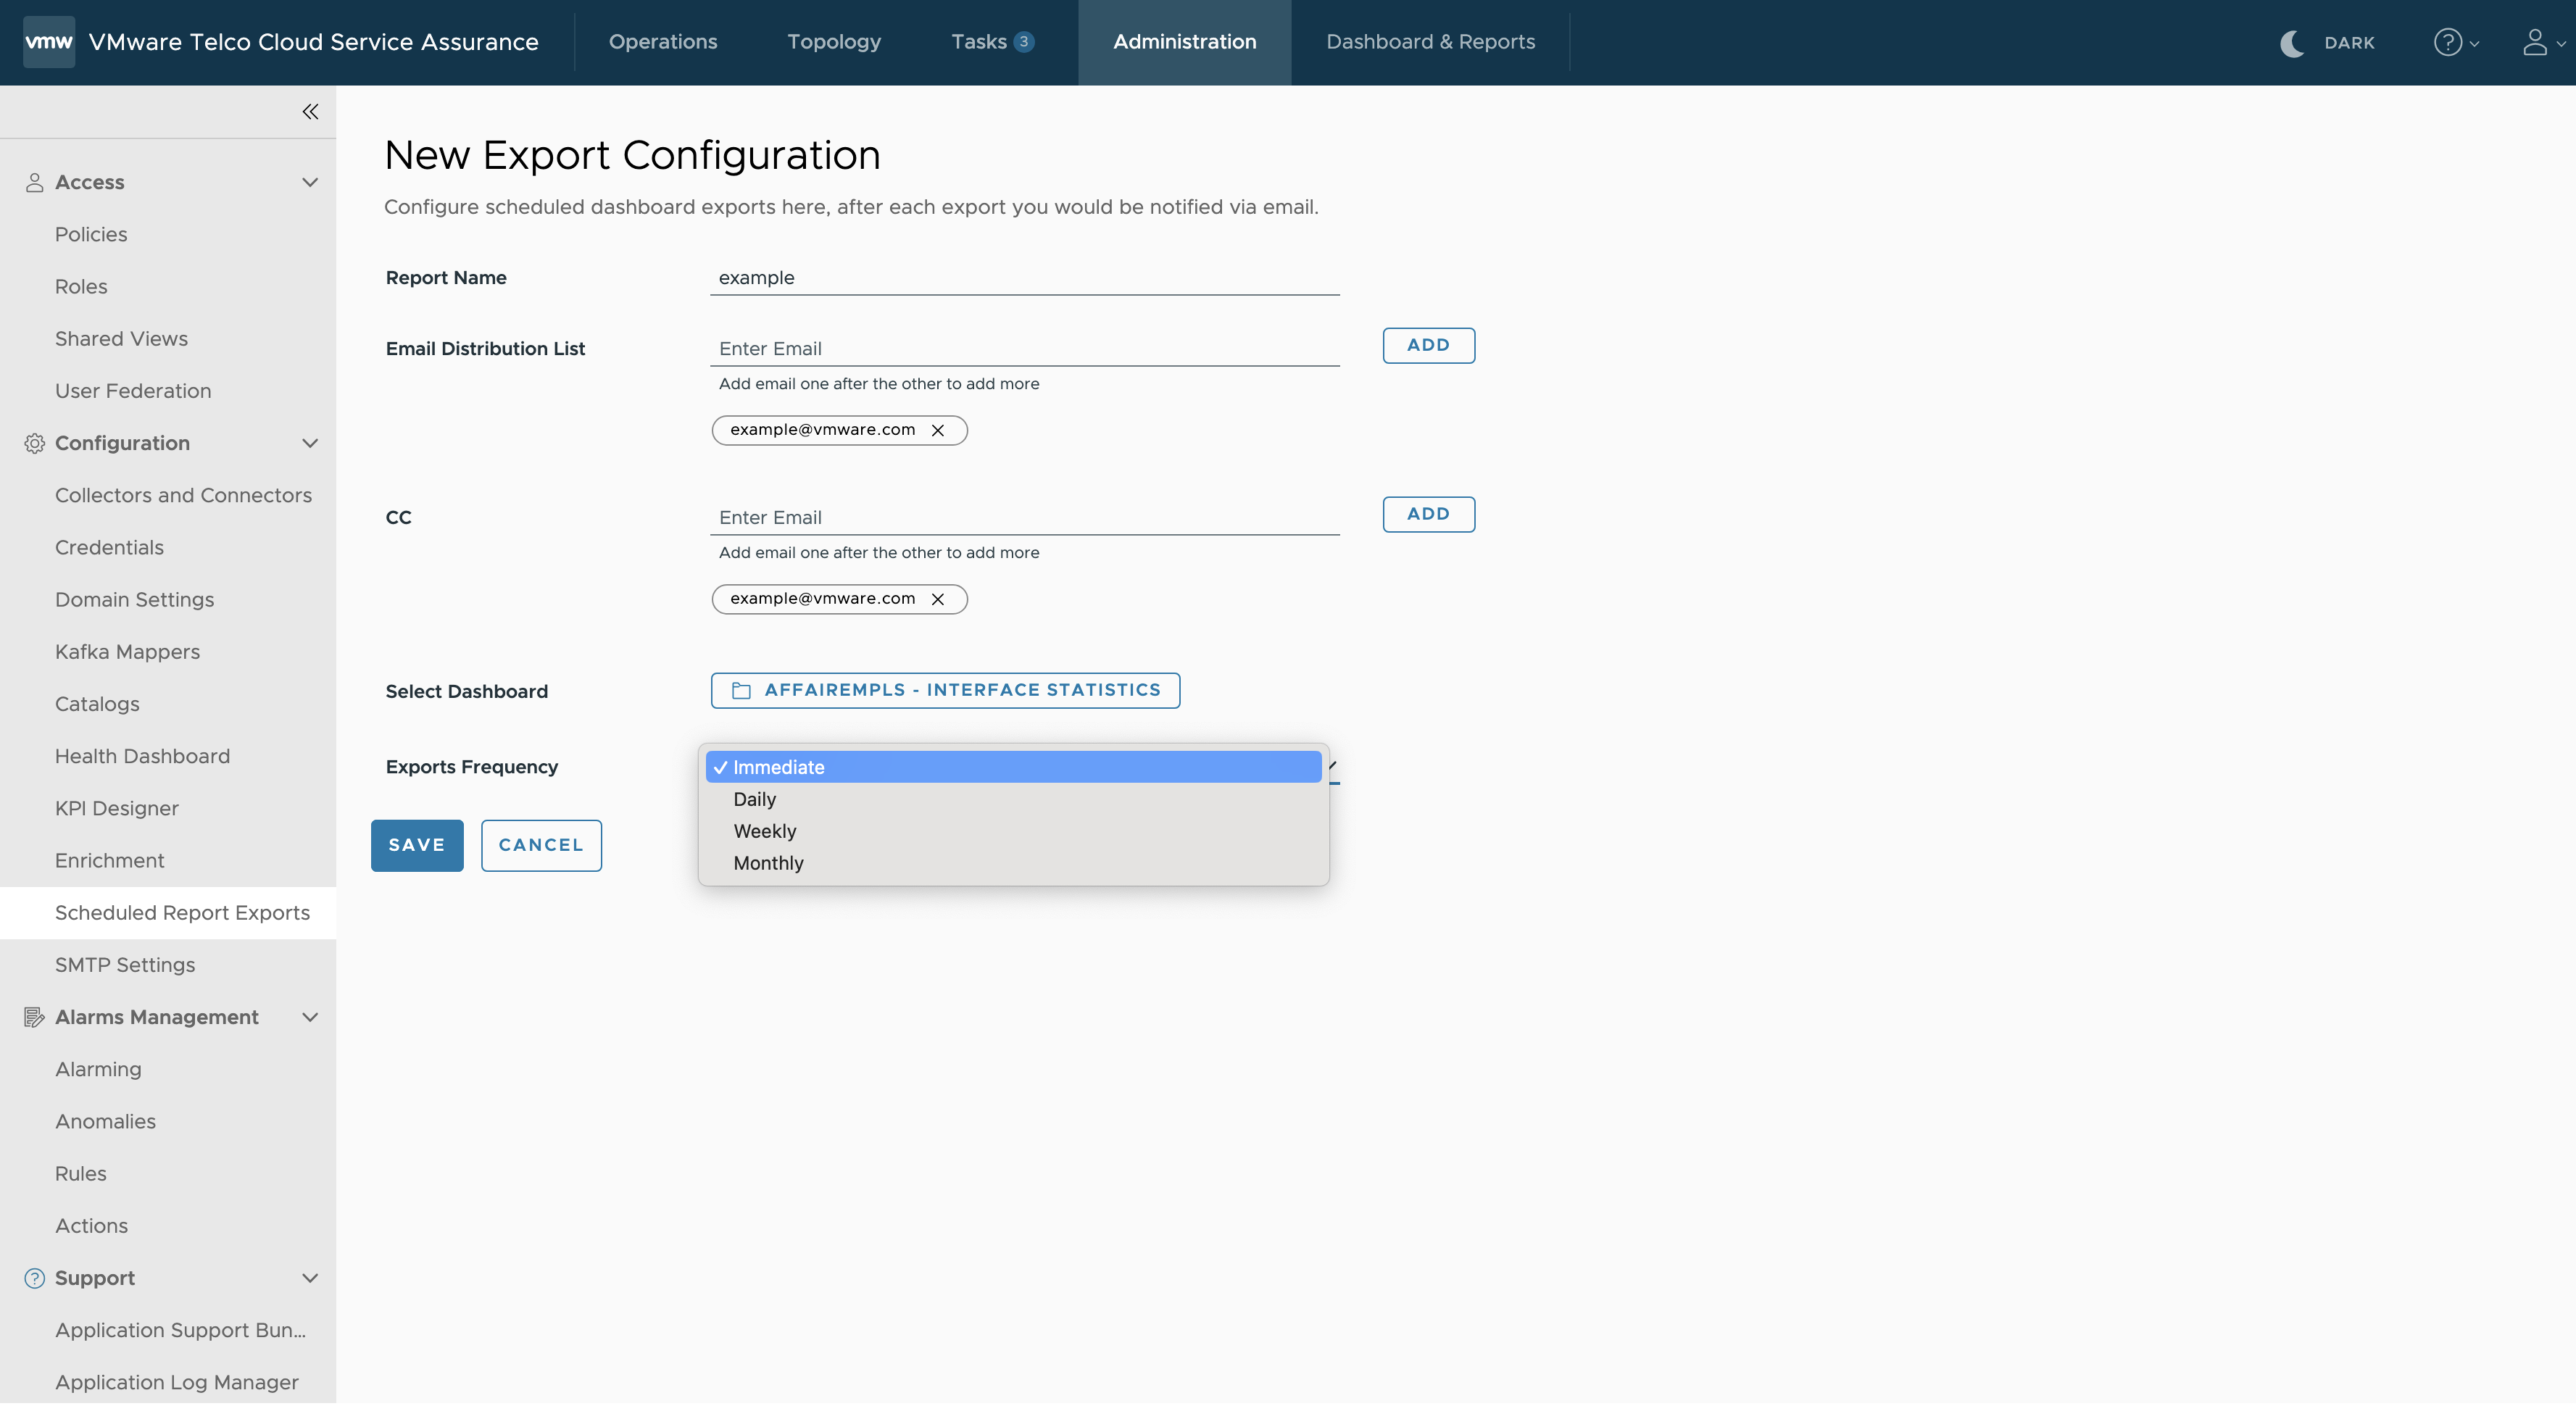
This feature allows you to add a new export configuration in which you can define a new distribution list and cc list along with the report that has to be sent to the new distribution list and cc list at a particular frequency.
Procedure
- Go to https://Telcocloud serviceassurance-ui-IP.
A typical URL for logging in to the user interface from the same system on which VMware Telco Cloud Service Assurance is installed is, https://10.x.x.x.
- Enter the user name and password.
- Click Next.
- Navigate to Administration > Configuration > Scheduled Report Exports.
- Click Add Export.
- Enter the Report Name.
- Enter the email address in the Distribution List field and click Add.
Note: You can only add one email address at a time. To add multiple email addresses, you must repeat step 7 multiple times.
- Enter the email address in the CC field and click Add.
Note: You can only add one email address at a time. To add multiple email addresses, you must repeat step 8 multiple times.
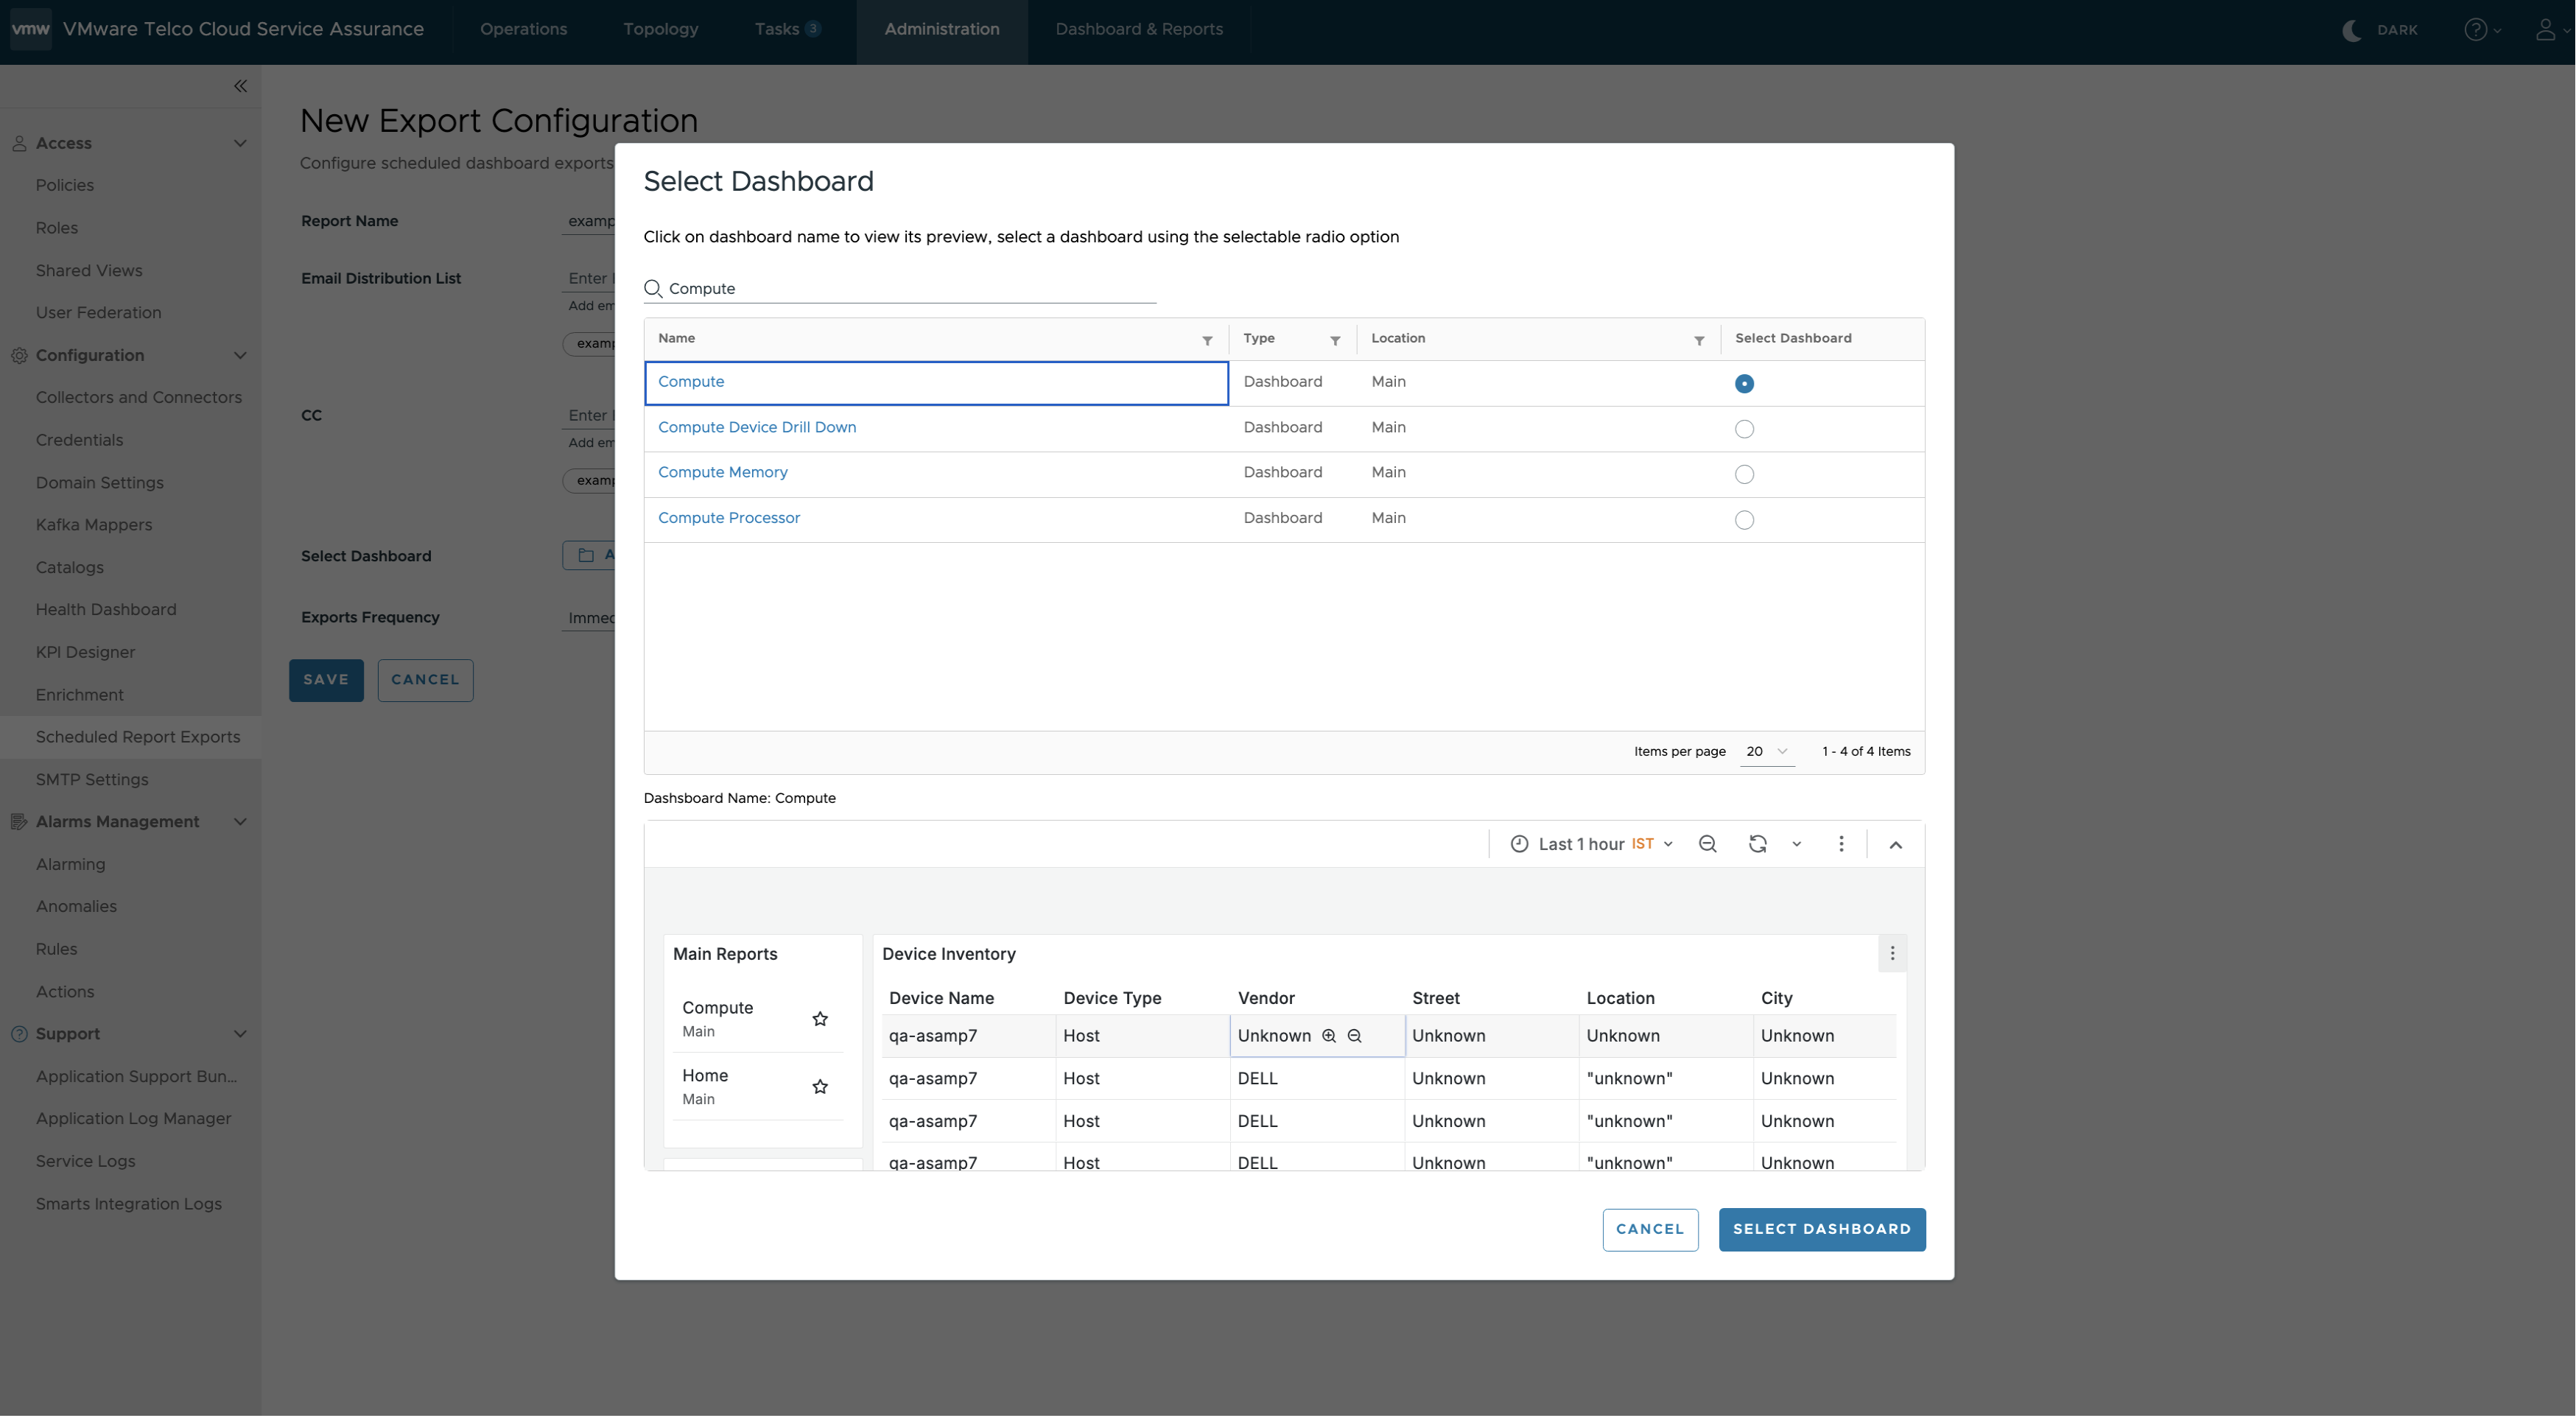
- Click Browse Dashboard.
- Click the radio button next to the dashboard that you want to send to the email recipients.
The Select Dashboard button becomes active.
Note: If you want to preview the report that you are selecting then click on that report name. The preview is displayed at the bottom of the window.
- Click Select Dashboard.
- Select the Export Frequency.
 Note: There are four export frequencies. They are Immediate and recurring such as Daily, Weekly, and Monthly. The report is sent to the distribution list and cc list based on the selected frequency.
- Immediate: Select this if you must send the report immediately.
- Daily: Select this if you must send the report daily at a particular time.
- Weekly: Select this if you must send the report every week on a particular day and time. Select the Day, Time, and Ends field to define the day, time, and period until which the report has to be sent.
- Monthly: Select this if you must send the report every month on a particular date and time. Select the Day, Time, and Ends field to define the date, time, and period until which the report has to be sent.
Note: In the Ends field, you can define the date until which the report will be sent at a particular frequency and time by selecting the On radio button and date in the date field. If you select, the Never radio button, then the report will be sent at a particular frequency and time without any end period until you edit the report and change the frequency and time.
- Click Save.