This topic provides you the procedure to increase the existing worker node count by one to accomodate a newly added VMware Telco Cloud Service Assurance services in TKG, Azure, TCA, and VM Based.
Add a Node to Kubernetes Cluster Woker Node in TKG
- Get existing worker node count using the following command.
export KUBECONFIG=/root/.kube/<clustername>;kubectl get nodes|grep -v NAME|grep -iv control|wc -l
- Scale worker node using the following command.
tanzu cluster scale <clustername> --worker-machine-count <current count + 1>
Add a Node to Kubernetes Cluster Woker Node in Azure
az aks scale --resource-group <your Resource-Group> --name <name of cluster> --node-count <number_of_vms> --nodepool-name <name of nodepool>
For example:
az aks scale --resource-group rg-vmw-us-west --name tcsa-cluster --node-count 20 -nodepool-name nodepool
Add a Node to Kubernetes Cluster Woker Node TCA
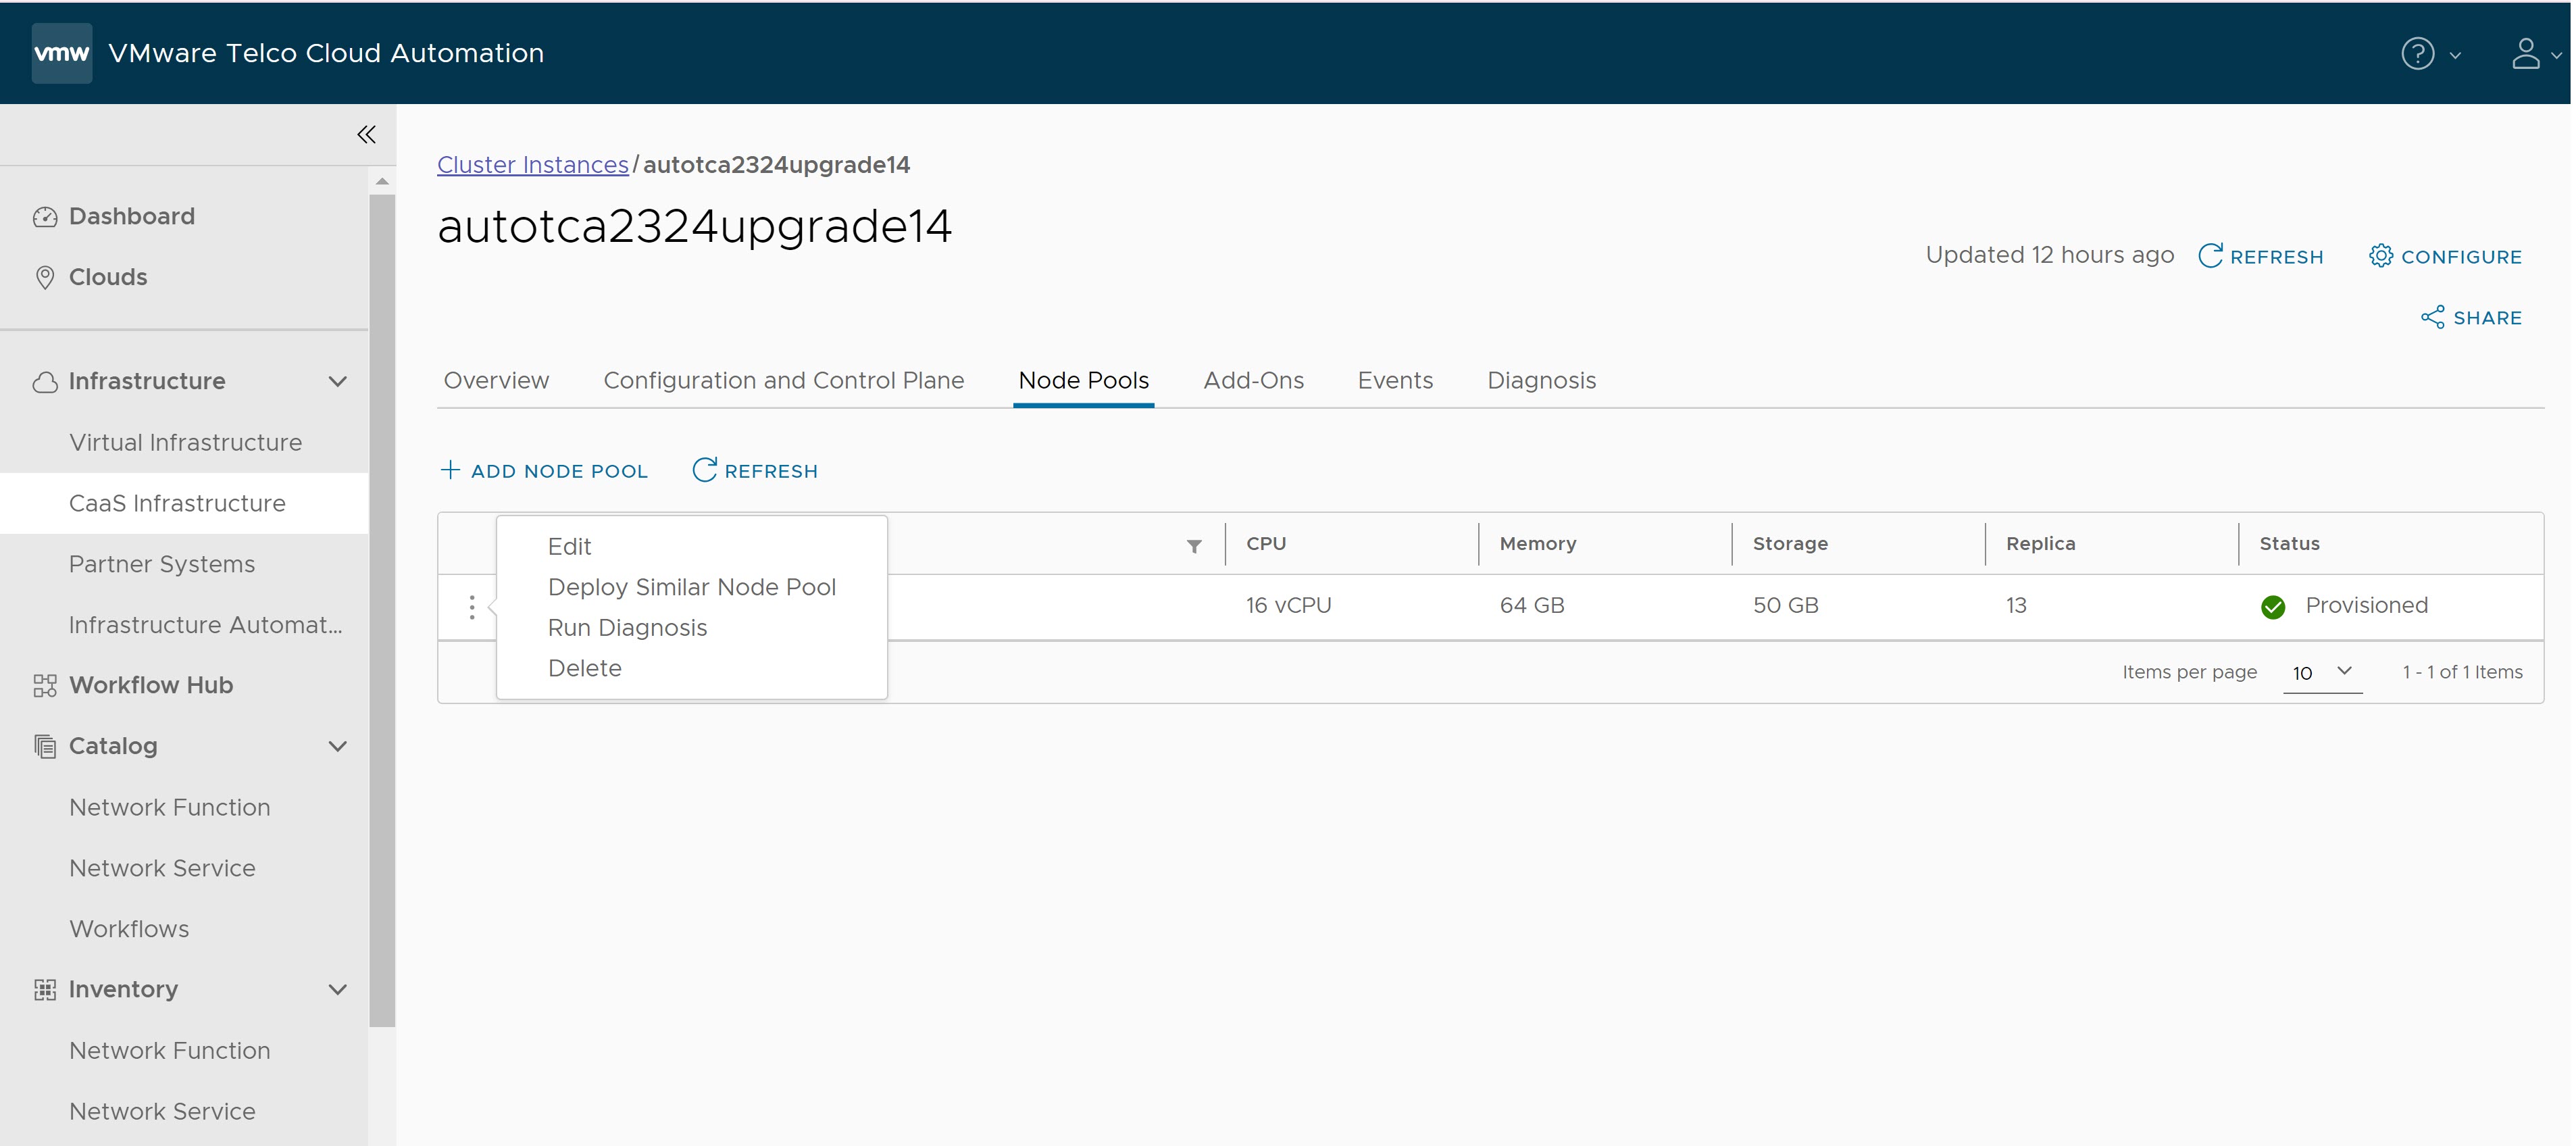
- Launch VMware Telco Cloud Automation, navigate to and click the Workload Cluster link that you want scale Worker Nodes.
- Click Node Pools tab.
- Click the vertical ellipsis (⋮) of the Worker Node pool.

- Click Edit.
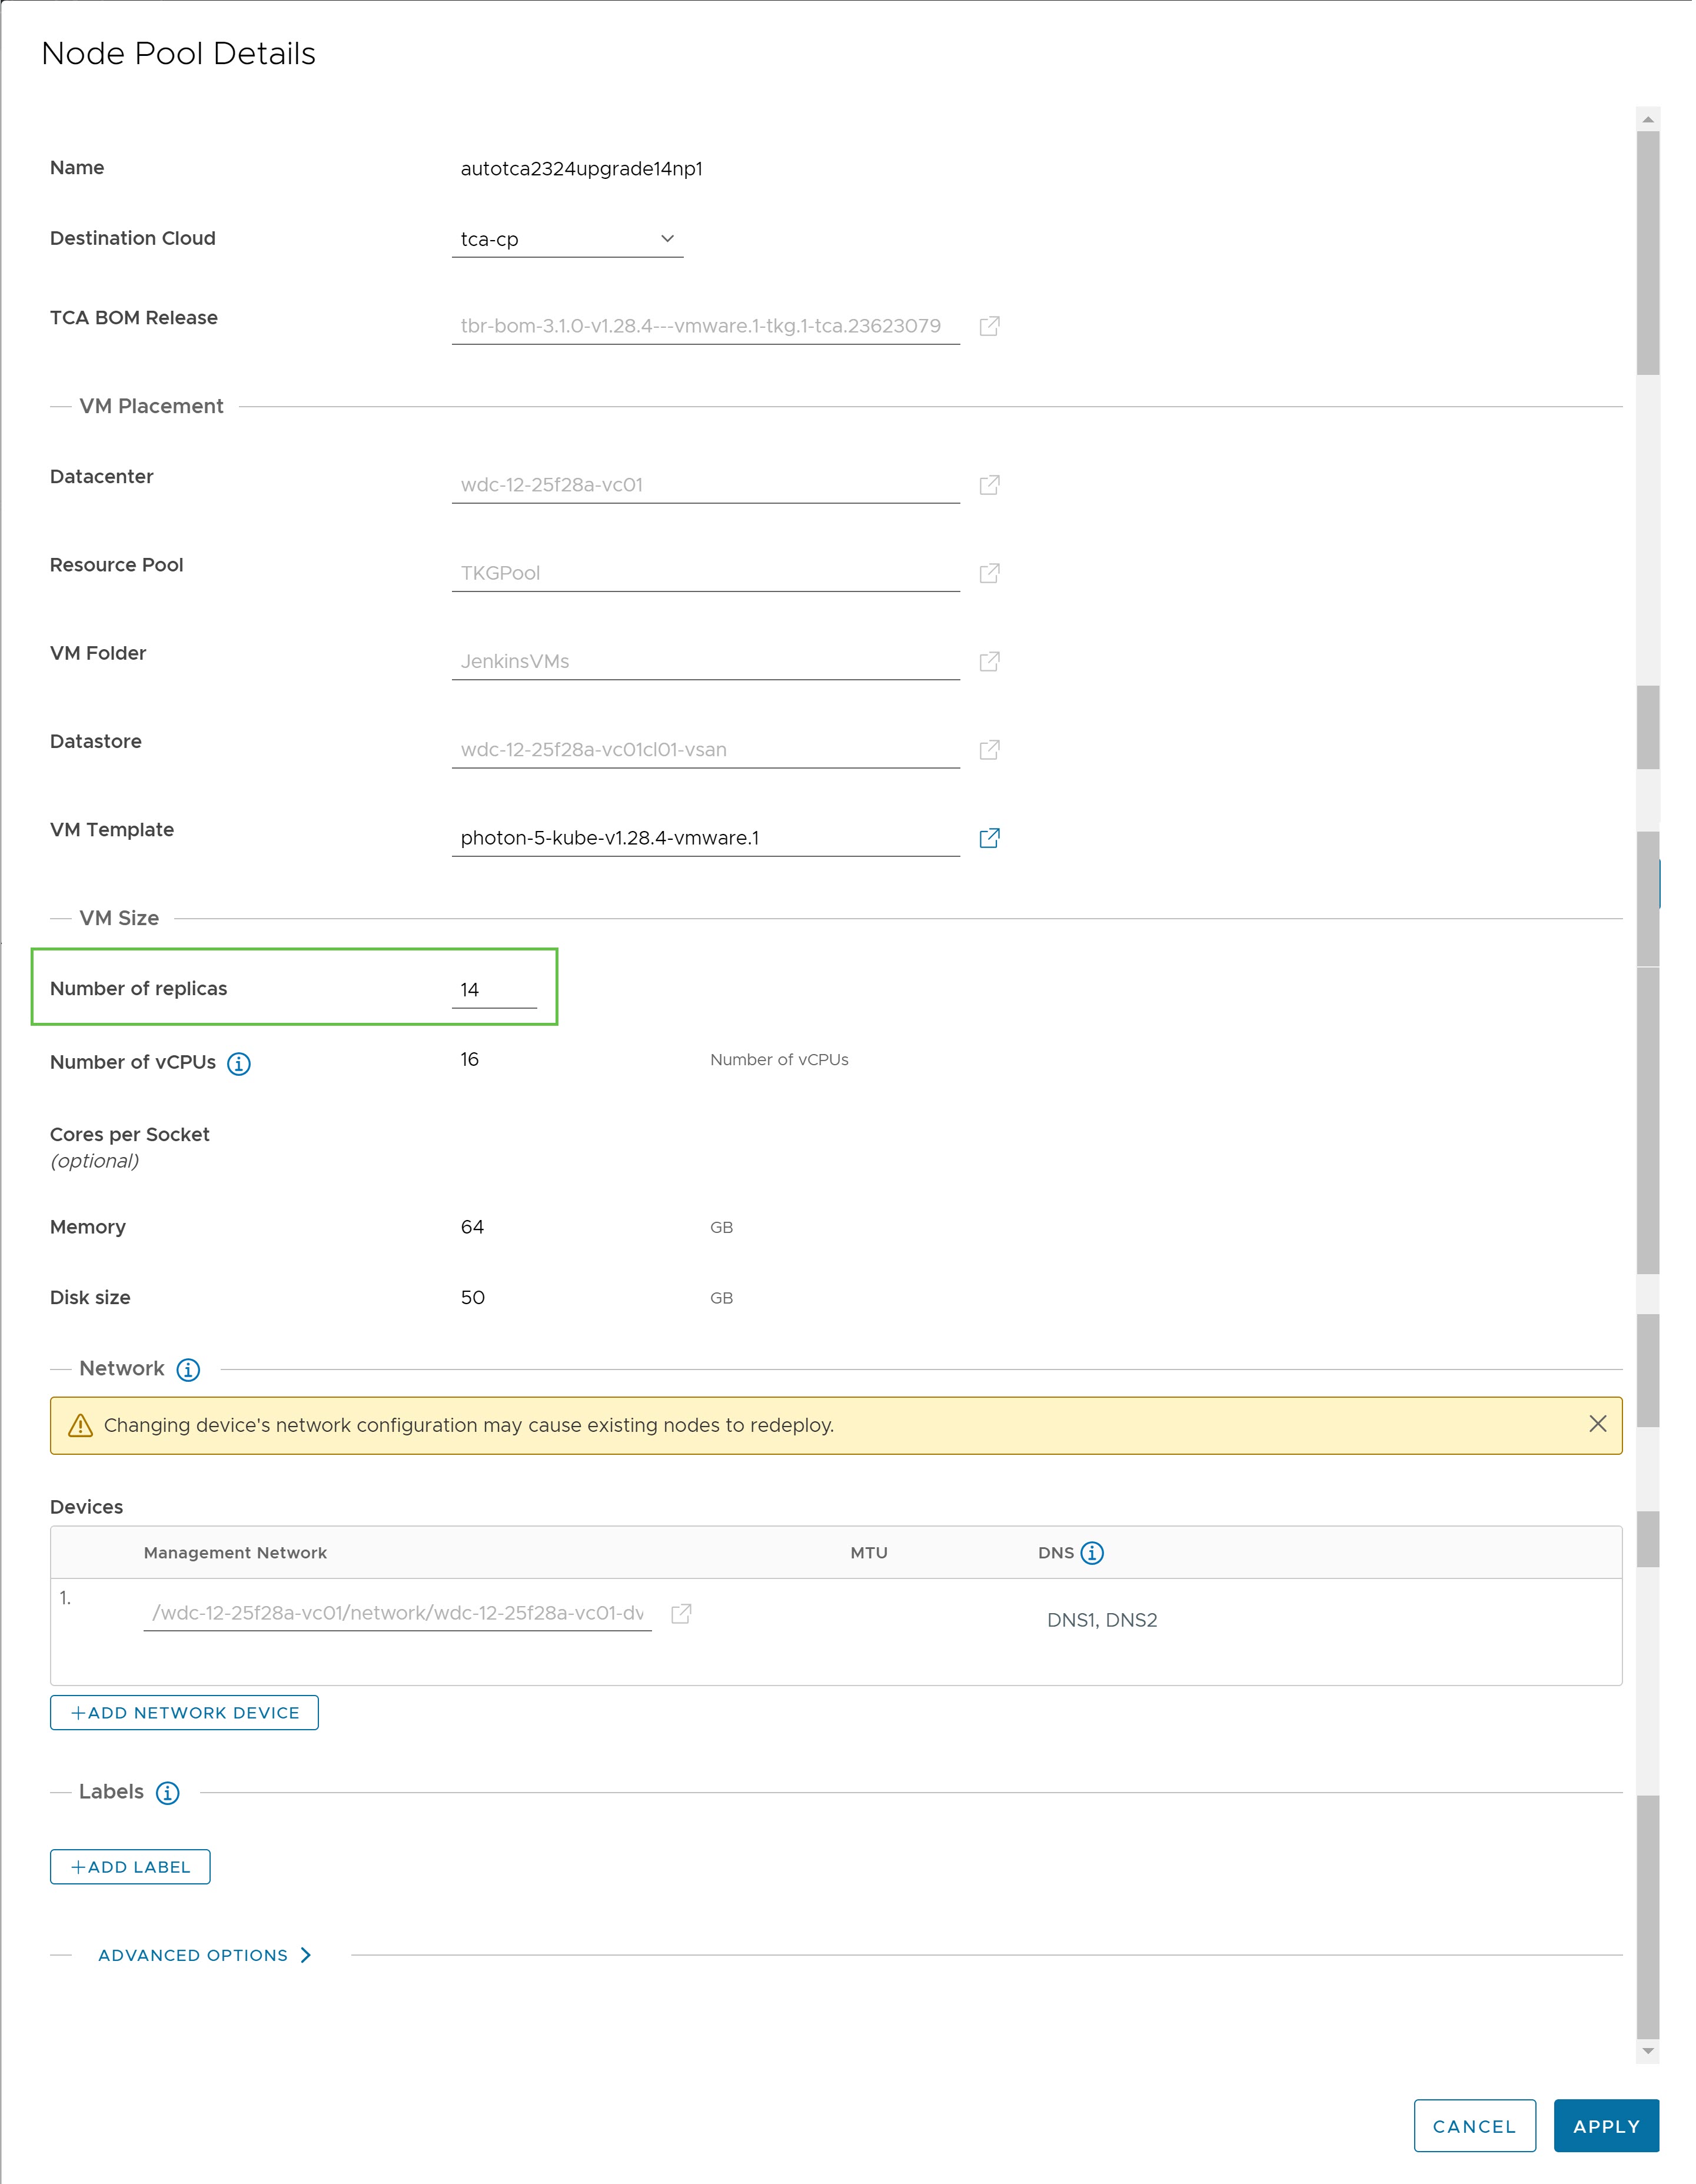
The Node Pool Details window appears in a while.
- In the Node Pool Details window, scroll down to the Number of replicas field and increase one extra node from the existing number of nodes.

- Click Apply.
- In the Workload Cluster: Edit Node Pool window, click Next.
- Click Update Node Pool.
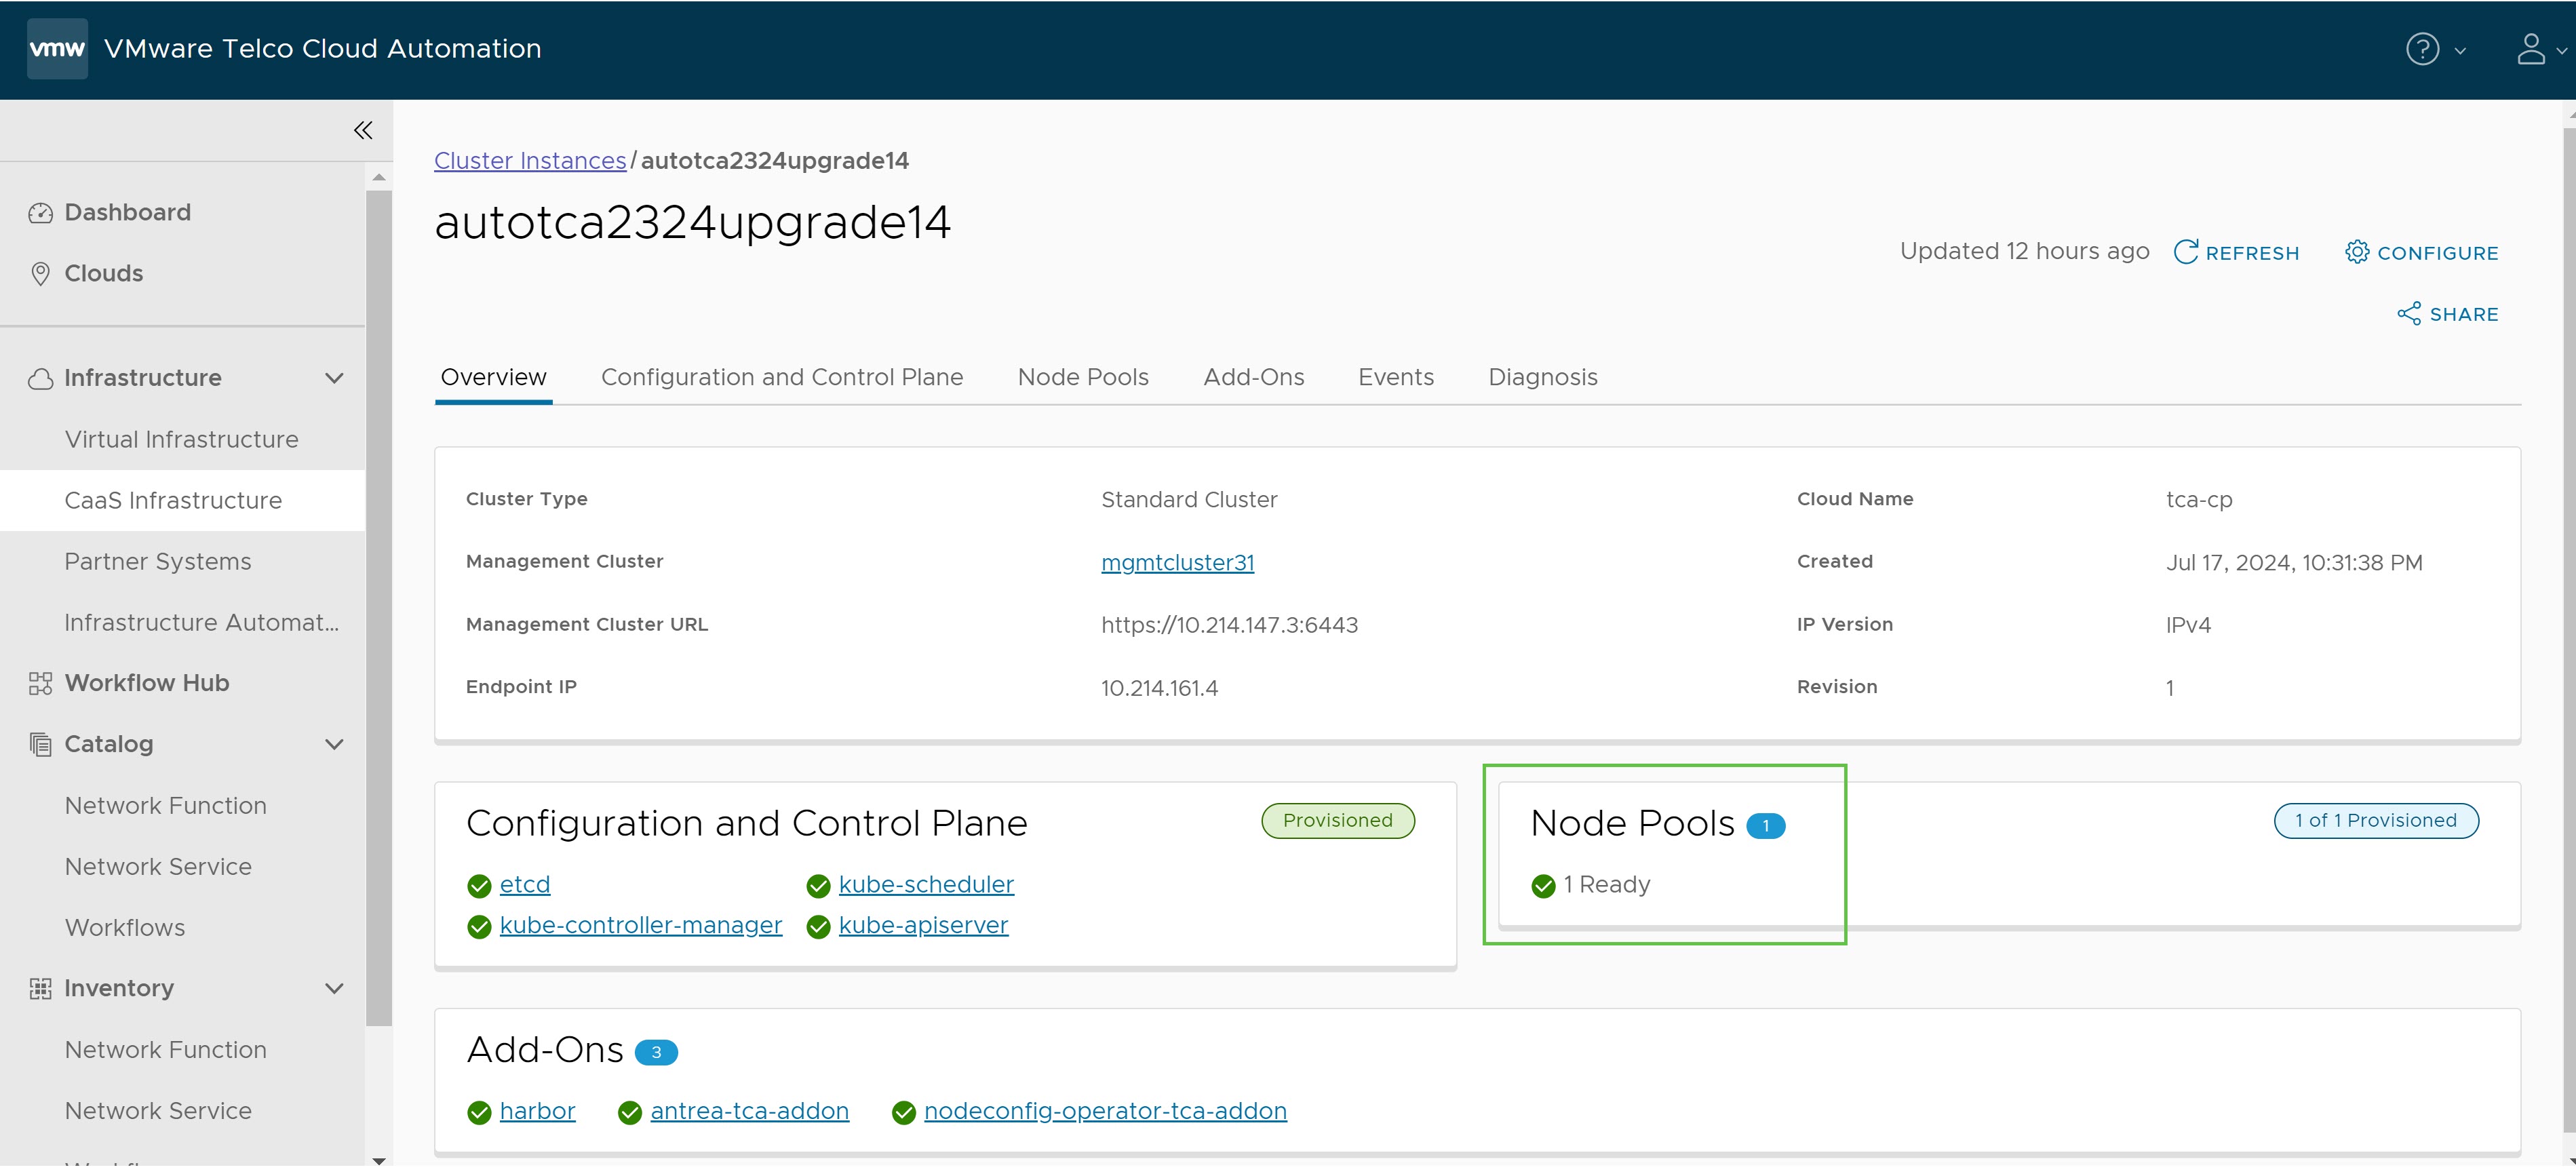
After the Worker Node Pool is increased, you will get a Ready message in the Node Pools section of the Workload Cluster window as shown in the following image.

Add a Node to Kubernetes Cluster Woker Node VMBased Deployment
Create a VM in the vCentre with static IP address in the same subnet where the existing cluster VMs are running and make it as a worker node by performing the following steps.
- Use the same vars.yaml file which was used during deployment and add a
<new VM IP>to $HOME/k8s-installer/scripts/ansible/vars.yml file inside the Deployment Container as in the following file.worker_node_ips: # The list of IP addresses of your VMs. This should be a YML list. - <IP1> #By default IP1 to IPn will be available. - <IPn> - <new VM IP> - Prepare for scale out and generate the inventory file (
$HOME/k8s-installer/inventory/<ClusterName>/host.yml) by running the following command inside the Deployment Container.cd $HOME/k8s-installer export ANSIBLE_CONFIG=$HOME/k8s-installer/scripts/ansible/ansible.cfg LANG=en_US.UTF-8 ansible-playbook scripts/ansible/prepare.yml -e @scripts/ansible/vars.yml --skip-tags check-vm-resources --become
- Scale out the Kubernetes cluster using the generated inventory file ($HOME/k8s-installer/inventory/<ClusterName>/host.yml) by running the following command inside the Deployment Container.
cd $HOME/k8s-installer/
ansible-playbook -i inventory/<your-cluster-name>/hosts.yml scripts/ansible/scale_k8s.yml -u <your-SSH-username> --become -e @scripts/ansible/vars.yml -e @scripts/ansible/internal_vars.yml --limit="localhost,nodex"
Note: The--limitargument must be used to limit the scale operation to the new nodes added to the inventory file. The node names can be obtained from the generated inventory file.- For example, if you originally had three nodes and you added a fourth node, then the node name to be used for the scale operation must be node4.
- Localhost is mandatory for the
--limitargument.If you are scaling multiple nodes, then
--limitmust be comma separated--limit=localhost, nodex, nodey.
- Verify the scaled cluster inside the control node.
kubectl get nodes (new node will show "READY" status)