You can create one or more virtual apps collections for each type of integration such as Horizon Cloud or Citrix published resources.

Prerequisites

  • All instances of the Workspace ONE Access service must be version 3.1 or later.
  • All connectors used for resources sync must be version 2017.12.1.0 or later.
  • The following administrator roles are required:
    • To get started with virtual apps collections, use the Super Admin role. See About Virtual Apps Collections for more information.
    • To create, edit, or delete Horizon, Horizon Cloud, and Citrix-published virtual apps collections, use any role that can perform the Manage Desktop Apps action in the Catalog service.
    • To create, edit, or delete ThinApps collections, use any role that can perform the Manage ThinApps action in the Catalog service.
    • To edit and save the Network Ranges page for Horizon and Citrix-published virtual apps collections, use the Super Admin role.
  • Integration with ThinApp packaged applications is only supported with the legacy Linux VMware Identity Manager connector. It is not supported with the Windows connector.

Procedure

  1. In the Workspace ONE Access console, select the Catalog > Virtual Apps Collections tab.
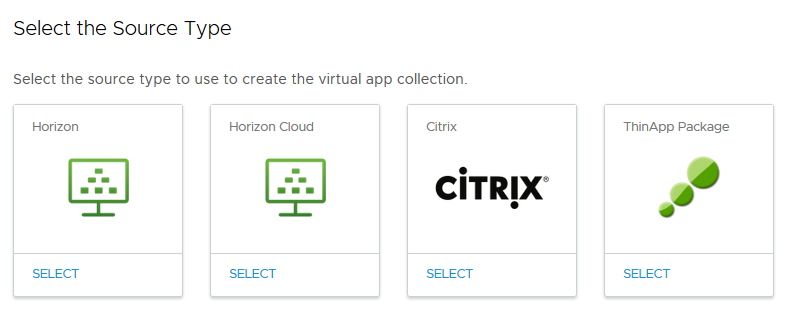
    • If this is the first time you are accessing the page, an information page appears. Click Get Started to proceed. The Select the Source Type page appears.
      select the source type page

      Note: If a Migration page appears instead, you have existing configurations that must be migrated to virtual apps collections. See Migrating Existing Configurations to Virtual Apps Collections.
    • If you have accessed the page previously, the Virtual Apps Collections page appears. Click New on the page to proceed.
  2. Select the type of resource to integrate.
    You can select Horizon, Horizon Cloud, Citrix published applications, or ThinApp packages as source types.
    Note: Integration with ThinApp packaged applications is only supported with the legacy Linux VMware Identity Manager connector. It is not supported with the Windows connector.
  3. Follow the New Collection wizard to create the collection.
    The configuration information for each type of integration is different.
    Some fields, such as the following, appear for all source types.
    Option Description
    Connector Select the connector that you want to use to sync this collection. To select the connector, select the directory that is associated with it. If you have set up a cluster of connectors, all the connector instances appear in the Host list and you can arrange them in failover order for this collection. To rearrange the list, click and drag the rows to the desired position.
    Important: After you create the collection, you cannot select a different directory.
    Sync Frequency Select when and how frequently you want to sync the resources in the collection. The sync frequency can range from hourly to weekly. If you do not want to set up an automatic sync schedule, select Manual.
    Activation Policy Select how you want to make resources in this collection available to users in the Workspace ONE portal and app. If you intend to set up an approval flow, select User-Activated, otherwise select Automatic.

    With both the User-Activated and Automatic options, the resources are added to the Catalog page. Users can use the resources from the Catalog page or move them to the Bookmarks page. However, to set up an approval flow for any of the apps, you must select User Activated for that app.

    The activation policy applies to all user entitlements for all the resources in the collection. You can modify the activation policy for individual users or groups per resource, from the user or group page in the Users & Groups tab.

What to do next

After you create the collection, you can view and edit the collection from the Virtual Apps Collections page.

The resources in the new collection are not synced yet. If you set a sync schedule for the collection, the resources are synced at the next scheduled time. To sync the resources manually, select the collection in the Virtual Apps Collections page and click Sync.