You can create one or more virtual apps collections for each type of integration such as Horizon Cloud or Citrix published resources.

Prerequisites

  • All instances of the VMware Identity Manager service must be version 3.1 or later.
  • All connectors used for resources sync must be version 2017.12.1.0 or later.
  • Beginning with the 3.2 release, the following administrator roles are required:
    • To get started with virtual apps collections, use the Super Admin role. See About Virtual Apps Collections for more information.
    • To create, edit, or delete Horizon, Horizon Cloud, and Citrix-published virtual apps collections, use any role that can perform the Manage Desktop Apps action in the Catalog service.
    • To create, edit, or delete ThinApps collections, use any role that can perform the Manage ThinApps action in the Catalog service.

Procedure

  1. In the VMware Identity Manager console, select the Catalog > Virtual Apps tab, then click Virtual App Configuration.
    If this is the first time you are accessing the page, an information page appears. Click Get Started to proceed.
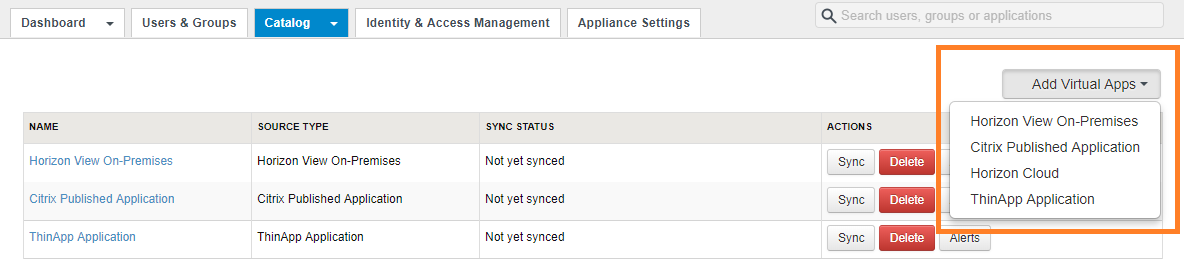
  2. Click Add Virtual Apps on the top right of the page and select the type of integration, for example, Citrix Published Application.

    add profile

  3. Enter the configuration information.
    The following fields are common to all types of integrations.
    Option Description
    Name Enter a unique name for the collection.
    Sync Connectors Select the connector that you want to use to sync the resources in the collection. If you have set up a cluster of connectors for high availability, click Add Connector and select the other connectors in the cluster in failover order.
    Sync Frequency Select how frequently you want to sync the resources in the collection. If you do not want to set up an automatic sync schedule, select Manually.
    Activation Policy

    Select how the resources are made available to users in Workspace ONE.

    With both the User Activated and Automatic options, the resources are added to the Catalog page. Users can use the resources from the Catalog page or move them to the Bookmarks page. However, to set up an approval flow for any of the apps, you must select User Activated for that app.

    The activation policy that you select here applies to all user entitlements for all the resources in the collection. You can modify the activation policy for individual users or groups per resource, from the application or desktop's Entitlements page.

    Setting the activation policy for the collection to User Activated is recommended if you intend to set up an approval flow.

  4. In the remaining fields, enter the configuration information for the integration, which is different for each type of integration.
  5. Click Save.
    The collection is created. You can view and edit the collection from the Virtual Apps Configuration page.

What to do next

The resources in the new collection are not synced yet. If you have set a sync schedule for the collection, the resources will be synced at the next scheduled time. To sync the resources manually, click the Sync button next to the collection in the Virtual Apps Configuration page.