Relay servers act as a content distribution node that provides more bandwidth and data use control in Workspace ONE UEM. Relay servers act as a proxy between the Workspace ONE UEM server and the rugged device for product provisioning.
Source Server Versus Relay Server
A source server is the original location of the data, usually a database, or content repository. After the data is downloaded from the source server to the UEM console, it is then transferred to the relay server. The data is then downloaded from the relay server to devices.
Relay Server Basics
The relay server acts as an FTP / Explicit FTPS / SFTP / HTTPS server that distributes products to the device for download and installation. You can distribute to all devices without consuming all the bandwidth to the main/central MDM server. There are two ways the files are sent from the Workspace ONE UEM console, Push and Pull.
- Push Relay Servers.
This method is typically used in on-premises deployments. The UEM console pushes content and applications contained in the product or staging to the relay server. SaaS customers interested in push relay servers must configure a public DNS to make the relay server available, and allows the Workspace ONE UEM server to open the required connection to send the files. Push servers must be FTP, Explicit FTPS, or SFTP file servers. HTTPS is supported only for Pull Relay Servers.
Supported FTP Clients- FileZilla FTP
- IIS FTP
- Brick FTP
- Pull Relay Servers.
Typically used in SaaS deployments, a pull service is installed on the relay server and monitors the UEM console for files to be downloaded. When it finds some, it downloads content and applications (whether provisioned or staged) to the FTP home directory through an outbound connection. This option is ideal because the pull service itself opens the HTTPS connection to the UEM console, making the need for a public connection unnecessary.
- Relay Service Cloud Connector.
A Relay Server Cloud Connector (RSCC) is a hybrid solution that pulls content from a service endpoint and distributes it to your relay servers. This design initiates an outbound connection from your network to the VMware cloud to download content for distribution. An outbound connection represents a security advantage over other designs. You can also configure RSCC as a Pull Relay Server. In such a case, RSCC is not enabled under Product Provisioning settings and the RSCC binary is configured as a Pull Relay.
FTP and FTPS servers must be compliant with RFC 959 and RFC 2228 set by the Internet Engineering Task Force.
Relay servers are required for barcode staging on Android and Windows Rugged. Otherwise, relay servers are optional but useful for pushing products to downloaded applications and content – as opposed to downloading directly from the server that hosts the Workspace ONE UEM console.
Relay servers also add redundancy through the fallback feature. If a device's relay server is down, the device falls back to the next relay server in the hierarchy system until it finds a working server or connects to the Workspace ONE UEM console server.
If you are not using a relay server, the device downloads applications and content directly from the UEM console server.
Relay Server and Job Status Updates
Relay servers greatly enhance the performance in a product provisioning environment, however, they complicate the task of reporting the status of a job. For more information, see Product Job Statuses.
Relay Server List View
Navigate to to see all the push and pull relay servers in your environment. After creating a relay server, refresh the relay server list view to get the status of the connection.
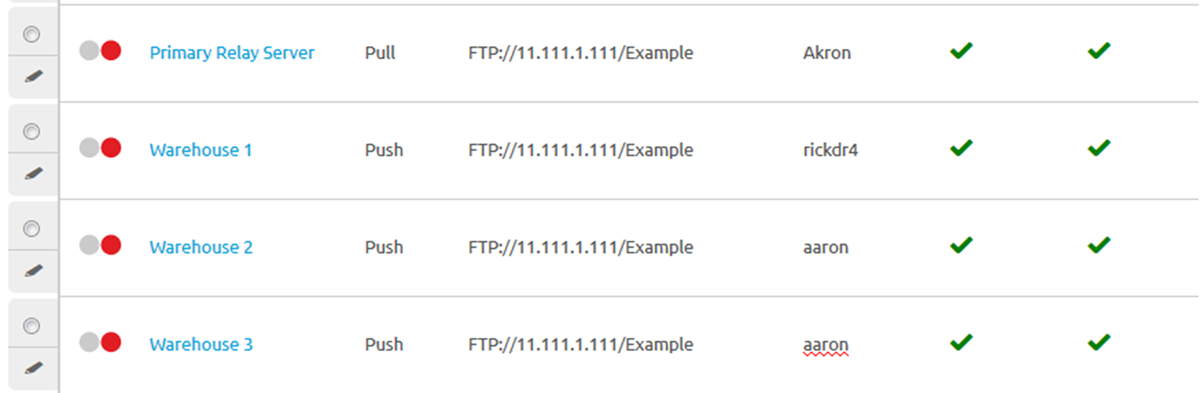
The Source Server and Relay Server statuses are defined as follows:
| Indicator | Source Server | Relay Server |
|---|---|---|
 |
Last retrieval from server succeeded. | Last file sync with server succeeded. |
 |
Retrieval from a server is in progress. | File sync with a server is in progress. |
 |
Last retrieval failed. | Last file sync failed. |
Once the check mark displays for both source server and relay server, the product components are available to distribute to the end-user device.
You can Export the Relay Servers List View to CSV (comma separated values) or XLSX file, both of which you can analyze with MS Excel. This file includes all the relevant details for each relay server in the listing.
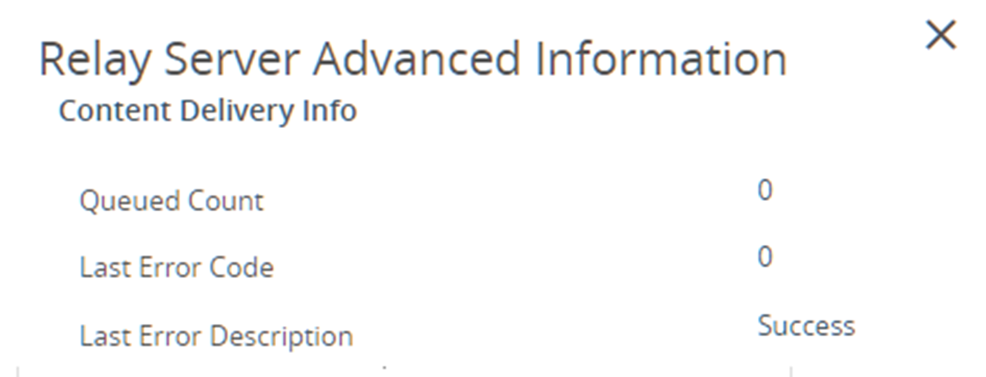
Advanced Info
You can access the Advanced Info action for more detailed information pertaining to the server. This action can be found in the More Actions options drop-down available after selecting a relay server. The Advanced Info action displays the Queued Count of files, the Last Error Code displayed, and the Last Error Description.
Batch Import Relay Servers
The Batch Import feature of Workspace ONE UEM loads relay servers into your product provisioning solution in bulk, saving you time if you have many to add. The Batch Import screen serves two purposes, 1) download a blank relay server batch file template and 2) import a completed template.
Download a blank relay server batch file template, fill it out, then upload the completed template by taking the following steps.
- Navigate to then select Add and Batch Import.
The Batch Import screen displays.
- Select the Show Server Function Codes and Show Relay Server Types links to see the codes that you need as you fill in the relay server batch import template.
- Select the Download template link and save the template to your device.
- Open the template with MS Excel or your favorite text editor.
The template features two sample entries. These entries allow you to see what kinds of values and their formats the system expects to find in each column heading when you import your completed template.
- You must associate the relay server users with an organization group (GroupID).
The columns that feature an asterisk are required.
- Remove the sample entries before you save your completed template.
- Save the template in CSV format.
- Return to the Workspace ONE UEM console and navigate once again to then select Add and Batch Import.
- Enter a Batch Name.
- Enter a Batch Description.
- Select Choose File to upload the completed Batch File.
Batch files must be in CSV format.
- Select Import to upload the file and begin the batch import process.
Results: All the relay servers in the correctly filled out template are now available to host product content in Workspace ONE UEM.
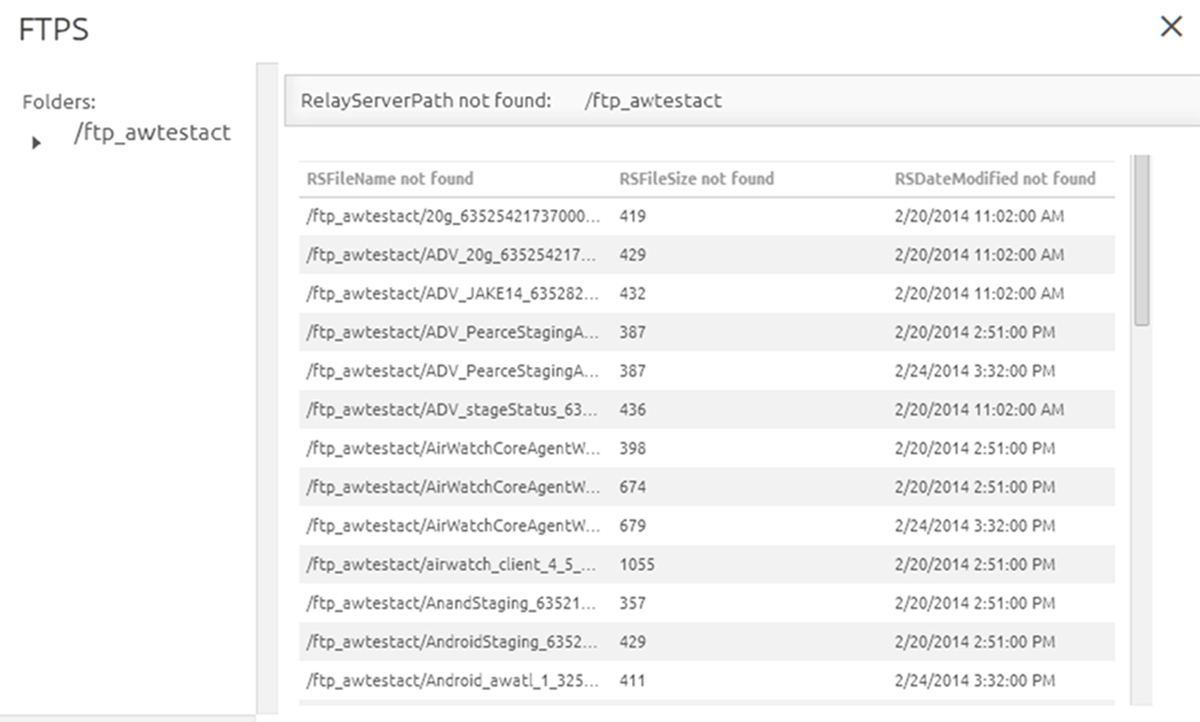
View Remote Files on Relay Server
Workspace ONE UEM lets you view files sent to a relay server through the Workspace ONE UEM console.
To use this feature, you must allow inbound communication from the Workspace ONE UEM console to the relay server over the FTP or HTTPS port used by the file server.
Since pull relay servers typically are used in networks where inbound communications cannot be allowed, the View Remote Files feature is typically used with push relay servers.
- Navigate to .
- Select the server you are interested in viewing by clicking the radio button to the left of the Active indicator, above the Edit pencil icon.
- Select the More Actions button.
- Select Remote File List and open the Remote File List for your selected relay server.