


After your devices are enrolled and configured, manage the devices using the Workspace ONE® UEM console. The management tools and functions enable you to keep an eye on your devices and remotely perform administrative functions.
You can manage all your devices from the UEM console. The Dashboard is a searchable, customizable view that you can use to filter and find specific devices. This feature makes it easier to perform administrative functions on a particular set of devices. The Device List View displays all the devices currently enrolled in your Workspace ONE UEM environment and their status. The Device Details page provides device-specific information such as profiles, apps, Workspace ONE Intelligent Hub version and which version of any applicable OEM service currently installed on the device. You can also perform remote actions on the device from the Device Details page that are platform-specific.
Shared devices allow multiple users to check out a device, log in, and access their assigned applications and files. Education settings are pushed to device carts and assigned to the class. Consider the following use requirements and limitations:
- iPads have a specific number of cached users associated with them.
- Student data is stored separately on the iPad and pushed to iCloud Drive or other cloud-based solutions that use apps from the App Store.
Create Device Carts for Shared iPads
Create device carts to manage groups of Shared iPads using device serial numbers.
- Navigate to Monitor > Education > Cart List.
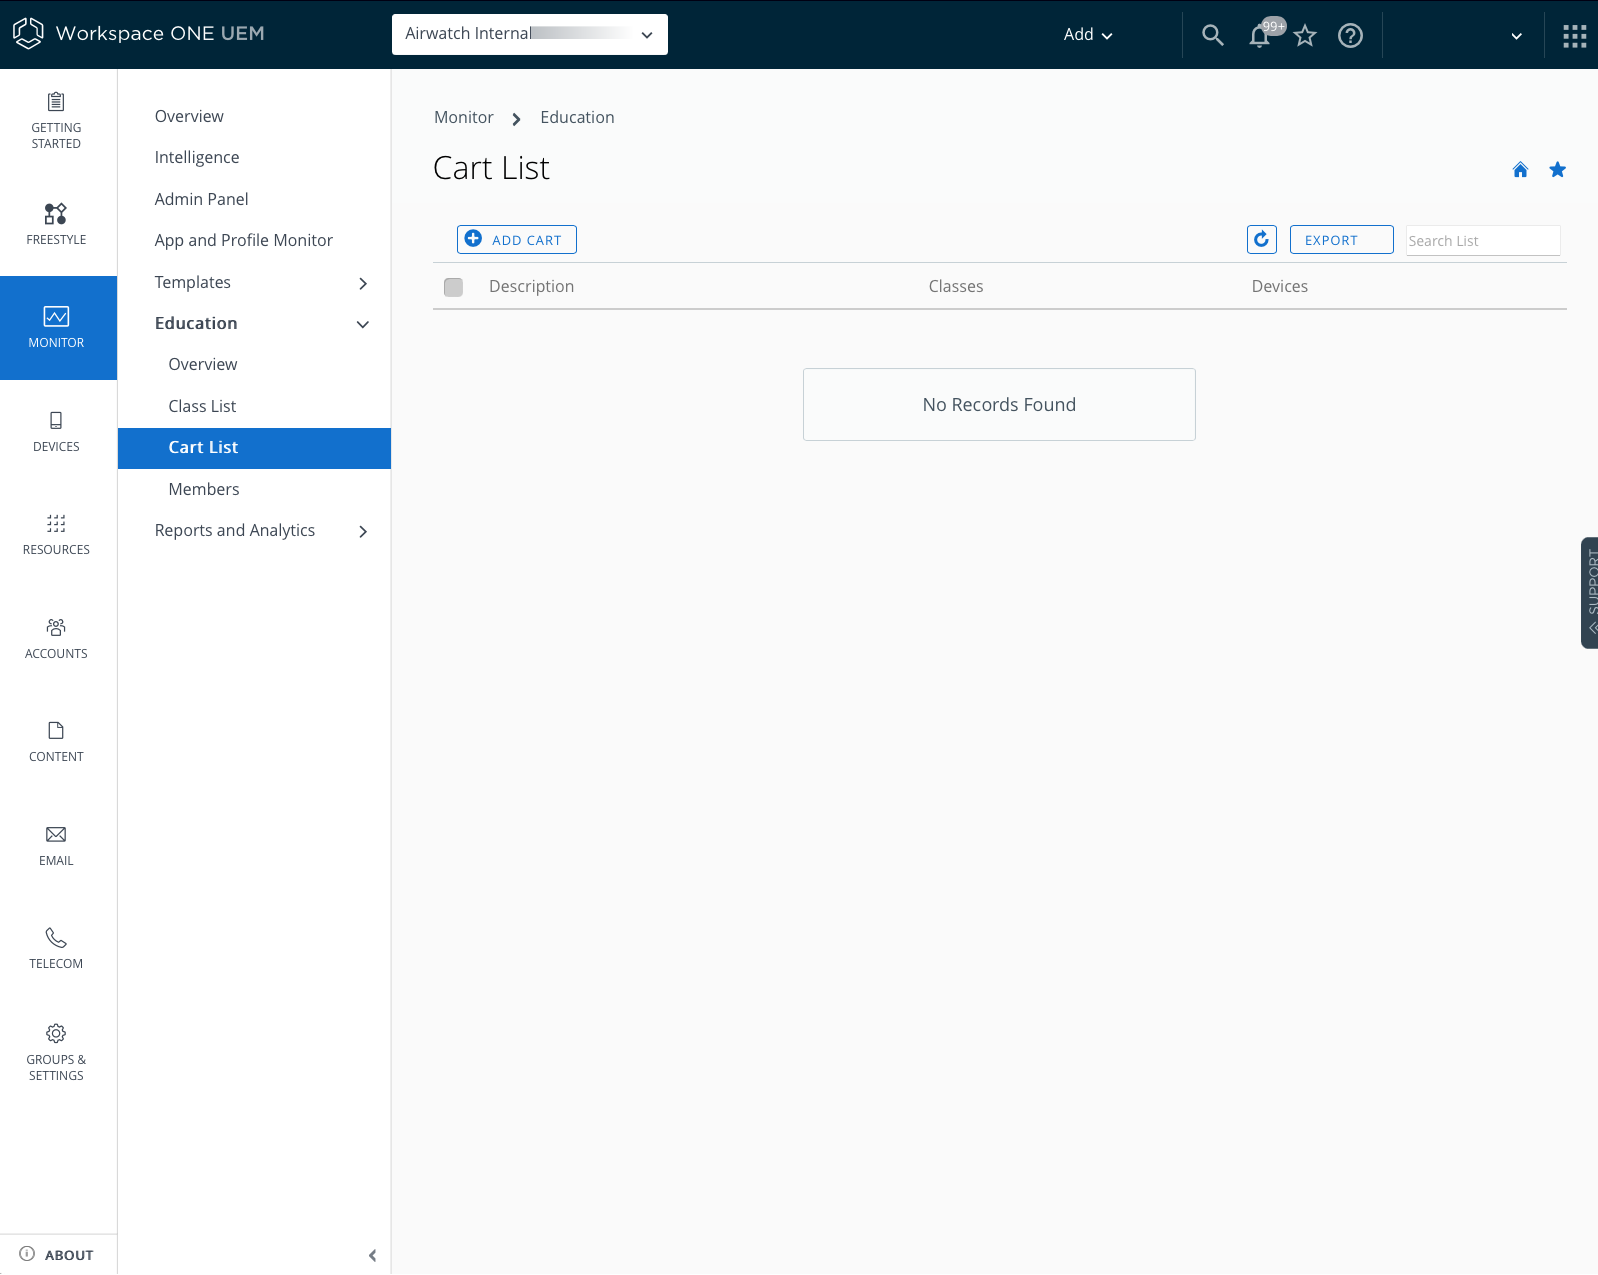
- Select Add Cart. An Add Cart window appears.
- Create a Name and Description for the cart.
- Select Download format to download a CSV template. Enter a unique serial number for each device cart on the template.
- Select Choose File to upload the template.
- Select Save.
Each cart creates a smart group of devices based on serial numbers. Tags are added to groups so devices can be assigned to the appropriate smart group upon enrollment. The new carts now appear in the Cart List.
Pre-Assign Applications for Shared iPads (Optional)
Although not required, Workspace ONE UEM recommends this workflow to assign and install VPP applications using Apple Configurator 2.
- Navigate to .
- Select the class name or pencil icon to edit the class. An Edit Class window appears and list of students and teachers displays.
- Review the members and select Next.
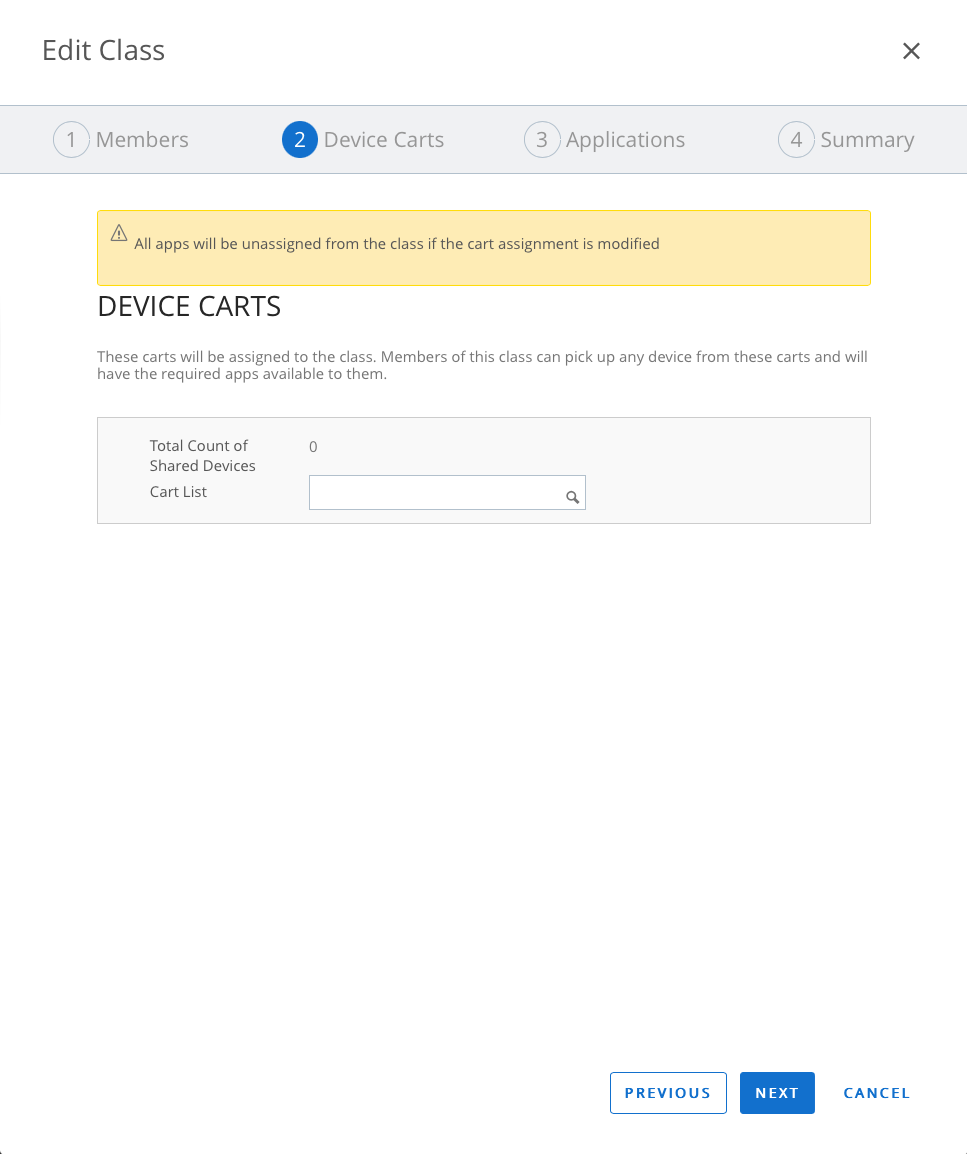
- Add Device Carts to the class by typing name of the cart you already created in the text box or select the Create New Carts shortcut to add a cart without leaving the class wizard. Select Next. For more information, see Create Device Carts for Shared iPads.
- Select Add App to add applications purchased through the Apple's Volume Purchase Program.A list of common applications that can be applied to all carts within the class appears in the window.
- Choose applications and select Next.
Note: You must have sufficient application licenses for each of the applications that are applied to the class. For more information on licenses and applications see the VMware Workspace ONE UEM Mobile Application Management guide.
- Review the Summary page and select Save to save the class settings.Devices receive the education configuration profile upon enrollment.
- Navigate to Apps & Books > Applications > Native > Purchased.
- Select an application to assign to the class configuration profile that you just saved.
- Scroll to Deployment.
- Select Make App MDM Managed if User Installed.
- Select Save.
- Navigate to Apple Configurator 2 on your desktop.
- Enter the credentials for the VPP account where the required apps were purchased.
- Select all the required applications from the list.
- Select Add Apps. The applications are pushed to the device upon enrollment.
Manually Manage Carts and Applications in Classes
Use a class wizard to assign and manage carts and applications for classes. Applications are converted to a device-based assignment upon saving the class.
- Navigate to .
- Select the class name or pencil icon to edit the class.An Edit Class window appears and list of students and teachers displays.
- Review the members and select Next.
- If you need to edit the member list, return to Apple School Manager to do so. Sync class rosters again.For more information, see Sync Class Rosters in Apple School Manager Integration section.
- Add Device Carts to the class by typing name of the cart you already created in the text box or select the Create New Carts shortcut to add a cart without leaving the class wizard. Select Next. For more information, see Create Device Carts for Shared iPads in Apple School Manager Shared Device Management section.
- Select Add App to add applications purchased through the Apple's Volume Purchase Program.A list of common applications that can be applied to all carts within the class appears in the window.
- Choose applications and select Next.
Note: You must have sufficient application licenses for each of the applications that are applied to the class. For more information on licenses and applications, see the VMware Workspace ONE UEM Mobile Application Management Guide available on Workspace ONE UEM Resources.
- Review the Summary page and select Save to save the class settings.
Devices receive the education configuration profile upon enrollment.
Delete Device Carts From Shared iPads
Once device carts are assigned to classes, they cannot be removed from the Cart List until the cart assignment and any external assignments, such as profiles, are removed from the class. Navigate to each class and delete the cart using the class wizard, then delete the cart from the list view.
- Navigate to .
- Select the class link to edit the cart assignment. Select Next.
- Find the device cart and select the X button next to the name of the cart on the drop-down menu.
- Follow the prompts to delete the device cart.
- Select Next to move through the screens in the wizard.
- Select Save to update the class assignment.
- Navigate to the Cart List tab and select it.
- Select the X button to remove the cart.
Once the cart is deleted, the apps may be reassigned to new carts.
