


Occasionally there are conflicting products provisioned to devices due to similar grouping in smart groups and custom attributes in Workspace ONE UEM. Product Sets allow you to group conflicting products and rank the products based on business needs.
Product Sets Basics
Product sets contain multiple products that you want to keep mutually exclusive. Product sets are useful for situations where the products contained inside the product set are only for specific devices within the parameters set by the rules engine using custom attributes.
The products in the product set follow a hierarchy based on ranking according to business needs. From a given product set, a device receives only one product that applies to the device. This product is the highest ranked among devices that meet the smart group and custom attribute rules criteria. After a device receives a product from a product set, the device does not receive any other products from the set unless the rank of a subsequent product raises or a new product is created in the set with a higher rank.
Create a Product Set
Create a product set to control the delivery of multiple products so a device receives only the specific product that applies to the device based on your business rules.
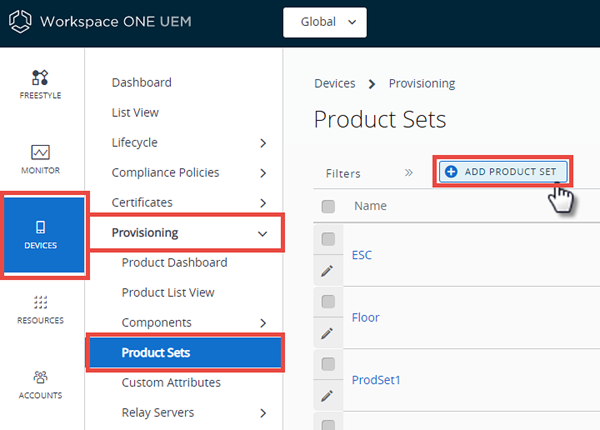
- Navigate to and select the Add Product Set button.
- Select the platform for which you want to create the product set.
- Complete the General text boxes.
Settings Descriptions Name Enter a name for the product sets. The name cannot be longer than 255 characters. Description Enter a short description for the product sets. Managed By Select the organization group that can edit the product sets. - Select the Products tab.
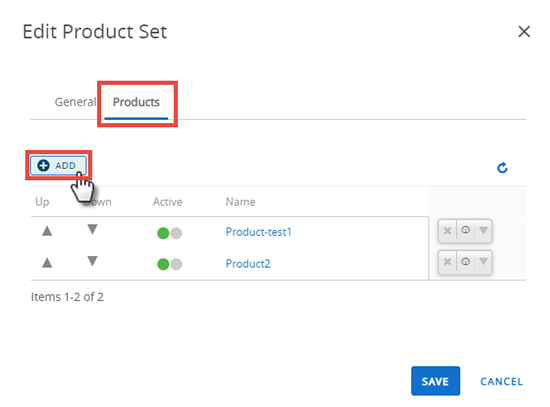
- Select Add to add products to the product set.
- Create a product including manifest items, conditions, and deployment settings.
See Create a Product for more information on creating a product. Ensure that you use the rules engine to create custom attribute-based rules for each product so the policy engine can properly assign the products.
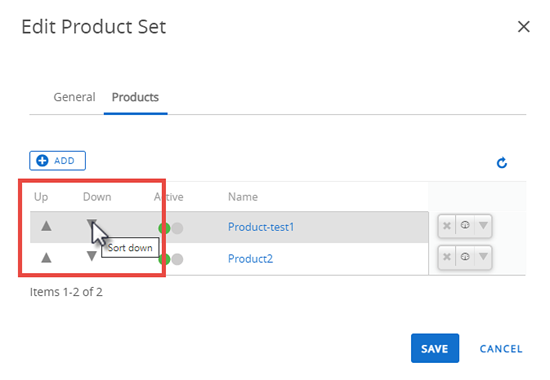
- Use the Up and Down arrows to adjust product ranking based on business needs.
- Set products to Active if needed.
- Select Save to create the product set.
Add a Product to a Product Set
You can add a product to an existing product set. This action requires following specific rules due to the complicated relationship between products and business rules.
A new product in a product set is added with the lowest ranking in the set by default. If the new product is a higher rank, you must edit the ranking. For more information on what happens when you adjust product ranks, see the section on this page entitled Change the Product Ranking in a Product Set.
- Navigate to .
- Find the product set you want to add a product to and select the Edit icon (
 ).
). - Select the Products tab.
- Select Add.
- Manually adjust the product rank as needed according to your business needs.
- Select Save to add the product to the product set.
Results: Any modifications made during the edit of a product set do not take effect until you save the product set. Once saved, the product set enters the policy engine for evaluation.
Remove a Product from a Product Set
Remove a product from an existing product set. This action requires following specific rules due to the complicated relation between products and business rules.
Removing a product from a product set raises the rank of all products previously ranked below the removed product by one. If you remove multiple products, the remaining products adjust by one rank for each product removed. For more information on what happens when you adjust product ranks, see the section on this page entitled Change the Product Ranking in a Product Set.
Any modifications made during the edit of a product set do not take effect until you save the product set.

- Navigate to .
- Find the product set you want to remove a product from and select the Edit icon ().
- Select the Products tab.

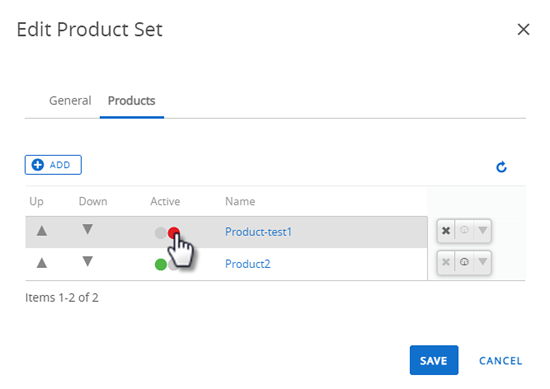
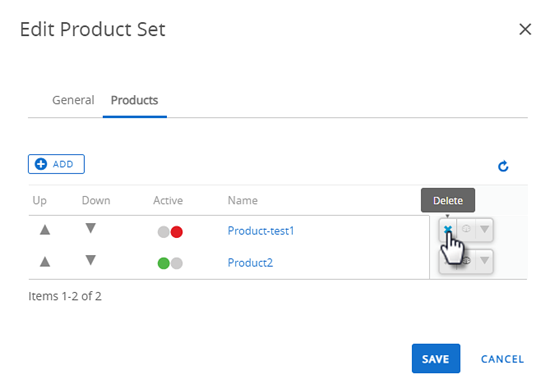
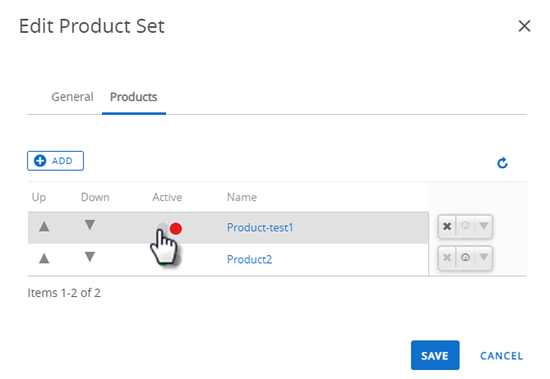
- If the product you want to remove is active, you must first deactivate it before you can remove it. Click the grey circle to the right of the green circle. The circle turns red, indicating that the product is now deactivated.
- You can now select the x to far right to remove the product from the set.
- Manually adjust the product rank as needed according to your business needs.
- Select Save to remove the product from the product set.
Results: Once saved, the product set enters the policy engine for evaluation.
Activate and Deactivate Products in a Product Set
When you activate or deactivate a product in a product set, you must be aware of and prepare for possible consequences.
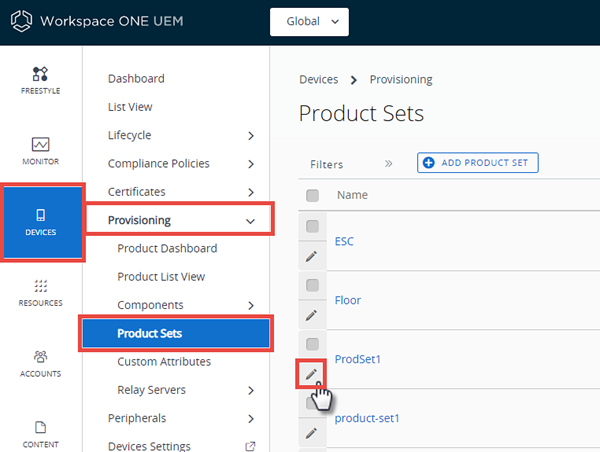
- Navigate to and select the pencil icon (
 ) to the left of the Product Set name in the listing.
The Edit Product Set screen displays.
- Select the Products tab.
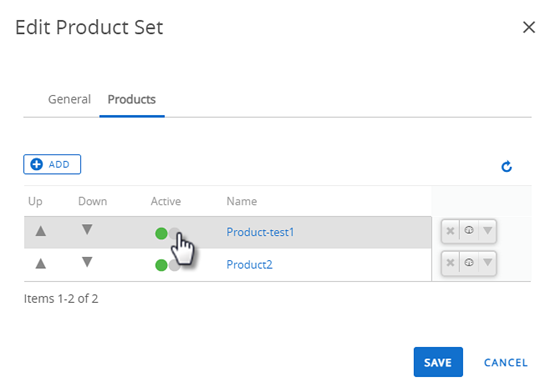
The full list of products in the product set displays including the green and red traffic light toggles. Products with a green light are active, products with a red light are inactive.
- Select the traffic light toggle and switch between activated (green) and deactivated (red) products.
- Deactivating a product in a product set sends a removal command to all devices with that product, and the next highest ranked product is installed.
- Activating a product in a product set might trigger other products to be removed on devices, and the newly activated product to be installed.
View Product Sets in Device Details
Product Sets display on individual device detail pages to show the status of the products' deployments to the device. The products listed that are part of a product set display the product set they pertain to and the deployment status of the products.
The Products tab displays all the products in a product set that are assigned to a device. The status of the products in relation to the device is displayed as well. Not all the displayed products from a product set are applicable for the device viewed.
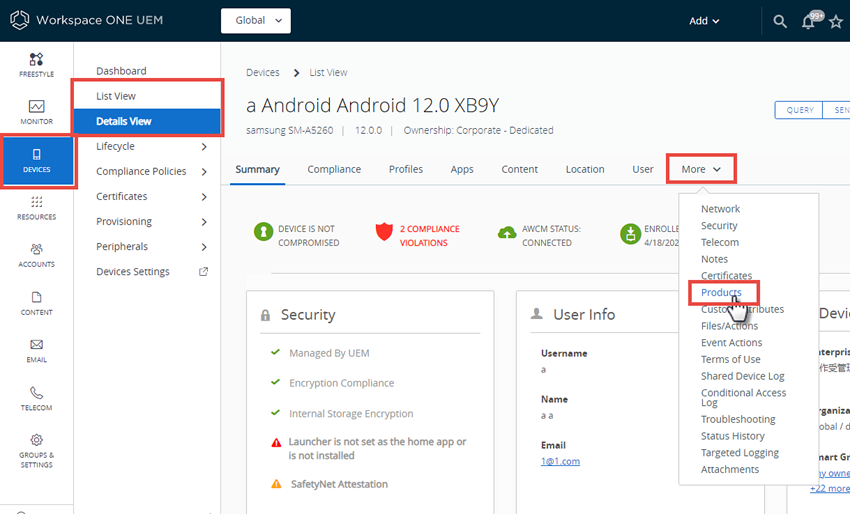
To see the product sets in the Device Details, navigate to and select the device you want to view by selecting the Friendly Name of the device. The Device Details view displays. Now select the More tab, which displays a large drop-down menu, and from that menu, select Products.
- Product Set – Displays the product set that contains the product. Select the product set to view the product set details.
- Status – Displays the status of the product. For products in a product set, the appropriate product deployed to the device is labeled as Compliant. The other products contained in the product set eligible for deployment but are not deployed to the device are labeled as Outranked. Any product that is not eligible to be deployed to the device is labeled as Not Applicable.
Change the Product Ranking in a Product Set
Product set ranking controls which product of a product set is sent to a device. Since the ranking is the key feature of product sets, changes in ranking cause a series of reactions in the product set.
The following are examples of rank changes and what happens to the product, product set, and devices as a result.
| Reason for Edit | Effect of Edit |
|---|---|
| To add a product. | The new product is set at the lowest rank. You must manually change the rank of the new product as needed. |
| Changing rank of existing products | Increasing the rank (selecting Up arrow) of a product decreases the rank of all subsequent products by one. Decreasing the rank (selecting Down arrow) of a product increases the rank of previously lower-ranked products. After you complete the rank changes and save the product, the product set enters the policy engine for evaluation. The engine assesses the custom attribute for each device against the new device rankings. If you reorder the Products priority within a Product Set, then the Products are reassigned based on the new priority order. As a result, the Workspace ONE UEM console sends removal commands for all devices affected by the reorder and assign Products based on the new order. After editing product ranking, only the products affected by the new ranking receive removal and install commands. Products outside the change in ranking are not affected. |
| Removing a Product | Removing a product increases the rank of all products previously ranked below the deleted product by one. If you remove multiple products, the ranking increases by one for each product removed. All products that preceded the deleted product's rank remain unchanged. Any products that had the removed product installed receives a new product based on the new rankings. |
- Navigate to .
- Find the product set you want to add a product to and select the Edit icon ().
- Select the Products tab.
- Manually adjust the product rank as needed according to your business needs.
- Select Save and apply the rank changes.
