


In this example, you’ll learn how to apply state files to quickly deploy and manage configuration settings using SaltStack Config. In your role as an IT system administrator or DevOps team member, you know that it is time-consuming to manually add or update configuration settings on many nodes one-by-one, especially at scale. To make matters worse, you also introduce the possibility of configuration mistakes or configuration drift when you have to manage hundreds or thousands of nodes at the same time. The state file system can help you solve this problem. In this example, you'll learn how to use state files with SaltStack Config to consistently add and update configuration settings, such as firewall settings on a Windows server.
This hands-on example changes your environment and that you should exercise caution when completing it. Consider only trying this example using nodes in a test or development environment rather than a production environment.
Configure firewall settings on a Windows node
To configure the firewall settings on a Windows minion by opening the firewall for port 445:
- Create a new file in the SaltStack Config File Server.
- In the SaltStack Config user interface, click Config > File Server in the side menu.
- When you first open the File Server workspace, you see the file directory and a blank new file. Use this blank file to create a new file.
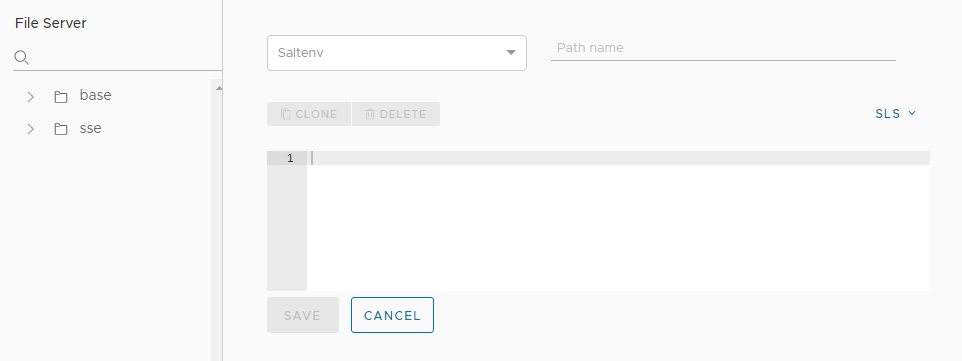
- Create a new state file (SLS) in the File Server.
- Click the Saltenv drop-down menu and select base.
- Next to the unlabeled menu, type the filepath and filename. Use
/windows/firewall.sls. - In the body of the file, copy and paste the following state file code (which uses YAML syntax):
open_smb_port:
  win_firewall.add_rule:
    - name: SMB (445)
    - localport: 445
    - protocol: tcp
    - action: allow
For more information about the Windows firewall module, see Salt modules - Win firewall.
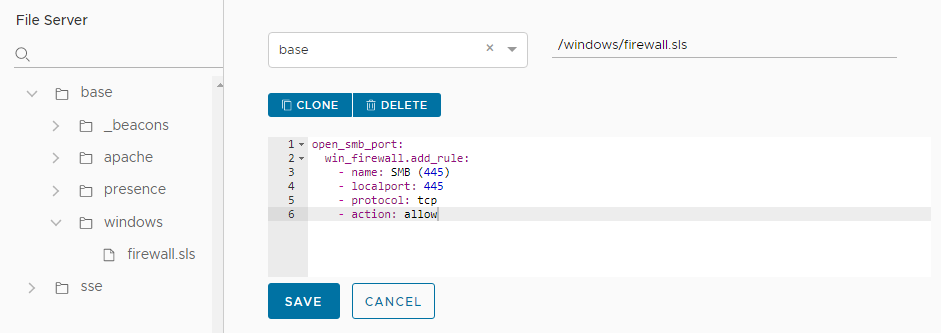
- Save the state file.
- Confirm the new file appears in the File Server directory under base > windows > firewall.sls.
- Create a new job.
- Open the Jobs workspace by clicking Config > Jobs in the side menu.
- Click the Create Job button.
Note:
If you don’t see the Create Job button, you do not have permission to create new jobs. Contact your vRealize Automation administrator for access or to create this job on your behalf so that you can complete the tutorial.
- Enter the details for the new job and save the job.
Field Sample value Name
Give this job a descriptive name such as “Configure Windows firewall.”
Description
Add a description that tells other users the purpose of this job, such as "Opens the firewall for port 445 on Windows nodes."
Command
Select salt.
The
saltcommand is used for jobs that are run against minions.Targets
Do not select anything from this menu. Leaving this field blank allows you to select the target at the time you run the job.
Function
Click this field and begin typing
state.applyuntil you can select this module.This field is where you select the Salt module that is applied when this job is run.
Environments
Select
basefrom the menu.States
Select your newly created state file from the menu:
windows.firewall.Arguments
This module does not accept arguments, so leave it blank.
Job Inputs This job does not require any job inputs, so leave it blank. For more information about job inputs, see How do I create jobs. 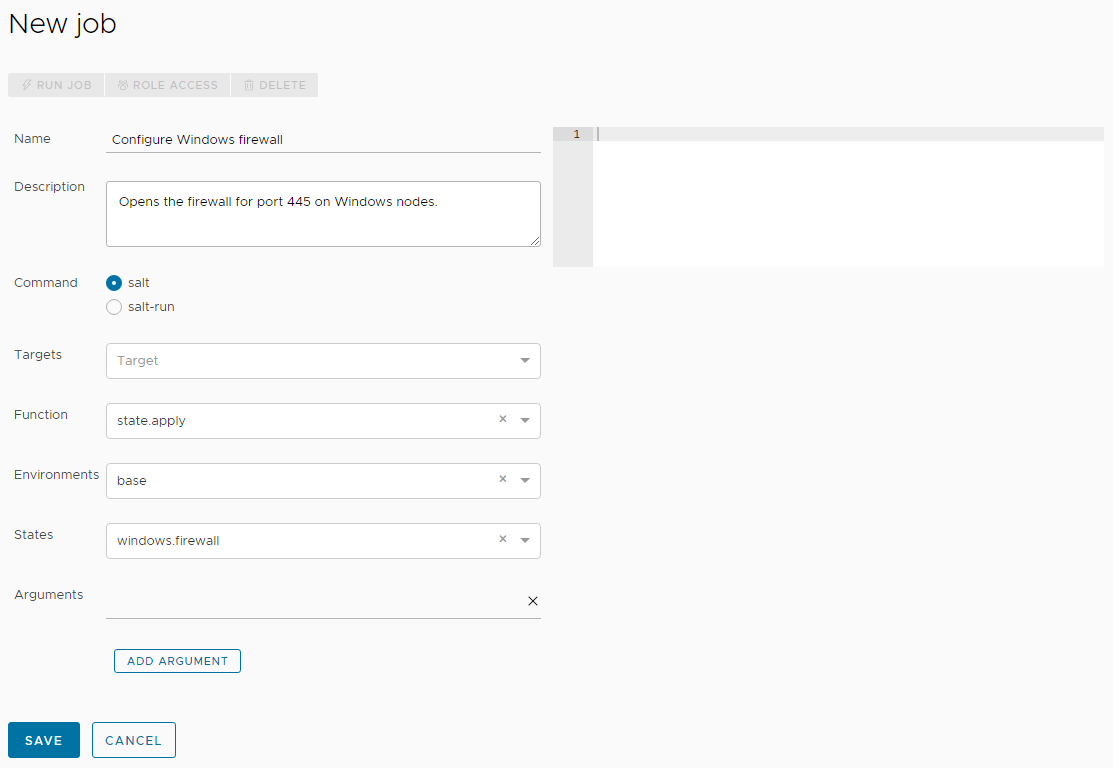
- Now that you’ve created a job, run the job by selecting the job targets.
- In the side menu, click Targets to open the Targets workspace and view your targets.
- In the All Minions table, find the Windows minion you want to target for this job. Check the box next to this minion and click the Run Job button.
- In the Run Job dialog box, click the Job menu and select the Configure Windows Firewall job you created in the previous steps. You can type the name of the job to filter the jobs if needed.
- Click Run Now.
If you successfully ran the job, a notification appears that explains the job was successfully started.
- Check whether the job is complete or not by clicking Activity > Completed in the side menu.
If you don’t see your job in this table, it might still be in progress. You can find jobs that are currently running by clicking Activity > In Progress. Continue refreshing Activity > Completed until your job appears in the table.
- When your job is complete, review the job results.
- Find the row that displays your job and click its JID (job identification number).
Note:
The JID appears as a hyperlinked number with 20 digits. For example, one possible JID could be: 20210823204015061902
- Review the job results to confirm the firewall opened for port 445.
- Find the row that displays your job and click its JID (job identification number).
Summary of results and key information
As you review the job results, consider the following points:
- State files provide a straightforward method for quickly applying the correct configuration settings (such as firewall settings) on a targeted set of nodes. State files ensure that your nodes have consistent configuration settings and that these settings can be deployed quickly and efficiently at any scale. If you need to change the configuration settings, simply update the state file and reapply it to all minions that are defined in a target.
- State files also prevent configuration drift, which is when your system configurations become increasingly different over time or from node to node. When you apply state files, SaltStack Config checks whether the target is in its desired configuration state. States are like configuration policies. They define the target state that you want the server to have. When you apply that state (policy) to a system, SaltStack Config performs only the operations necessary to bring the configuration into compliance with that state (policy). If it's already compliant, SaltStack Config simply tells you it's already compliant and makes no further changes.
- In this example, you stored the state files locally in the SaltStack Config File Server, but be aware that you can store state files in a private, version-controlled Git repository. Many users link SaltStack Config to private Git repositories where they store and closely monitor changes to state files using an infrastructure-as-code approach.
