


In this example, you’ll see another example of how to apply state files to quickly deploy and manage configuration settings using SaltStack Config. This example shows a slightly more complex state file that handles three different tasks (installing a service, starting a service, and deploying a file to the node running the service).
This hands-on example make changes to your environment and that you should exercise caution when completing it. Consider only trying this example using nodes in a test or development environment rather than a production environment.
Configure an Apache web server on a CentOS (Linux) node
To write a state file that configures and deploys an Apache web server:
- Create a new file in the SaltStack Config File Server.
- In the SaltStack Config user interface, click Config > File Server in the side menu.
- When you first open the File Server workspace, you see the file directory and a blank new file. Use this blank file to create a new file.
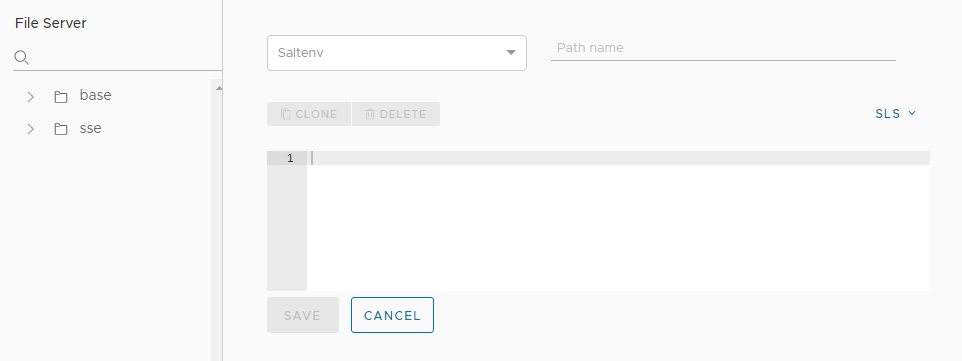
- Use the blank new file to create a new state file (SLS).
- Click the Saltenv menu and select base.
- Next to the unlabeled menu, type the filepath and filename. Use
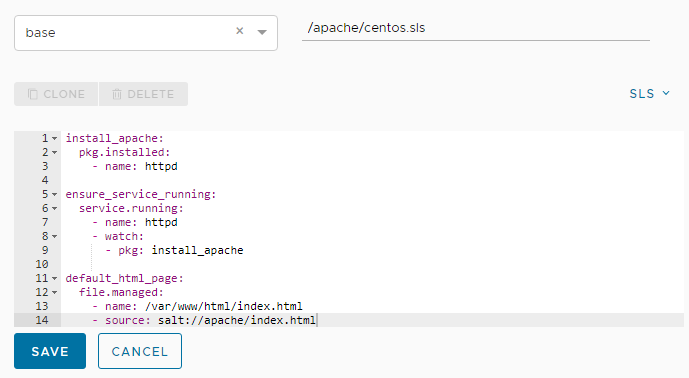
/apache/centos.sls. - In the body of the file, copy and paste the following state file code (which uses YAML syntax):
install_apache: pkg.installed: - name: httpd ensure_service_running: service.running: - name: httpd - watch: - pkg: install_apache default_html_page: file.managed: - name: /var/www/html/index.html - source: salt://apache/index.htmlNote:This state file has three steps that run three different Salt execution modules. When this state file is applied to a minion, SaltStack Config:- Installs Apache (httpd) on the minion.
- Starts the Apache service.
- Deploys a sample HTML index page that is hosted on the minion.
- Save the state file.
- Confirm the new file appears in the File Server directory under base > apache > centos.sls.
- Add a sample HTML index page to the File Server.
- In the File Server workspace, click the Create button to add a new file.
- Click the unlabeled menu and select base.
- Next to the unlabeled menu, type the filepath and filename for this file. Use
/apache/index.html. - In the body of the file, copy and paste the following HTML code:
<html>
<head><title>SaltStack Config Example></title></head>
<body>
<h1>SaltStack Config Example</h1>

Hello, world!

</body>
- Save the HTML file.
- Confirm the new file appears in the File Server directory under base > apache > index.html.
- Create a new job.
- Open the Jobs workspace by clicking Config > Jobs in the side menu.
- Click the Create Job button.
Note:
If you don’t see the Create Job button, you do not have permission to create new jobs. Contact your vRealize Automation administrator for access or to create this job on your behalf so that you can complete the tutorial.
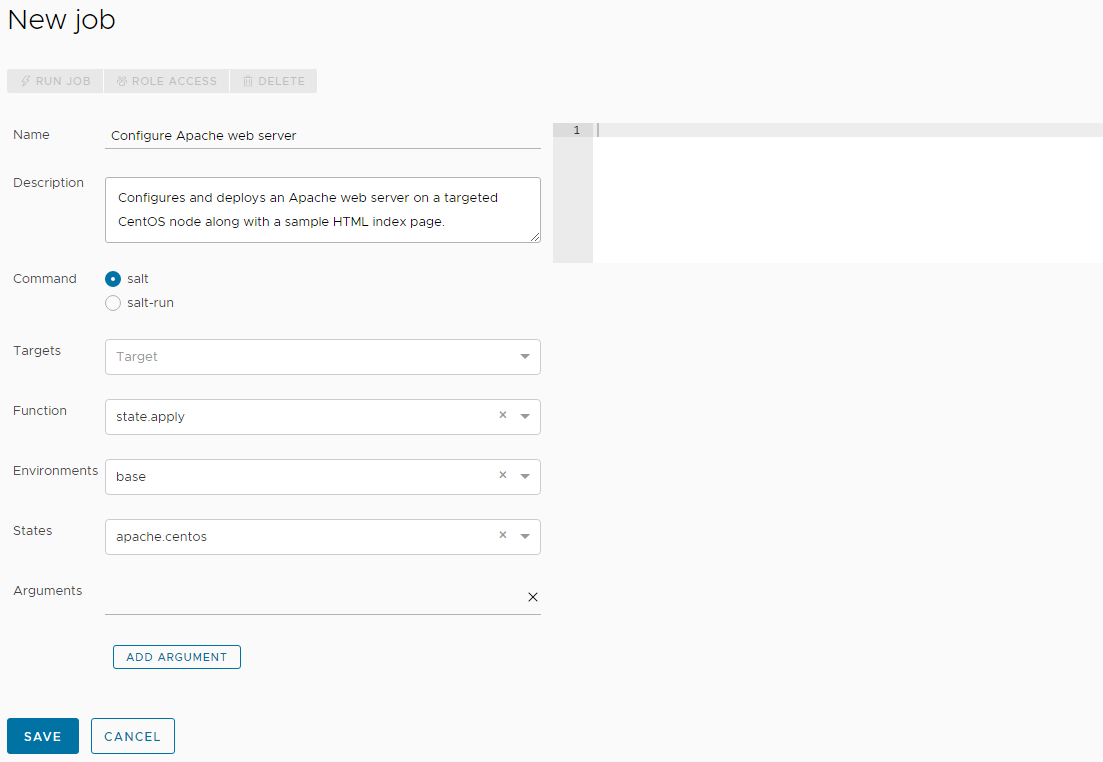
- On the New job screen, fill out the details for the new job and save the job.
Field Sample value Name
Give this job a descriptive name such as “Configure Apache web server.”
Description
Add a description that tells other users the purpose of this job, such as "Configures and deploys an Apache web server on a targeted CentOS node along with a sample HTML index page."
Command
Select salt.
The
saltcommand is used for jobs that are run against minions.Targets
Do not select anything from this menu. Leaving this field blank allows you to select the target at the time you run the job.
Function
Click this field and begin typing
state.applyuntil you can select this module.This field is where you select the Salt module that is applied when this job is run.
Environments
Select
basefrom the menu.States
Select your newly created state file from the menu:
apache.centos.Arguments
This module does not accept arguments, so leave it blank.
Job Inputs This job does not require any job inputs, so leave it empty. For more information about job inputs, see How do I create jobs.
- Now that you’ve created a job, run the job by selecting the job targets.
- In the side menu, click Targets to open the Targets workspace and view your targets.
- In the All Minions table, find the CentOS minion you want to target for this job. Check the box next to that minion and click the Run Job button.
- In the Run Job dialog box, click the Job menu and select the Configure Apache Web Server job you created in the previous steps. You can type the name of the job to filter the jobs if needed.
- Click Run Now.
If you successfully ran the job, a notification appears that explains the job was successfully started.
- Check whether the job is complete or not by clicking Activity > Completed in the side menu.
If you don’t see your job in this table, it might still be in progress. You can find jobs that are currently running by clicking Activity > In Progress. Continue refreshing Activity > Completed until your job appears in the table.
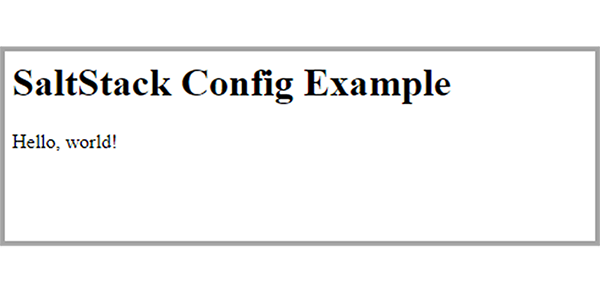
- When your job is complete, check that the index page is hosted on your newly configured web server.
- In your web browser, go to the IP address of the CentOS minion that you targeted in the job. To find your minion’s IP address in SaltStack Config, look in the Targets workspace under the IP address column for that minion.
- When you enter that IP address, you should see your sample HTML index page.
Summary of results and key information
As you review the job results and index page, consider the following points:
- State files are a method for quickly setting and updating system configuration at any scale and for preventing configuration drift in an infrastructure-as-code approach.
- SaltStack Config allows you to build state files that can incorporate complex elements like variables, which are values that can change depending on conditions or on information passed to the state file at the time it is applied to your system.
- You can also build state files that can pull passwords from a private bank (which are called pillar in SaltStack Config) to help keep credentials secure while also empowering authorized team members to run jobs on resources they are authorized to access.
