The goal of this use case is to programmatically install the Salt minion service on a minion by connecting a Windows VM to your SaltStack Config environment.
Prerequisites
Before you can deploy a minion using the API in a Windows environment you must:
- Have a SaltStack Config environment with RaaS deployed.
- Have a Salt master and Salt minion installed.
- Have a Windows VM deployed.
Procedure
- Verify that the folder etc/salt/cloud.deploy.d on the Salt master contains these files.

If you do not see the files, contact support.
Note: The xxxx in the filename, for example,
salt-xxxx-windows--x86.tar.gz, should match the version of the Salt master. To verify the version of the Salt master, run the
salt-master -V command on the Salt master.
- In the Salt master's terminal, install the following libraries by running the
pip3 install pypsexec smbprotocol and pip3 install impacket --ignore-installed commands.
- To identify the FQDN of the Salt master, run the
salt saltmaster grains.get fqdn command in the Salt master's terminal.
- On your Windows machine, verify that the C: \Windows\System32\drivers\etc\hosts file is configured with the Salt master's IP and FQDN.
- Open PowerShell on the Windows machine and run this command to open the required ports:
| Port |
Commands |
| 445 |
New-NetFirewallRule -Name "SMB445" - DisplayName "SMB445" -Protocol TCP - LocalPort 445Enable-Psremoting |
- In the Salt master's terminal, use this command to open ports 4505 and 4506 on the Salt master:
| Port |
Commands |
| 4505-4506 |
netsh advfirewall firewall add rule name="Salt" dir=in action=allow protocol=TCP localport=4505-4506 |
See Understanding SaltStack for more information about the Salt communication model.
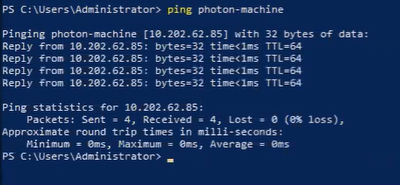
- Ensure that the FQDN is configured for the Salt master by running the ping [FQDN] command on your Windows machine.
- Make this API call using an SSEAPI client with the correct credentials for your environment.
Note: If you integrated
SaltStack Config with
vRealize Automation, the
vRealize Automation service makes this API call for you when you deploy minions using a cloud template.
from sseapiclient import APIClient

client = APIClient('https://<master-ip>', '<ssc-username>', '<sscpassword>', ssl_validate_cert=False)


client.api.minions.deploy_minion(

 master_id = '<master-id>',

 host_name_ip = '<prospective minion’s ip>',

 os = ‘<prospective minion’s os>’,

 minion_id = '<desired-minion-name-for-prospective-minion>',

 username = '<ssh-username-for-prospective-minion>',

 password = '<ssh-password-for-prospective-minion>',

)
The
deploy.minion function begins running in your
SaltStack Config environment. You can verify that the job is running in the
Activity tab of the
SaltStack Config user interface or by running the
python3 command, followed by
client.api.minions.get_minion_deployments().
Results
The minion was successfully deployed and configured from your Windows environment and API call.
What to do next
Verify that the minion was deployed successfully by running a
test.ping command against the minion using the
Run Command window or by running the
\* test.ping and
\* test.versions commands in the Salt master command window.