


In this example, you’ll run a job that checks the current disk usage for your nodes (minions). In your role as an IT system administrator or DevOps team member, you often need to monitor the disk capacity of your nodes. When your nodes are close to reaching their full capacity, that usually signals the need to purchase new hardware or requisition new virtual machines to meet server capacity needs. You'll learn how to use SaltStack Config to check for disk usage in this kind of scenario.
Check disk usage
To run a job that checks the disk usage for your minions:
- Create a new job.
- In the SaltStack Config user interface, open the Jobs workspace by clicking Config > Jobs in the side menu.
- Click the Create Job button.
Note:If you don’t see the Create Job button, you do not have permission to create new jobs. Contact your vRealize Automation administrator for access or to create this job on your behalf so that you can complete the tutorial.
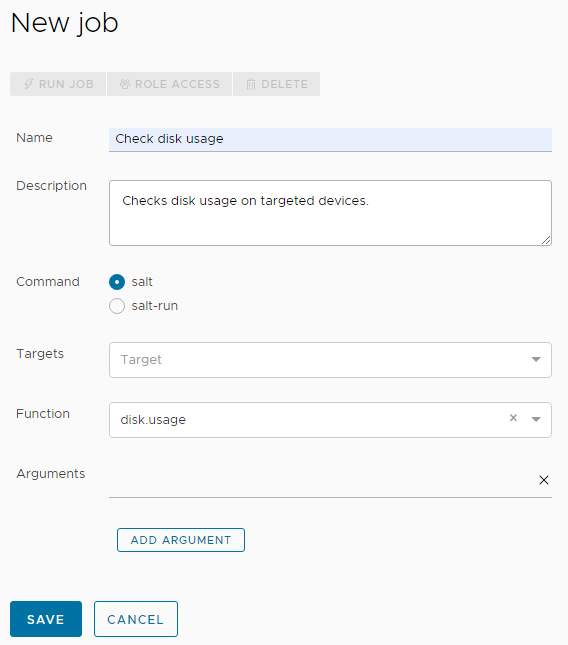
- Enter the details for the new job and save the job.
Field Sample value Name
Give this job a descriptive name such as “Check disk usage."
Description
Add a description that tells other users the purpose of this job, such as “Checks disk usage on targeted devices.”
Command
Select salt.
The
saltcommand is used for jobs that are run against minions.Targets
Do not select anything from this menu. Leaving this field blank allows you to select the target at the time you run the job.
Function
Click this field and begin typing
disk.usageuntil you can select this module.This field is where you select the Salt module that is applied when this job is run. For more information about the disk usage module, see Salt modules - Disk usage.
Arguments
This module does not accept arguments, so leave it blank.
Job Inputs This job does not require any job inputs, so leave it empty. For more information about job inputs, see How do I create jobs.
- Now that you’ve created a job, run the job by selecting the job targets.
- In the side menu, click Targets to open the Targets workspace and view your targets.
- Verify that the All Minions target is selected. Inside the All Minions target, click the Run Job button.
- In the Run Job dialog box, click the Job menu and select the Sample Disk Usage job you created in the previous steps. You can type the name of the job to filter the jobs if needed.
- Click Run Now.
If you successfully ran the job, a notification appears that explains the job was successfully started.
- Check whether the job is complete by clicking Activity > Completed in the side menu.
If you don’t see your job in this table, it might still be in progress. You can find jobs that are currently running by clicking Activity > In Progress. Continue refreshing Activity > Completed until your job appears in the table.
- When your job is complete and appears in the table, review the job results.
- Find the row that displays your job and click its JID (job identification number).
Note:
The JID appears as a hyperlinked number with 20 digits. For example, one possible JID could be: 20210823204015061902
- In the job results, click the Disk Usage tab. This tab displays information about each minion that was targeted by the job, including its total size, the current amount used, the amount of space available, and the percentage of space being used.
- Find the row that displays your job and click its JID (job identification number).

Summary of results and key information
As you review the job results, consider the following points:
- Notice that this job is cross-platform. You’ll get the same result no matter which operating system the minion is running (Windows, Linux, MacOS, etc.). SaltStack Config is designed to work with nearly every operating system.
- SaltStack Config also gives you the ability to run this job on a schedule and to publish it into an exportable report.
- You could also use this job in a more sophisticated way using Salt’s beacon and reactor system. The beacon and reactor system allows you to set up events that will trigger a reaction event. For example, you could set up a schedule that checks disk usage on a regular basis. When the percentage used is above a certain threshold, you could have Salt send a notification email, text message, or Slack message indicating that new hardware needs to be procured.
