


On the License and Usage page, you see the license usage count and view the license details by clicking the individual link on each entity count.You can also add and change the license type.
Add a License
- Go to .
- On the License and Usage page, click Add.
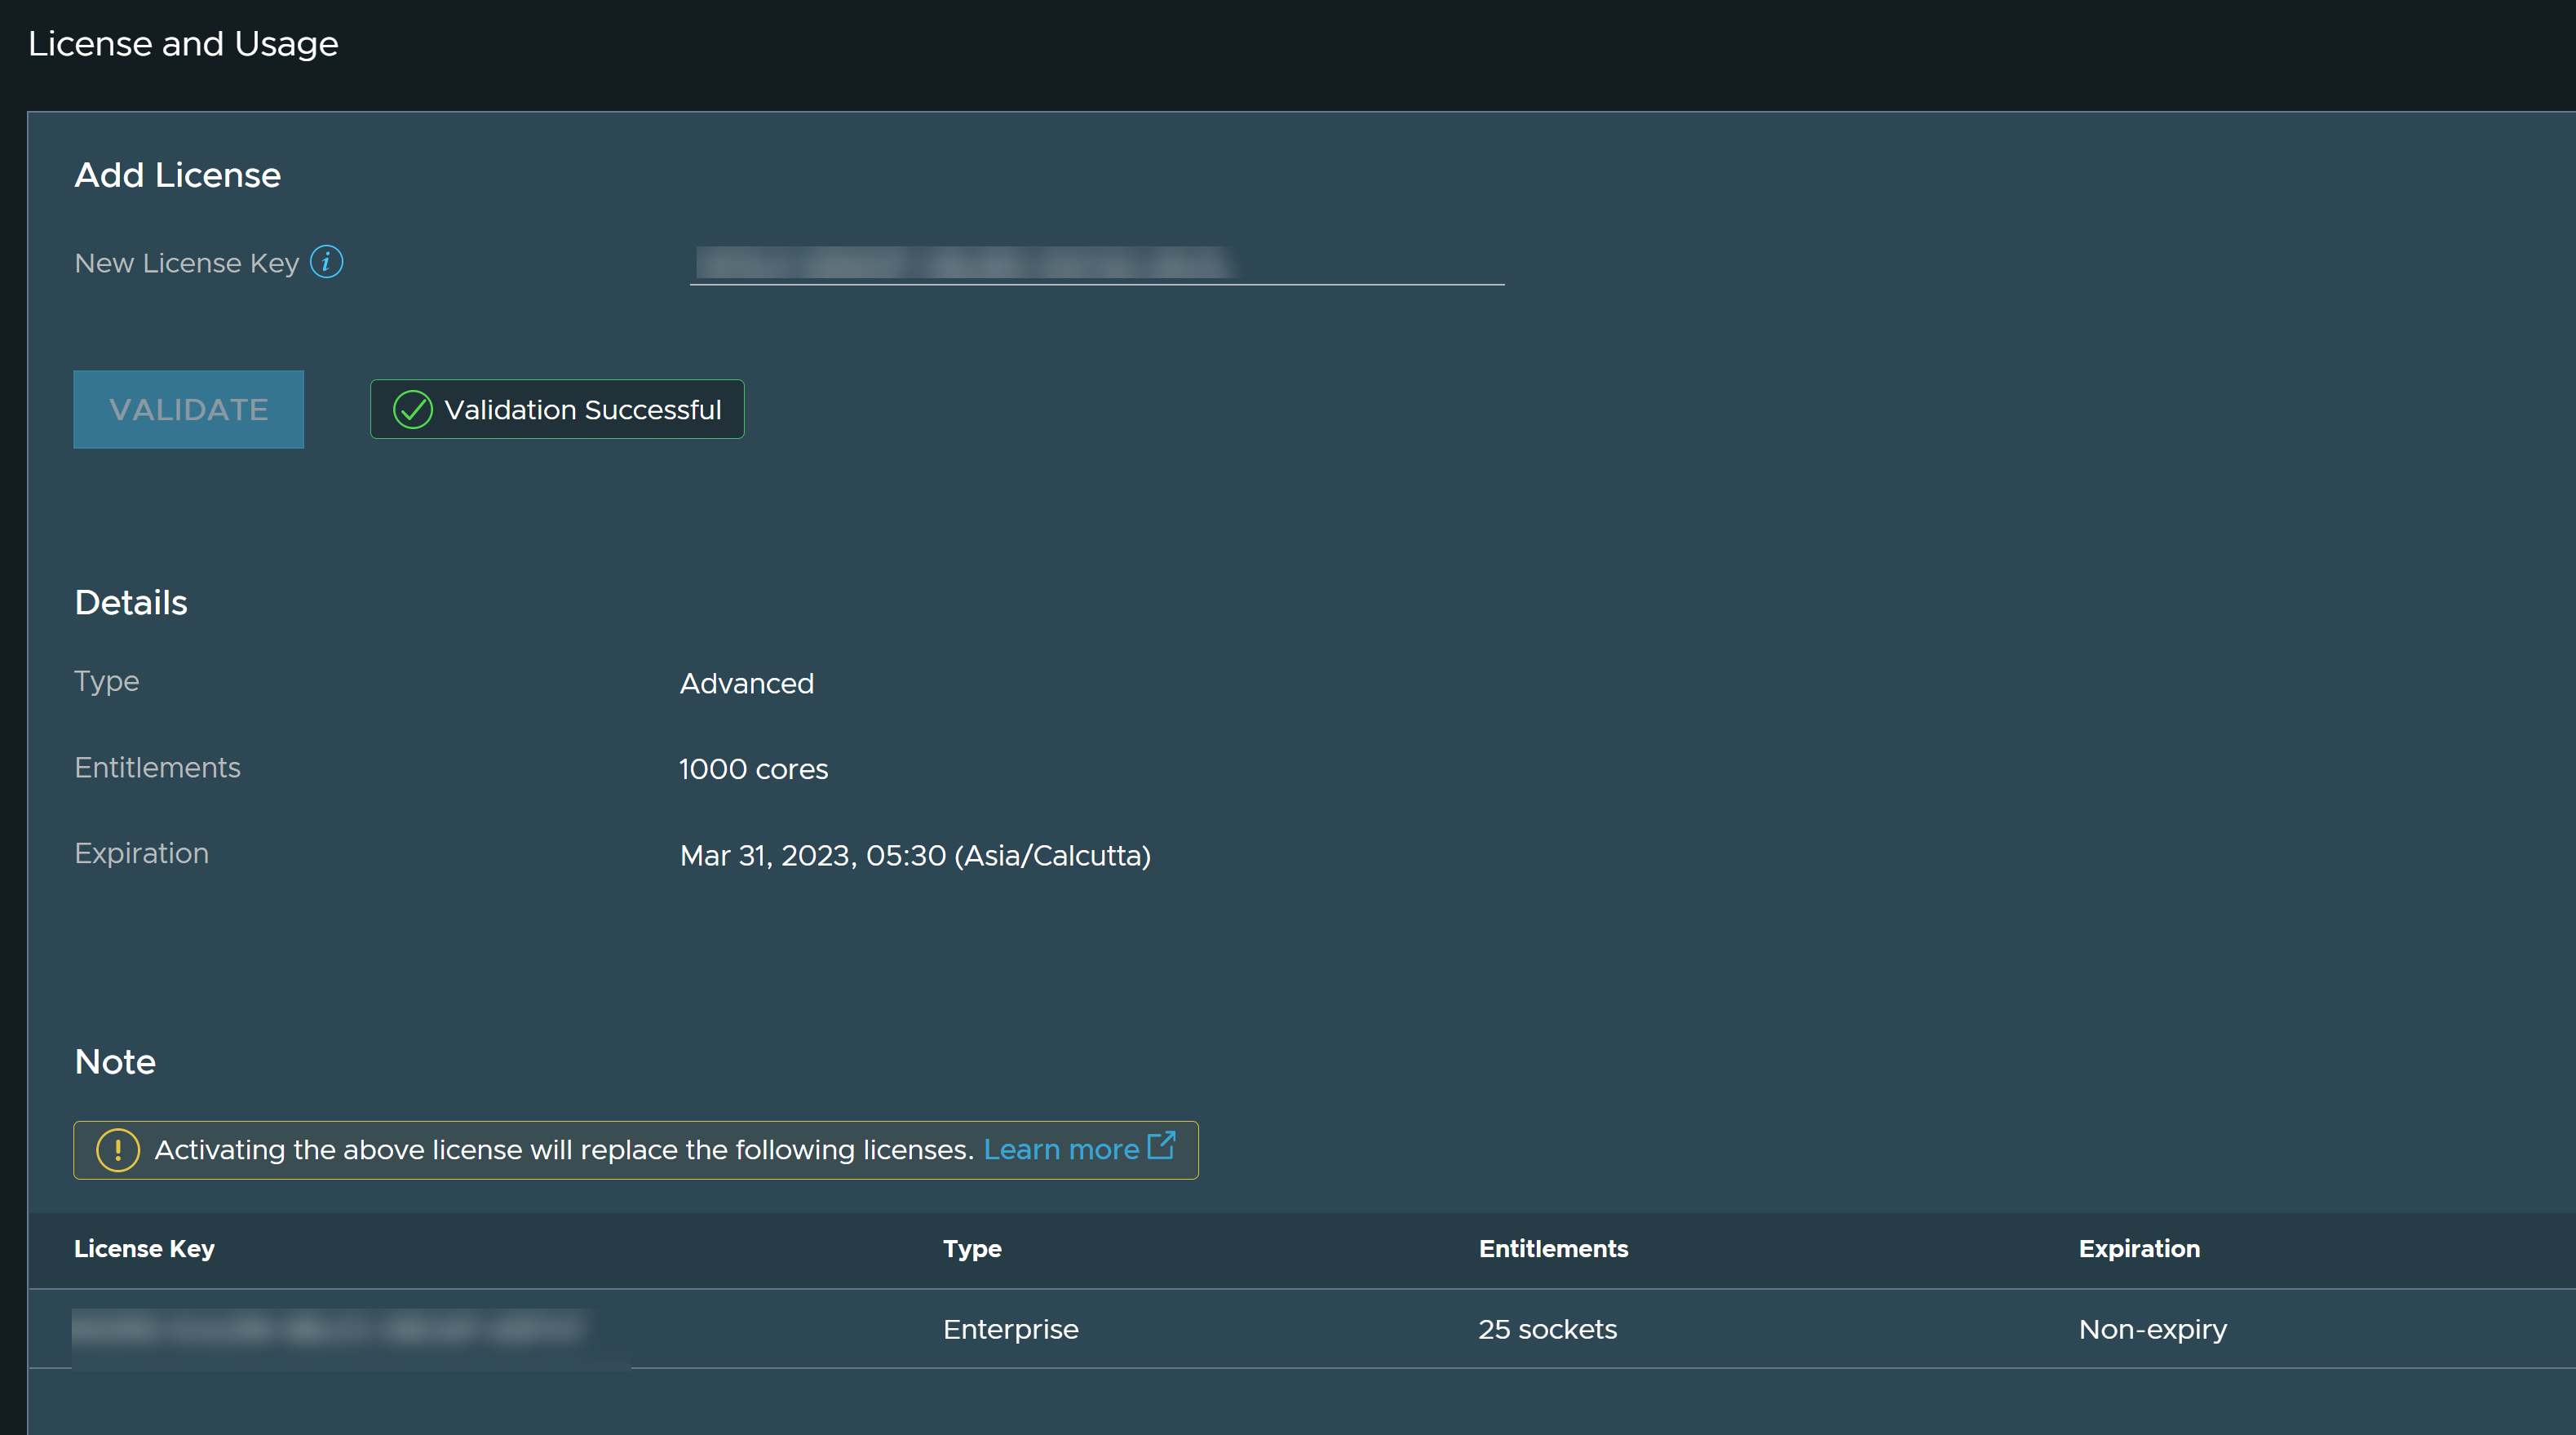
- Provide the license key for the New License Key field.
- Click Validate.
You see the type of license, entitlements in cores or sockets, and the expiry details.
Note:For a vRealize Network Insight instance that uses Socket-based licenses, if you add a Per Core license for the first time, all the existing Socket-based licenses will be replaced with Per Core licenses. However, your SD-WAN licenses remain unchanged.
When you add a Per Core license on the user interface and click Validate, vRealize Network Insight validates the license key and displays all Socket-based licenses that will be replaced on adding the Per Core license. For example,
To switch to Socket-based license, you must raise a support request.
- Click Activate.
- You can see the list of licenses in the page.
- You can also delete the license by clicking the delete icon next to the Expiration column. If the license belongs to an Enterprise edition and if it is the last remaining Enterprise edition in the system, then ensure that you have deleted the AWS account before you delete the Enterprise license.
Note: In the event of expiry of evaluation license, you can add a new license.
Upon the expiry of the evaluation license, the data providers are deactivated and they stop collecting data. After renewing the license, the data providers must be enabled again from the UI to start data collection.
