Before you can begin using the Management Pack, you must create an adapter instance to identify the host from which the Management Pack will retrieve data.
Procedure
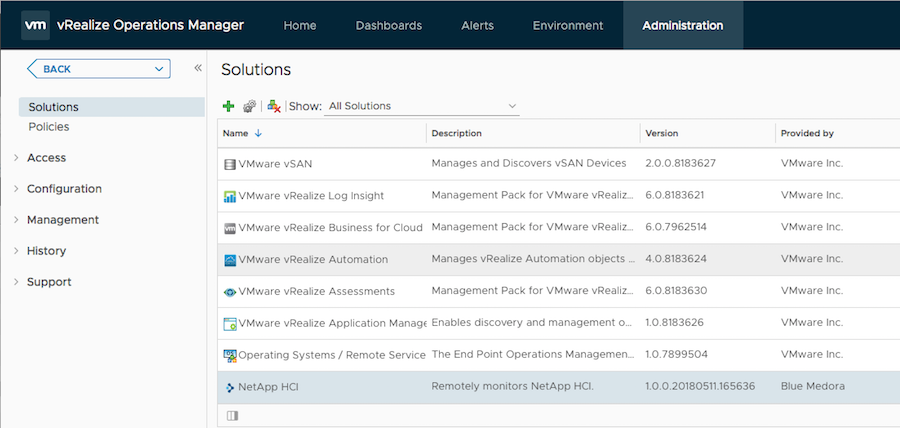
- From the top navigation bar, select Administration. In the right panel, the Solutions view will be displayed.
- Select NetApp HCI from the Solutions list on the right.

- Click the Configure
 icon. The Manage Solution window will appear.
Note: Click the
Add

icon above the
Instance Name list on the left to create multiple adapter instances.
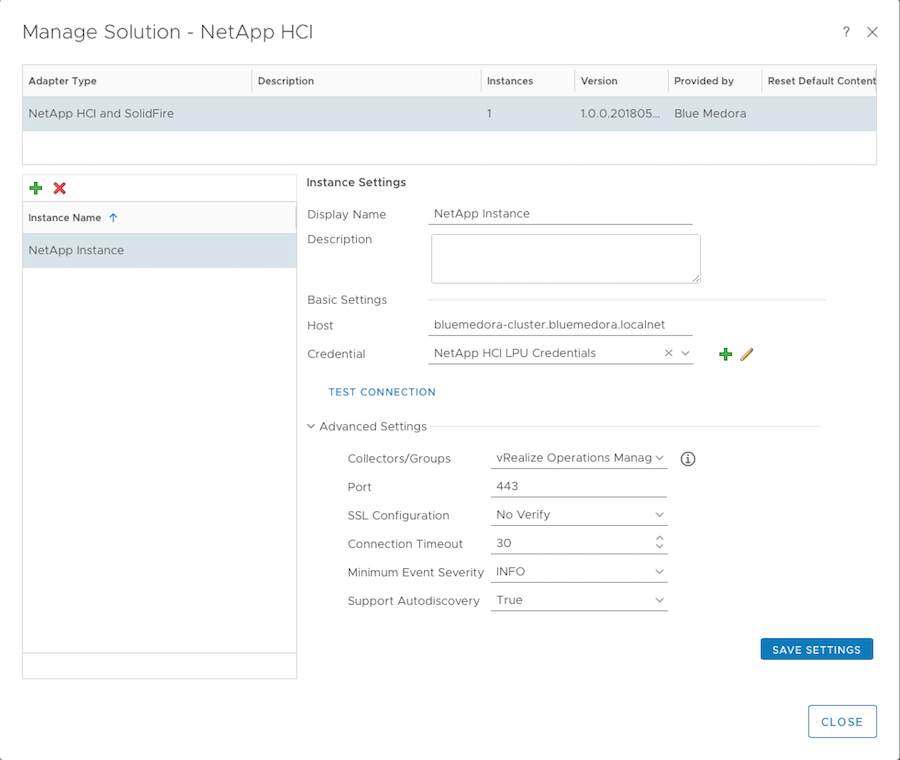
- In the Manage Solution window, enter the following information:
-
Instance Settings:
-
Display Name: A name for this particular instance of the Management Pack.
-
Description: Optional, but it can be helpful to describe multiple instances of the Management Pack.
-
Basic Settings:
-
Host:Enter the hostname of your NetApp HCI/SolidFire cluster. Supported formats include: domain name, Fully-Qualified Domain Name (FQDN), and IPv4 address.
-
Credential: Select the credential you created when Creating a Credential (NetApp HCI), or click the Add icon  now to create one.
- Advanced Settings:
- Collector(s)/Groups: Default Collector/Group is automatically selected. Click the drop-down menu if you want to run the collection on a different node.
- Port: Specify the port at which to make API requests. The default port is 443.
-
SSL Configuration: Options are No Verify (default value; SSL enabled/certificate not verified), and Verify (SSL enabled/certificate verified). When you click Test Connection in step 5 below, you should be prompted to add an SSL certificate to the vROps truststore.
- Connection Timeout: 30 seconds
- Minimum Event Severity: Alerts (NetApp HCI)
- Support Autodiscovery: True ; False.
- Click Test Connection to test the configured connection information. If you encounter any errors, see: Troubleshooting the Management Pack (NetApp HCI).
- Click Save Settings and Close to save your adapter instance.

 icon. The
  icon above the
