


Before you deploy vSphere Container Storage Plug-in, review the prerequisites to ensure that you have set up everything you need for the installation.
vCenter Server and ESXi Version Requirements for vSphere Container Storage Plug-in
Make sure that you use correct vCenter Server and ESXi versions with vSphere Container Storage Plug-in.
For information, see vSphere Versions Compatible with vSphere Container Storage Plug-in.
vSphere Roles and Privileges
vSphere users for vSphere Container Storage Plug-in require a set of privileges to perform Cloud Native Storage operations.
To know how to create and assign a role, see vSphere Security Documentation.
You must create the following roles with sets of privileges:
| Role Name | Privilege Name | Description | Required On |
|---|---|---|---|
| CNS-Datastore | Datastore > Low level file operations | Allows performing read, write, delete, and rename operations in the datastore browser. | Shared datastore where persistent volumes reside.
Note:
vSphere Container Storage Plug-in version earlier than 2.2.0 required all shared datastores to have the
Datastore.Low level file operations privilege. Starting from version 2.2.0, all shared datastores do not need to have the
Datastore.Low level file operations privilege. During volume provisioning,
vSphere Container Storage Plug-in skips shared datastores that do not have the
Datastore.Low level file operations privilege. Volumes are not provisioned on these datastores.
|
| CNS-HOST-CONFIG-STORAGE | Host > Configuration > Storage partition configuration | Allows vSAN datastore management. | Required on a vSAN cluster with vSAN file service. Required for file volume only. |
| CNS-VM | Virtual machine > Change Configuration > Add existing disk | Allows adding an existing virtual disk to a virtual machine. | All node VMs. |
| Virtual Machine > Change Configuration > Add or remove device | Allows addition or removal of any non-disk device. | ||
| CNS-SEARCH-AND-SPBM | CNS > Searchable | Allows storage administrator to see Cloud Native Storage UI. | Root vCenter Server. |
| VM storage policies > View VM storage policies | Allows viewing of defined storage policies. | ||
| Read-only | Default role | Users with the Read Only role for an object are allowed to view the state of the object and details about the object. For example, users with this role can find the shared datastore accessible to all node VMs. For topology-aware environments, all ancestors of node VMs, such as a host, cluster, folder, and data center, must have the Read-only role set for the vSphere user configured to use vSphere Container Storage Plug-in. This is required to allow reading tags and categories to prepare the nodes' topology. |
All hosts where the nodes VMs reside. Data center. |
You need to assign roles to the vSphere objects participating in the Cloud Native Storage environment. Make sure to apply roles when a new entity, such as node VM or a datastore, is added in the vCenter Server inventory for the Kubernetes cluster.
sc2-rdops-vm06-dhcp-215-129.eng.vmware.com (vCenter Server)
|
|- datacenter (Data Center)
    |
    |-vSAN-cluster (cluster)
      |
      |-10.192.209.1 (ESXi Host)
      | |
      | |-k8s-control-plane (node-vm)
      |
      |-10.192.211.250 (ESXi Host)
      | |
      | |-k8s-node1 (node-vm)
      |
      |-10.192.217.166 (ESXi Host)
      | |
      | |-k8s-node2 (node-vm)
      | |
      |-10.192.218.26 (ESXi Host)
      | |
      | |-k8s-node3 (node-vm)
- shared-vmfs.
- shared-nfs.
- vsanDatastore.
| Role | Usage |
|---|---|
| ReadOnly | 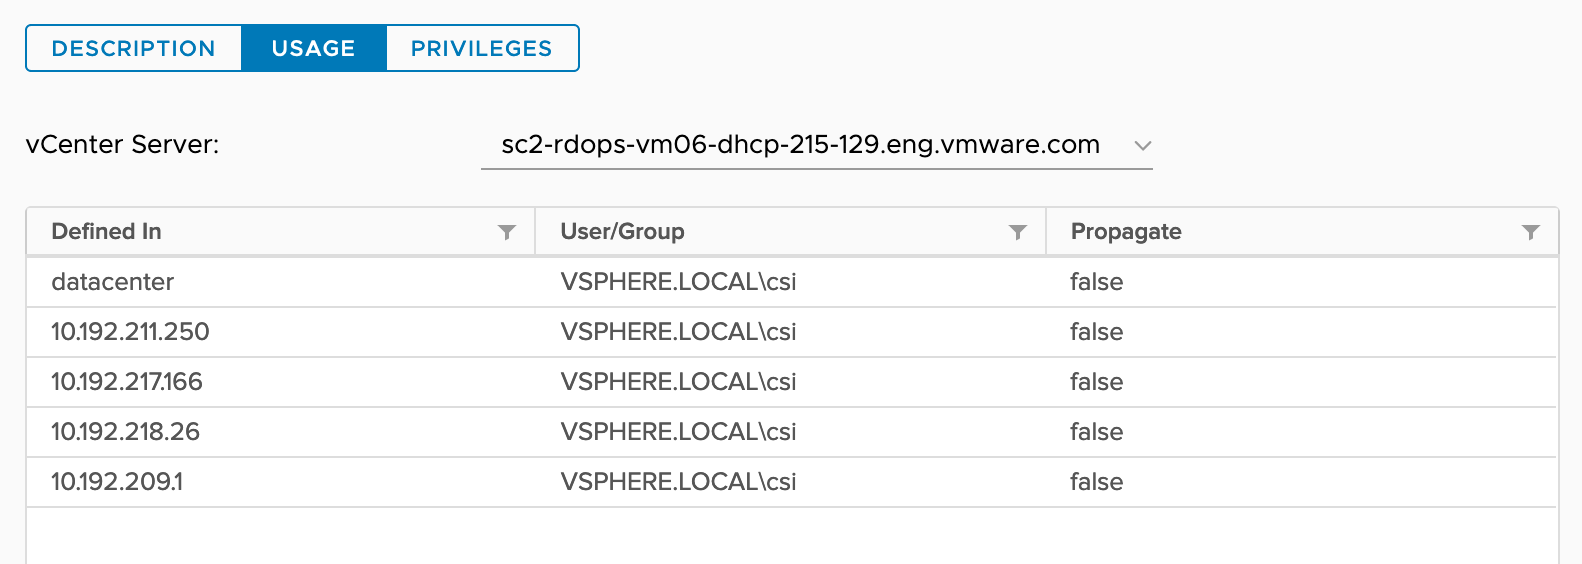 |
| CNS-HOST-CONFIG-STORAGE | 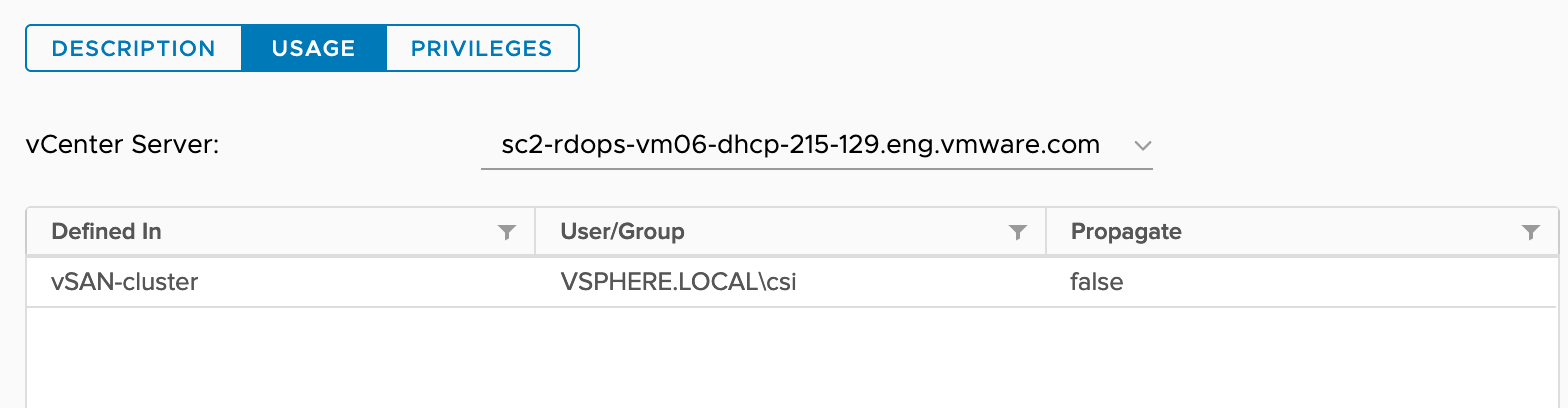 |
| CNS-DATASTORE |  |
| CNS-VM | 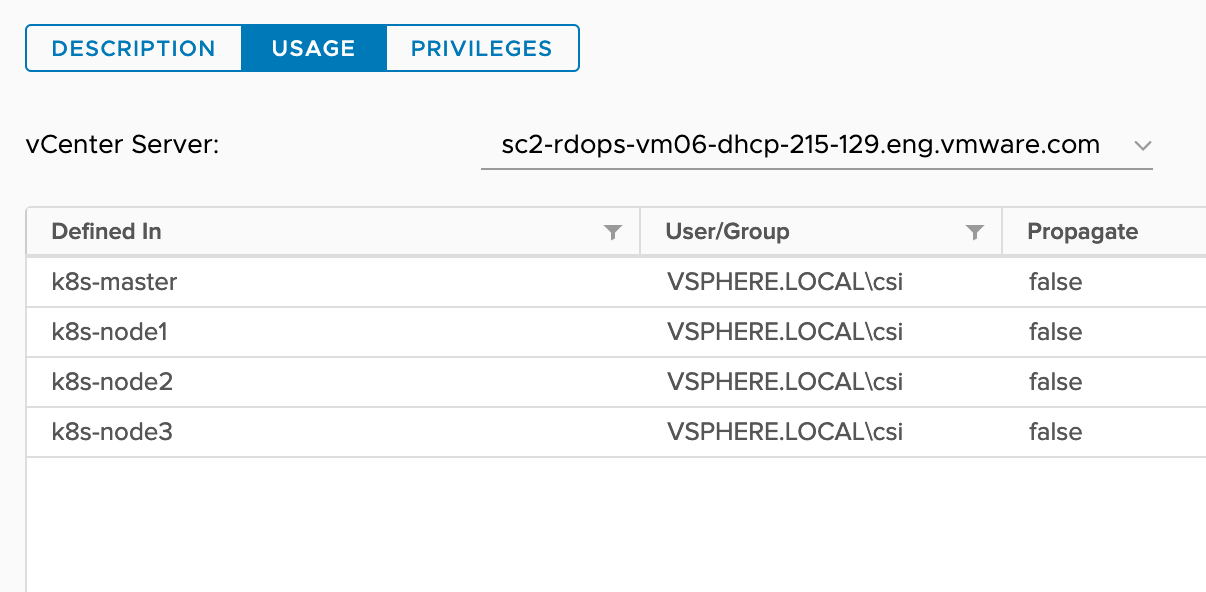 |
| CNS-SEARCH-AND-SPBM | 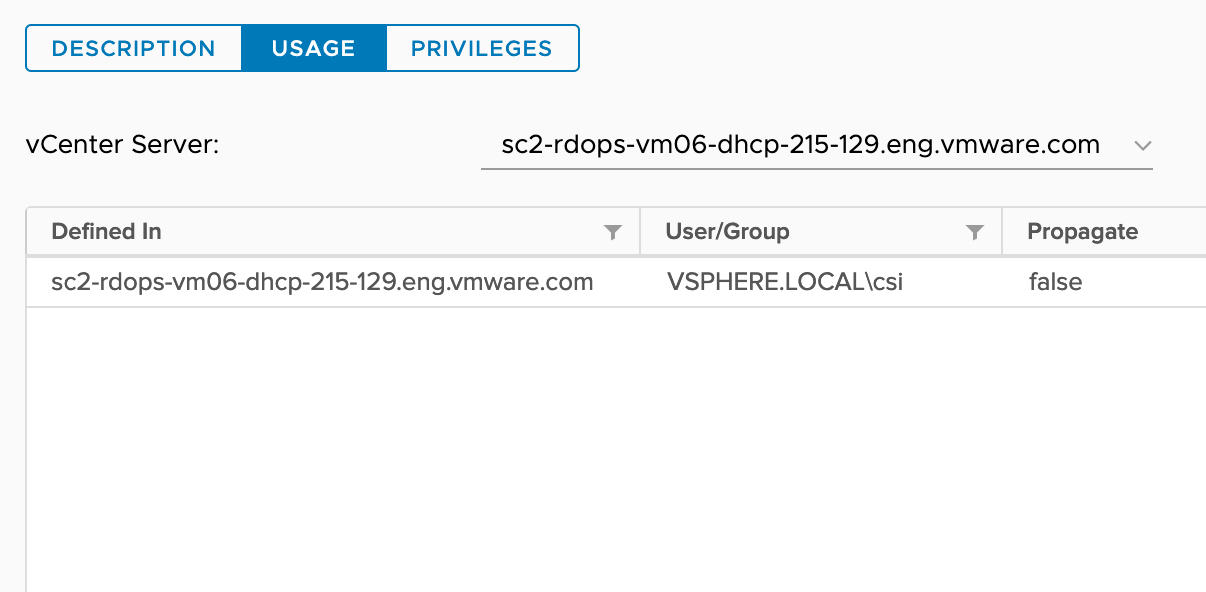 |
Management Network for vSphere Container Storage Plug-in
By default, the vSphere Cloud Provider Interface and vSphere Container Storage Plug-in pods are scheduled on Kubernetes control plane nodes. For non-topology aware Kubernetes clusters, it is sufficient to provide the credentials of the control plane node to vCenter Server where this cluster is running. For topology-aware clusters, every Kubernetes node must discover its topology by communicating with vCenter Server. This is required to utilize the topology-aware provisioning and late binding feature.
For more information on providing vCenter Server credentials access to Kubernetes nodes, see Deploy vSphere Container Storage Plug-in with Topology.
Configure Kubernetes Cluster VMs
On each node VM that participates in the Kubernetes cluster with vSphere Container Storage Plug-in, you must enable the disk.EnableUUID parameter and perform other configuration steps.
Configure all VMs that form the Kubernetes cluster with vSphere Container Storage Plug-in. You can configure the VMs using the vSphere Client or the govc command-line tool.
Prerequisites
- Create several VMs for your Kubernetes cluster.
- On each node VM, install VMware Tools. For more information about installation, see Installing and upgrading VMware Tools in vSphere.
- Required privilege: .
Procedure
- Enable the disk.EnableUUID parameter using the vSphere Client.
- In the vSphere Client, right-click the VM and select Edit Settings.
- Click the VM Options tab and expand the Advanced menu.
- Click Edit Configuration next to Configuration Parameters.
- Configure the disk.EnableUUID parameter.
If the parameter exists, make sure that its value is set to True. If the parameter is not present, add it and set its value to True.
Name Value disk.EnableUUID True
- Upgrade the VM hardware version to 15 or higher.
- In the vSphere Client, navigate to the virtual machine.
- Select .
- Click Yes to confirm the upgrade.
- Select a compatibility and click OK.
- Add VMware Paravirtual SCSI storage controller to the VM.
- In the vSphere Client, right-click the VM and select Edit Settings.
- On the Virtual Hardware tab, click the Add New Device button.
- Select SCSI Controller from the drop-down menu.
- Expand New SCSI controller and from the Change Type menu, select VMware Paravirtual.
- Click OK.
Example
govc command-line tool.
- Install
govcon your devbox/workstation. - Obtain VM paths.
$ export GOVC_INSECURE=1
  $ export GOVC_URL='https://<VC_Admin_User>:<VC_Admin_Passwd>@<VC_IP>'

  $ govc ls
  /<datacenter-name>/vm
  /<datacenter-name>/network
  /<datacenter-name>/host
  /<datacenter-name>/datastore

  // To retrieve all Node VMs
  $ govc ls /<datacenter-name>/vm
  /<datacenter-name>/vm/<vm-name1>
  /<datacenter-name>/vm/<vm-name2>
  /<datacenter-name>/vm/<vm-name3>
  /<datacenter-name>/vm/<vm-name4>
  /<datacenter-name>/vm/<vm-name5>
- To enable disk.EnableUUID, run the following command:
govc vm.change -vm '/<datacenter-name>/vm/<vm-name1>' -e="disk.enableUUID=1"
- To upgrade the VM hardware version to 15 or higher, run the following command:
govc vm.upgrade -version=15 -vm '/<datacenter-name>/vm/<vm-name1>'
Install vSphere Cloud Provider Interface
vSphere Container Storage Plug-in requires that you install a Cloud Provider Interface on your Kubernetes cluster in the vSphere environment. Follow this procedure to install the vSphere Cloud Provider Interface (CPI).
Prerequisites
- Read permission on the parent entities of the node VMs such as folder, host, datacenter, datastore folder, and datastore cluster.
Procedure
Configure CoreDNS for vSAN File Share Volumes
vSphere Container Storage Plug-in requires DNS forwarding configuration in CoreDNS ConfigMap to help resolve vSAN file share host name.
Procedure
- ♦ Modify the CoreDNS ConfigMap and add the conditional forwarder configuration.
kubectl -n kube-system edit configmap coredns
The output of this step is shown below.
 .:53 {
    errors
    health {
       lameduck 5s
    }
    ready
    kubernetes cluster.local in-addr.arpa ip6.arpa {
       pods insecure
       fallthrough in-addr.arpa ip6.arpa
       ttl 30
    }
    prometheus :9153
    forward . /etc/resolv.conf {
       max_concurrent 1000
    }
    cache 30
    loop
    reload
    loadbalance
   }
   vsanfs-sh.prv:53 {
   errors
   cache 30
   forward . 10.161.191.241
   }
In this configuration,vsanfs-sh.prvis the DNS suffix for vSAN file service.- 10.161.191.241 is the DNS server that resolves the file share host name.
You can obtain the DNS suffix and DNS IP address from vCenter Server using the following menu options:
