


Refer to this delta topic if you are configuring TKGS to support AI/ML workloads using vGPU and Dynamic DirectPath IO.
vSphere Administrator Workflow Adjustments for vGPU with Dynamic DirectPath IO
To use vGPU and Dynamic DirectPath IO, follow the same vGPU workflow with the following changes.
Admin Step 2: Enable Passthrough for the PCI Device
To use vGPU and Dynamic DirectPath IO, configure each ESXi host for vGPU has described here: Admin Step 2: Configure Each ESXi Host for vGPU Operations.
- Log on to the vCenter Server using the vSphere Client.
- Select the target ESXi host in the vCenter Cluster.
- Select .
- Select the All PCI Devices tab.
- Select the target NVIDIA GPU accelerator device.
- Click Toggle Passthrough.
- Right-click the ESXi host and put it into maintenance mode.
- Reboot the host.
- When the host is running again, take it out of maintenance mode.
Admin Step 7: Create a Custom VM Class with a vGPU and Dynamic DirectPath IO
To use vGPU and Dynamic DirectPath IO, first configure a custom VM Class with a NVIDIA vGPU profile as described here: Admin Step 7: Create a Custom VM Class with the vGPU Profile.
Then, to this VM Class you add a second PCI Device configuration with Dynamic DirectPath IO specified and the supported PCI Device selected. When a VM Class of this type is instantiated, the vSphere Distributed Resource Scheduler (DRS) determines VM placement.
- Log on to the vCenter Server using the vSphere Client.
- Select Workload Management.
- Select Services.
- Select VM Classes.
- Edit the custom VM Class that is already configured with a NVIDIA vGPU profile.
- Select the PCI Devices tab.
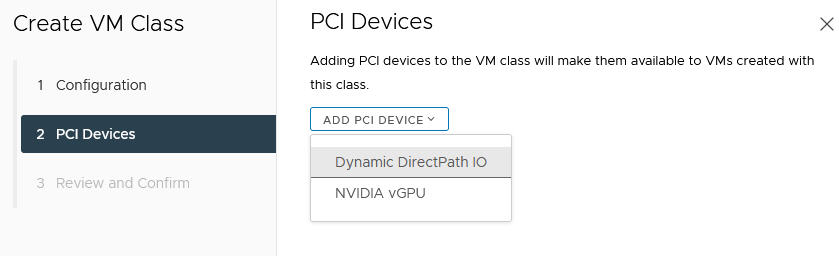
- Click Add PCI Device.
- Select the Dynamic DirectPath IO option.
- Select the PCI Device.
For example:
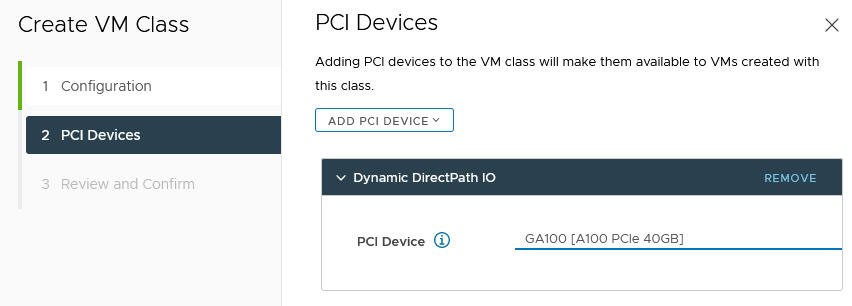
- Click Next.
- Review and confirm your selections.
- Click Finish.
- Verify that the new custom VM Class is available in the list of VM Classes.
