Learn how to create a vSphere distributed switch on a data center to handle the networking configuration of multiple hosts at a time from a central place.
Procedure
In the vSphere Client, right-click a data center from the inventory tree.
Select Distributed Switch > New Distributed Switch.
On the Name and location page, enter a name for the new distributed switch, or accept the generated name, and click Next.
On the Select version page, select a distributed switch version and click Next.
Option
Description
Distributed Switch: 8.0.3
Compatible with ESXi 8.0.3 and later. Features released with later vSphere Distributed Switch versions are not supported.
Distributed Switch: 8.0.0
Compatible with ESXi 8.0 and later. Features released with later vSphere Distributed Switch versions are not supported.
Distributed Switch: 7.0.3
Compatible with ESXi 7.0.3 and later. Features released with later vSphere Distributed Switch versions are not supported.
Distributed Switch: 7.0.2
Compatible with ESXi 7.0.2 and later. Features released with later vSphere Distributed Switch versions are not supported.
Distributed Switch: 7.0.0
Compatible with ESXi 7.0 and later. Features released with later vSphere Distributed Switch versions are not supported.
Distributed Switch: 6.6.0
Compatible with ESXi 6.7, ESXi 7.0 and later. Features released with later vSphere Distributed Switch versions are not supported.
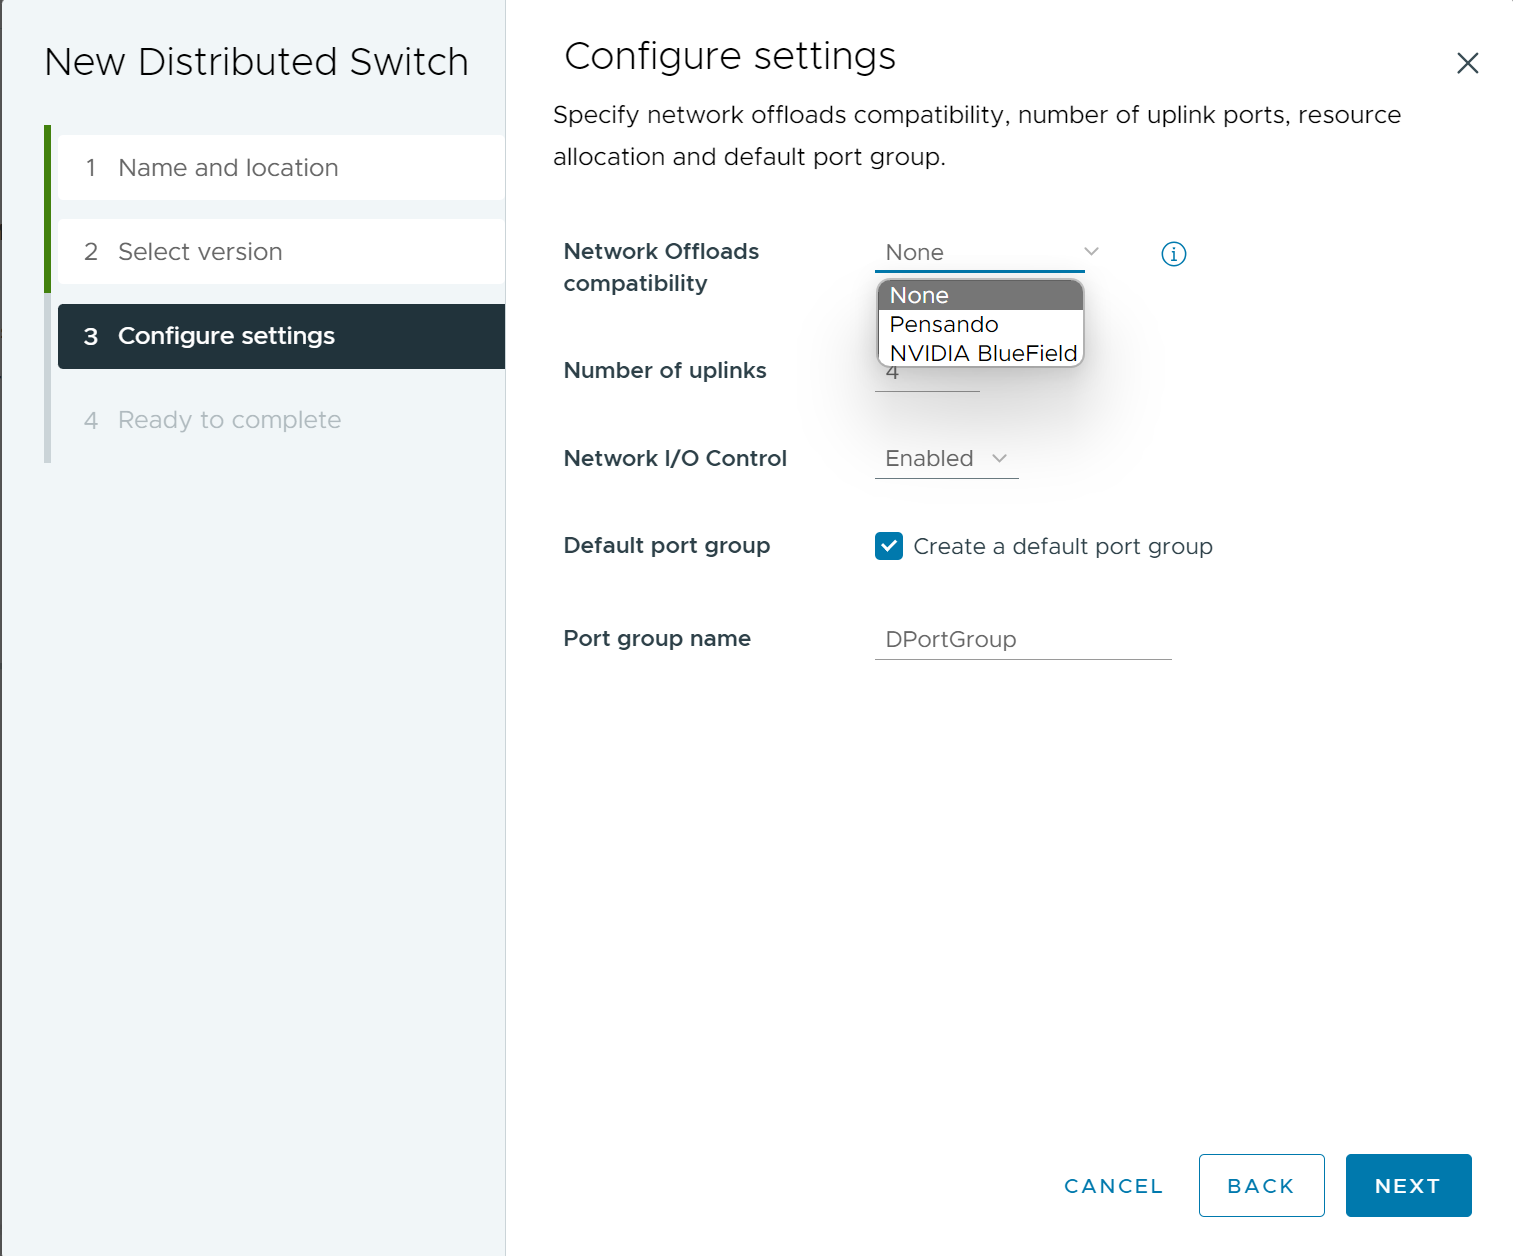
On the Configure settings page, configure the distributed switch settings.
Use the drop-down menu to select the type of Network Offloads Compatibility.
Figure 1. Network Offloads Compatibility
By using network offloads compatibility you can offload network and security functions to the DPU device. DPU is a network card that has compute capability embedded in it. You can offload the networking functionality from the
ESXi host to DPU for better performance.
None: If you select None, Network Offloads compatibility is not supported.
Pensando: If you select Pensando, Network Offloads compatibility is supported. Network I/O Control is disabled.
NVIDIA BlueField: If you select NVIDIA BlueField, Network Offloads compatibility is supported. Network I/O Control is disabled.
Note: You can configure
Network Offloads compatibility when you use
vSphere Distributed Switch 8.0.0 and later.
Use the arrow buttons to select the Number of uplinks.
Uplink ports connect the distributed switch to physical NICs on associated hosts. The number of uplink ports is the maximum number of allowed physical connections to the distributed switch per host.
Use the drop-down menu to enable or disable Network I/O Control.
By using Network I/O Control you can prioritize the access to network resources for certain types of infrastructure and workload traffic according to the requirements of your deployment. Network I/O Control continuously monitors the I/O load over the network and dynamically allocates available resources.
(Optional) Select the Create a default port group check box to create a new distributed port group with default settings for this switch. Enter a Port group name, or accept the generated name.
If your system has custom port group requirements, create distributed port groups that meet those requirements after you add the distributed switch.
In the DPU Failover Configuration page, specify how the uplinks in a team are used when a failover occurs by configuring the failover order list. If you want to use some uplinks but reserve others for emergencies in case the uplinks in use fail, use the Move Up and Move Down to move uplinks into different groups.
In the DPU Failover Configuration page, you can specify how DPU mapped uplinks can be consumed. When multiple DPUs are present on the host, then they can be attached to same distrubuted switch in high availability mode, that is one DPU will run the active traffic and other DPU will be available as standby.
Select the type of DPU from the Preset drop-down menu.
Single DPU: If you select Single DPU, then only one DPU connects to the switch at a time as an active DPU.
Dual DPU: If you select Dual DPU, then both the DPUs connect to the switch at the same time. Only one of them is active.
Custom: If you select Custom, then you can specify the uplinks.
Option
Description
Active uplinks
Continue to use the uplink if the DPU adapter connectivity is up and active.
Standby uplinks
Use this uplink if the active DPU adapter is down.
On the Ready to complete page, review the settings you selected and click Finish.
Use the
Back button to edit any settings.
Results
A distributed switch is created in the data center. You can view the features supported on the distributed switch and other details by navigating to the new distributed switch and clicking the Summary tab.
What to do next
Add hosts to the distributed switch and configure their network adapters on the switch.