vCenter Single Sign-On users can use the Kubernetes CLI Tools for vSphere to connect to and interact with TKG Service clusters.

About the Kubernetes CLI Tools for vSphere

The Kubernetes CLI Tools for vSphere download package (vsphere-plugin.zip) includes two executables: kubectl and the vSphere Plugin for kubectl.

The kubectl CLI has a pluggable architecture. The vSphere Plugin for kubectl extends the commands available to kubectl so that you connect to the Supervisor and to TKG clusters using vCenter Single Sign-On.
Note: The vSphere IaaS control plane provides binaries for x86/64 processors.

Prerequisite: vSphere Namespace Is Created

The Kubernetes CLI Tools for vSphere are available for download from the vSphere IaaS control plane DevOps page.
Figure 1. vSphere DevOps Page
vSphere with Tanzu DevOps Page

You can access the vSphere IaaS control plane DevOps page from the vSphere Namespace configuration panel. See Configuring vSphere Namespaces for Hosting TKG Service Clusters.

The vSphere Namespace configuration panel with the Link to CLI tools circled.

Install the Kubernetes CLI Tools for vSphere Using the vSphere Client

To install the Kubernetes CLI Tools for vSphere from the DevOps page in vCenter, complete these steps.
  1. Get the link for the Kubernetes CLI Tools download page from your vSphere administrator. Alternatively, if you have access to the vCenter Server, get the link as follows.
    1. Log in to the vCenter Server using the vSphere Client.
    2. Navigate to Workload Management > Namespaces.
    3. Select the vSphere Namespace where you are working.
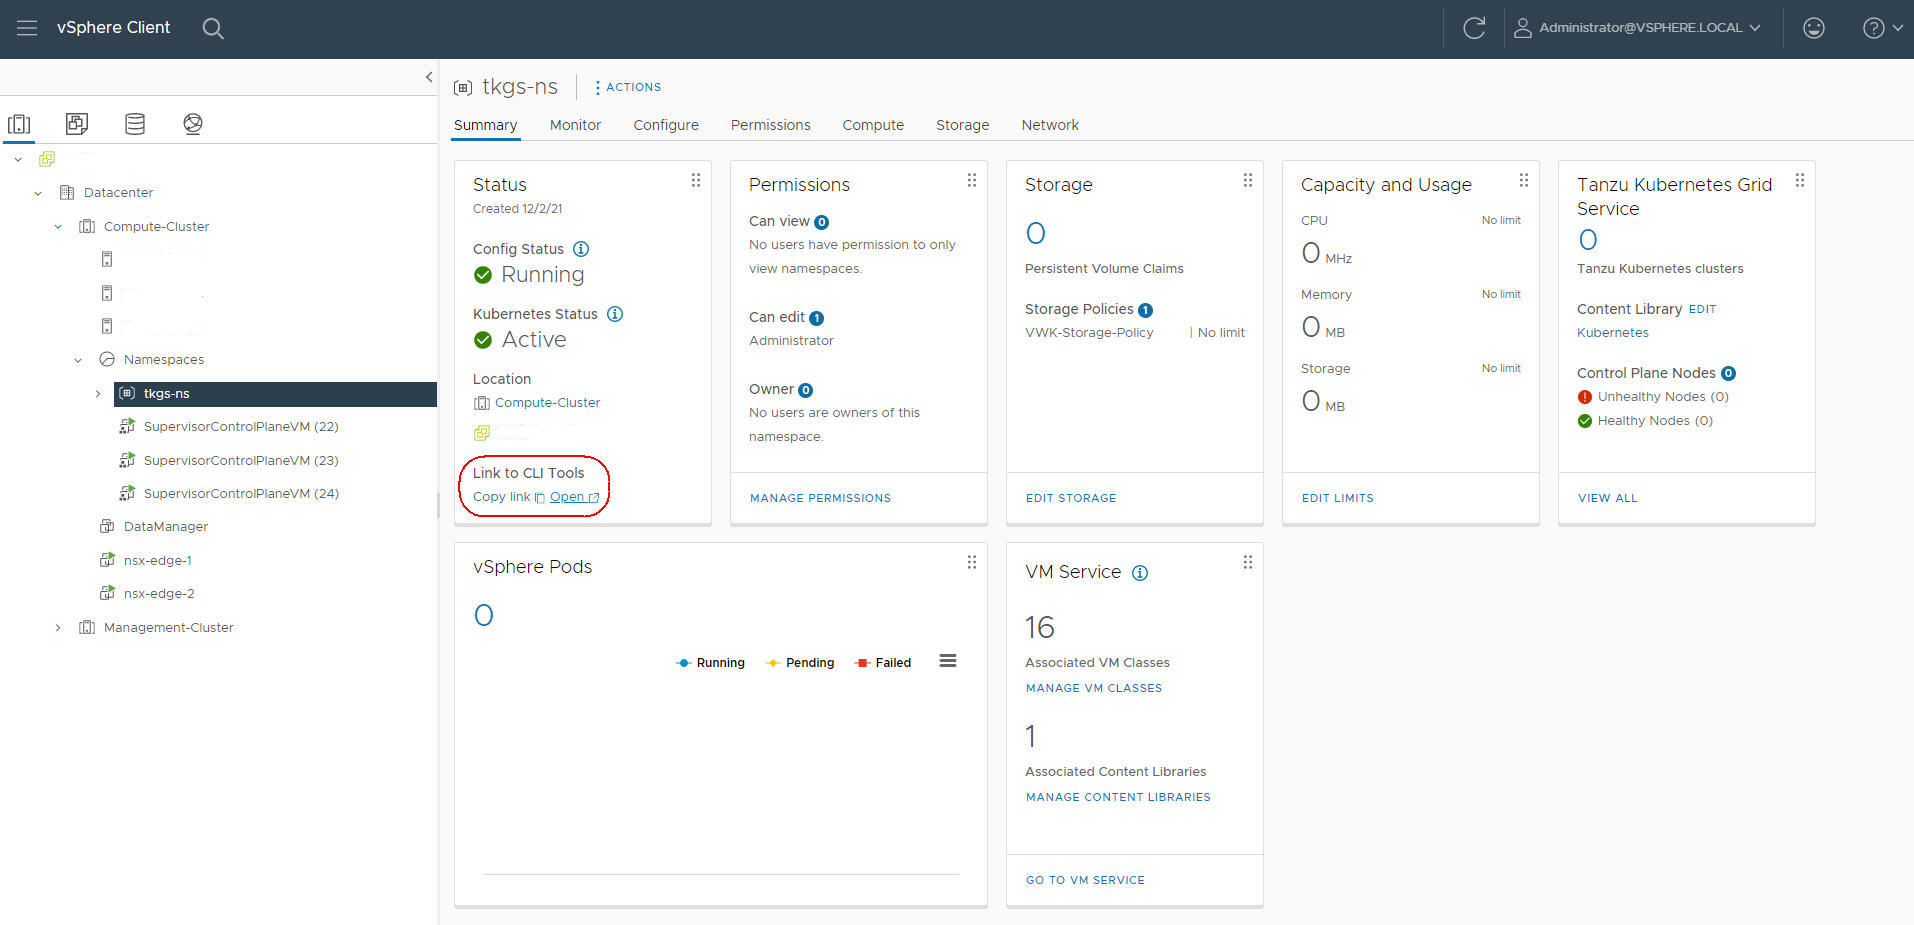
    4. Select the Summary tab and locate the Status area on this page. (Refer to the image.)
    5. Select Open beneath the Link to CLI Tools heading to open the download page. Or, you can Copy the link.

      The vSphere Namespace configuration panel with the Link to CLI tools circled.

  2. Select the operating system.
    Note: Refer to OS-specific installation steps at the end of this topic as needed.
  3. Download the vsphere-plugin.zip file.
  4. Extract the contents of the ZIP file to a working directory.
  5. Add the location of both executables to your system's PATH variable.
  6. To verify the installation of the kubectl CLI, start a shell, terminal, or command prompt session and run the command kubectl.

    You see the kubectl banner message, and the list of command-line options for the CLI.

  7. To verify the installation of the vSphere Plugin for kubectl, run the command kubectl vsphere.

    You see the vSphere Plugin for kubectl banner message, and the list of command-line options for the plugin.

Install the Kubernetes CLI Tools for vSphere from the Command Line

If you are using Linux or MacOS, you can run the following command to download the tools the Kubernetes CLI Tools for vSphere.
  1. Log in to the vCenter Server using the vSphere Client.
  2. Select Workload Management > Supervisor.
  3. Get the load balancer IP address for the Supervisor control plane.
  4. Create a variable for it.
  5. Install the tools by running the following command. (You may have to adjust it for your environment.)
    Linux:
    curl -LOk https://${SC_IP}/wcp/plugin/linux-amd64/vsphere-plugin.zip
    unzip vsphere-plugin.zip
    mv -v bin/* /usr/local/bin/
    MacOS:
    curl -LOk https://${SC_IP}/wcp/plugin/macos-darwin64/vsphere-plugin.zip
    unzip vsphere-plugin.zip
    mv -v bin/* /usr/local/bin/
  6. Run the commands kubectl and kubectl vsphere and verify installation.

Install the Kubernetes CLI Tools for vSphere on Linux

Install the Kubernetes CLI Tools for vSphere on a Linux host.
  1. Download the vsphere-plugin.zip file for Linux.
  2. Extract the contents of the archive which are two executables: kubectl and kubectl-vsphere.
  3. Put both executables in the your OS's executable search path, such as /usr/local/bin.
  4. Run command kubectl vsphere to verify installation.
  5. Run command kubectl vsphere login --server=Supervisor-IP to log in to Supervisor.
  6. Run command kubectl config get-contexts to view a list of your vSphere Namespaces that you have access to.
  7. Run command kubectl config use-context CONTEXT to choose your default context.

Install the Kubernetes CLI Tools for vSphere on MacOS

Install the Kubernetes CLI Tools for vSphere on a MacOS host.
  1. Download the vsphere-plugin.zip file for MacOS.
  2. Extract the contents of the archive which are two executables: kubectl and kubectl-vsphere.
  3. Put both executables in the your OS's executable search path, such as /usr/local/bin.
  4. Run command kubectl vsphere to verify installation.
  5. Run command kubectl vsphere login --server=Supervisor-IP to log in to Supervisor.
  6. Run command kubectl config get-contexts to view a list of vSphere Namespaces that you have access to.
  7. Run command kubectl config use-context CONTEXT to choose your default context.

Install the Kubernetes CLI Tools for vSphere on Windows

Install the Kubernetes CLI Tools for vSphere on a Windows host.
  1. Download the vsphere-plugin.zip file for MacOS.
  2. Extract the contents of the archive which are two executables: kubectl.exe and kubectl-vsphere.exe.
  3. Put both executables in the system path.
  4. Run command kubectl vsphere to verify installation.
  5. Run command kubectl vsphere login --server=Supervisor-IP to log in to Supervisor.
  6. Run command kubectl config get-contexts to view a list of vSphere Namespaces that you have access to.
  7. Run command kubectl config use-context CONTEXT to choose your default context.