


As a service administrator, you can make Code Stream pipelines available in the Service Broker catalog by adding a Code Stream content source and sharing the pipelines. The pipelines are the continuous integration and delivery model of your software release process.
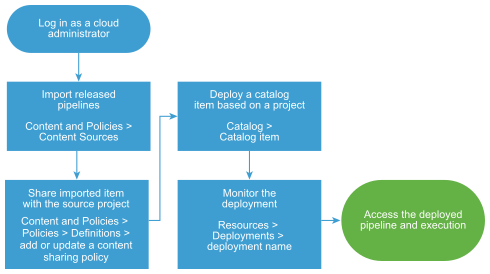
After you import the pipelines, you share them with project members so that they can deploy the pipelines from the catalog. After the pipeline deployment execution completes, the users can access review the inputs and outputs, and use the output, pipeline, and execution links.
Prerequisites
- Verify that the pipelines that you are importing are enabled and released in Code Stream before you import it. See How do I run a pipeline and see results in Using and Managing vRealize Automation Code Stream.
Procedure
Results
The released pipelines are imported into Service Broker, shared in the catalog, and deployable.
What to do next
- If the deployment fails, click the deployment name and begin troubleshooting. See What can I do if a Service Broker deployment fails. If you are a Cloud Assembly cloud administrator, you can also do more extensive troubleshooting in Cloud Assembly What can I do if a Cloud Assembly deployment fails in Using and Managing VMware Cloud Assembly.
- If the deployment fails, review the failed execution in Code Stream.
- If you want to control who must approve a pipeline request before it provisions, create an approval policy. See How do I configure Service Broker approval policies. The lease and day 2 policies do not apply to pipelines.
- To provide more or fewer user inputs at request time, you can create a custom form. See Customize a Service Broker icon and request form.
