


As a cloud administrator, you can add Cloud Assembly extensibility actions to Service Broker as a content source. The extensibility actions are created and managed in Cloud Assembly.
The actions are small scripts that perform lightweight tasks or steps. For example, rename a virtual machine or assign an IP address.
Prerequisites
- Verify that the actions you are adding are associated with a project, and that they are released. See How do I create extensibility actions.
Procedure
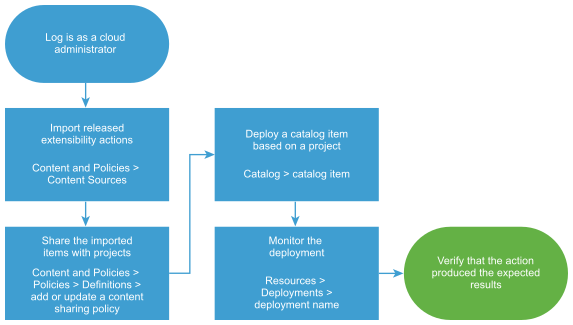
Results
The extensibility actions are imported into Service Broker and shared in the catalog.
What to do next
- If the deployment fails, click the deployment name and begin troubleshooting. See What can I do if a Service Broker deployment fails. If you are a Cloud Assembly cloud administrator, you can also do more extensive troubleshooting in Cloud Assembly What can I do if a Cloud Assembly deployment fails in Using and Managing VMware Cloud Assembly.
- If you want to control how long a deployment can exist, create a lease. See Setting up Service Broker policies.
- To provide more or fewer user inputs at request time, you can create a custom form. See Customize a Service Broker icon and request form.
