


As a cloud administrator, you want to automate the deployment process for a project so that when the cloud template designers are creating and deploying templates, Cloud Assembly does the work for you. For example, the workloads are deployed with a particular custom machine naming pattern, the machines are added to a specific Active Directory organizational unit, and specific DNS and IP ranges are used.
By automating the process for the project deployments, you can more easily manage multiple projects across various data centers and cloud environments.
You are not required to complete all of the tasks provided here. You can mix and match any of these tasks, depending on your management goals.
Before you begin
This tutorial requires you to have your infrastructure configured and to have successfully deployed a cloud template with a machine and a network. Verify that the following are already configured on your system.
- You successfully performed all of the steps specified in the infrastructure tutorial. See Tutorial: Setting up and testing vSphere infrastructure and deployments in Cloud Assembly.
- You have the Cloud Assembly Administrator role. See Organization and service user roles in vRealize Automation.
Customize the machine names
The goal of this task is to ensure that the deployed machines for the a project are named based on the project, the operating system that the user selects at deployment time, and that it is incremented to ensure uniqueness. For example, DevProject-centos-021.
You can adapt this example to your naming requirements.
- Create a project.
For this tutorial, the project name is DevProject.
For more about projects, see Adding and managing Cloud Assembly projects.
- Select and click Add Project.
- Enter the name DevProject.
- Click the Users tab and add the users who are members of this project.
- Click the Provisioning tab and click Add Zone to add cloud zones that support your deployments.
- Click Save.
- Create a custom naming templates.
The custom naming templates allow you to create templates that you can assign to more than one project. To assist with template management, the templates are managed in one location and the templates reduce the number that you must manage.
For this tutorial, enter ProjectName-OS.
For additional examples, see Create global custom naming templates.
- Select and click New Custom Name.
- Enter the name ProjectName-OS.
- Click New Naming Template and configure the following values.
Option Value Resource type machine Template format ${project.name}-${resource.name}-${####} Starting counter value 1 Increment step 1 - Click Assign Projects and select DevProject.
You can also assign the template to other projects where the templates support the template.
- Click Save.
- Update the cloud template with an input value for the operating system type.
Input values are the direct way that you can customize the deployment request form for users and simplify your development process. By creating input values, you can use a single cloud template to deploy workloads with different configurations. For example, size or operating system.
This example uses the Development Template from a previous tutorial. See Step 5: Design and deploy a basic cloud template.
- Select Design and open the Development Template.
- In the Code pane, update the YAML with the following changes.
- In the
Inputssection, add installedOS.In the next step you can see that
installedOSinput is also used to specify the image. When you add the strings in theenumsection, the values, in this example they arecentosandubuntu, must match the image names that you defined in . For example, if your image mapping name is CentOS rather than centos, you should use CentOS in the inputs section. - In the
Cloud_vSphere_Machine_1section, update theimageto an installedOS input parameter (${input.installedOS}) and add name custom property with the same input parameter.inputs: installedOS: type: string title: OS Type description: Select the operating system. enum: - centos - ubuntu resources: Cloud_vSphere_Disk_1: type: Cloud.vSphere.Disk properties: capacityGb: 1 Cloud_vSphere_Machine_1: type: Cloud.vSphere.Machine properties: image: ${input.installedOS} name: ${input.installedOS} flavor: small networks: - network: '${resource.Cloud_NSX_Network_1.id}' attachedDisks: - source: '${resource.Cloud_vSphere_Disk_1.id}' Cloud_NSX_Network_1: type: Cloud.NSX.Network properties: networkType: existing
- In the
- Click Deploy and enter the name Custom name deployment test.
- Click Next.
- Select the centos operating system from the drop-down menu.
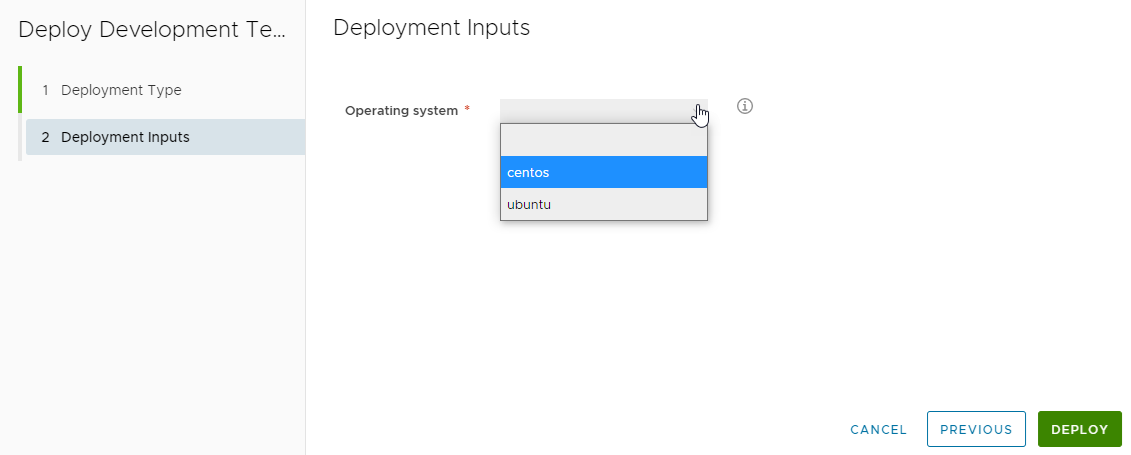
- Click Deploy.
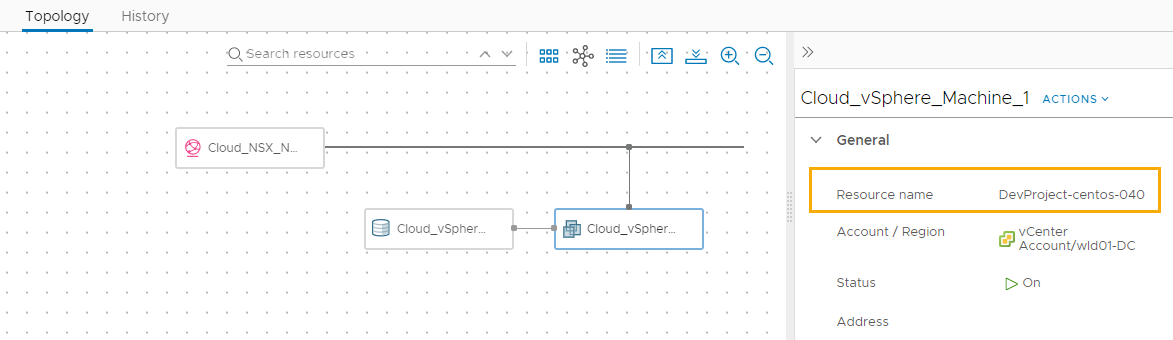
- Track the progress and review the successful deployment.
The machine name in this example is DevProject-centos-026. Just a reminder, this example is based on the tutorial referenced at the beginning of this task.
Create Active Directory machine records
When you provision a workload, you can create machine records in Active Directory. By configuring Cloud Assembly to perform this task automatically for a project deployments, you have lightened your own workload as the cloud administrator.
- Add an Active Directory integration.
- Select .
These steps cover the basic Active Directory configuration that is related to this AD machine records tutorial. For more about the Active Directory integration, see How do I create an Active Directory integration in Cloud Assembly.
- Click Add Integration and click and click Active Directory.
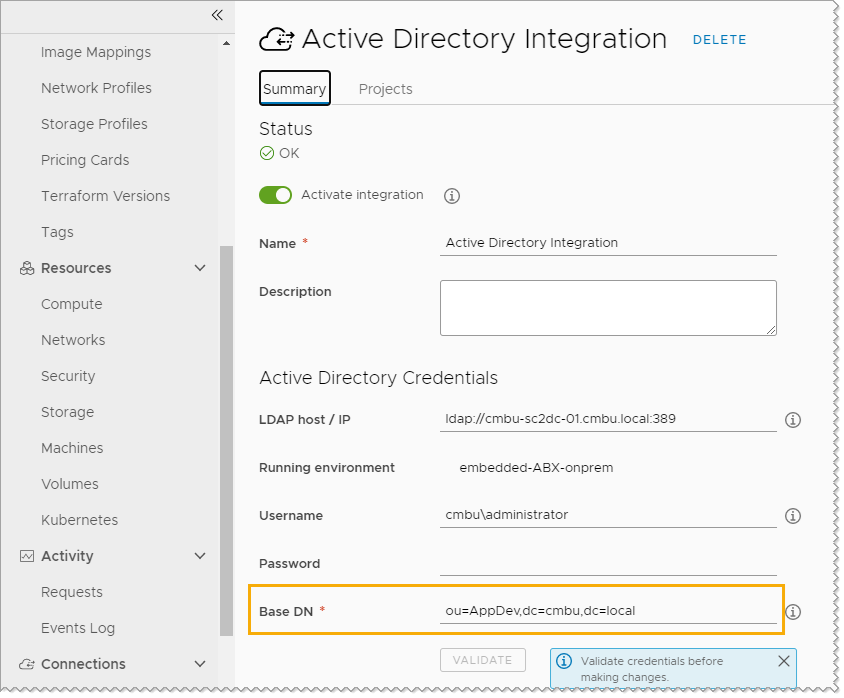
- Enter the name that you are using for this integration.
- Enter the LDAP host / IP and the associated credentials.
- Enter the Base DN.
In this tutorial the example is ou=AppDev,dc=cmbu,dc=local. AppDev is the parent OU for the computer OU that you will add for the project.
- Click Add.
- Select .
- Add the project to the integration.
- In the Active Directory integration, click the Projects tab and click Add Project.
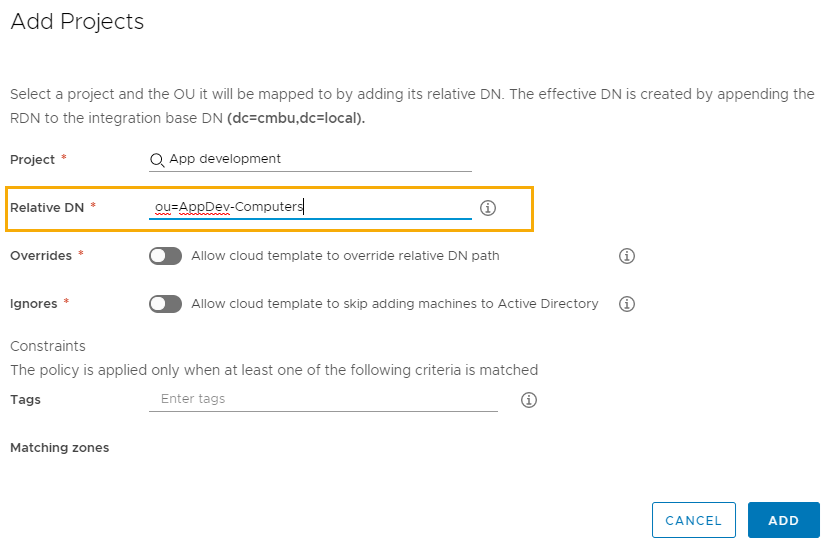
- Select the App Development project.
- Enter the relative DNs. For example, OU=AppDev-Computers.
- Leave the Overrides and Ignores switches turned off.
This procedure is focused on automating the process for a project. It is not about customizations that you can do in templates.
- Click Add.
- To save your changes to the integration, click Save.
- Deploy a cloud template for the project and verify that the machine added to the correct Active Directory OU.
Set your network DNS and internal IP range
Add or update a network profile to include your DNS servers and internal IP ranges.
You must have already created a cloud account for vSphere, NSX-V, or NSX-T. See Tutorial: Setting up and testing vSphere infrastructure and deployments in Cloud Assembly or Adding cloud accounts to Cloud Assembly.
- Select .
- Select an existing profile or create one.
- On the Summary tab, select an Account/region and enter a name.
For this tutorial, the network profile name is Network Profile.
- Add networks.
- Click the Networks tab.
- Click Add Network.
- Add one or more NSX or vSphere networks.
- Click Add.
- Configure the DNS servers.
- In the networks list on the Networks tab, click the network name.
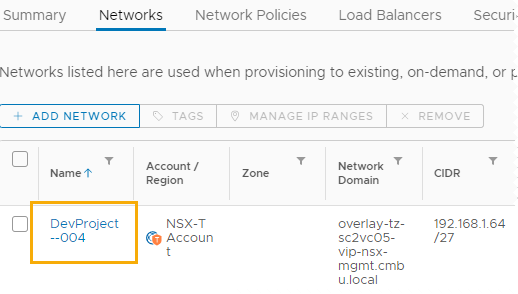
- Enter the DNS server IP addresses you want this network to use.
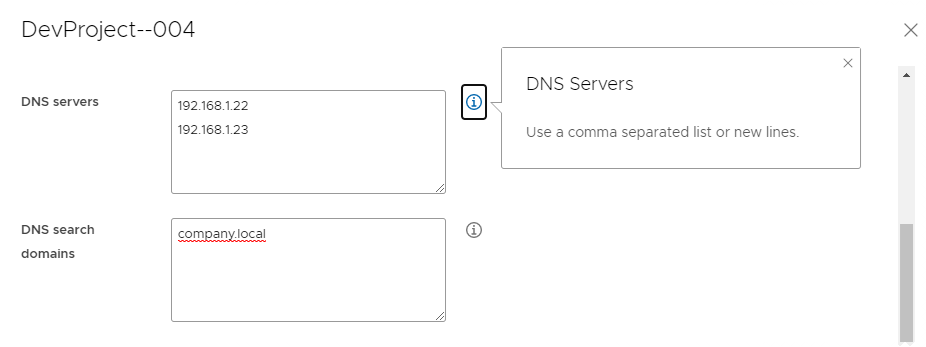
- Click Save.
- In the networks list on the Networks tab, click the network name.
- Specify the IP range for the network.
- In the networks list, select the check box next to the network name.
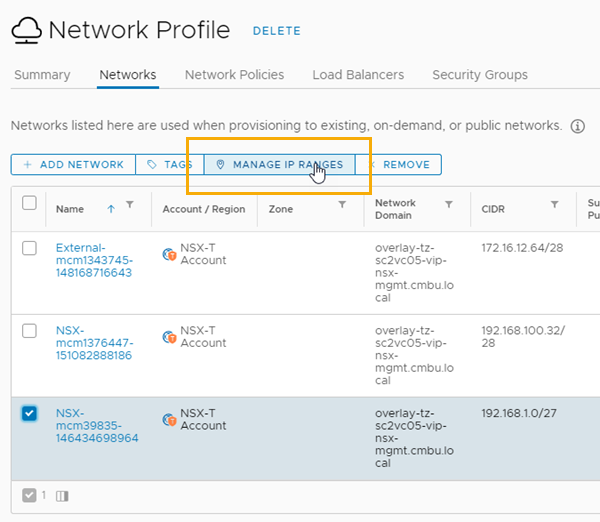
- Click Manage IP Ranges.
- In the Manage IP Ranges dialog box, click New IP Range.
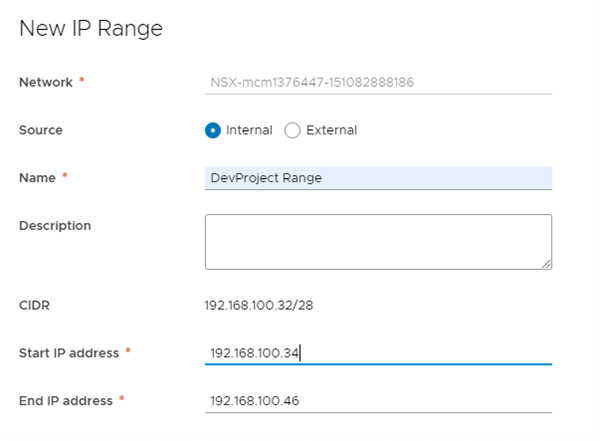
- Enter a name.
For example, DevProject Range.
- To define the range, enter the Start IP address and End IP address.
- Click Add.
- Add additional ranges or click Close.
- In the networks list, select the check box next to the network name.
- Add the cloud zone containing the associated network account/region that you configured to your Development project.
- Deploy a cloud template for the project and verify that the machine is provisioned within the specified IP range.
