


Provider administrators can select or create global image and flavor mappings that can be assigned to vRealize Automation tenants.
Global image and flavor mapping enables you to quickly set up mappings that apply to multiple tenants. You can also quickly update these mappings. The tenant management page also enables you to create tenant specific image and flavor mappings that can override the default comfigurations.
Note: Image and flavor mappings configured on the Tenant Management page apply only to tenants as configured and are not applicable to the broader provider organization.
Prerequisites
Procedure
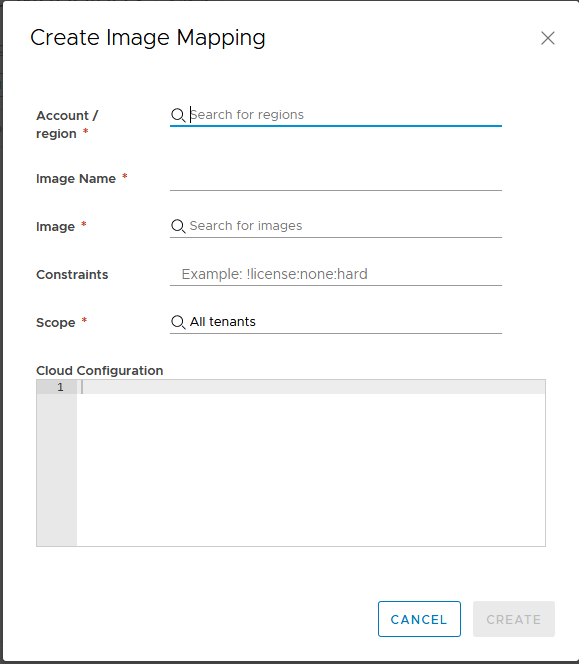
- Select Image Mapping on the Tenant Management page left menu.
The Image Mapping page displays all image currently configured for tenants in Cloud Assembly and imdicates whether the mappings are global or associated with a specific tenant.
- Select Add Flavor Mapping to add a flavor mapping for use with tenants.
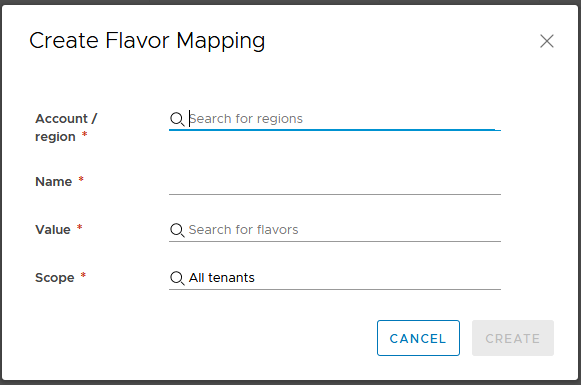
- Select the Account/Region to which the flavor mapping will apply.
- Enter a name for the flavor mapping you are creating.
- Select the Size parameters for the flavor mapping you are creating.
You can specify the number of processors and the amount of memory for this flavor.
- Select the scope for the flavor mapping. The scope can be either Alll tenants, or global, or you can select a specific tenant to which the flavor mapping will apply. All tenants applies to all tenants in the provider administrator's organization.
Results
After you create global mappings, these mapping will show up on the Flavor Mapping or Tenant Mapping tabs on the Tenant Management page for applicable tenants.
What to do next
You can edit or delete global image and flavor mappings on this page. To edit a mapping select it and make the desired changes.
