


You can create a SaltStack Config integration to access the SaltStack Config service and use SaltStack Config objects and actions in vRealize Automation.
With vRealize Automation SaltStack Config, you can provision, configure, and deploy software to your virtual machines at any scale using event-driven automation. You can also use SaltStack Config to define and enforce optimal, compliant software states across your entire environment.
Installation
Before integrating SaltStack Config with vRealize Automation, you must first install it in your environment. See Installing and Configuring SaltStack Config for more information.
Considerations
- The SaltStack Config integration is associated to a specific host during install.
- vRealize Automation does not support multi-tenancy for SaltStack Config currently.
- The vRealize Automation tenant can support one SaltStack Config integration and one Salt master. The Salt master can support multiple minions.
- Before you can delete a SaltStack Config integration in vRealize Automation, you must delete any existing deployments that use the SaltStack Config integration.
Prerequisites
- Verify that you have vRealize Automation administrator credentials and SaltStack Config administrator credentials (root level access).
You need vRealize Automation administrator credentials and SaltStack Config administrator credentials (root level access) to create a SaltStack Config integration.
You also need SaltStack Config administrator credentials to open and work in the SaltStack Config service itself.
You use vRealize Automation credentials to access vRealize Automation and SaltStack Config credentials to access SaltStack Config.
For information about SaltStack Config administrator credentials, see the Installing and Configuring SaltStack Config guide.
- Verify that the SaltStack Config service is installed.
- Verify that the Salt master to be used in the SaltStack Config integration contains the Master Plugin.
- Verify that you have the SaltStack Config service administrator role in vRealize Automation. See What are the vRealize Automation user roles.
- Verify that you have the Cloud Assembly service administrator role in vRealize Automation. See Organization and service user roles in vRealize Automation.
Configure a SaltStack Config integration in vRealize Automation
After you install SaltStack Config for vRealize Automation, you can configure the integration in Cloud Assembly.
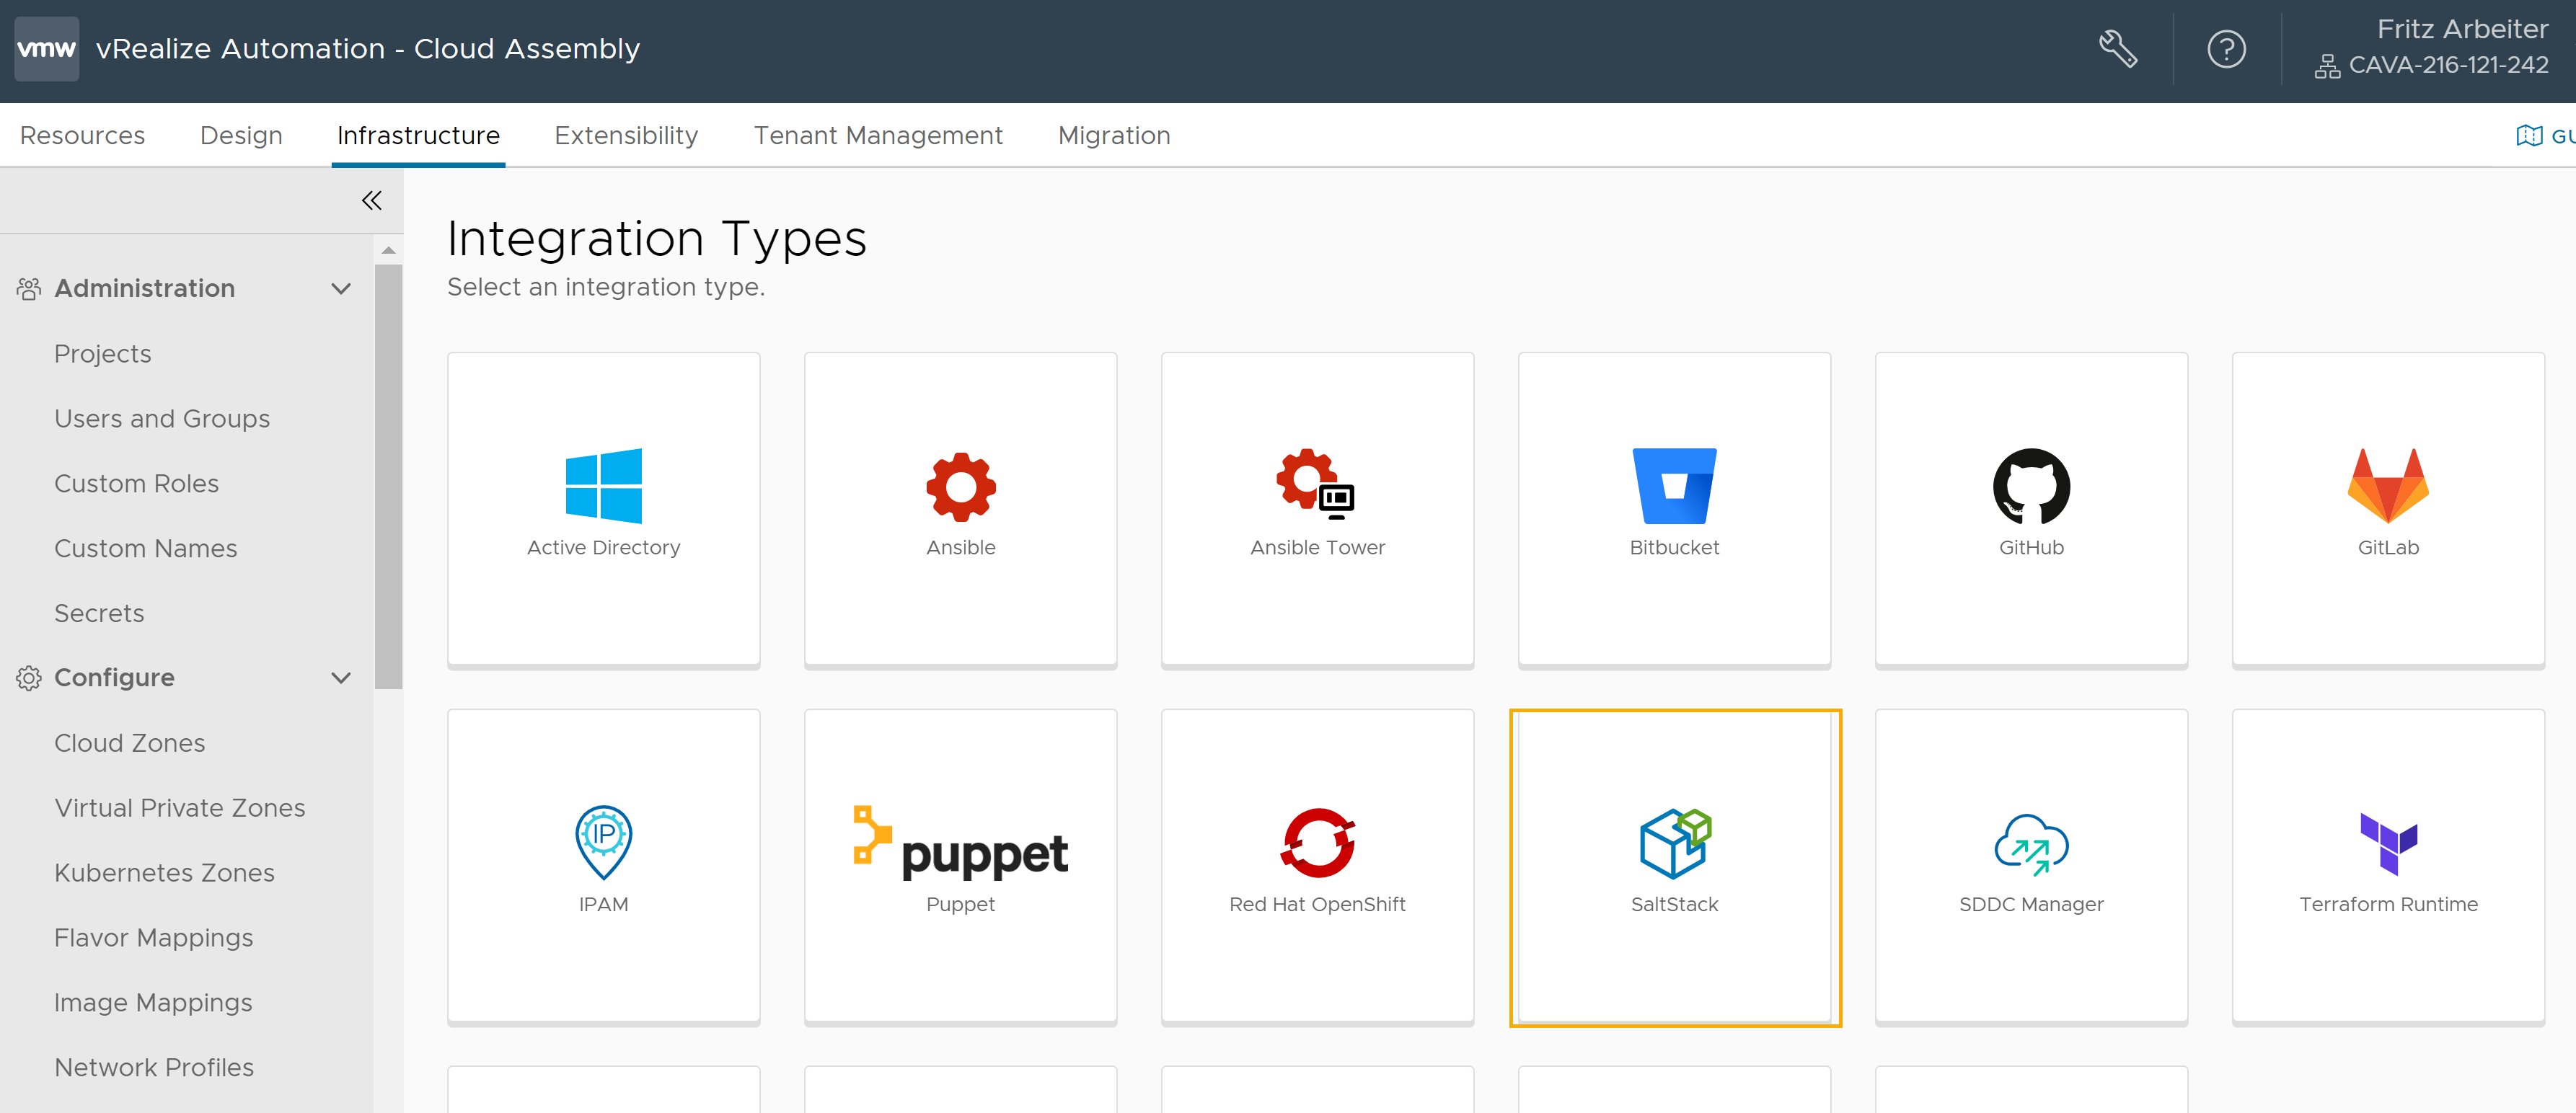
- In Cloud Assembly, select , and click Add Integration.
- Select the SaltStack Config integration type.
- Complete the form.
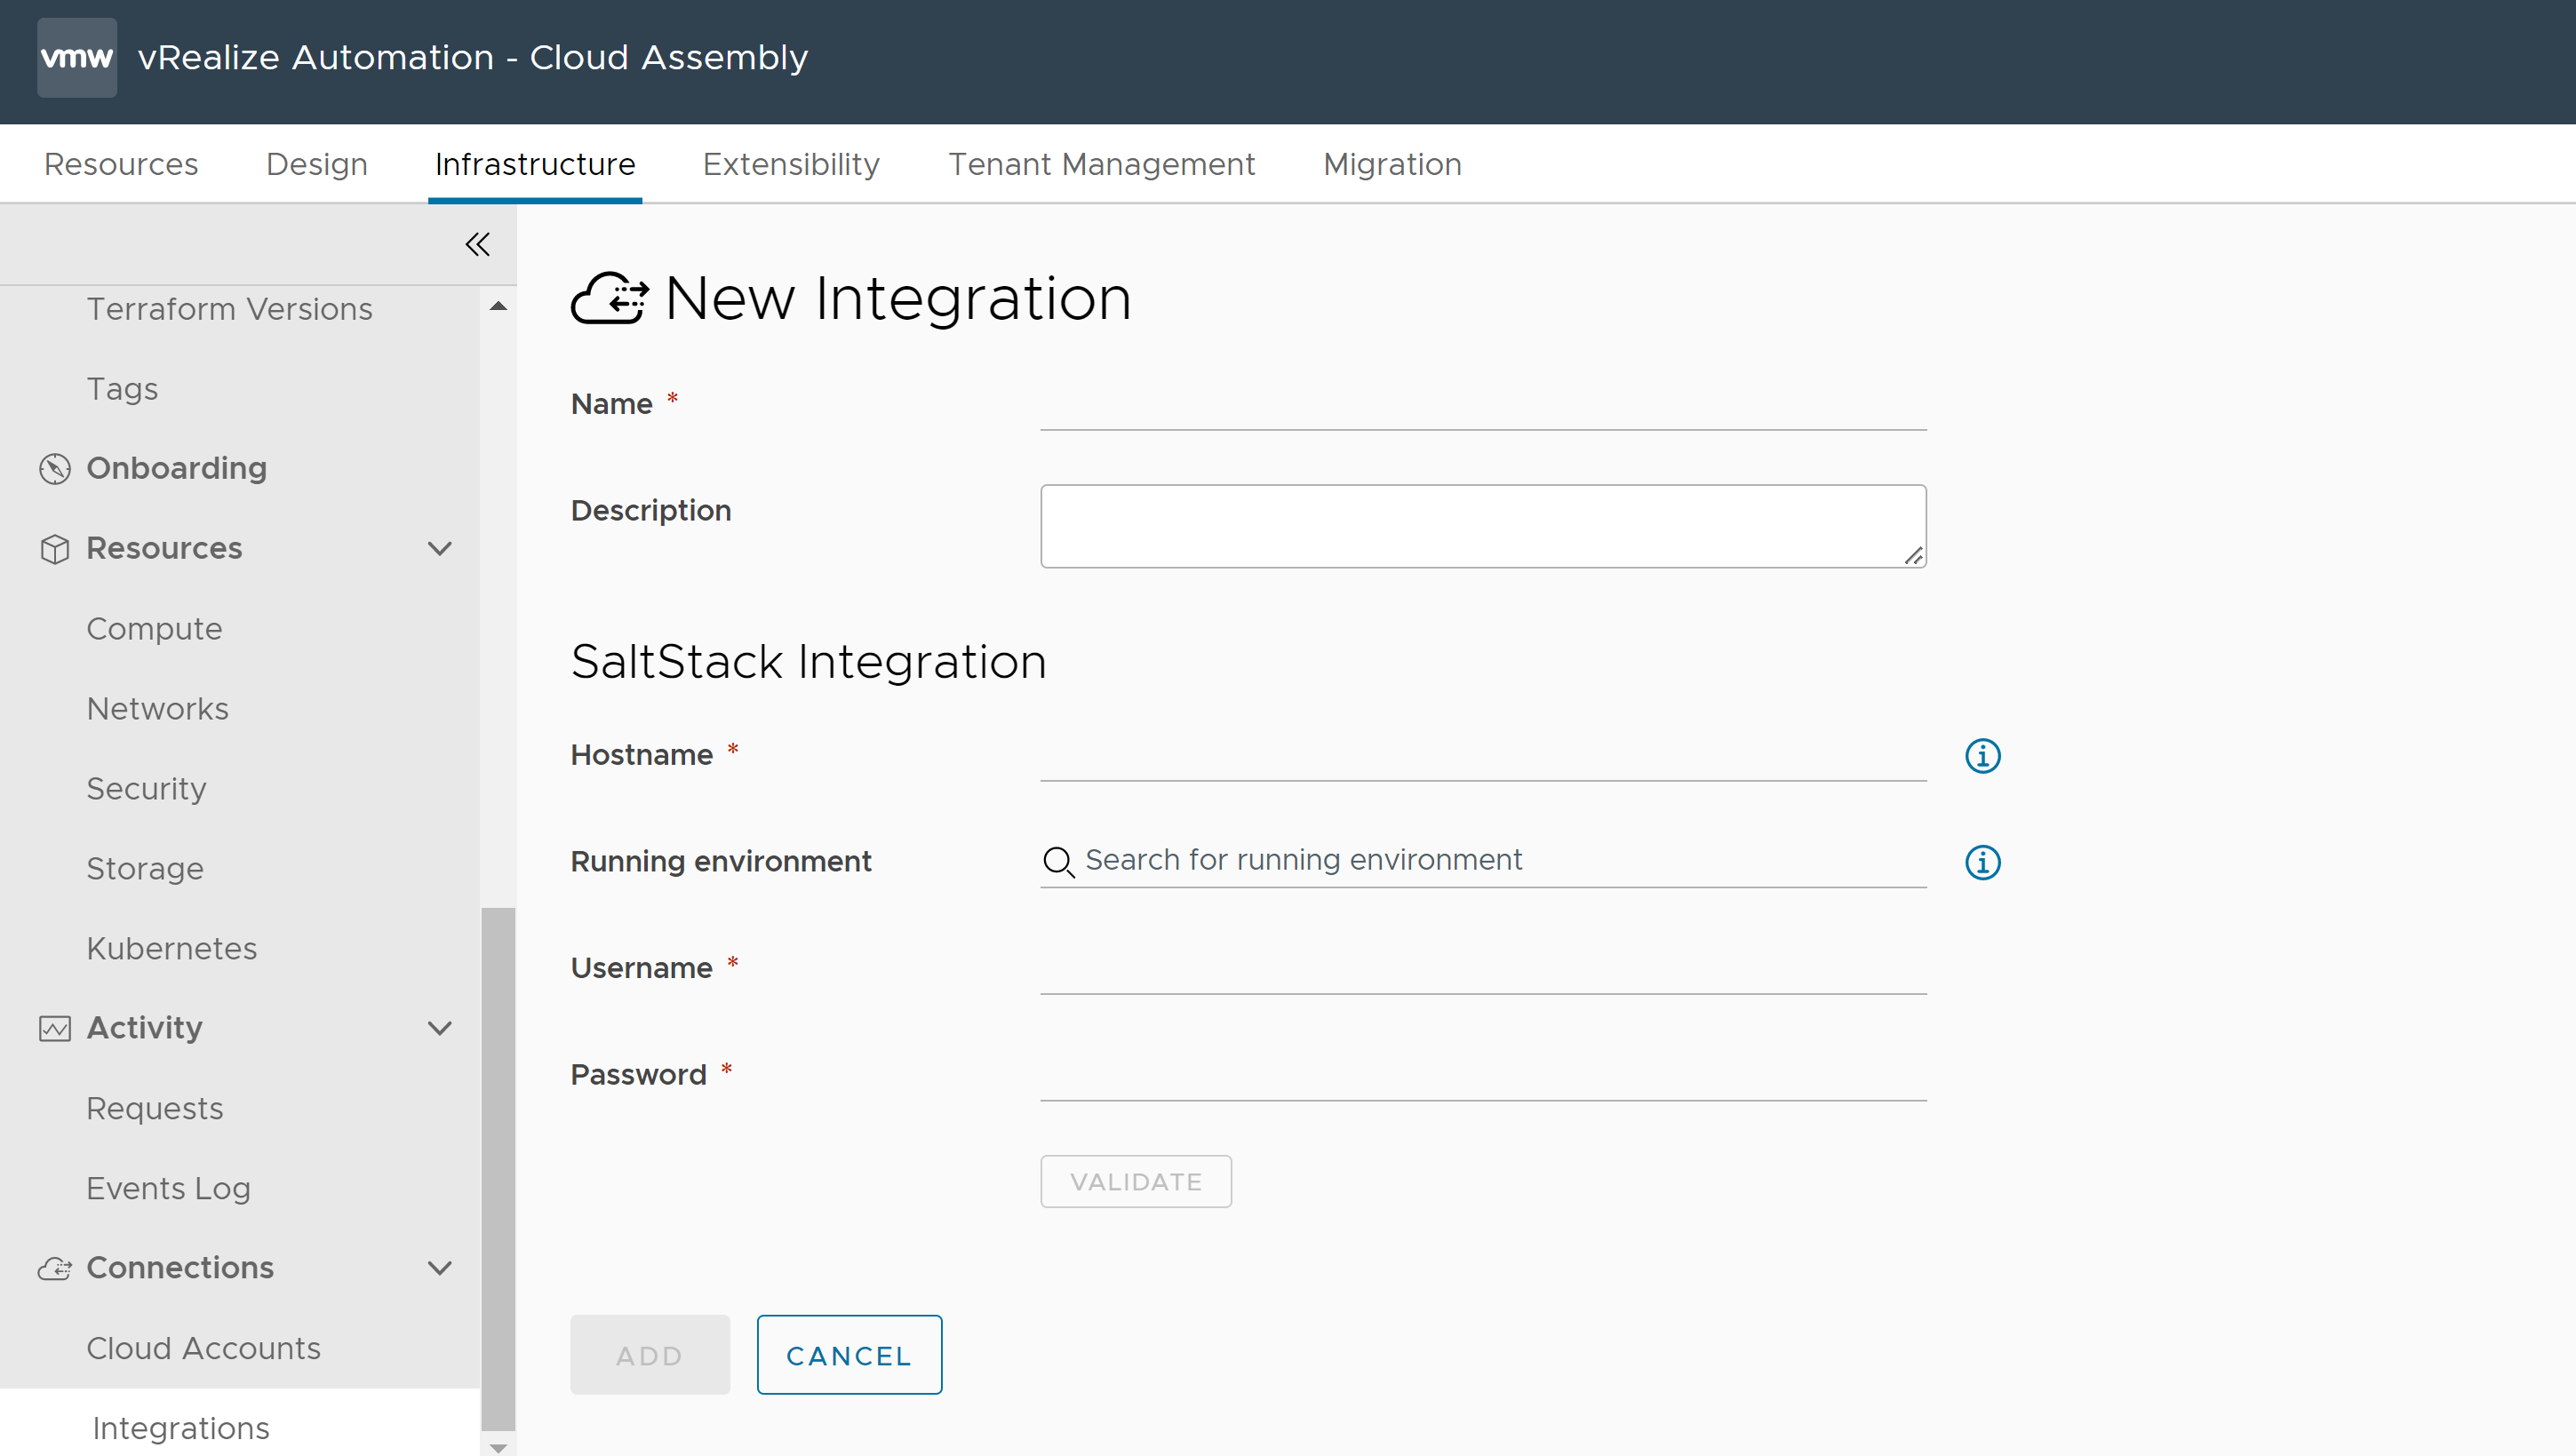
- Enter a name for the integration.
- (Optional) Provide a description for the integration.
- Enter the hostname for the SaltStack Config server.
- Specify the running environment for the SaltStack Config integration.
If you're using the
saltConfigurationproperty to deploy minions and apply state files on your virtual machines, you don't need to configure a running environment. However, it is recommended that you update your cloud templates to use the SaltStack Config resource. ThesaltConfigurationproperty is now deprecated. You can still use thesaltConfigurationproperty in your cloud templates, but SaltStack Config integration features will be limited.If you are using the SaltStack Config resource to deploy minions and apply state files on your virtual machines, select the embedded-ABX-onprem running environment.
- Enter the SaltStack Config administrator user name and password used to access the specified host.
- Click Validate to confirm your administrator access to the SaltStack Config integration host.
If validation fails, make sure you entered the correct hostname, user name, and password.
- Click Save.
Access your SaltStack Config integration
After you save the SaltStack Config integration point, you can open the SaltStack Config integration service.
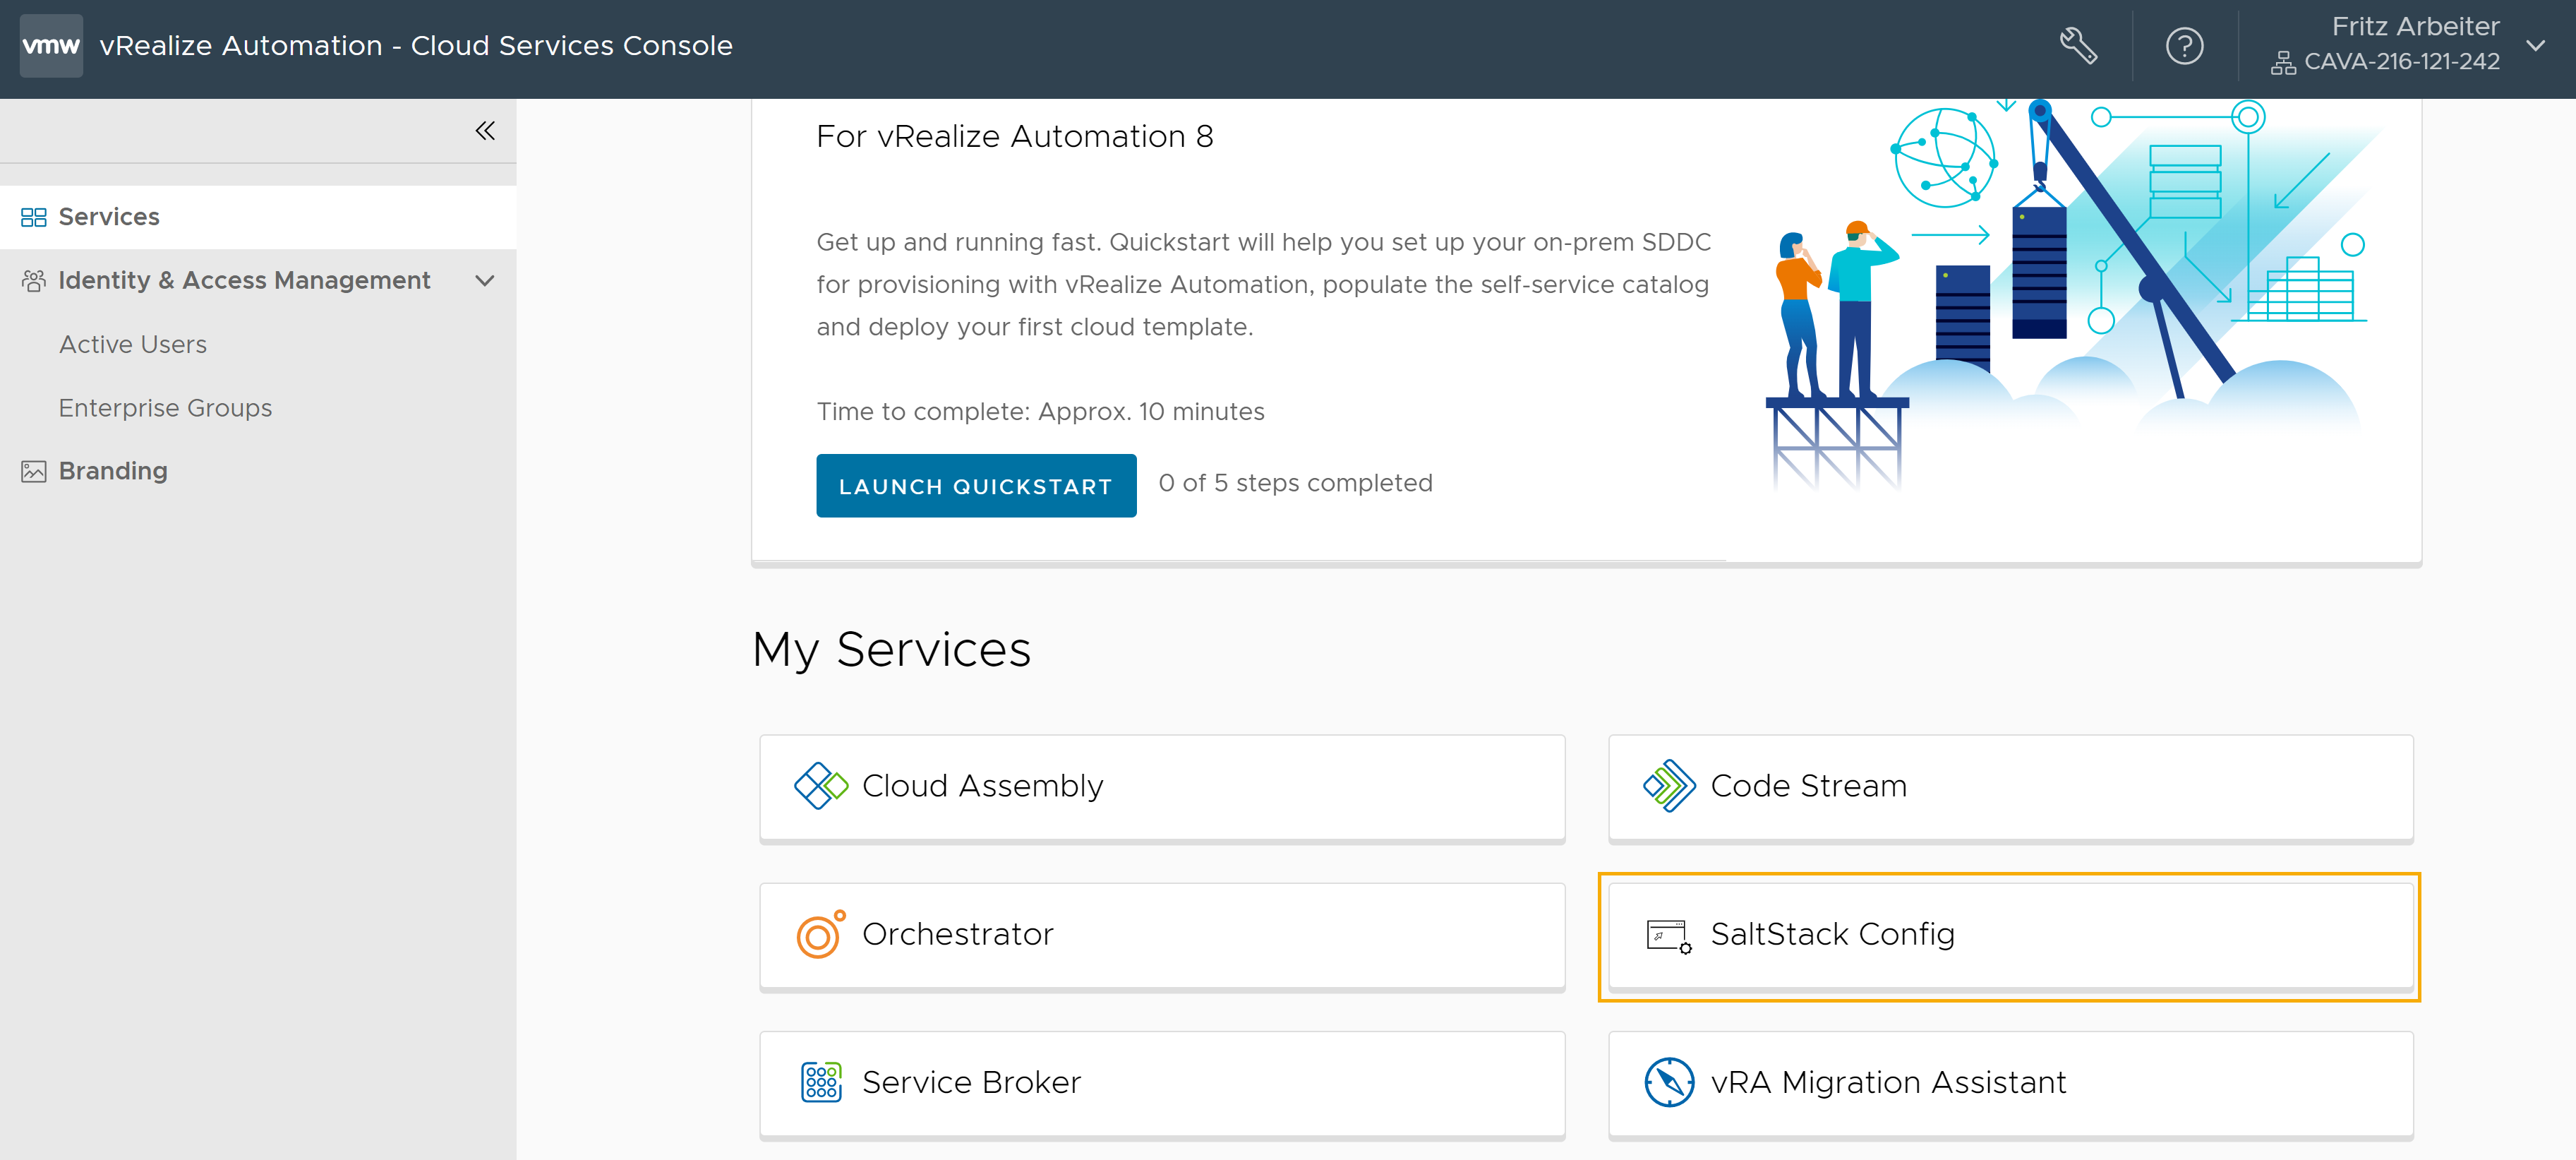
- If you deployed SaltStack Config through vRealize Suite Lifecycle Manager, you can click on the service tile from the vRealize Automation Service Console to open the integration and access the host.
If you did a stand-alone install of SaltStack Config, you can access the service using your SaltStack Config hostname.
- When prompted to log in to SaltStack Config, enter your SaltStack Config administrator user name and password.
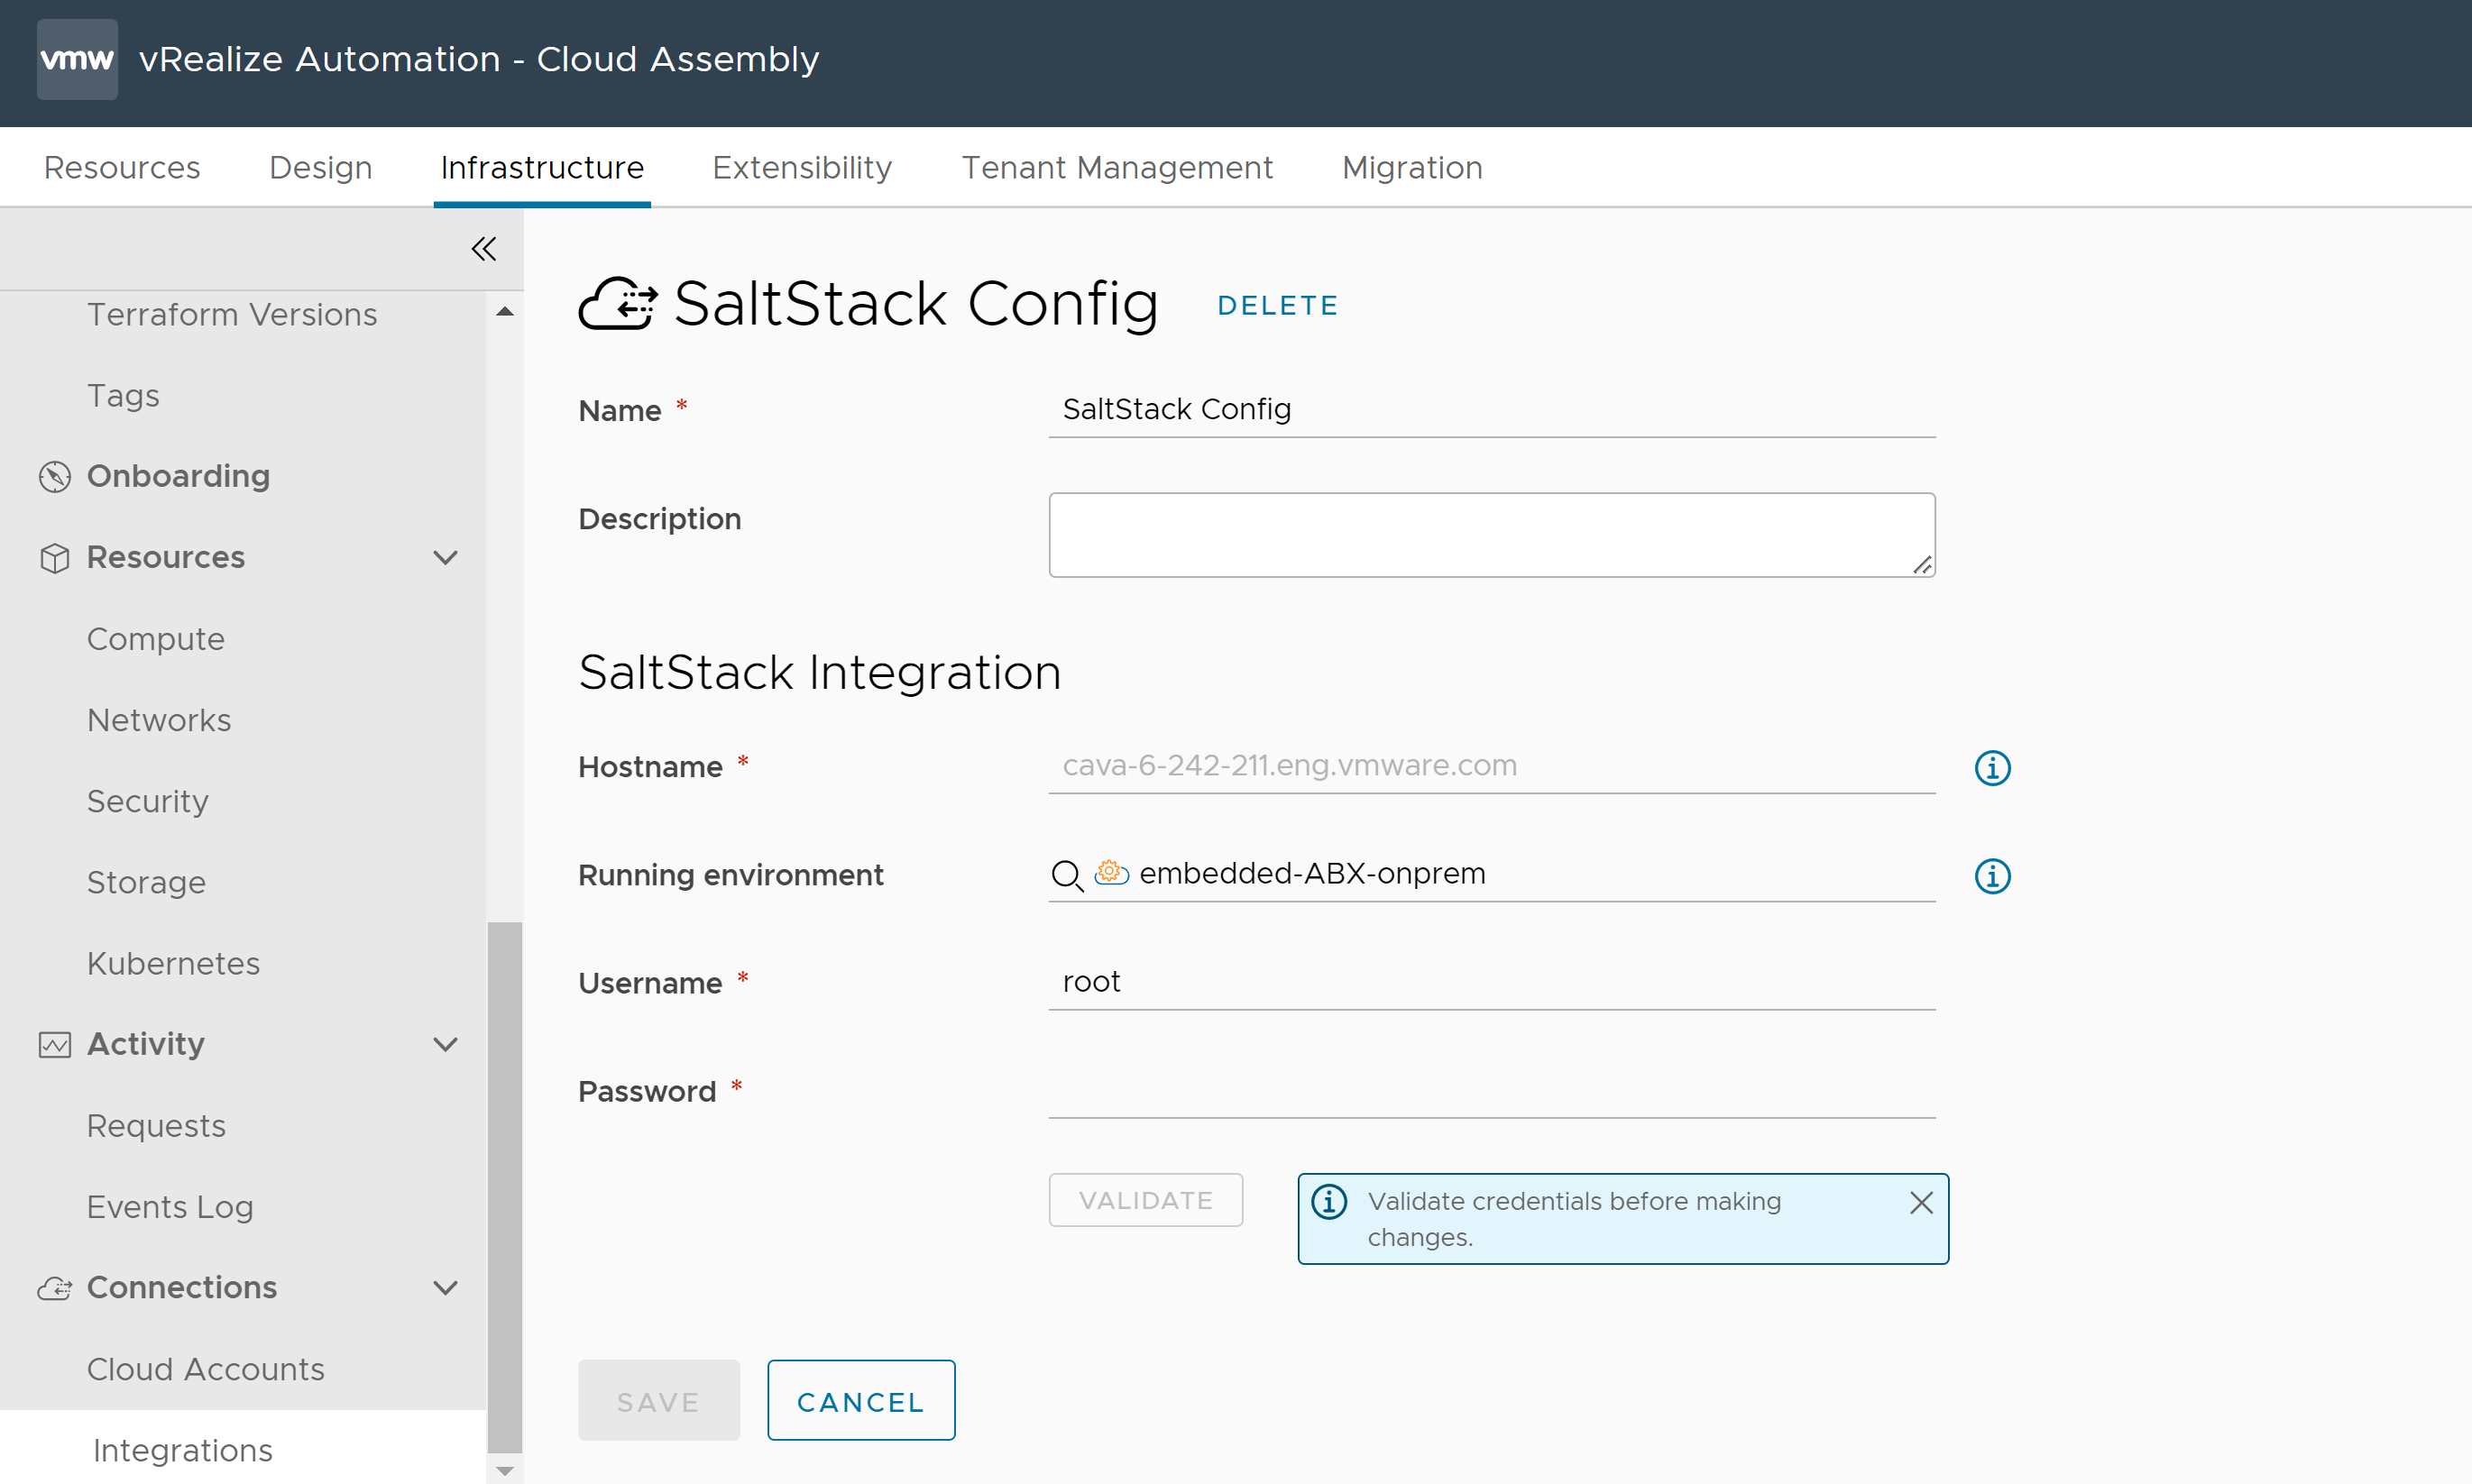
If you need to make any changes to the integration, select , select the available SaltStack Config integration tile, and click Open.

The hostname cannot be changed after you configure the integration. You can only edit the name, description, running environment, and credentials for the integration.
What's next
SaltStack Config is a stand-alone product that you can integrate with and use in vRealize Automation.
-
Learn how to add the SaltStack Config resource to install minions on virtual machines in your Cloud Assembly deployments.
