Cloud Assembly users who need to design and run Terraform integrations while disconnected from the internet can set up their runtime environment by following this example.
This process assumes that you have your own Docker registry and can access its repositories without an internet connection.
Create the custom container image
- Build a custom container image that includes the Terraform provider plug-in binaries.
The following Dockerfile shows an example of creating a custom image with the Terraform GCP provider.
The base image
projects.registry.vmware.com/vra/terraform:latestdownload in the Dockerfile requires internet access to the VMware Harbor registry at projects.registry.vmware.com.Firewall settings or proxy settings can cause the image build to fail. You might need to enable access to releases.hashicorp.com to download the Terraform provider plug-in binaries. However, you may use your private registry to supply the plug-in binaries as an option.
FROM projects.registry.vmware.com/vra/terraform:latest as final # Create provider plug-in directory ARG plugins=/tmp/terraform.d/plugin-cache/linux_amd64 RUN mkdir -m 777 -p $plugins # Download and unzip all required provider plug-ins from hashicorp to provider directory RUN cd $plugins \ && wget -q https://releases.hashicorp.com/terraform-provider-google/3.58.0/terraform-provider-google_3.58.0_linux_amd64.zip \ && unzip *.zip \ && rm *.zip # For "terraform init" configure terraform CLI to use provider plug-in directory and not download from internet ENV TF_CLI_ARGS_init="-plugin-dir=$plugins -get-plugins=false" - Build, tag, and push the custom container image to your own Docker repository at your disconnected site.
- In Cloud Assembly at your disconnected site, under , go to your Terraform runtime integration.
- Create or edit the runtime container settings to add your repository for the custom container image. The example built custom container image name is
registry.ourcompany.com/project1/image1:latest.
Host the Terraform CLI locally
- Download the Terraform CLI binaries.
- Upload the Terraform CLI binaries to your local web or FTP server.
- In Cloud Assembly, go to .
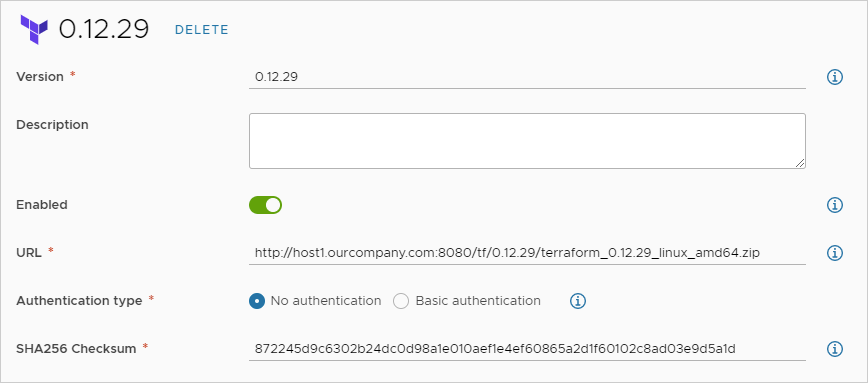
- Create or edit the Terraform version so that it includes the URL to the Terraform CLI binaries hosted on your local server.
- If your local web or FTP server requires login authentication, select Basic authentication, and enter username and password credentials that can access the server.
To change the authentication type, you must have the cloud administrator role in Cloud Assembly.

Design and deploy Terraform configurations
With the runtime in place, you can add Terraform configuration files to git, design cloud templates for them, and deploy.
To get started, see Preparing for Terraform configurations in Cloud Assembly.
Troubleshooting
When deploying, open the deployment in Cloud Assembly. Under the History tab, look for Terraform events, and click Show Logs to the right. When your local Terraform provider is working, the following messages appear in the log.
Initializing provider plugins
Terraform has been successfully initialized
For a more robust log, you can manually edit the cloud template code to add TF_LOG: DEBUG as shown in the following example.
resources:
  terraform:
    type: Cloud.Terraform.Configuration
    properties:
      providers:
        - name: google
          # List of available cloud zones: gcp/us-west1
          cloudZone: gcp/us-west1
      environment:
        # Configure terraform CLI debug log settings
        TF_LOG: DEBUG
      terraformVersion: 0.12.29
      configurationSource:
        repositoryId: fc569ef7-f013-4489-9673-6909a2791071
        commitId: 3e00279a843a6711f7857929144164ef399c7421
        sourceDirectory: gcp-simple
Creating your own base image
Although VMware occasionally updates the base image at projects.registry.vmware.com/vra/terraform:latest, that image might be out of date and contain vulnerabilities.
To build your own base image, use the following Dockerfile instead.
FROM alpine:latest as final
RUN apk add --no-cache git wget curl openssh