


As a Code Stream administrator, you can share pipelines so that users within an organization can run them on any other project or add them as nested tasks within a pipeline on another project.
Why is a shared pipeline useful
When you share a pipeline, you eliminate the need to create the same pipeline for different projects within an organization. And if you update a shared pipeline, all pipeline users will have the same update.
A shared pipeline can also be used in Service Broker. A Service Broker administrator can add your shared pipeline as catalog item for users to request and run on multiple projects.
Only Code Stream administrators can share or stop sharing pipelines.
How do I share a pipeline
To share a pipeline, click Pipeline and select the pipeline that you want to share.
- Click
- If the pipeline is deactivated, click .
- (Optional) To make your shared pipeline available in Service Broker, click .
After you release the pipeline, a Service Broker administrator can add it to Service Broker. See Add Code Stream pipelines to the Service Broker catalog.
How do I run a shared pipeline
To run a shared pipeline, you select the pipeline and select a project.
The pipeline is run in the context of the project you select and only the pipeline model is shared. Any infrastructure such as endpoints or variables used in the pipeline is not shared. If a shared pipeline that uses endpoints or variables is run on a different project, then those endpoints and variables must be available on that project.
For example, let's say that jenkinsPipeline uses projectA and includes a task with an endpoint named jenkinsEndpoint.
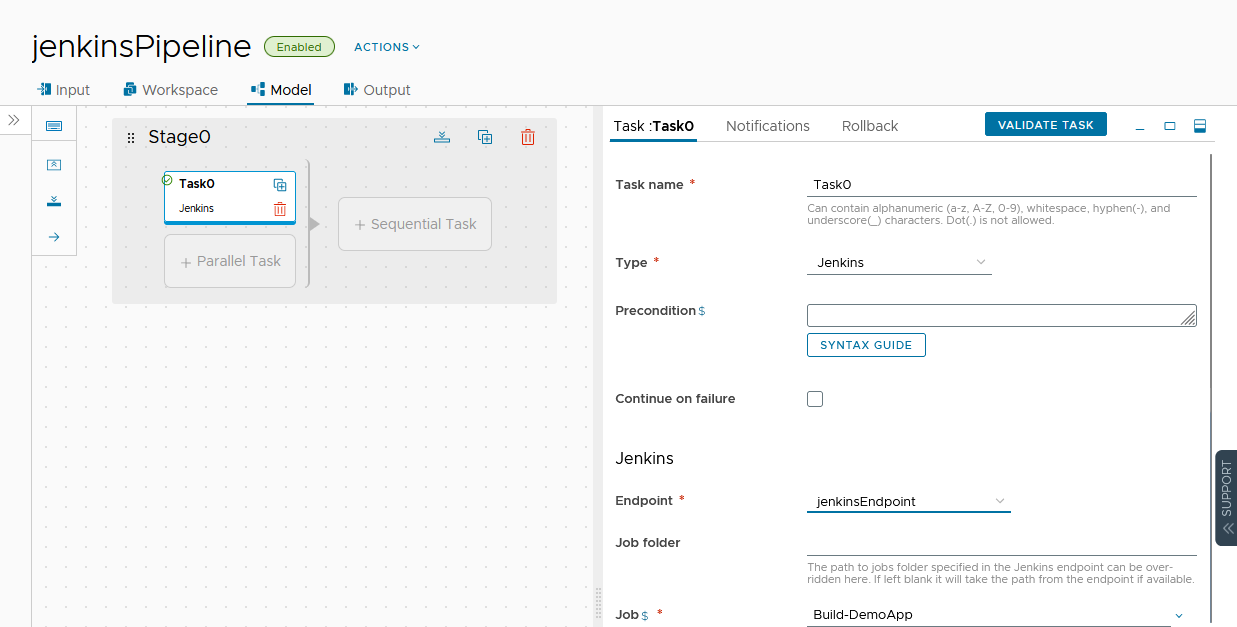
If you share jenkinsPipeline and want to run it in the context of projectB, then there must be a jenkinsEndpoint on projectB. If there is no jenkinsEndpoint, create the endpoint on projectB before running the shared pipeline.
The following procedure shows how to duplicate an endpoint on another project. You follow similar steps for a variable.
- Click Endpoints. On the endpoint that you want to duplicate, for example
jenkinsEndpoint, click . - Click the Import button, and select the YAML file for
jenkinsEndpoint. - Edit the file to change the project, such as
projectBin the following sample YAML code.--- project: projectB kind: ENDPOINT name: jenkinsEndpoint ...
- Click Import.
To run jenkinsPipeline on projectB, click Run on the pipeline card, and select projectB as the project.
projectB, you must have the
Code Stream role of administrator, developer, or executor. If you are a
Code Stream viewer or user, you can not run the pipeline unless a
Code Stream administrator makes you a project administrator or project member in
projectB. For more information about roles in
Code Stream, see
How do I manage user access and approvals in Code Stream.
How do I add a shared pipeline to another pipeline
Using shared pipelines as nested tasks within another pipeline enables you to extend pipeline functionality beyond the pipelines that are included in one project. The shared pipelines can be on different projects from each other and from the pipeline where they are included as nested tasks.
The following example shows a pipeline named master-shared-pipeline-demo with two nested pipeline tasks.
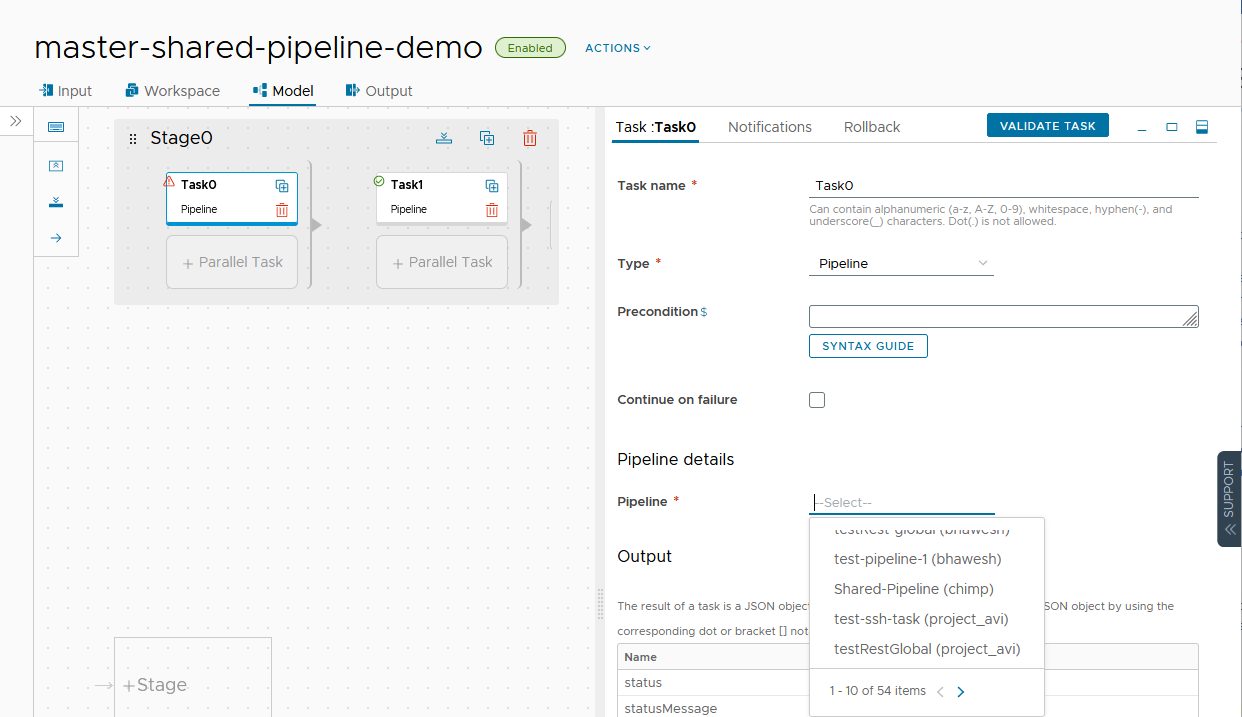
To specify the pipeline for Task0, select from a list of shared pipelines. Every pipeline name includes the project name. If several shared pipelines have the same name, you can use the project name to select the one you want.
How do I delete or stop sharing a pipeline
If you add a shared pipeline as a nested task, that pipeline is referenced by the pipeline in which it is nested. If you want to delete or stop sharing the pipeline, you must remove it from any pipeline that references it.
For example, if master-shared-pipeline-demo includes Shared-Pipeline as a nested task, then Shared-Pipeline is referenced. You cannot delete or stop sharing Shared-Pipeline until you remove it from master-shared-pipeline-demo.
The following procedure shows how to check a pipeline's references and remove it from the pipeline that references it before you delete or stop sharing it.
- Check for references and update pipeline references if found.
- Click Pipelines. On the shared pipeline that you want to check, click .
- Open the pipelines that reference the shared pipeline, remove the nested task, and save the pipeline.
- Delete or stop sharing a pipeline.
- On the pipeline that you want to delete, click .
- On the pipeline that you want to stop sharing, click .
