


The Weather Map widget provides a graphical display of the changing values of a single metric for multiple resources over time. The widget uses colored icons to represent each value of the metric. Each icon location represents the metric value for particular resources. The color of an icon changes to show changes in the value of the metric.
How the Weather Map Widget and Configuration Options Work
You can add the Weather Map widget to one or more custom dashboards and configure it to display data that is important to different dashboard users. The data that appears in the widget is based on the configured options for each widget instance.
Watching how the map changes can help you understand how the performance of the metric varies over time for different resources. You can start or stop the display using the Pause and Play options at the bottom of the map. You can move the slider forwards or backwards to a specific frame in the map. If you leave the widget display and return, the slider remains in the same state.
The map does not show the real-time performance of the metrics. You select the time period, how fast the map refreshes, and the interval between readings. For example, you might have the widget play the metric values for the previous day, refreshing every half second, and have each change represent five minute's worth of metric values.
To view the object that an icon represents, click the object.
Where You Find the Weather Map Widget
The widget might be included on any of your custom dashboards. From the left menu, click to see your configured dashboards.
To customize the data that appears in the dashboard widget, from the left menu, click . To create your dashboard, from the left menu, click . From the Dashboards panel, click Create. To edit your dashboard, from the left menu, click . From the Dashboards panel, select the dashboard you want to edit and select . Toggle between the Views and Widgets option to view and add a widget or view to the dashboard. The widgets list panel displays a list of all the predefined widgets. Drag a widget to the dashboard workspace in the upper panel.
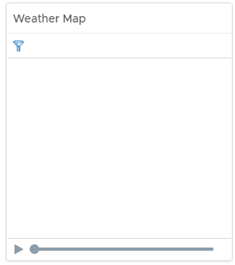
Weather Map Widget Toolbar Options
On the title bar of the widget, click the Show Toolbar icon to access the toolbar options.
The toolbar contains the icons that you can use to view the graph.
| Icon | Description |
|---|---|
| Pause and Play | Start or stop the display. The icon remains in the same state if you leave the widget display and return. |
| Display Filtering Criteria | View the current settings for the widget, including the current metric. |
Weather Map Widget Configuration Options
On the title bar of the widget, click the Edit Widget icon to configure the widget.
The configuration options are grouped into one or more sections. You can select the objects on which you want to base the widget data and refine the objects in the following sections. Each section filters the objects further and pushes the filtered objects to the next section. The widget data is based on the objects that are the output of the last section.
The Configuration section provides general configuration options for the widget.
The Output Data section provides options to select object types on which you are basing the widget data.
The Output Filter section provides options to restrict the widget data based on the selected filter criteria.
| Option | Description |
|---|---|
| Title | Enter a custom title that identifies this widget from other instances that are based on the same widget template. |
| Configuration | |
| Refresh Content | Enable or disable the automatic refreshing of the data in this widget. If not enabled, the widget is updated only when the dashboard is opened or when you click the Refresh button on the widget in the dashboard. |
| Refresh Interval | If you enable the Refresh Content option, specify how often to refresh the data in this widget. |
| Redraw Rate | An interval at which cashed data is refreshed based on newly collected data. For example, if you set metric history to Last 6 hours and image redraw rate to 15 minutes, and data is collected every 5 minutes, the data collected during 10 minutes will not be calculated at the 15 minutes. For example, if you set metric history to Last 6 hours and image redraw rate to 15 minutes, and data is collected every 5 minutes, the data collected during 10 minutes will not be calculated at the 15 minutes. |
| Metric History | Select the time period for the weather map, from the previous hour to the last 30 days. |
| Metric Sample Increment | Select the interval between metric readings. For example, if you set this option to one minute and set the Metric History to one hour, the widget has a total of 60 readings for each metric. |
| Group by | Select a tag value by which to group the objects. |
| Sort by | Select Object name or Metric value to set the way to sort the objects. |
| Frame Transition Interval | Select how fast the icons change to show each new value. You can select the interval between frames and the number of frames per second (fps). |
| Start Over Delay | The number of seconds for the display to remain static when it reaches the end of the Metric History period, the most current readings, before it starts over again from the beginning. |
| Color | Shows the color range for high, intermediate, and low values. You can set each color and type minimum and maximum color values in the Min Value and Max Value text boxes. If you leave the text boxes blank, vRealize Operations maps the highest and lowest values for the Color By metric to the end colors. If you set a minimum or maximum value, any metric at or beyond that value appears in the end color. |
| Output Data | |
|
Select an object type in your environment on which you want to base the widget data.
|
|
| Metric | Select a common metric or a metric for the selected object type in the list. The metric will be the basis for the widget data. The object corresponding to the metric is the selected object for the widget. |
| Output Filter | |
| Basic |
Pick tags to refine the widget data. The widget data is based on the objects that have the picked tags applied. If you pick more than one value for the same tag, the widget includes objects that have any of the tags applied. If you pick more than one value for different tags, the widget includes only the objects that have all the tags applied. |
| Advanced |
Refine the widget data further based on the filter criteria for object types. The widget data is based on the objects for the filtered object types. If the objects have a tag filter applied in the Basic subsection, you define filter criteria for the object types of the objects with tag filter applied. If the objects with tag filter applied do not belong to any of the object types in this filter criteria, the widget skips this filter and includes all the objects with tag filter applied.
|
