You can test or run the configured recovery plan.
Procedure
- In the vSphere Client or the vSphere Web Client, click Site Recovery > Open Site Recovery.
- On the Site Recovery home tab, select a site pair and click View Details.
- Select the Recovery Plans tab, select the vIDM LCM vRA vRO RP recovery plan, and click Run.
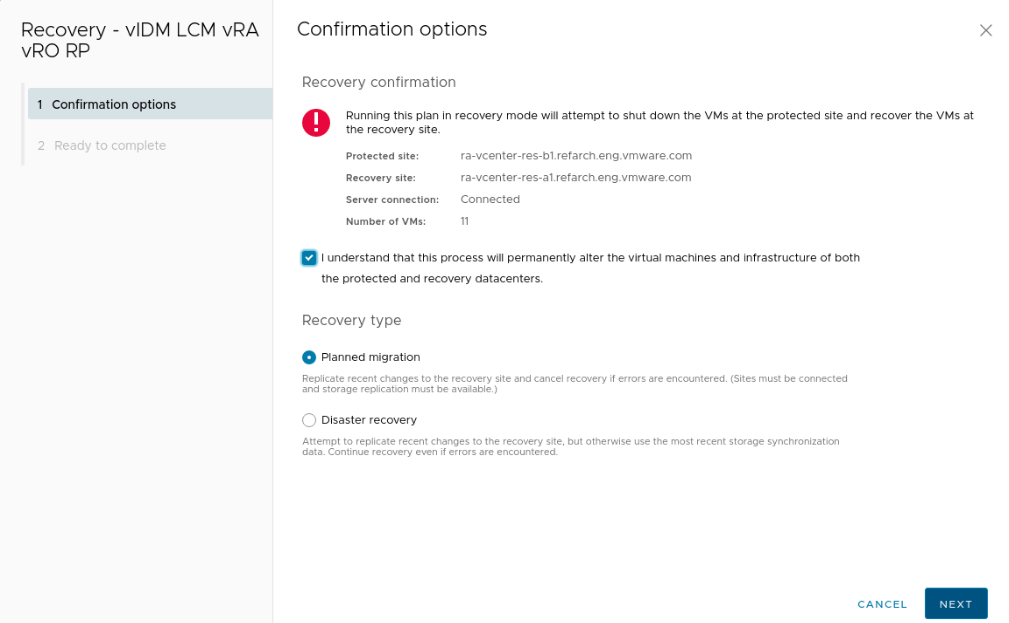
- Review the summary information and click Finish to start the recovery plan.
- Click the Recovery Steps tab to monitor the progress of the recovery plan.
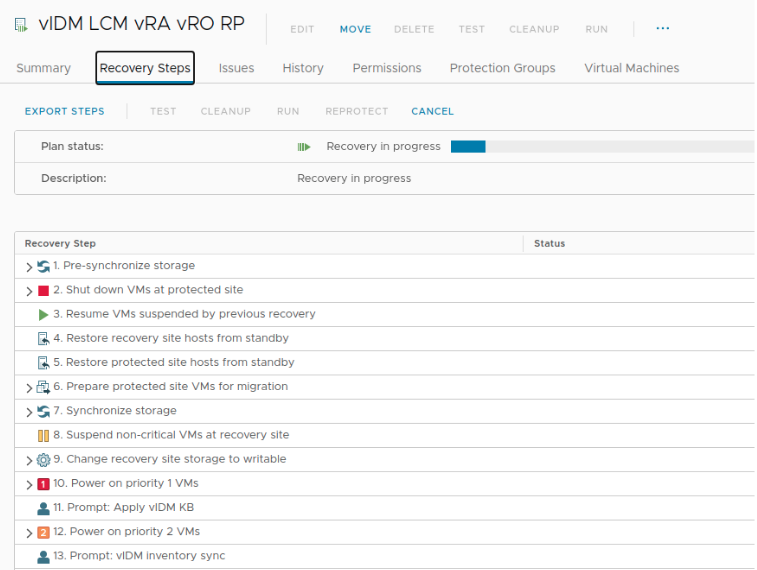
- After completing the manual task described in the prompt, click Dismiss.
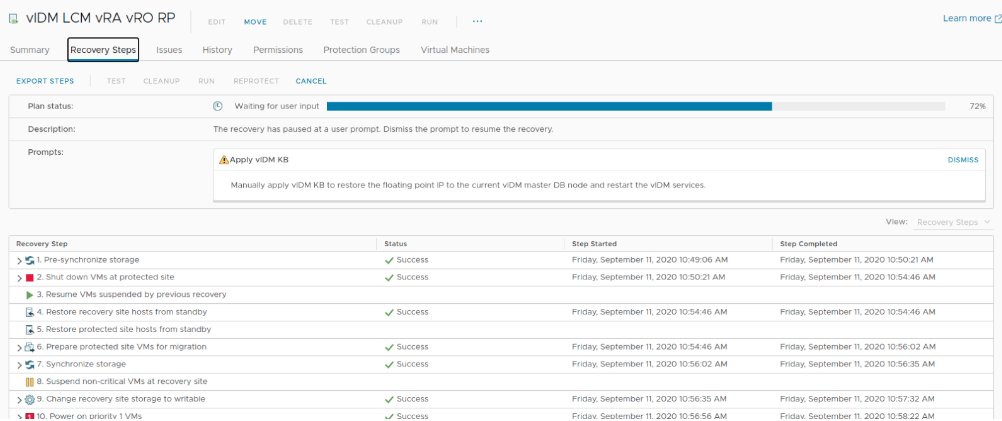
- If Identity Manager cluster deployment is configured by VMware Aria Lifecycle Manager, complete the manual steps described in the next prompt, and click Dismiss.
- When prompt to perform vIDM inventory sync, synchronize the vCenter Server inventory with VMware Aria Suite Lifecycle Manager:
- Log in to VMware Aria Suite Lifecycle Manager and navigate to Lifecycle Operations > Environments
- Click View Details on the Identity Manager globalenvironment. Open the actions menu and click Trigger Inventory Sync.
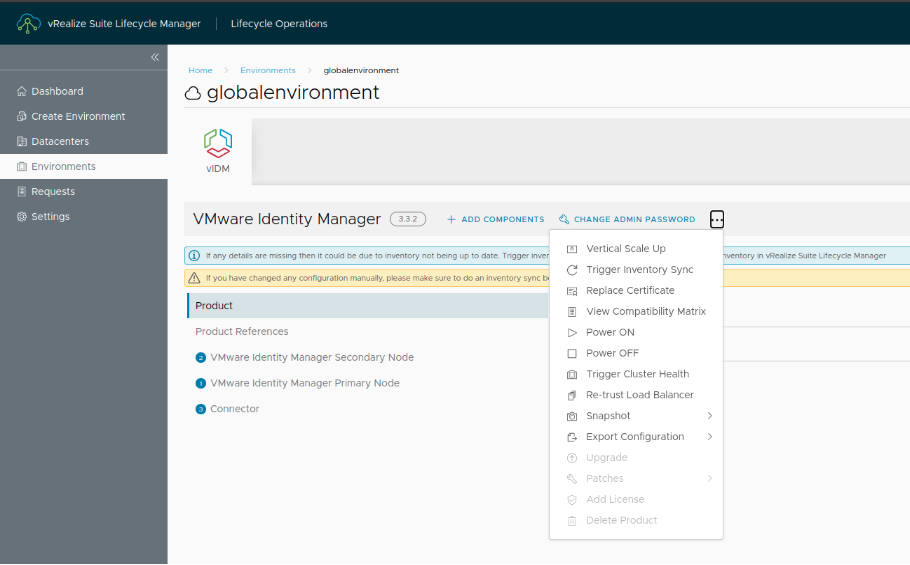
- Click Submit.
The inventory sync request will first fail, while trying to discover the Identity Manager VM(s) on the failed vCenter Server site
- Click Retry, provide the new vCenter Server site access details, and click Submit.

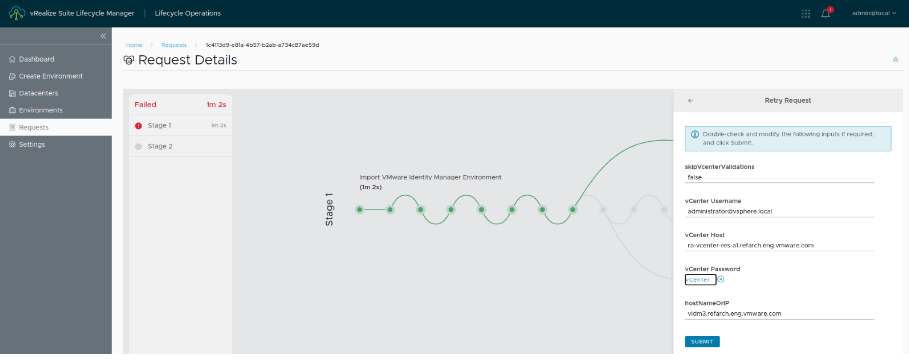
- Wait until the request is completed. To verify that VMware Aria Suite Lifecycle Manager must be able to manage Identity Manager again, click Export Configuration > Advanced action, and verify that the vCenter Server details are updated with the new vCenter Server site.
- When prompt to perform Wait for vRA services, verify the state of the VMware Aria Automation services.
- Using SSH, log in to one of the VMware Aria Automation nodes, and run the vracli status services command to verify that all services are ready.
Note:
To monitor the initialization for all VMware Aria Automation pods, you can run the kubectl -n prelude get pods command.
- Using SSH, log in to one of the VMware Aria Automation nodes, and run the vracli status services command to verify that all services are ready.
- When the recovery plan reaches the vRA inventory sync prompt step
- Log in to VMware Aria Suite Lifecycle Manager and navigate to Lifecycle Operations > Environments.
- Click View Details on the VMware Aria Automation environment, open the actions menu, and click Trigger Inventory Sync:

- Click Submit.
The inventory sync request will first fail, while trying to discover the VMware Aria Automation VMs on the failed vCenter Server site.
- Click Retry, provide the new vCenter Server site access details, and click Submit.


- Wait until the request is completed. To verify that VMware Aria Suite Lifecycle Manager must be able to manage VMware Aria Automation again, click Export Configuration > Advanced action, and verify that the vCenter Server details and VM IDs are updated with the new vCenter Server site.
- Click Dismiss to resume the recovery plan.
- When the recovery plan is completed, you can start using the recovered VMware Aria Automation.
- Validate the recovered VMware Aria Automation environment
- Login to the VMware Aria Automation portal with Active Directory user
- Navigate to Cloud Assembly > Infastructure and verify that all available Cloud Accounts and Integrations are operational and when relevant recent data-collection has completed successfully.
- Navigate to Service Broker > Catalog and ensure all previous catalog items are present.
- Request some catalog items from different content sources (VMware Cloud Templates, VMware Aria Orchestrator workflow, etc.) and verify the successful completion.