


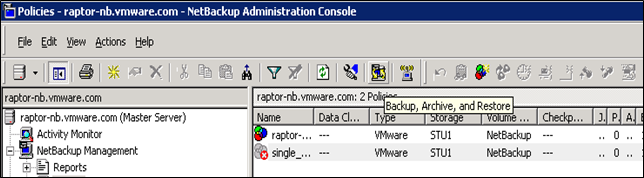
You can restore the backed up data for vRealize Suite components by using NetBackup.
Prerequisites
Verify that a backup of the vRealize Suite components is available.
Procedure
- Start NetBackup Administration Console and click the Backup, Archive, and Restore icon from the toolbar.
- In the Backup, Archive, and Restore utility window, select .
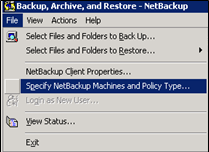
- In the Specify NetBackup Machines and Policy Type window, configure the NetBackup machines and policy type.
- In Server to use for backups and restores, select the IP address or FQDN of the system that hosts NetBackup Master server. If the IP address or FQDN you want is not listed, click Edit Server List, add the IP address or FQDN, and select it.
- In Source client for restores (or virtual client for backups), select the client name from the drop-down menu. If the client that was backed up is not listed, click Edit Client List, add the VM name, and select it.
- In Destination client for restores, enter the destination server name on which the VMs should be restored. This destination selection is not final.
- In Policy type, select the same policy type that you configured for backup. To restore a VM configured with VMware policy, select VMware.
- Click OK.

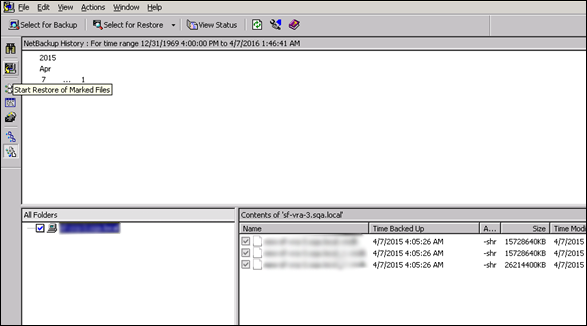
- In the Backup, Archive, and Restore window, click .
The NetBackup History is displayed.

- Select the file that you want to restore and click the Start Restore of Marked Files icon from the left toolbar. To restore a complete VM, select all files listed in the lower-right panel.
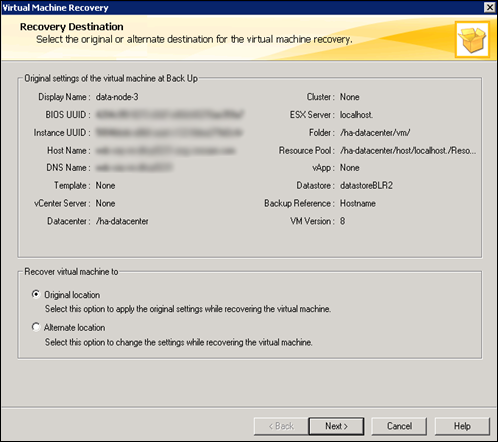
- In the Recovery Destination window, select the original or alternate location for the VM to restore and click Next.
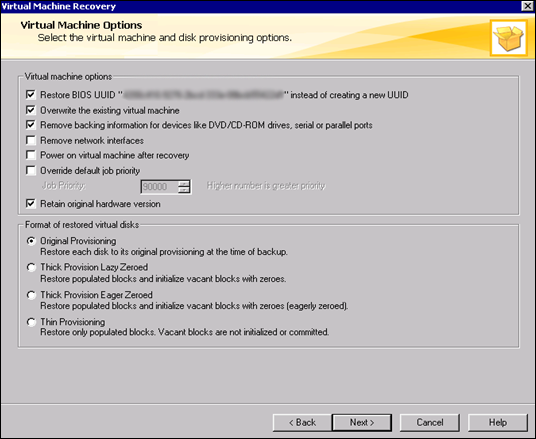
- In the Virtual Machine Options window, select the virtual machine and disk provisioning options and click Next.
- For Virtual machine options, select the Restore BIOS UUID "<exisiting UUID>" instead of creating a new UUID option.
- Select the Overwrite the existing virtual machine option.
- Select the Remove backing information for devices like DVD/CD-ROm drives, serial or parallel ports option.
- Ensure that Power on virtual machine after recovery option is not selected.
- For Format of restored virtual disks, select Original Provisioning to restore each disk to its original provisioning at the time of backup.
- Click Next.
- After the pre-recovery check is finished, click Start Recovery to restore the backup of the VMs.

Results
The time it takes to restore can vary from a few minutes to hours, depending on the environment settings.
What to do next
After the restore is finished, start the cluster and verify that the system is working correctly. After you restore your vRealize Suite components, refer to the validation process for each component in Restoring, Powering On, and Validating vRealize Suite to verify that your system is working correctly.
If any cluster displays the status waiting for analytics in vRealize Operations Manager after the restore is finished, restart the analytics service. See Restart the Cluster Analytic Service.
