


You can assign NSX security tags to virtual machines (VMs) using the Security Intelligence visualization canvas.
Overview
You can use the Security Intelligence visualization canvas to assign NSX tags to a VM or multiple VMs at the same time. Prior to Security Intelligence 4.1.1 release, you can only assign NSX tags to a VM in the UI using the tab.
You can assign an existing tag or create a new tag to assign to the VMs you have selected in the Security Intelligence visualization canvas. When new tags are created, they are added to the NSX tags inventory and can be viewed on the UI page. When tags are assigned successfully, the assignment details can be viewed using the UI page.
- Tag name, which is analogous to a value. It is required, must be unique, and is case-sensitive.
-
The scope is optional. It is analogous to a key.
For example, if you want to label all virtual machines based on their operating system (Windows, MacOS, or Linux), you can create three tags, such as Windows, Linux, and MacOS, and set the scope of each tag to OS. Other examples of tag scope can be tenant, owner, or name. After you create and save a new tag, you cannot update its name and scope. However, you can unassign or remove tags from a VM object.
- You can only assign tags to VMs. You cannot assign them to a physical server or an IP address.
- A maximum limit of 30 tags can be assigned per VM.
- A maximum limit of 1000 VMs can be tagged simultaneously.
You can unassign a tag from a VM entity but you cannot delete a tag from the NSX tags inventory.
Assign a tag to a single VM
- After logging in to the NSX Manager with admin privileges, select .
- Select Computes in the Discover view selection area.
Alternatively, while in the Groups view, you can deep dive into a group to see the VM members that belong to the group.
- (選擇性) Use the filtering mechanism to reduce the number of compute entities displayed in the visualization canvas.
- Right-click the node for the VM that you want to tag and select VM Information from the contextual menu.
- In the dialog box displayed for the selected VM’s information, locate the Tags information and click Edit.
The Edit Tag Assignment dialog box is displayed.
- To assign an existing tag to the selected VM, click the Tag text box and select a tag from the drop-down menu. You can type ahead to narrow down the selection list.
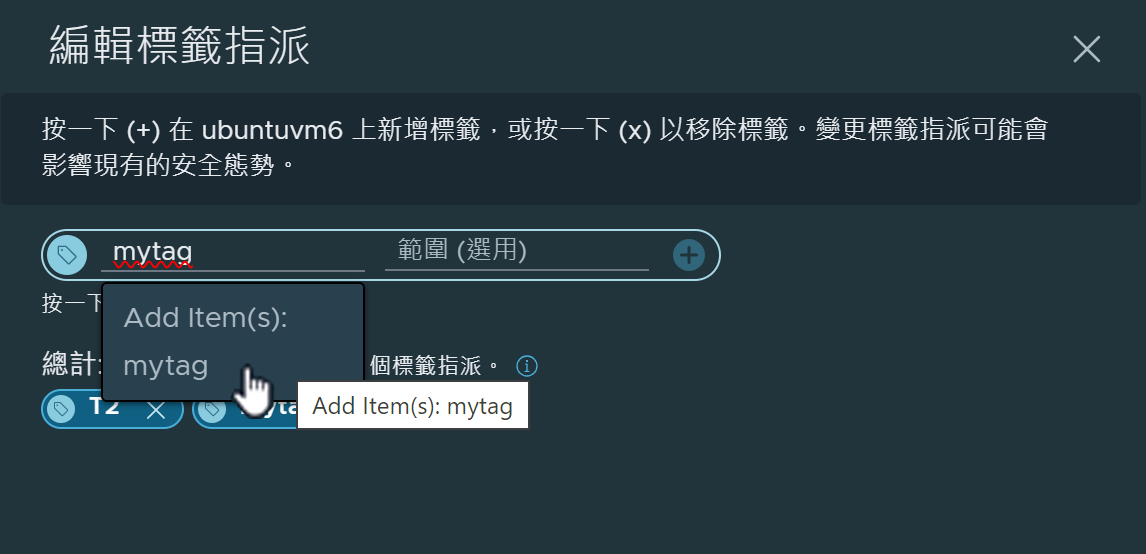
- (選擇性) To assign a new tag, click the Tag text box and type the name of the new tag. When the new name appears in the drop-down menu, select it, as shown in the following image. The maximum length allowed for the tag name is 256 characters.
- (選擇性) In the Scope text box, specify the scope name by selecting from the available scope or assign a new scope name.
If using a new scope name, type the new name and select the name when it appears in the drop-down menu.
- To complete the assignment, click the + icon or press Enter.
It can take a few minutes for the tag assignment to be reflected in the Security Intelligence VM information, but the tag assignment for the VM is updated in the NSX inventory immediately after you assign it.
- Click Close.
- (選擇性) To verify that the tag has been assigned before the Security Intelligence VM information gets updated, select . Locate the VM whose tag information you just updated and click the number in the Tags column to view the tag assignment details.
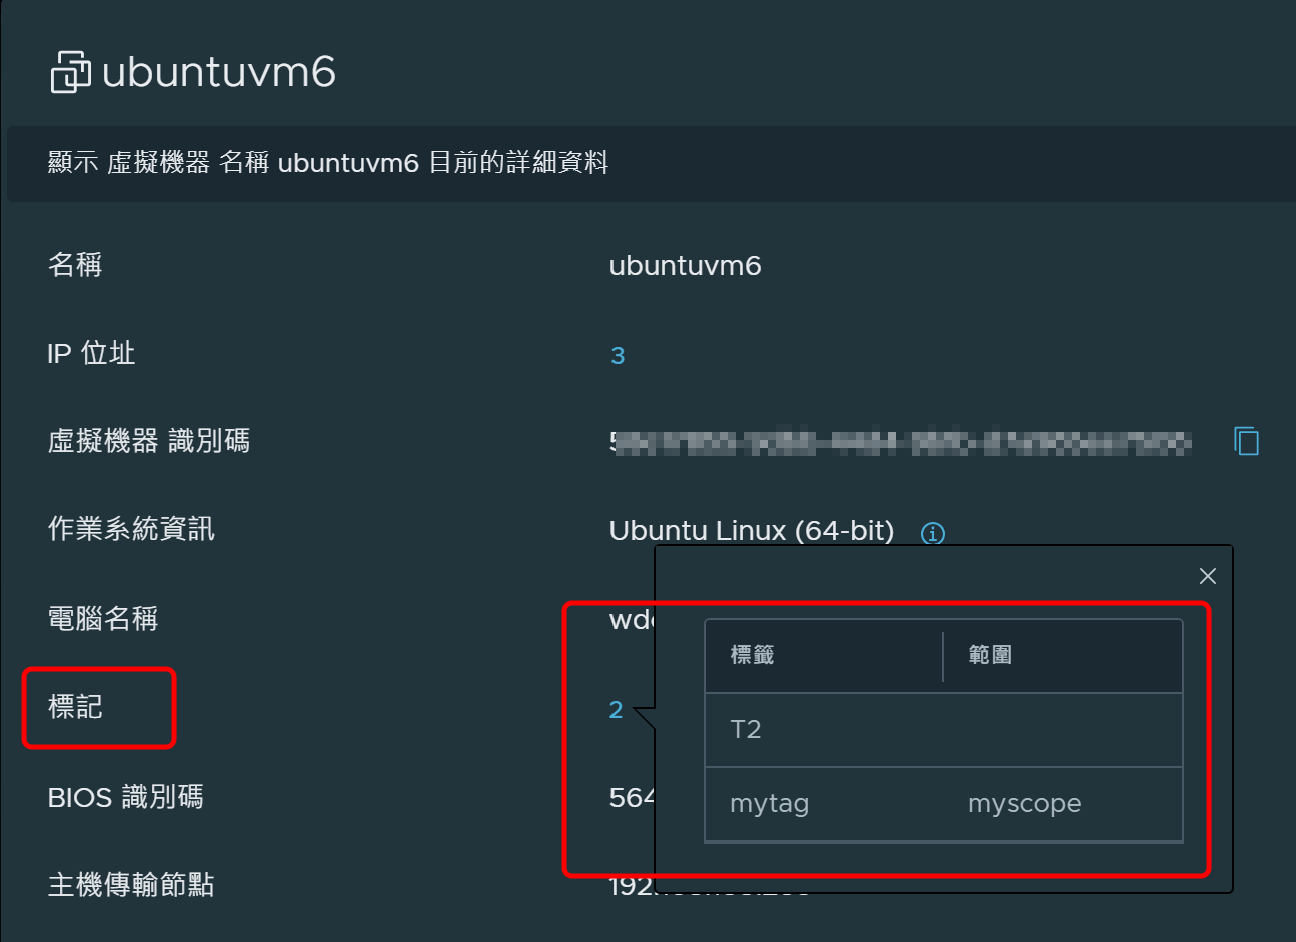
- After a few minutes, right-click the node for the VM node in the Security Intelligence canvas and select VM Information from the contextual menu, and click the number in the Tags section, as shown in the following image.
Assign a tag to multiple VMs
You can assign a tag to multiple VMs simultaneously.
- After logging in to the NSX Manager with admin privileges, select .
- Select Computes in the Discover view selection area.
Alternatively, while in the Groups view, you can deep dive into a group to see the VM members that belong to the group.
- (選擇性) Use the filtering mechanism to reduce the number of compute entities displayed in the visualization canvas.
- Click the select control icon
 from the viewing control toolbar on the lower-right corner of the visualization canvas.
 - Select multiple VMs in the Computes view by clicking and dragging your cursor over the VMs you want to make a tag assignment or continuously select the VMs by pressing Shift+click for each VM.
- Click the tag icon
 in the Selected toolbar located to the right of the Flows section.
 The Tag Assignment dialog box appears and displays the preselected VMs that are currently active. Remote or deleted VMs are filtered out from the displayed list.
The number of selected VMs that are eligible for tag assignment is displayed under the dialog box's title, as shown in the following image. It is possible that not all of the preselected VMs can be assigned a tag. For example, if a VM already has 30 tag assignments, it is ineligible to be tagged again due to the limit of 30 tag assignments per VM.
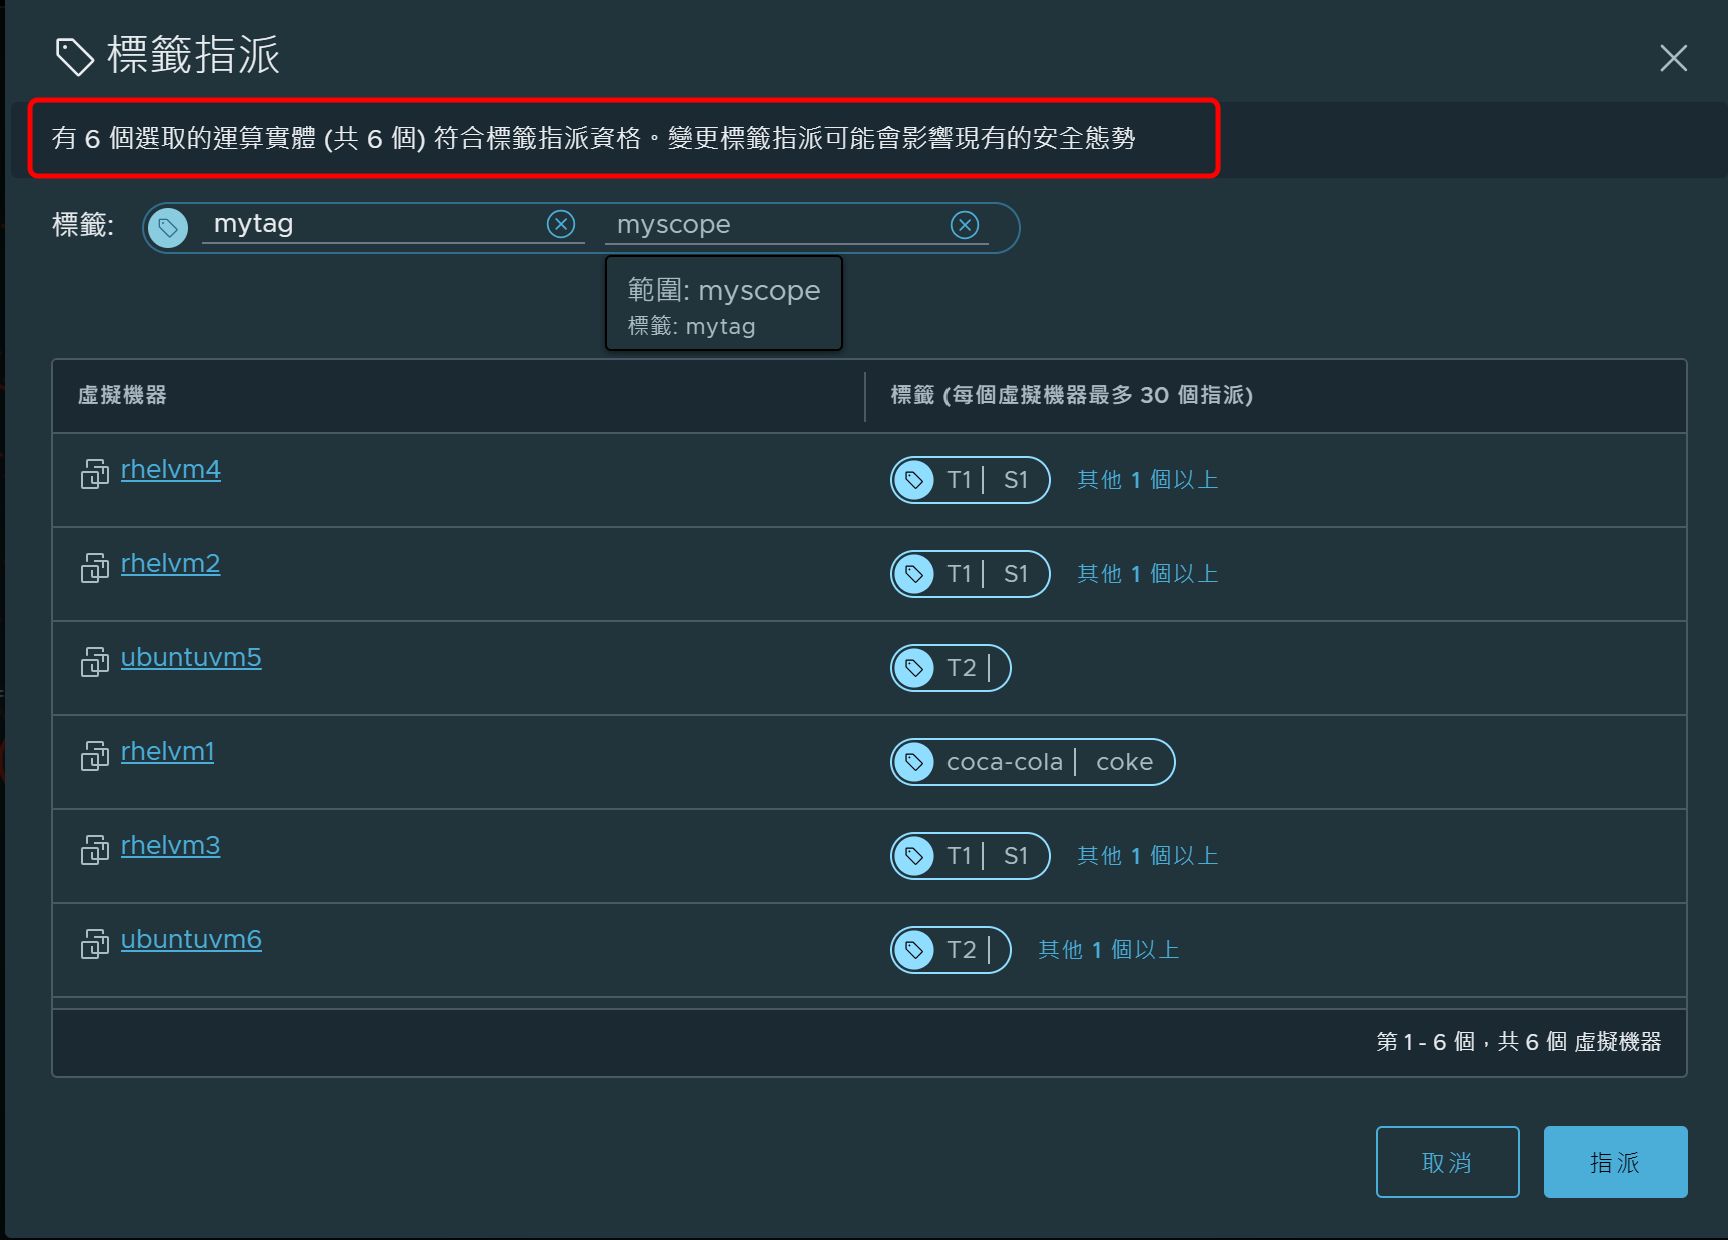
The VMs column in the Tag Assignment table lists the names of the preselected VMs. In the Tags column, information about the tags currently assigned to each VM are displayed. If more than one tag is assigned to a VM, the number of additional tags assigned is displayed to the right of the first tag name. Clicking the number for the additional tags displays the drop-down menu of the other assigned tags for the VM.
- To assign an existing tag to all of the preselected VMs, click inside the Tag text box and select from the drop-down menu of available tags from the NSX inventory. You can type ahead to narrow down the selection list.
- (選擇性) To assign a new tag, click the Tag text box and type the name of the new tag. When the new tag name appears in the drop-down menu, select it, as shown in the following image. The maximum length allowed for the tag name is 256 characters.
- (選擇性) In the Scope text box, specify the scope name by selecting from the available scope or assign a new scope name.
If using a new scope name, type the new name and select the name when it appears in the drop-down menu. The maximum length allowed for the Scope name is 128 characters.
- Click Assign.
When the tags are successfully assigned, a status banner appears at the bottom left corner of the canvas, similar to the following image.

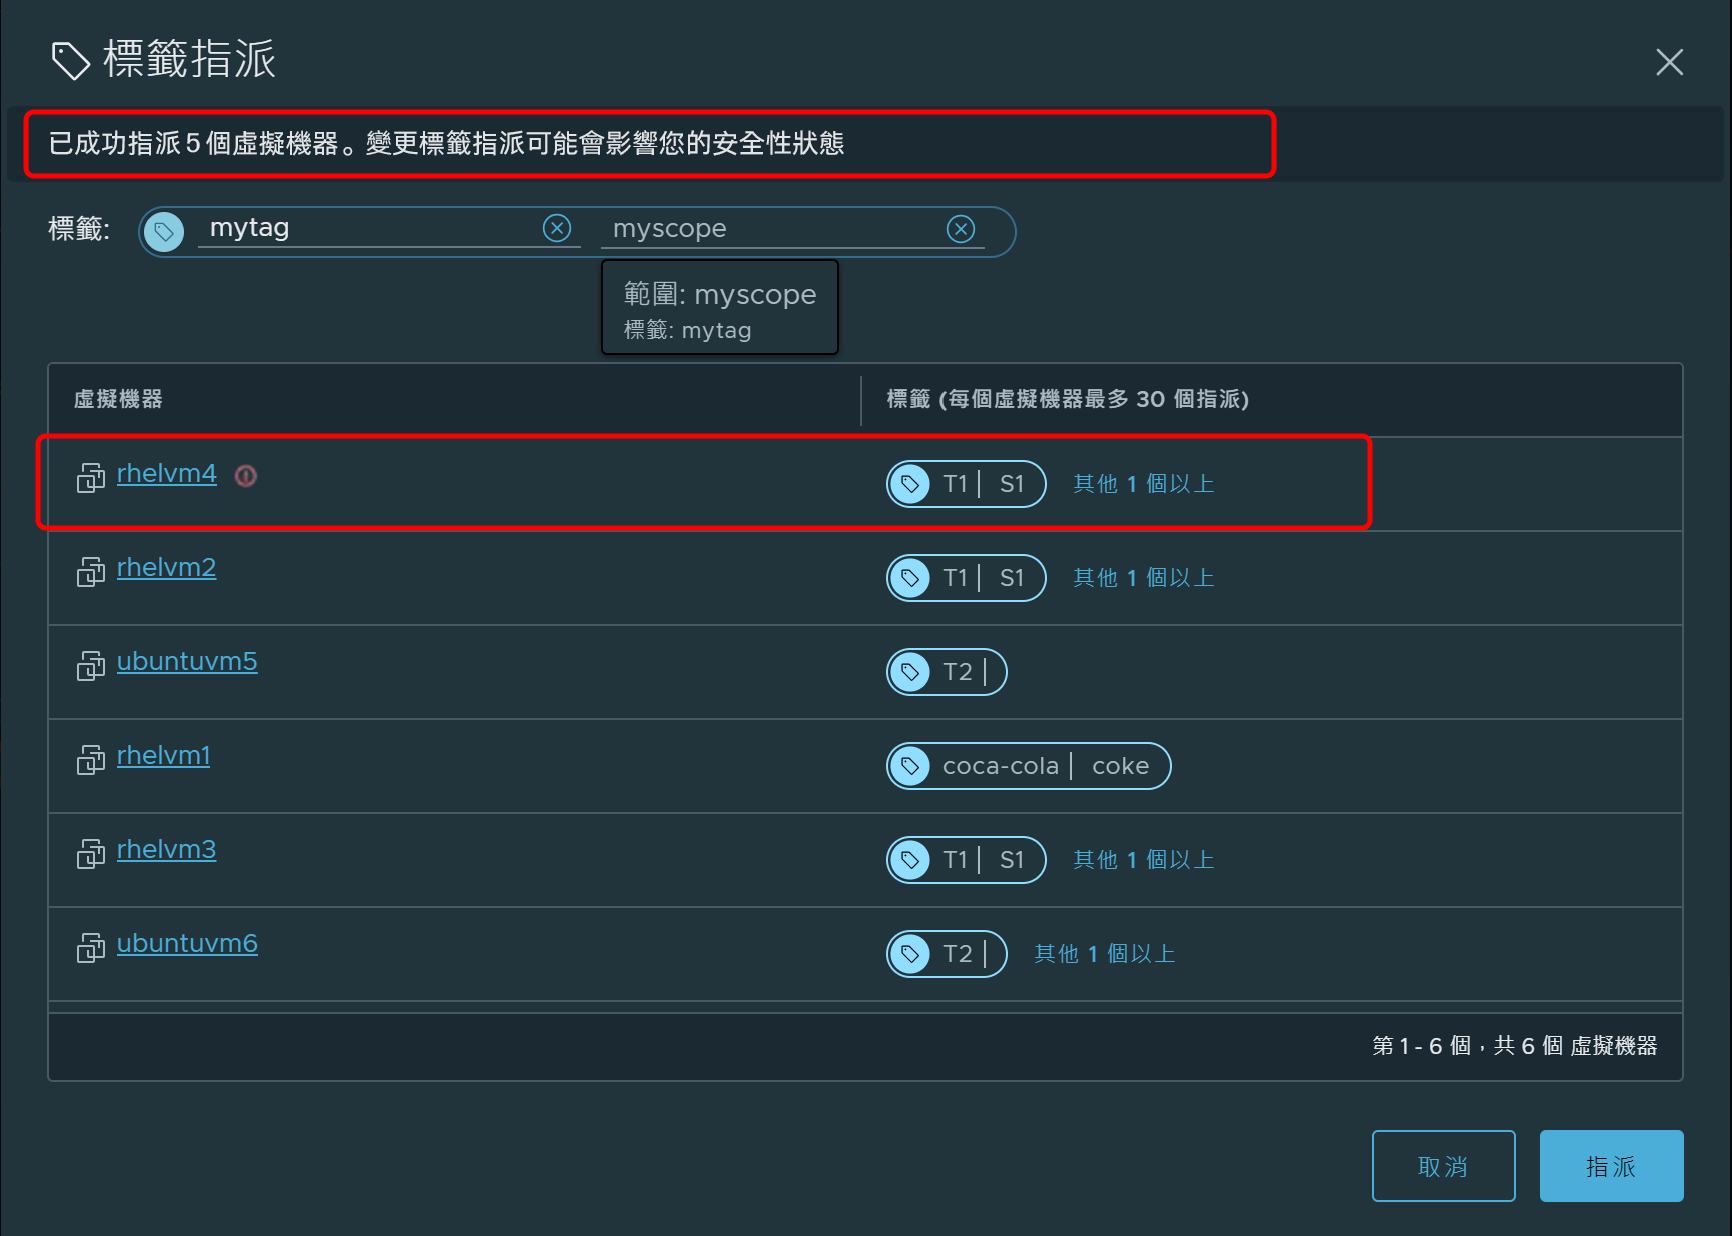
If an error occurs when trying to assign the tag name to at least one VM, the information about that VM is moved to the top of the table and an error badge is displayed next to its name, as shown in the following image. All other tag assignments proceeds. The number of VMs that are successfully assigned the tag is indicated at the top of the Tag Assignment dialog box.
備註: It can take a few minutes for the new tag assignment information to be reflected on the Security Intelligence visualization canvas. - (選擇性) To verify that the tag has been assigned before the VM information gets updated in the Security Intelligence visualization canvas, select . Locate the VM whose tag information you just updated, navigate to the Tags column, and confirm the tag assignment completed successfully.
- After a few minutes, in the Security Intelligence visualization canvas, right-click the node for each of the VMs that were assigned a new tag and select VM Information from the contextual menu. Click the number in the Tags section to view all the tags assigned to the VM.
Remove a tag assignment for a single VM
Use the following steps to remove a tag assignment from a VM. You cannot remove tag assignments for multiple VMs simultaneously.
- After logging in to the NSX Manager with admin privileges, select .
- Select Computes in the Discover view selection area.
Alternatively, while in the Groups view, you can deep dive into a group to see the VM members that belong to the group.
- (選擇性) Use the filtering mechanism to reduce the number of compute entities displayed in the visualization canvas.
- Right-click the node for the VM from which you want to unassign a tag and select VM Information from the contextual menu.
- In the dialog box displayed for the selected VM’s information, locate the Tags information and click Edit.
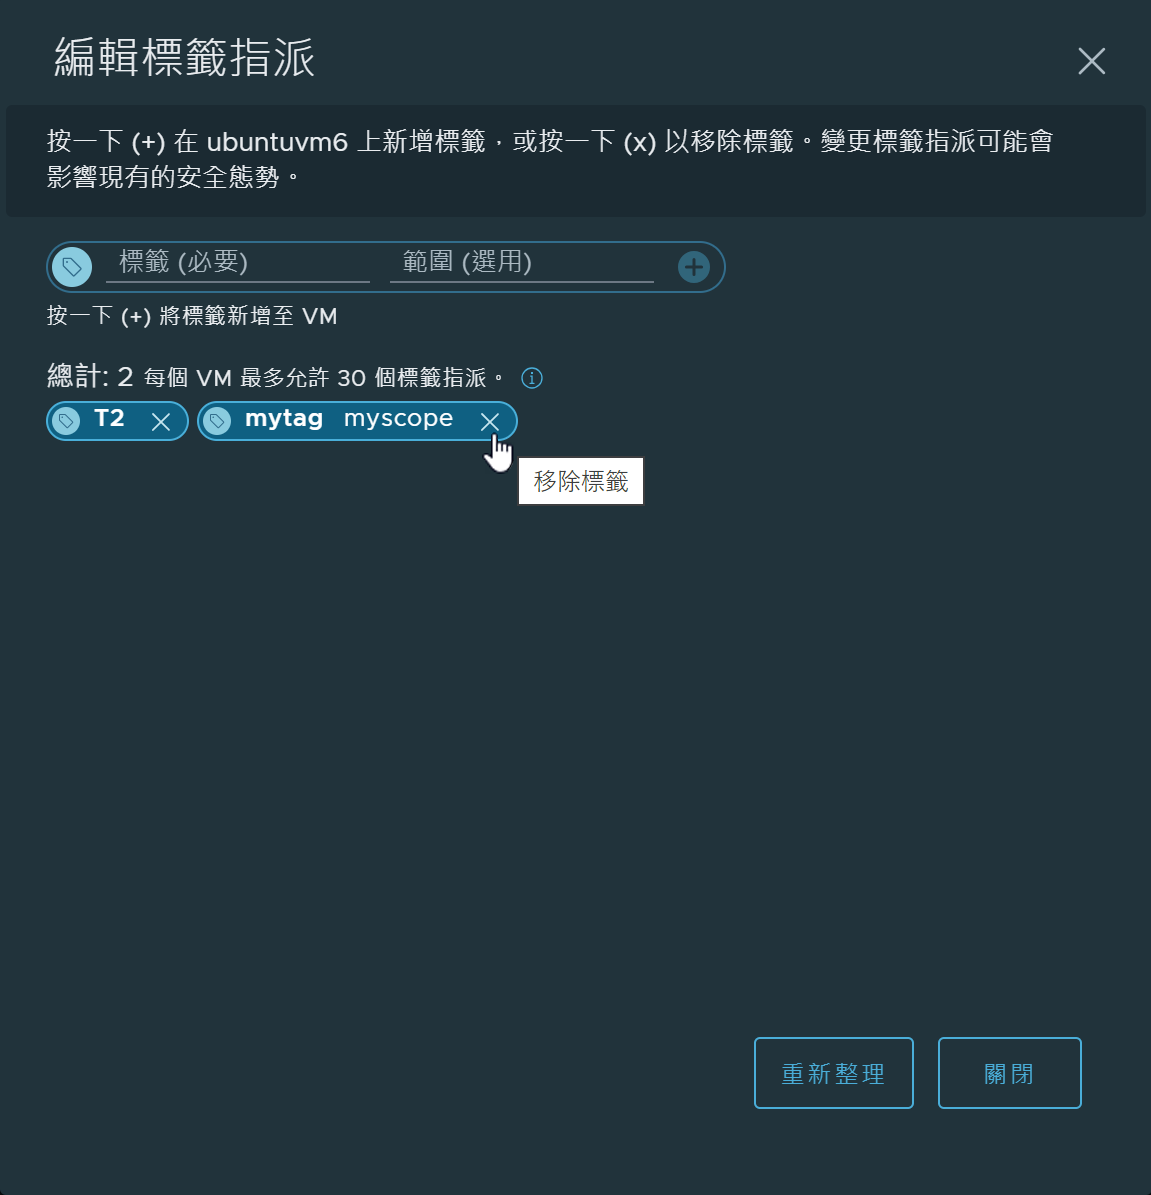
The Edit Tag Assignment dialog box is displayed.
- Locate the tag that you want to unassign from the VM and click the X on the right side of the tag, as illustrated in the following image.
備註: It can take a few minutes for the removal of the tag assignment to be reflected in the VM information on the Security Intelligence visualization canvas. - (選擇性) To verify that the tag has been unassigned from the VM before the VM information gets updated in the Security Intelligence visualization canvas, select . Locate the VM whose tag information you just updated, navigate to the Tags column, and verify that the tag assignment has been removed.
- After a few minutes, in the Security Intelligence visualization canvas, right-click the node for the VM from which you remove a tag assignment. Select VM Information from the contextual menu, locate the Tags section, and confirm that the tag assignment was removed from the VM.
