This topic tells you how to install and configure Anti-Virus for VMware Tanzu.
Before you install Anti-Virus for Tanzu, VMware recommends that you download and install the Anti-Virus for VMware Tanzu Mirror tile. For more information about the Anti-Virus Mirror for Tanzu tile, see Installing and Configuring Anti-Virus for VMware Tanzu Mirror.
Prerequisites
To install Anti-Virus for Tanzu, you must have:
-
Tanzu Operations Manager operator user account with admin rights. For more information, see Platform Operators in the Tanzu Operations Manager documentation.
-
VMware Tanzu Operations Manager. For compatible versions, see the Product Snapshot.
-
At least 4 GB of RAM free for each VM that installs Anti-Virus for Tanzu. Anti-Virus for Tanzu installs itself on each tile VM and runs internally. Anti-Virus for Tanzu takes at least 3 GB of RAM on each VM in reserve. On Google Cloud Platform (GCP), the recommended minimum VM size is
micro.cpuusing 2 CPU and 2 GB RAM. For more information about why Anti-Virus for Tanzu requires this much RAM, see Why Is So Much RAM Required?. -
An external mirror. If you do not have an external mirror, VMware recommends that you install the Anti-Virus Mirror for Tanzu. For instructions, see Installing and Configuring Anti-Virus for VMware Tanzu Mirror.
Install Anti-Virus for Tanzu
Install the Anti-Virus for Tanzu tile on the Tanzu Operations Manager Installation Dashboard:
-
Download the product file from Broadcom Support.
-
Go to the Tanzu Operations Manager Installation Dashboard and select Import a Product to upload the product file.
-
Under the Import a Product button, click + next to the version number of Anti-Virus for Tanzu. This adds the tile to your staging area.
-
Click the newly added Anti-Virus for VMware Tanzu tile.
Configure Anti-Virus for Tanzu
To configure Anti-Virus for Tanzu:
-
Select Anti-Virus Configuration.
-
Configure Mirror for Automatic Database Updates. Use the Official Mirror, Deployed Mirror, Existing Mirror, or Existing Mirror with TLS information.
The following tabs expand to show instructions for each type of mirror.
Field Description Official mirror Select this to have the mirror fetch databases from database.clamav.net. 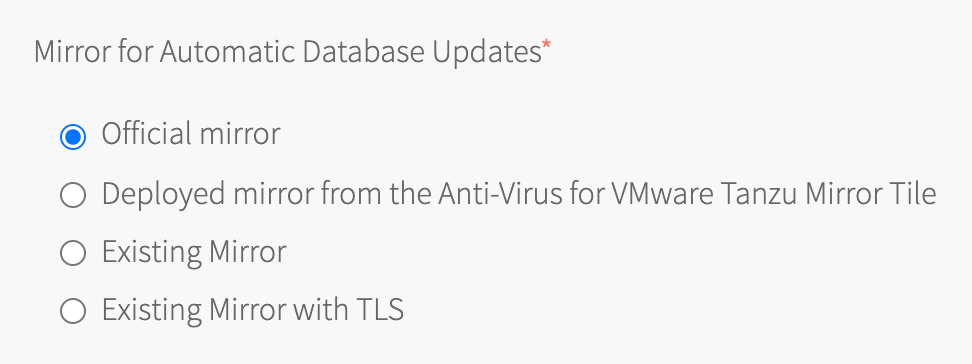
Field Description Deployed mirror from the Anti-Virus for VMware Tanzu Mirror tile Select this when using the Anti-Virus for VMware Tanzu Mirror tile.
For more information, see Installing and Configuring Anti-Virus Mirror.Anti-Virus Mirror port Enter the port for Anti-Virus Mirror to use. The default value is 6501.Note Anti-Virus Mirror uses mutual TLS (mTLS). This port must be the same port used in Anti-Virus Mirror Port of the Anti-Virus for VMware Tanzu Mirror tile. If these ports are not the same, Anti-Virus Mirror database updates and deployments fail.

Field Description Existing mirror Select this to use an existing mirror without TLS. Comma separated list of mirror host names or IPs Enter one or more mirror host names or IP addresses in a comma-separated list. 
Field Description Existing mirror with TLS Select this to enter a host name, port number, and CA certificate. Mirror host name without leading https:// Enter the host name or IP address for your existing mirror.
For example:my-anti-virus-mirror.s3.example.comor10.0.4.5. Verify that your existing mirror server is using the correct certificate for the host name or IP address.Mirror port Enter the port used by your existing mirror.
For example:443Mirror CA certificate Enter the CA certificate used with your existing mirror.
For example:-----BEGIN CERTIFICATE----- MIIEYzCCA0ugAwIBAgIQAYL4CY6i5ia5GjsnhB+5rzANBgkqhki ... upcHi9nzBhDFKdT3uhaQqNBU4UtJx5g= -----END CERTIFICATE-----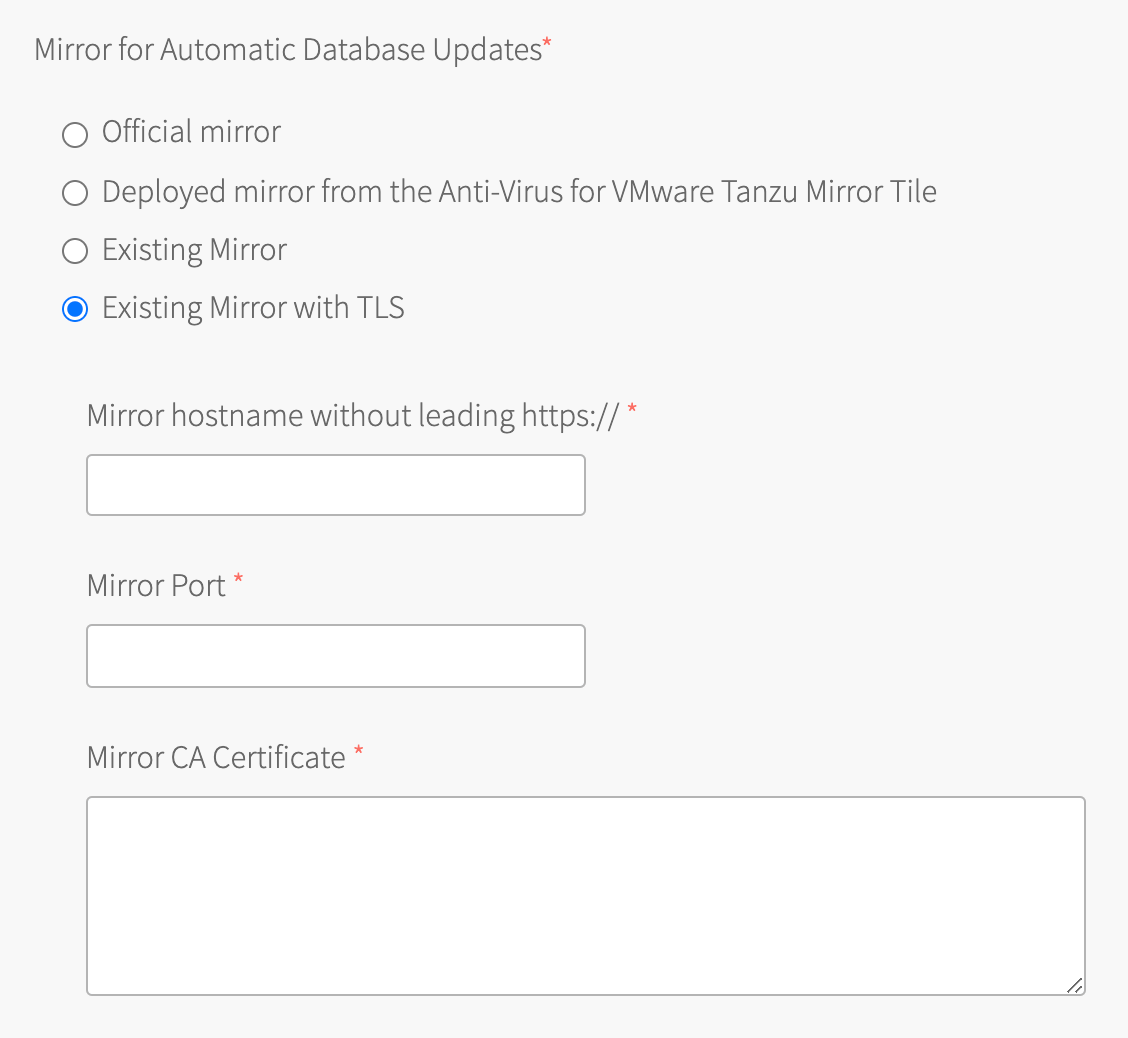
-
Configure the remaining fields:
Field Description (Optional) Enable on-access scanning on Linux Select this option to scan files immediately after they are modified. Note On-access scan is not supported on Windows.
Also, due to the dynamic nature of application containers mounted on thediego_cellVM, On-access scan cannot scan containers. Scheduled scans scan containers.Memory limit (in bytes) Enter the maximum amount of user memory (including file cache) in bytes that Anti-Virus for Tanzu can use. The default value is 4294967296, which is the recommended minimum value.Number of database checks per day Set how often VMs check the mirror for virus database updates. This is the mirror you selected for automatic database updates, above. The default value is 12.Timeout to connect to the database server (in seconds) Set the timeout for downloading virus definitions from the mirror server configured in Mirror for Automatic Database Updates. The default value is 30.CPU limit (percentage) Set the percentage of CPU that the Anti-Virus for Tanzu processes can use.
Integers from1to100are valid.
Setting this field to100permits the use of one full core.Note CPU Limit affects only one core. For example, in a system with four cores, if you set the CPU limit to
100, Anti-Virus for Tanzu uses only one of the four cores.Note This setting does not affect CPU usage on a Windows VM.
Enforce CPU limit Set the enforcement policy for the CPU limit:
- Always: Ensures the CPU limit is always enforced.
- When other processes are using CPU resources: Permits the CPU usage to exceed the limit set by CPU limit if idle CPU cycles are available.
Warning: If Enforce CPU limit is set to
Enable, ensure CPU limit (percentage) is set high enough for Anti-Virus for Tanzu to execute normally. If the limit is too strict, Anti-Virus for Tanzu fails to start.Action to take when a virus is found Select one of the following options:
- Notify: (Default) Only send a notification to syslog.
- Remove: Delete the infected file from the file system.
- Move: Move the infected file to a specified directory.
- Copy: Copy the infected file to a specified directory.
Destination for infected files Enter the directory location where you want the infected files moved or copied to. This field only appears if you have selected the move or copy while selecting an Action to take when a virus is found. Note Add this path to the Directories and files are ignored (on Windows) list. If you do not do this, then Anti-Virus for Tanzu:
- Detects the moved or copied file
- Logs redundant alerts
- Creates additional copies of the detected file
Directories and files that will be ignored Enter directories in a comma-separated list for Anti-Virus for Tanzu to not scan on Linux. The default value is " /proc/,/sys/". This configures Anti-Virus for Tanzu scans to exclude the/procand/sysdirectories.
VMware recommends that you ignore the/proc,/sys, and Destination for infected files directories.Directories and files that will be ignored on Windows Enter directories in a comma-separated list for Anti-Virus for Tanzu to not scan on Windows. Note Windows directory paths use backslashes. To match the path using regex, escape the backslashes. For example:
example\directory\pathList of signature names that are ignored (Used for false positives) Enter signature names in a comma-separated list for Anti-Virus for Tanzu to add to the allowlist. For example,
Eicar-Test-Signature, Clamav.Test.File-7
configures Anti-Virus for Tanzu to ignore the Eicar Test File and ClamAV Test File-7 signatures.List of instance group names that will be excluded from deployment Enter the instance groups that you do not want Anti-Virus for Tanzu deployed on. Use a comma-separated list. 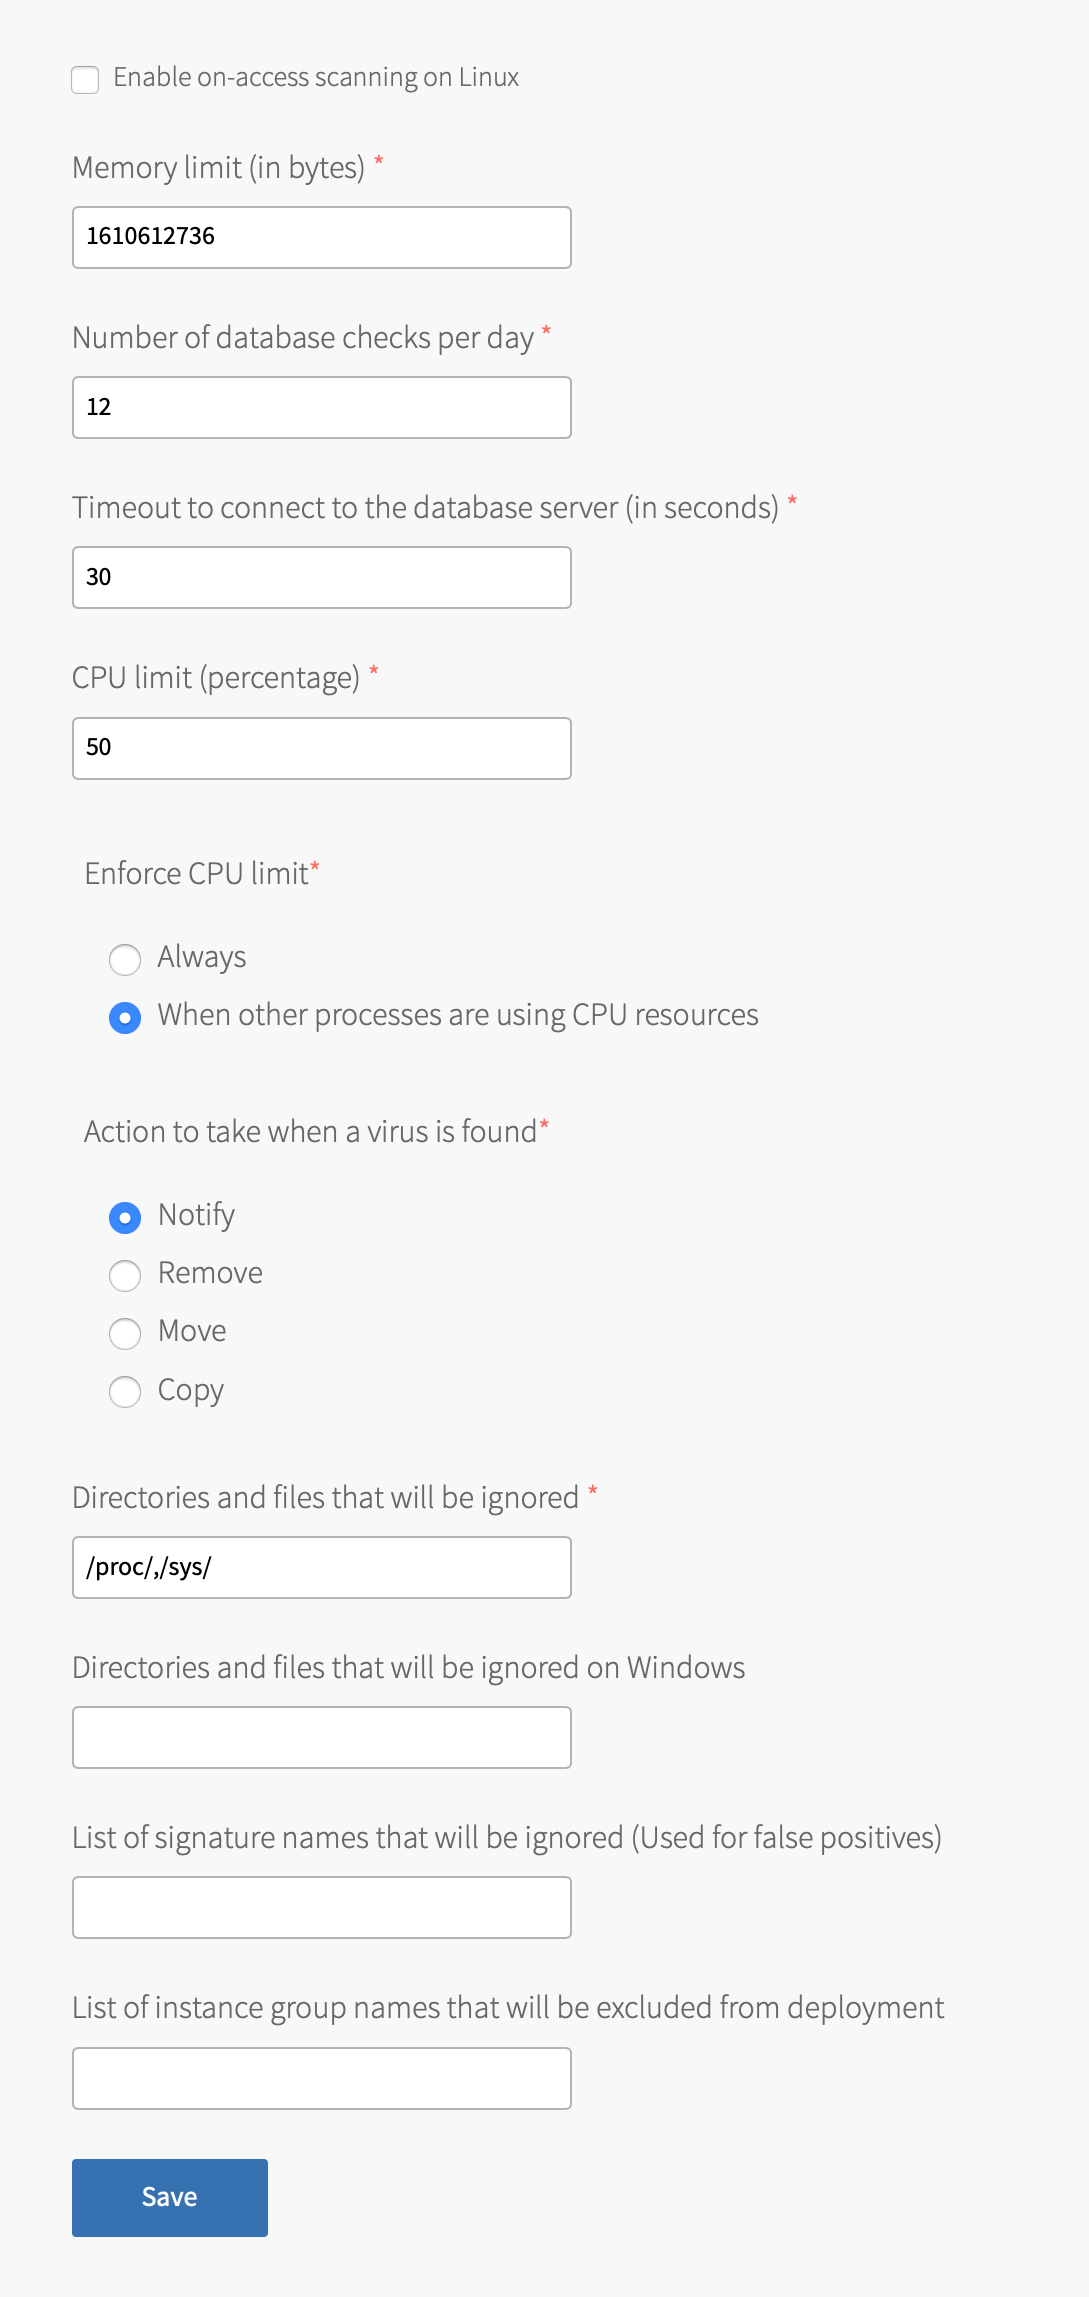
-
Click Save.
If a scan reports false positives, report the issue to ClamAV. For more information about false positives, see Anti-Virus Reports False Positives. It takes about a week for ClamAV to verify and publish a new database.
Configure HTTP Proxy
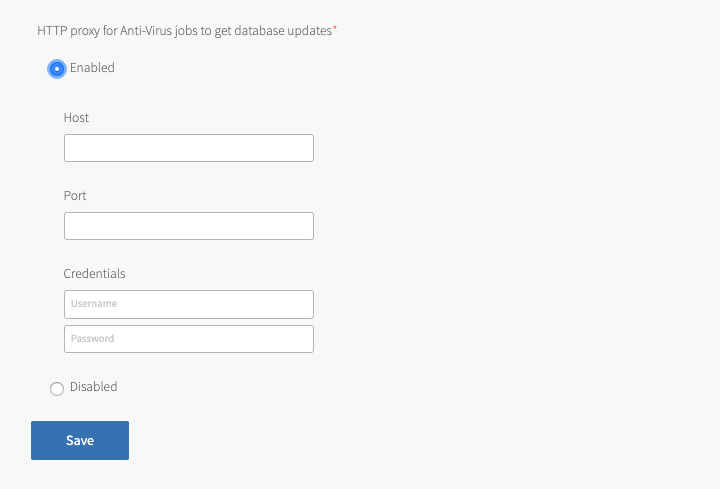
If you require a proxy server for Anti-Virus for Tanzu jobs to connect to the internet to update their virus definitions, you can configure one:
-
Select HTTP Proxy Configuration for Anti-Virus Jobs.
-
Set HTTP proxy for Anti-Virus jobs to get database updates to Enabled.
- Enter the Host, Port, Username and Password in the fields that appear.
- Click Save.
Configure Scheduled Scan
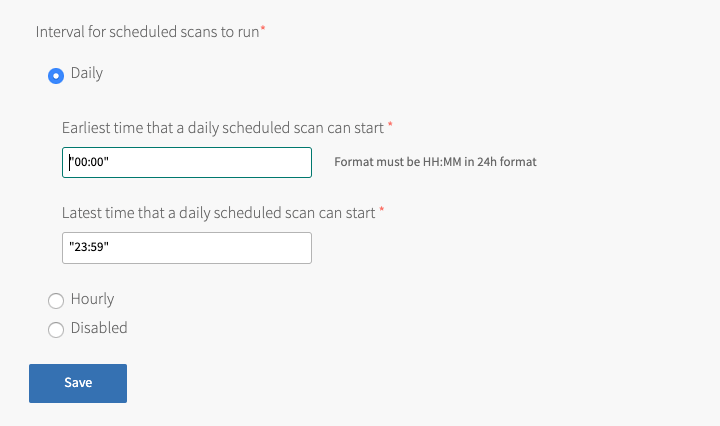
You can configure Anti-Virus for Tanzu to run a virus scan hourly or daily. The default value is daily. The format of these values must be in 24-hour format HH:MM.
To change the scheduled scan value:
-
Select Scheduled Scans.
-
Set Interval for scheduled scans to run to one of these options:
- Hourly
- Daily (default)
- Disabled
-
(Optional) If you selected Daily scheduled scans, you can restrict the interval. To do this, set Earliest time that a daily scheduled scan can start and Latest time that a daily scheduled scan can start.
-
Click Save.
Apply Changes from Your Configuration
Your installation is not complete until you apply your configuration changes. To do so:
- Return to the Tanzu Operations Manager Installation Dashboard.
- Click Review Pending Changes.
- Ensure all products are selected and click Apply Changes.
(Optional) Configure Anti-Virus for Tanzu to Exclude Duplicate Logs on Containers
You can use Anti-Virus for Tanzu to scan:
- Garden containers on the Diego Cell VMs in VMware Tanzu Application Service for VMs (TAS for VMs).
- Containers on the Kubernetes worker node VMs in Enterprise Tanzu Kubernetes Grid Integrated Edition (Enterprise TKGI).
However, duplicate logs about the same file appear under the diff, rootfs, or merged directories as a consequence of OverlayFS implementation.
To configure Anti-Virus for Tanzu to ignore duplicate logs for these directories, see the optional Exclude Duplicate Logs on Garden Containers or Exclude Duplicate Logs on Containers in Enterprise TKGI sections:
(Optional) Exclude Duplicate Logs on Garden Containers
When Anti-Virus for Tanzu scan results detect potential malware on Garden containers, logs are reported for both the diff and rootfs directories.
This is because the rootfs directory is the projection of the diff directory on top of a base image layer, therefore it is safe to ignore the rootfs directory. GrootFS mounts the underlying volumes using OverlayFS to a point in the images directory. This mount point is the rootfs directory for the container and is read-write.
For more information about GrootFS OverlayFS implementation, see Volumes in the Cloud Foundry documentation.
Procedure
To configure Anti-Virus for Tanzu to ignore duplicate logs for these directories:
- Select Anti-Virus Configuration.
-
Enter the following ignore pattern into the Directories and files that are ignored field:
^/var/vcap/data/grootfs/store/(un)?privileged/images/[\w-]+/rootfs/.*$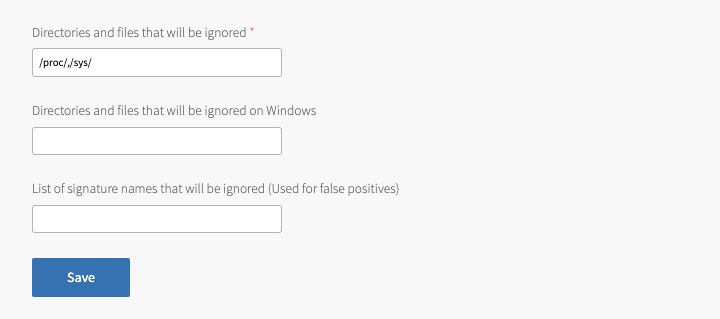
Note Adding this ignore pattern means that files and directories in the
/var/vcap/data/grootfs/store/unprivileged/images/UUID/rootfsdirectory are ignored by Anti-Virus for Tanzu.UUIDis the ID of the container. -
Click Save.
- To apply the configuration change, follow the earlier instructions in Apply Changes from Your Configuration.
For an example log entry, see Container Log Messages.
(Optional) Exclude Duplicate Logs on Containers in Enterprise TKGI
When Anti-Virus for Tanzu scan results detect potential malware on containers of the Kubernetes worker node VMs in Enterprise TKGI, logs are reported for both the diff and merged directories.
This is because the merged directory is the projection of the diff directory on top of a base image layer, therefore it is safe to ignore the merged directory.
For more information about Docker OverlayFS implementation, see Use the OverlayFS storage driver in the Docker documentation.
Procedure
To configure Anti-Virus for Tanzu to ignore duplicate logs for these directories:
- Select Anti-Virus Configuration.
-
Enter the following ignore pattern into the Directories and files that will be ignored field:
^/var/vcap/store/docker/docker/overlay2/\w+/merged/.*$
Note Adding this ignore pattern means that files and directories in the
/var/vcap/data/grootfs/store/unprivileged/images/UUID/mergeddirectory are ignored by Anti-Virus for Tanzu.UUIDis the ID of the container. -
Click Save.
- To apply the configuration change, follow the earlier instructions in Apply Changes from Your Configuration.
For an example log entry, see Container Log Messages.