


This topic describes how to add an Active Directory Federation Services (ADFS) external SAML identity provider to your Single Sign‑On for VMware Tanzu Application Service service plan.
Overview
When you integrate ADFS with your deployment, you must configure an ADFS external SAML identity provider with specific settings. For information about how to add an external SAML identity provider in general, see Add a SAML Provider.
To configure an ADFS external SAML identity provider, do the following:
- Overview
- Download Identity Provider Metadata
- Create a New SAML Identity Provider
- Configure Your New Identity Provider
Download Identity Provider Metadata
Download the metadata from your Active Directory Federation Services (ADFS) server at the following URL: https://ADFS-HOSTNAME/federationmetadata/2007-06/federationmetadata.xml
Create a New SAML Identity Provider
Follow the steps below to create a new identity provider:
-
Log in to the SSO Operator Dashboard at
https://p-identity.SYSTEM-DOMAINas a Plan Administrator. -
Select your plan and click Manage Identity Providers from the dropdown.

-
Click New Identity Provider to access configuration options.
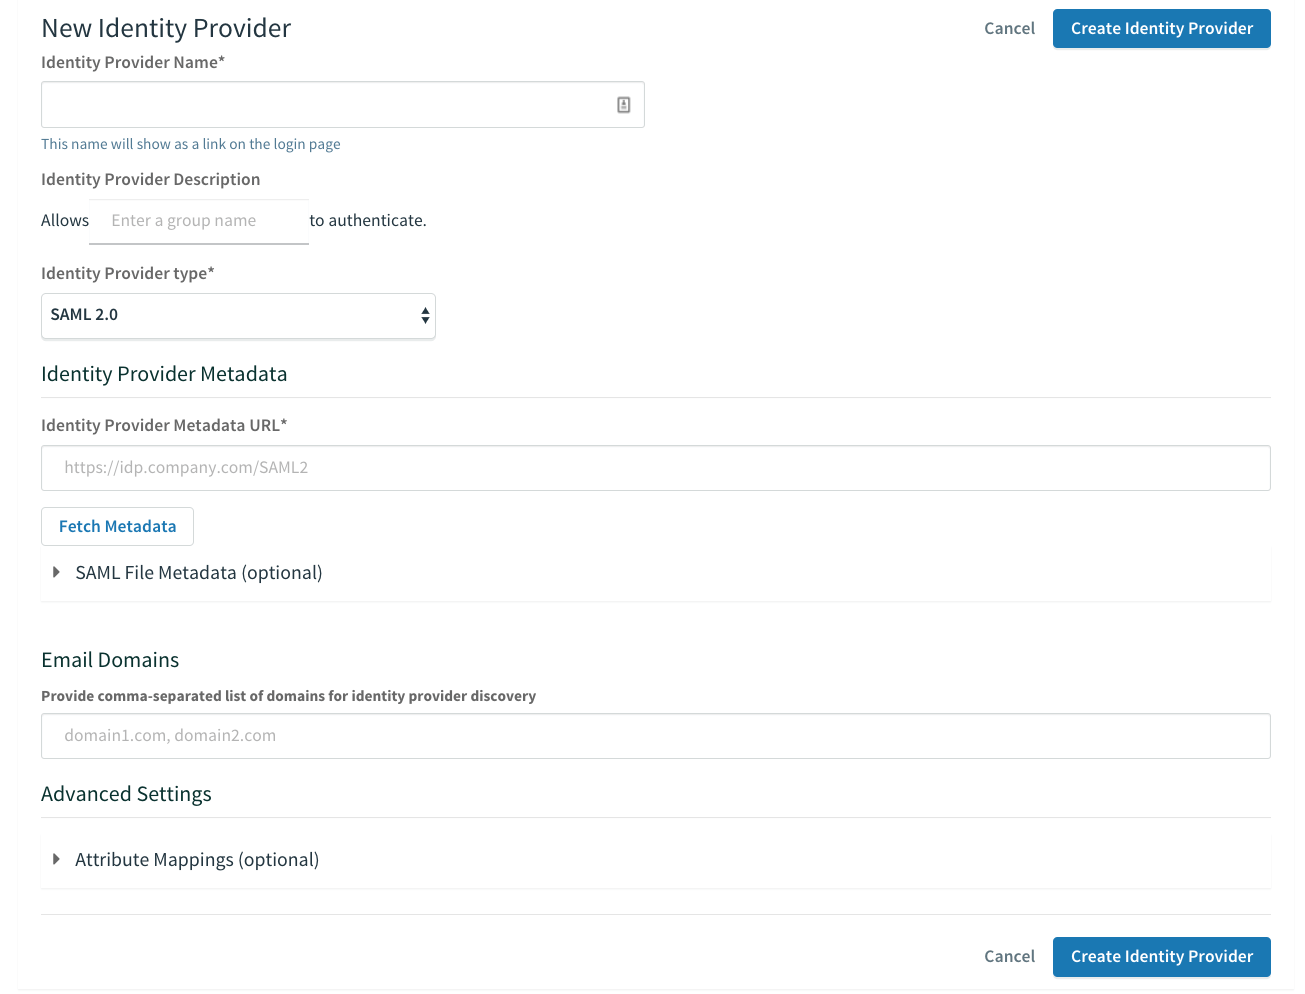
Configure Your New Identity Provider
Follow the steps below to configure a new identity provider:
-
Enter an identity provider name below Identity Provider Name.
-
(Optional) Enter a description under Identity Provider Description. This is displayed to space developers when they select an identity provider for their app.
-
Select SAML 2.0 from the dropdown under Identity Provider Type.
-
Click SAML File Metadata (optional) and then click Upload Identity Provider Metadata to upload the XML metadata that you downloaded from your ADFS server. You do not need to enter a Identity Provider Metadata URL.
Uploading the Identity Provider Metadata as an XML file makes you unable to use the Fetch Metadata option to update your Identity Provider metadata later. If metadata changes on the Identity Provider side, you will have to manually re-upload them as an updated XML file.
-
Enter the email domains you want to include as a comma-separated list under Email Domains.
-
Under Advanced Settings, click Attribute Mappings (optional).
-
Configure User Attributes to determine how user attributes are propagated from the ADFS identity provider to Single Sign‑On. For example, you might want to map ADFS’s SAML groups to Single Sign‑On’s
external_groups.
To map ADFS’s SAML groups to Single Sign‑On’sexternal_groups, do the following:- Under User Schema Attribute, select external_groups.
-
If you followed the steps in Create Custom Value Groups, type
groupsunder Attribute Name. An attribute mapping with a customized SAML assertion value looks like this:
If you did not follow the steps in Create Custom Value Groups, type
http://schemas.xmlsoap.org/claims/groupunder Attribute Name. An attribute mapping with a non-customized SAML assertion value looks like this:
-
Click Create Identity Provider.
-
From the identity provider list, click on the name of the ADFS identity provider and then click Group Whitelist.
-
Follow the instructions in Configure Group Allowlist for an External Identity Provider to enter the ADFS SAML group names to be propagated in the ID tokens generated by Single Sign‑On. These SAML groups are now included in the roles claim of the user’s ID token.
-
From the identity provider list, click on the name of the ADFS identity provider and then click Resource Permissions.
-
Follow the instructions in Create or Edit Resource Permissions Mapping to map the user’s ADFS group memberships to their access token’s scopes. The resource permissions that the SAML groups were mapped to are now included in the scopes claim of the user’s access token.
