


This topic tells you how to set up Okta as your identity provider by configuring SAML integration in both Single Sign‑On for VMware Tanzu Application Service and Okta.
Overview
To set up Okta as your identity provider:
- Overview
- Set up SAML in <%= vars.product_short %>
- Sign in to Okta
- Configure the SAML Settings
- (Optional) Configure Single Logout
- (Optional) Specify Attribute Statements
- Download the Metadata
Set up SAML in Single Sign‑On
To set up SAML in Single Sign‑On, follow the steps in Configure SAML Settings.
Sign in to Okta
To sign in to Okta:
-
Sign in as an Okta admin.
-
Navigate to your app and click the Sign On tab.
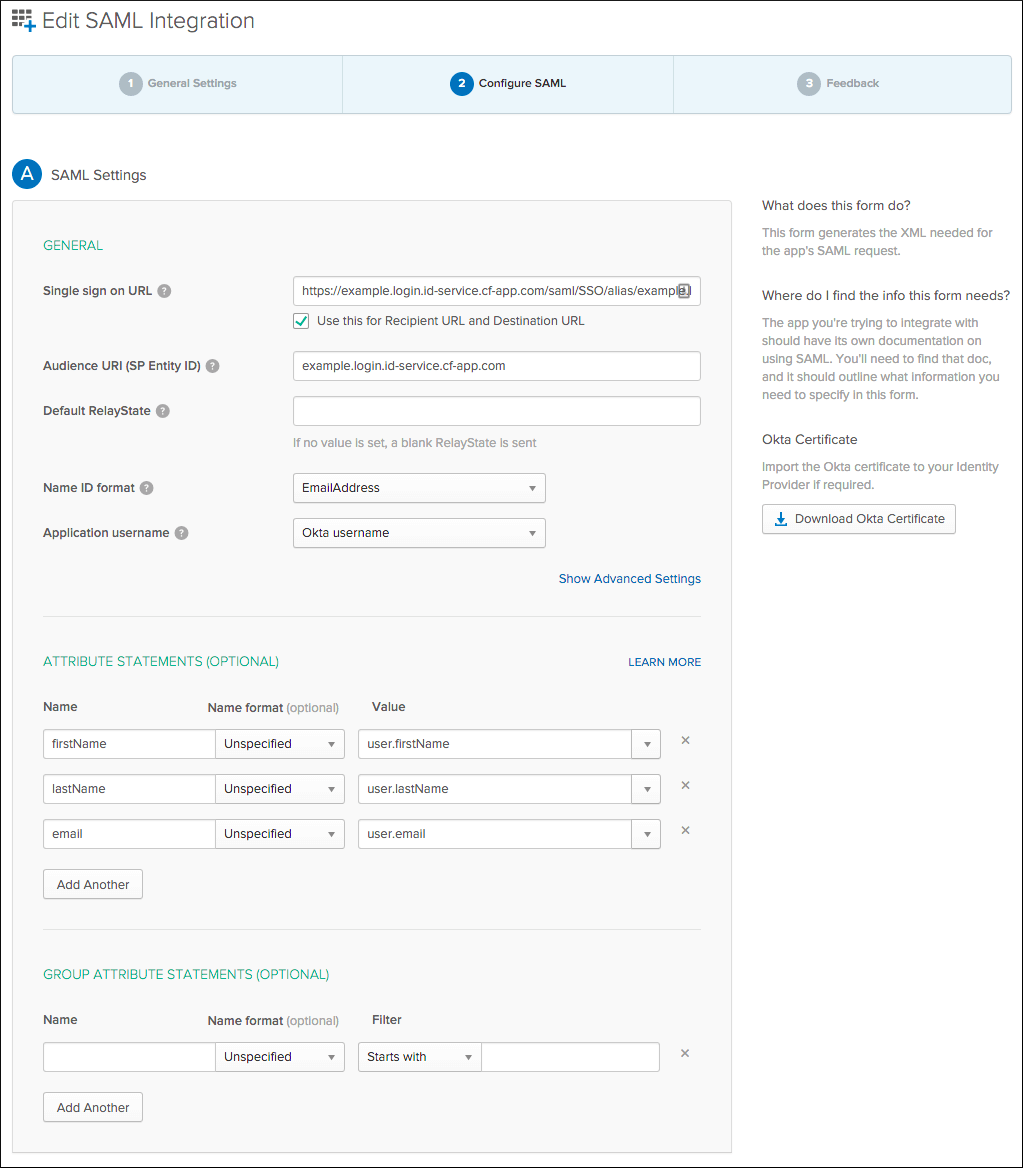
Configure the SAML Settings
To configure the SAML settings:
-
Under Settings, click Edit, and select SAML 2.0.

-
Click the General tab.
-
Under SAML Settings, click Edit and then click Next.
-
Enter the
AssertionConsumerService Location URLfrom your downloaded service provider metadata into Single sign on URL.For example:
https://PORTAL-FQDN/saml/SSO/alias/PORTAL-FQDNWhere
PORTAL-FQDNis the fully qualified domain name (FQDN) for your login portal.The portal FQDN uses the format
AUTH-DOMAIN.login.SYSTEM-DOMAIN. You can view the portal FQDN for a plan by logging into the SSO Operator Dashboard, clicking the name of your plan, and selecting Edit Plan. -
Enter the FQDN for your login portal into Audience URI (SP Entity ID). This value is available in the downloaded service provider metadata as the entity ID.
-
Select a Name ID format.
-
Select an Application username.
(Optional) Configure Single Logout
To configure single logout:
-
Click Show Advanced Settings.
-
For Enable Single Logout, select Allow application to initiate single logout.
-
Enter the
SingleLogoutService Location URLfrom your downloaded service provider metadata into Single Logout URL. -
Enter your
Auth Domain URLinto SP Issuer. -
Click Upload Signature Certificate to upload the signature certificate from your downloaded service provider metadata. You must copy the
X509Certificateinformation from the downloaded service provider metadata and reformat it as a valid certificate file to upload.
(Optional) Specify Attribute Statements
To specify attribute statements:
-
Under Attribute Statements (Optional), specify any attribute statements that you want to map to users in the ID token.
-
Under Group Attribute Statements (Optional), specify any group attribute statements that you want to map to users in the ID token. This is a group that users belong to within Okta.
Download the Metadata
To download the metadata:
-
Click Next and then click Finish.
-
Click Identity Provider metadata to download the metadata, or copy and save the link address of the Identity Provider metadata. You need this Okta metadata for the Configure a Single Sign‑On Service Provider procedure.

