


This topic tells you how to set up the Plan-to-Plan OpenID Connect (OIDC) integration between two Single Sign‑On for VMware Tanzu Application Service service plans, one acting as an identity provider (identity provider plan or IDP) and one acting as a relying party (relying party plan or RP).
Overview
A Plan-to-Plan OIDC integration enables users from the identity provider plan to authenticate into the relying party plan through OIDC.
To set up this integration:
- Overview
- Prerequisites
- Set Up Relying Party Configurations in the Identity Provider Plan
- Set Up the OIDC Identity Provider Configuration in the Relying Party Plan
- Finish Configuration
Prerequisites
You must meet the following prerequisites to set up Plan-to-Plan OIDC integration:
- Your IDP must be visible to your org.
- You must add the IDP as a service instance in a space so you can access the app developer dashboard.
If you have not completed these prerequisites, see Create or Edit Service Plans.
Set Up Relying Party Configurations in the Identity Provider Plan
Follow the instructions below to set up relying party configurations in the identity provider plan.
-
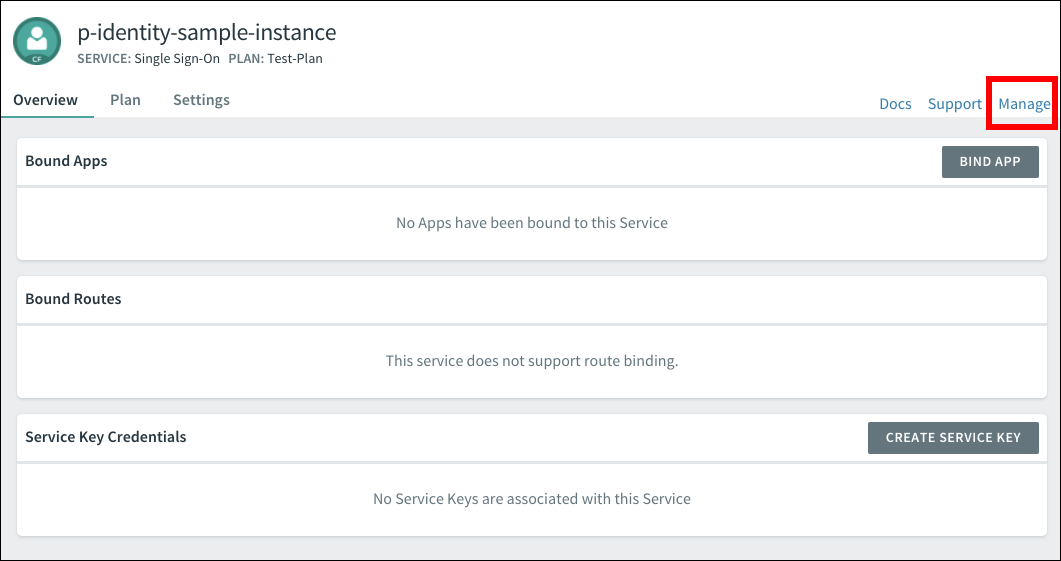
Navigate to Apps Manager.
-
Select the space.
-
Click into the Service tab.
-
Click the service you want to modify.
-
Click Manage.
-
Click New App.
-
Type a name in the App Name field.
-
Choose Web App from the list of app types.
-
Type a temporary URL in the Auth Redirect URIs field. You replace this URL after configuring an identity provider on the relying party plan.
-
In the Scopes field, type
openid. Optionally, selectopenidfrom the list of Auto-Approved Scopes. By addingopenidas an automatically approved scope, you prevent users from being prompted to authorize a login from the identity provider. -
Click Register App. When the app is created successfully, you are prompted to download your app credentials.

-
Click Download App Credentials to save the credentials for your app.
This is the last time you can download your app credentials. VMware recommends that you download the credentials and store them securely.
Set Up the OIDC Identity Provider Configuration in the Relying Party Plan
To set up the OIDC Identity Provider Configuration in the relying party plan, follow the steps below.
- Follow steps 1–6 in Add an OIDC Provider.
- If you use a self-signed certificate where the IDP is located, select the Skip SSL Validation checkbox. If you do not use a self-signed certificate, you can leave this box unchecked.
- Select the Enable Discovery checkbox and type in the Discovery Endpoint URL.
This URL ishttps://IDP-DOMAIN/.well-known/openid-configuration, whereIDP-DOMAINis the domain setting you enter when you add the IDP service plan you are integrating. - Fill in the Relying Party OAuth Client ID with the App Client ID from the previous section.
- Fill in the Relying Party OAuth Client Secret with the App Secret from the previous section.
- Confirm that
openidis selected as a scope.
Finish Configuration
After you create an app, follow the steps below to finish configuration.
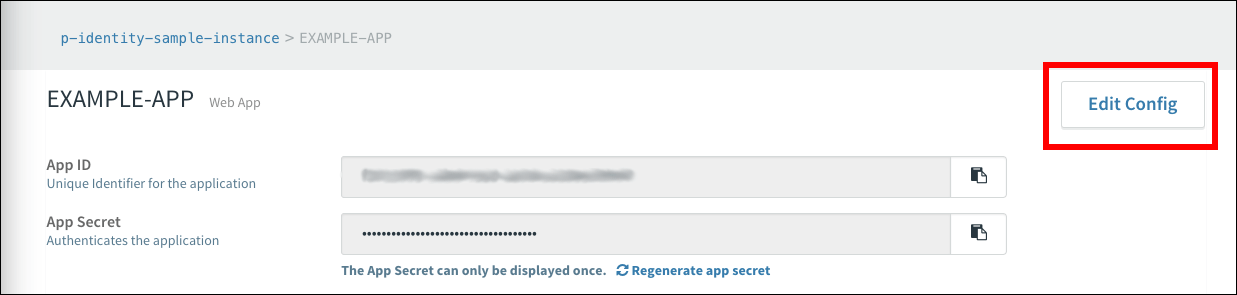
- Return to the page for the app you created.
- Click Edit Config. The app configuration screen appears.
- Add an Auth Redirect URL. The URL should read
https://RELYING-PARTY-DOMAIN/login/callback/ORIGIN-KEY
Where:RELYING-PARTY-DOMAINis the domain setting you enter during Relying Party configuration.ORIGIN-KEYis based on the IDP name you set in the SSO Operator Dashboard.
- Click Save Config.
