This topic describes how to use the Snyk Service Broker for VMware Tanzu after it has been successfully installed.
Using Snyk Service Broker for VMware Tanzu
To use the Snyk Service Broker for VMware Tanzu with an application, create a service instance and bind the service instance to your application. For more information on managing service instances, see Managing Service Instances with the cf CLI.
After the Snyk tile is installed, you can see the snyk-service-broker and its service plans appear in your VMware Tanzu marketplace. Run cf marketplace to see the service listing:
$ cf marketplace
Getting services from marketplace in org snyk / space snyk as admin...
OK
service              plans                                           description
snyk-service-broker  enterprise-plan    Snyk service broker for testing and monitoring security vulnerabilities and license issues in your app.
For more information on available service plans, see Configure Snyk Service Broker for VMware Tanzu.
Create a Service Instance
To provision a Snyk service instance, run cf create-service. For example:
$ cf create-service snyk-service-broker enterprise-plan my-snyk-service
Getting services from marketplace in org snyk / space snyk as admin...
OK
name              service               plan              bound apps   last operation
my-snyk-service   snyk-service-broker   enterprise-plan                create succeeded
Run the cf services command to view the creation status. This command displays a list of all your service instances. To view the status of a specific service instance, run cf service NAME-OF-YOUR-SERVICE.
Bind an Application to a Service Instance
After your Snyk service instance is created, run cf bind-service to bind the service to your application:
$ cf bind-service my-app my-snyk-service
Restage or Restart Your Application
To enable your application to access the service instance, run cf restage or cf restart to restage or restart your application.
Obtain Service Instance Access Credentials
After a service instance is bound to an application, Snyk credentials are stored in the environment variables of the application. Run cf env APP-NAME to display the environment variables.
You can find the credentials in the VCAP_SERVICES key.
$ cf env my-app
Getting env variables for app my-app in org snyk / space snyk as admin...
OK

System-Provided:
{
 "VCAP_SERVICES": {
  "snyk-service-broker": [
   {
     "credentials": {
      "apiToken": "01234567-0123-0123-0123-0123456789ab",
      "apiUrl": "",
      "orgName": ""
     },
    "label": "snyk-service-broker",
    "name": "my-snyk-service",
    "plan": "enterprise-plan",
    "provider": null,
    "syslog_drain_url": null,
    "tags": [
     "snyk",
     "security",
     "licenses",
     "vulnerabilties"
    ]
   }
  ]
 }
}
...
Scanning Your Dependencies
When Snyk service is bound to your application every time you run cf push APP-NAME, Snyk will scan your open source dependencies and will break the deployment if Snyk finds vulnerabilties.
$ cf push my-app
Updating app my-app in org snyk / space snyk as admin...
...
✗ High severity vulnerability found on [email protected]
      - desc: Arbitrary Code Execution
      - info: https://snyk.io/vuln/npm:ejs:20161128
      - from: [email protected] > [email protected]
Upgrade direct dependency [email protected] to [email protected]
Run `snyk wizard` to explore remediation options.
✗ High severity vulnerability found on [email protected]
        - desc: Prototype Override Protection Bypass
        - info: https://snyk.io/vuln/npm:qs:20170213
        - from: [email protected] > [email protected] > [email protected]
        Upgrade direct dependency [email protected] to [email protected] (triggers upgrades to [email protected])
...
Tested 576 dependencies for known vulnerabilities, found 34 vulnerabilities, 111 vulnerable paths.
<font color=red>**ERROR**</font> Snyk found vulnerabilties. Failing build...
<font color=red>**ERROR**</font> After Compile: exit status 1
Optional Paramaters
In order to enable optional parameters to your application you can add an environment variable to your project manifest.yml env section or by the CLI set-env command (e.g cf set-env APP-NAME SNYK_DONT_BREAK_BUILD true)
- SNYK_DONT_BREAK_BUILD: This will tell Snyk to continue with the application deployment even though Snyk found vulnerabilties.
- SNYK_MONITOR_BUILD: This will take a snapshot of your current dependencies, so you can be notified about newly disclosed vulnerabilities in them, or when a previously unavailable patch or upgrade path becomes available.
- SNYK_PROTECT_BUILD: This will apply the patches specified in your .snyk file to the local file system. (After running Snyk wizard)
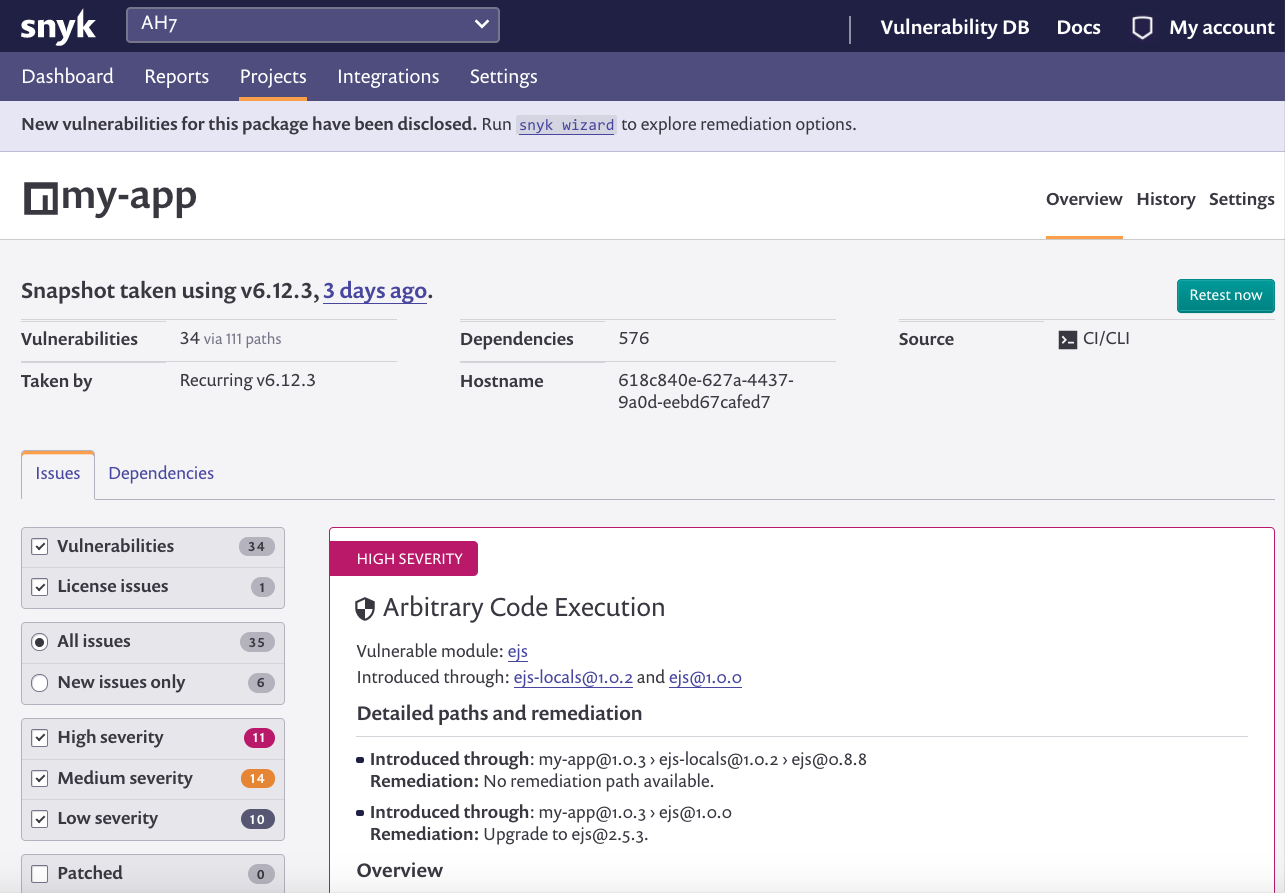
Projects on Snyk
If you enable the SNYK_MONITOR_BUILD option this will create a project in your Snyk dashboard where you can view the results of the scan.