


Organizations and Identities
This topic explains identities and roles in Tanzu Data Hub (TDH), including how to create identities that enable users and services to access Tanzu Data Hub, and how to apply roles and optional policies to identities to control their access.
Overview
Identity and access management (IAM) in TDH is governed by three main object types:
- Organizations: Groups of users and other identities who share access to the same data resources.
- Identities:
- Users: Human users.
- Service Accounts: Accounts used for programmatic access to the deployed data products.
- Local User: User accounts for data products that include their own access control systems and define their users natively.
- Policies: TDH defined framework to control and manage access to the instances of the deployed data products.
Organizations and identities are described in the sections below, and for policies, see Policies and Rules.
Organizations
Organizations (Orgs) in TDH represent groups of users within the same department or business unit. When you create or onboard a new user, you need to associate them with the correct Org so that they can see and access the same data products that others in their organization use. Organizations are further split into two types:
-
SRE Organization (Singleton): The SRE Org is created by the TDH installer during the TDH installation. There is only one SRE Org per instance of TDH. When created, the SRE Org contains one user, the SRE persona, who can:
- Create Orgs.
- Associate user identities with Orgs.
- Access Fleet Management, Infrastructure Management, Data Plane Management and other functional areas within the GUI.
- Add multiple other SRE users to the SRE Org.
-
Customer Organizations (Multiple):
- Customer Orgs are defined by the SRE user and define business units or teams that work together.
- Each customer Org has its own Admin(s) who can add identities to the Org and assign their roles.
- An identity can belong to multiple organizations, and have different identity types, roles, and policies within different organizations.
- For User identity types, who can log in to the Tanzu Data Hub GUI, the upper-right corner of the GUI shows the user’s name and organization. On clicking the dropdown from upper-right corner, user can see if they belong to more than one organization as well as their currently-selected organization.
- Users in multiple organizations can switch the currently-selected one by clicking their name and Change Organization. Because switching organizations changes a user’s roles, available data planes, and other access, it changes what they can see and do in Tanzu Data Hub.
To create a new organization, see Create an Organization below.
Identities
SREs and Customer Admins create identities manually via the Create an Identity procedure below, or SREs can federate them in bulk from external identity providers via LDAP as described in Federation. Roles within TDH belong either to the SRE persona or Customer Persona.
To grant access to Tanzu Data Hub and the service instances that it hosts on data planes, admin users create three types of identities:
- User lets people log in to Tanzu Data Hub and data service instances via Tanzu Data Hub’s own identity provider. When added, they receive an invitation and manage their access via email. Tanzu Data Hub manages their password and other account details. Users can be created as shown in Create an Identity below.
- Local User lets people log in to data service instances that authenticate through an RDBMS, such as PostgreSQL and MySQL. For these accounts, Tanzu Data Hub does not manage any authentication secrets. Local Users can be created as shown in Create local user below.
- Service Account lets pipelines and other automation access Tanzu Data Hub. Service Accounts authenticate to Tanzu Data Hub via a generated
client_credentialsJSON struct that downloads to your local machine. Service Accounts can be created as shown in Create Service Account below.
Two main types of Roles/Permissions exist in TDH, namely
| Applies To | Defines Permissions For | |
| Service Role | User Identities | Tanzu Data Hub |
| Policy | All Identities | Data Product Instances |
Service Roles - Customer Persona
For an User identity, the admin specifies one or more service roles that determine what the user can see and do in Tanzu Data Hub:
| Service Role | What they can do |
| Operator | Patch, upgrade data service cluster instances and manage polices |
| Compliance Manager | Review data service cluster instances security compliance |
| Viewer | View data service cluster instances, users, and policies |
| Admin | Create and manage data service cluster instances, users, and policies |
| Developer | View database cluster instances and policies, and manage secret keys for service accounts |
More specifically, the different service roles enable access to the following Tanzu Data Hub areas:
| Service Role | {Data Services} | Identities | Policies | Tasks | Usage, Event Logs, Upgrade Status | Settings |
| Operator | R | R | W | – | ✔ | R |
| Compliance Manager | R | R | R | – | – | R |
| Viewer | R | R | R | – | – | R |
| Admin | W | W | W | ✔ | ✔ | W |
| Developer | W | R | R | ✔ | – | R |
- W: Can view and perform operations, e.g. create, upgrade
- R: Can view but not perform operations
- ✔: Can view, and area does not include operations
- –: Cannot view
SRE Persona - SRE user is created during the installation step. Once created this user can add more SRE admins to SRE organization.
Policies
For all identity types, admin users can optionally apply policies that specify the identity’s permissions for accessing data service instances deployed by Tanzu Data Hub.
For more information about policies, see Policies and Rules.
Create an Identity
As Org Admin user
Admin can grant access to Tanzu Data Hub or its service instances. In this example, we are adding a new user from customer organization:
-
Click Identity & Access Management > Identities to open the Manage Identities pane.

-
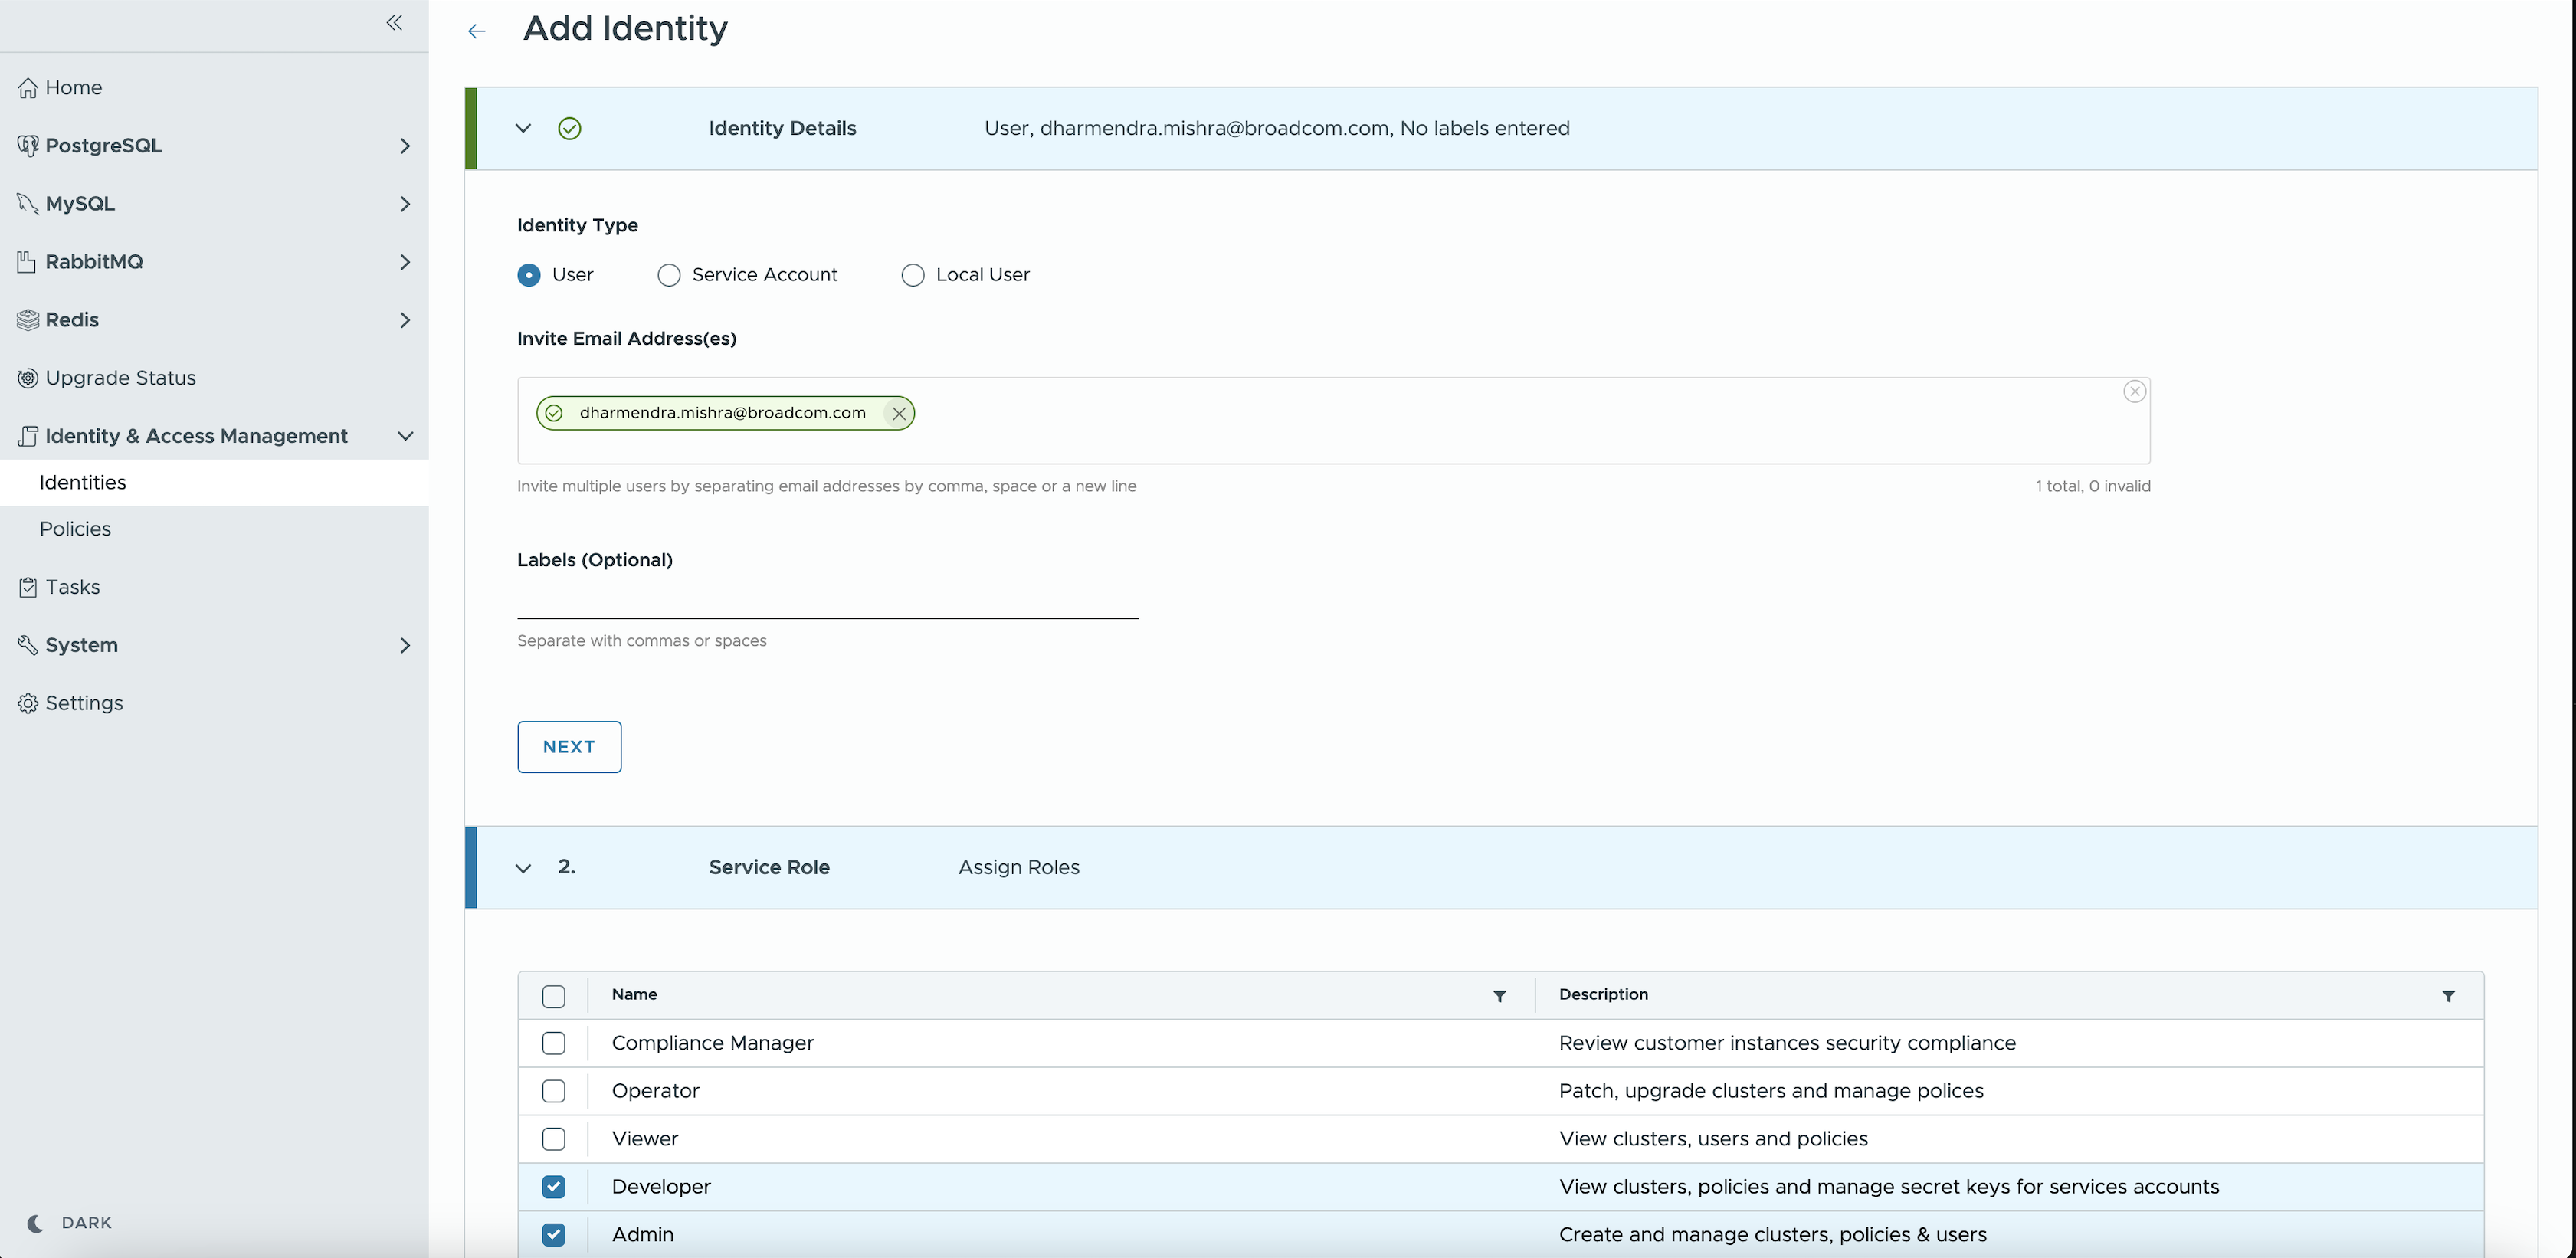
Click Add Identity at top right. An Add Identity page opens. Add the email address of the user you wish to invite to TDH. Multiple user email addresses can be added to invite the users to the current organization.
-
Click Next. Select the roles that apply to this user. The roles selected here controls access of this user to TDH control plane.
-
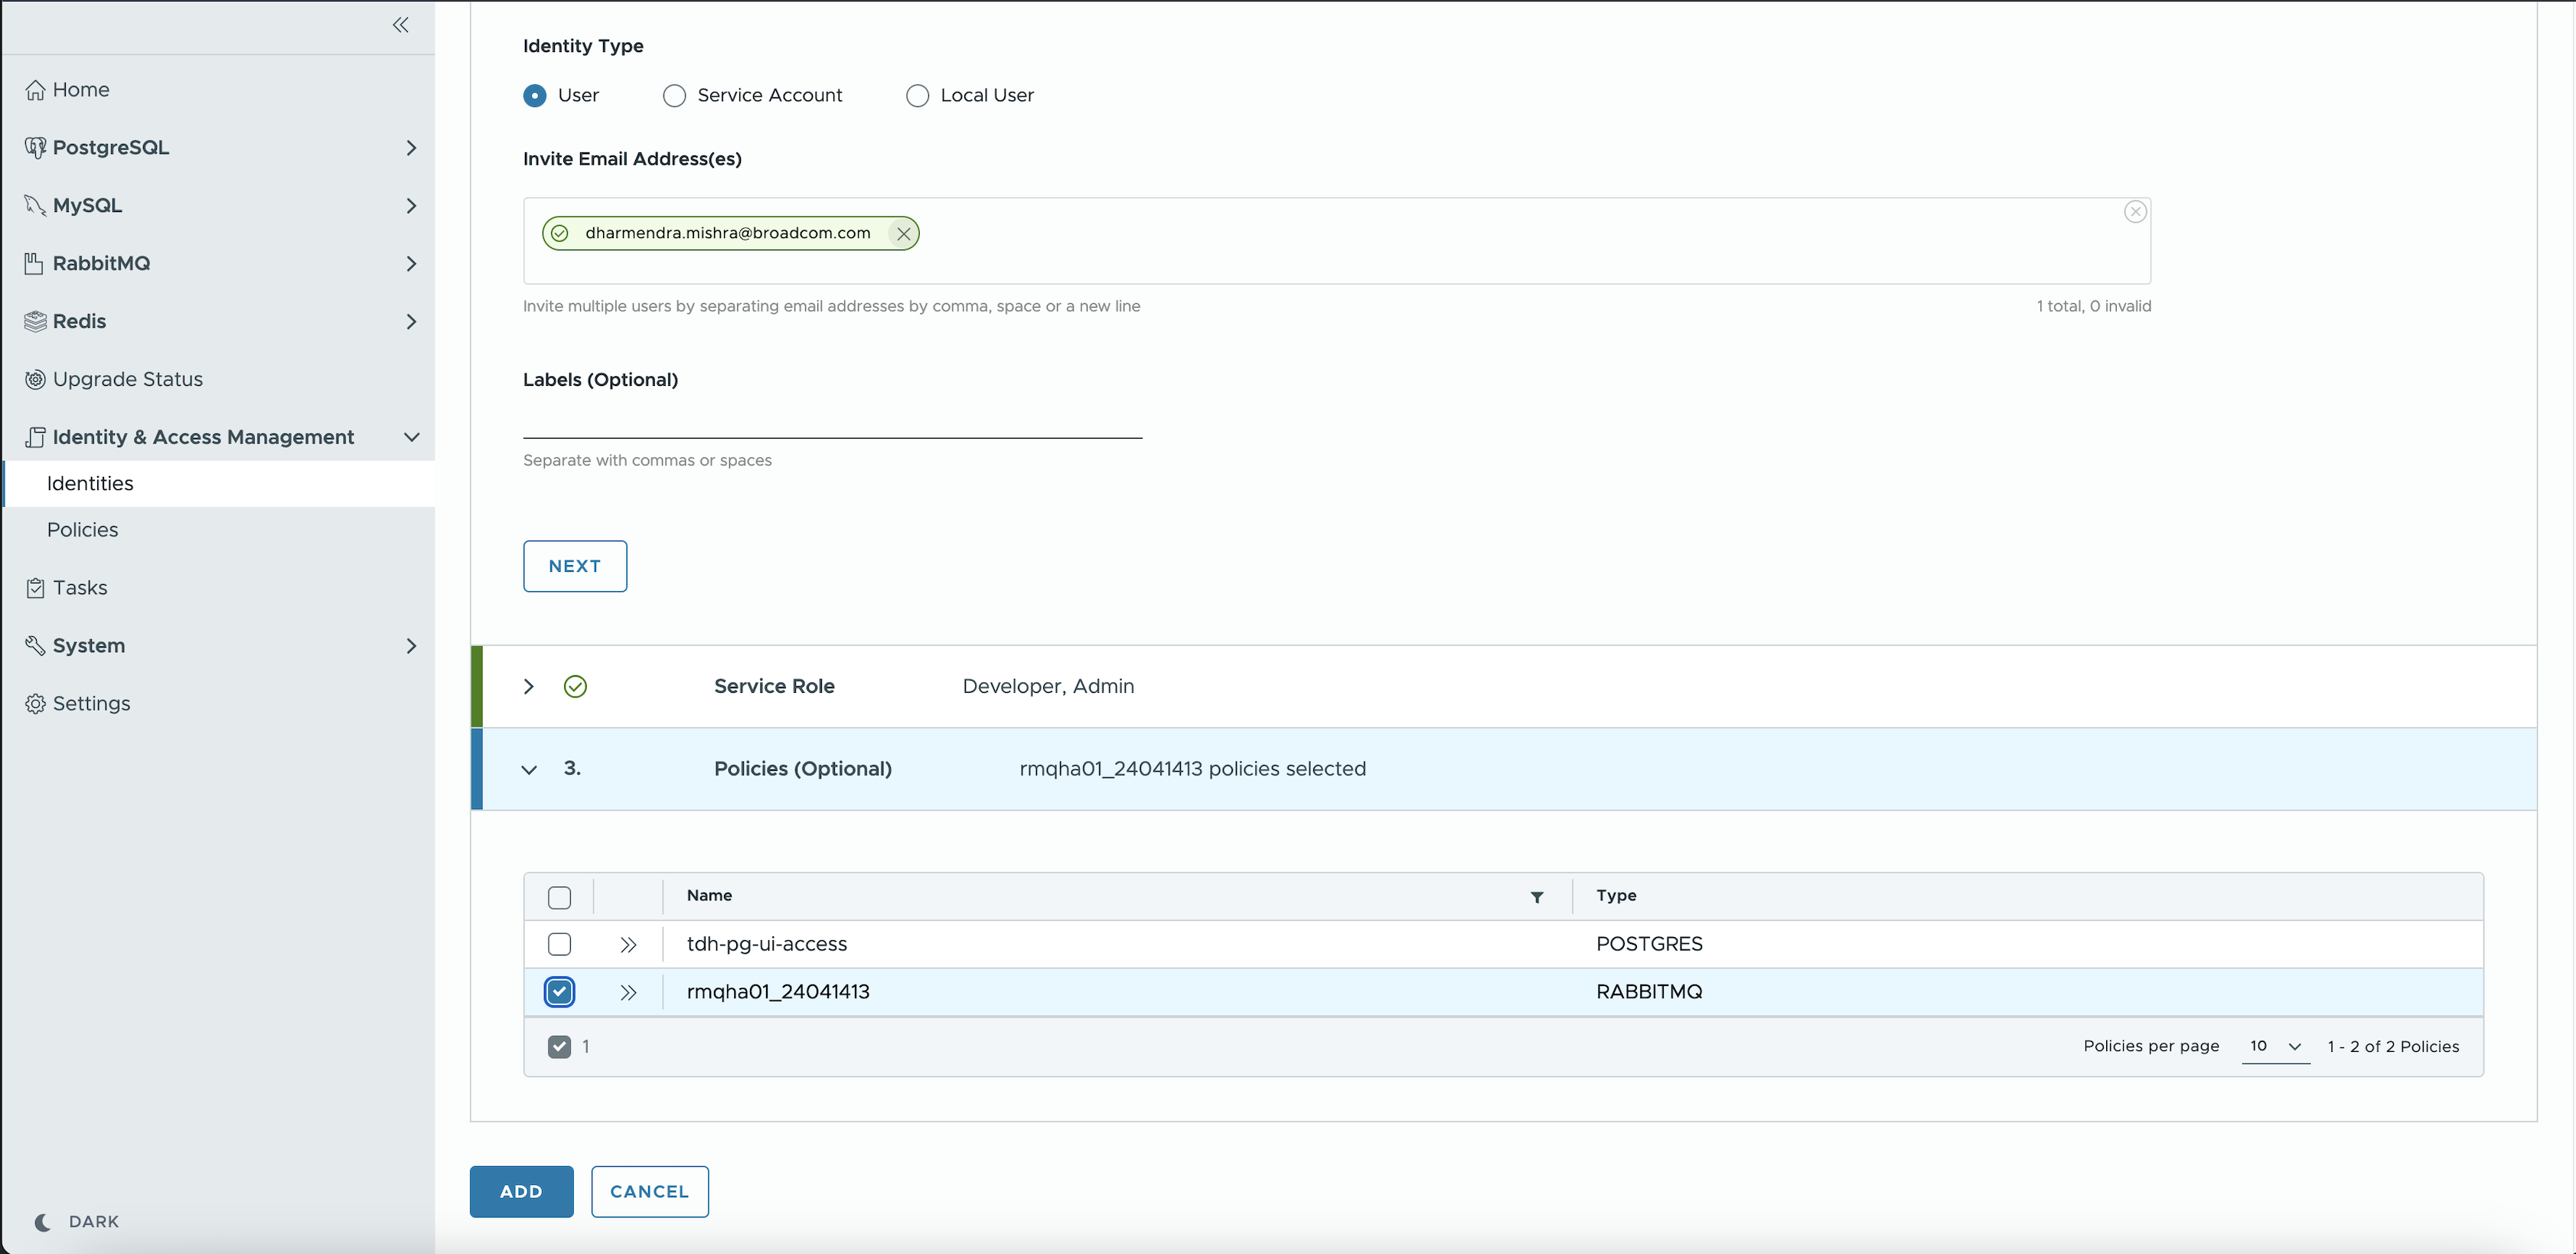
(Optional) Associate a Policy with the user. You can also do this later via Manage Identities > Edit User.
-
Once the user is created, an invitation email is sent to them. The newly-created identity appears in the Manage Identities pane.
As SRE user
SRE can grant access to Tanzu Data Hub or its service instances. In this example, SRE is trying to add a new user:
-
Click Identity & Access Management > Identities to open the Manage Identities pane.
-
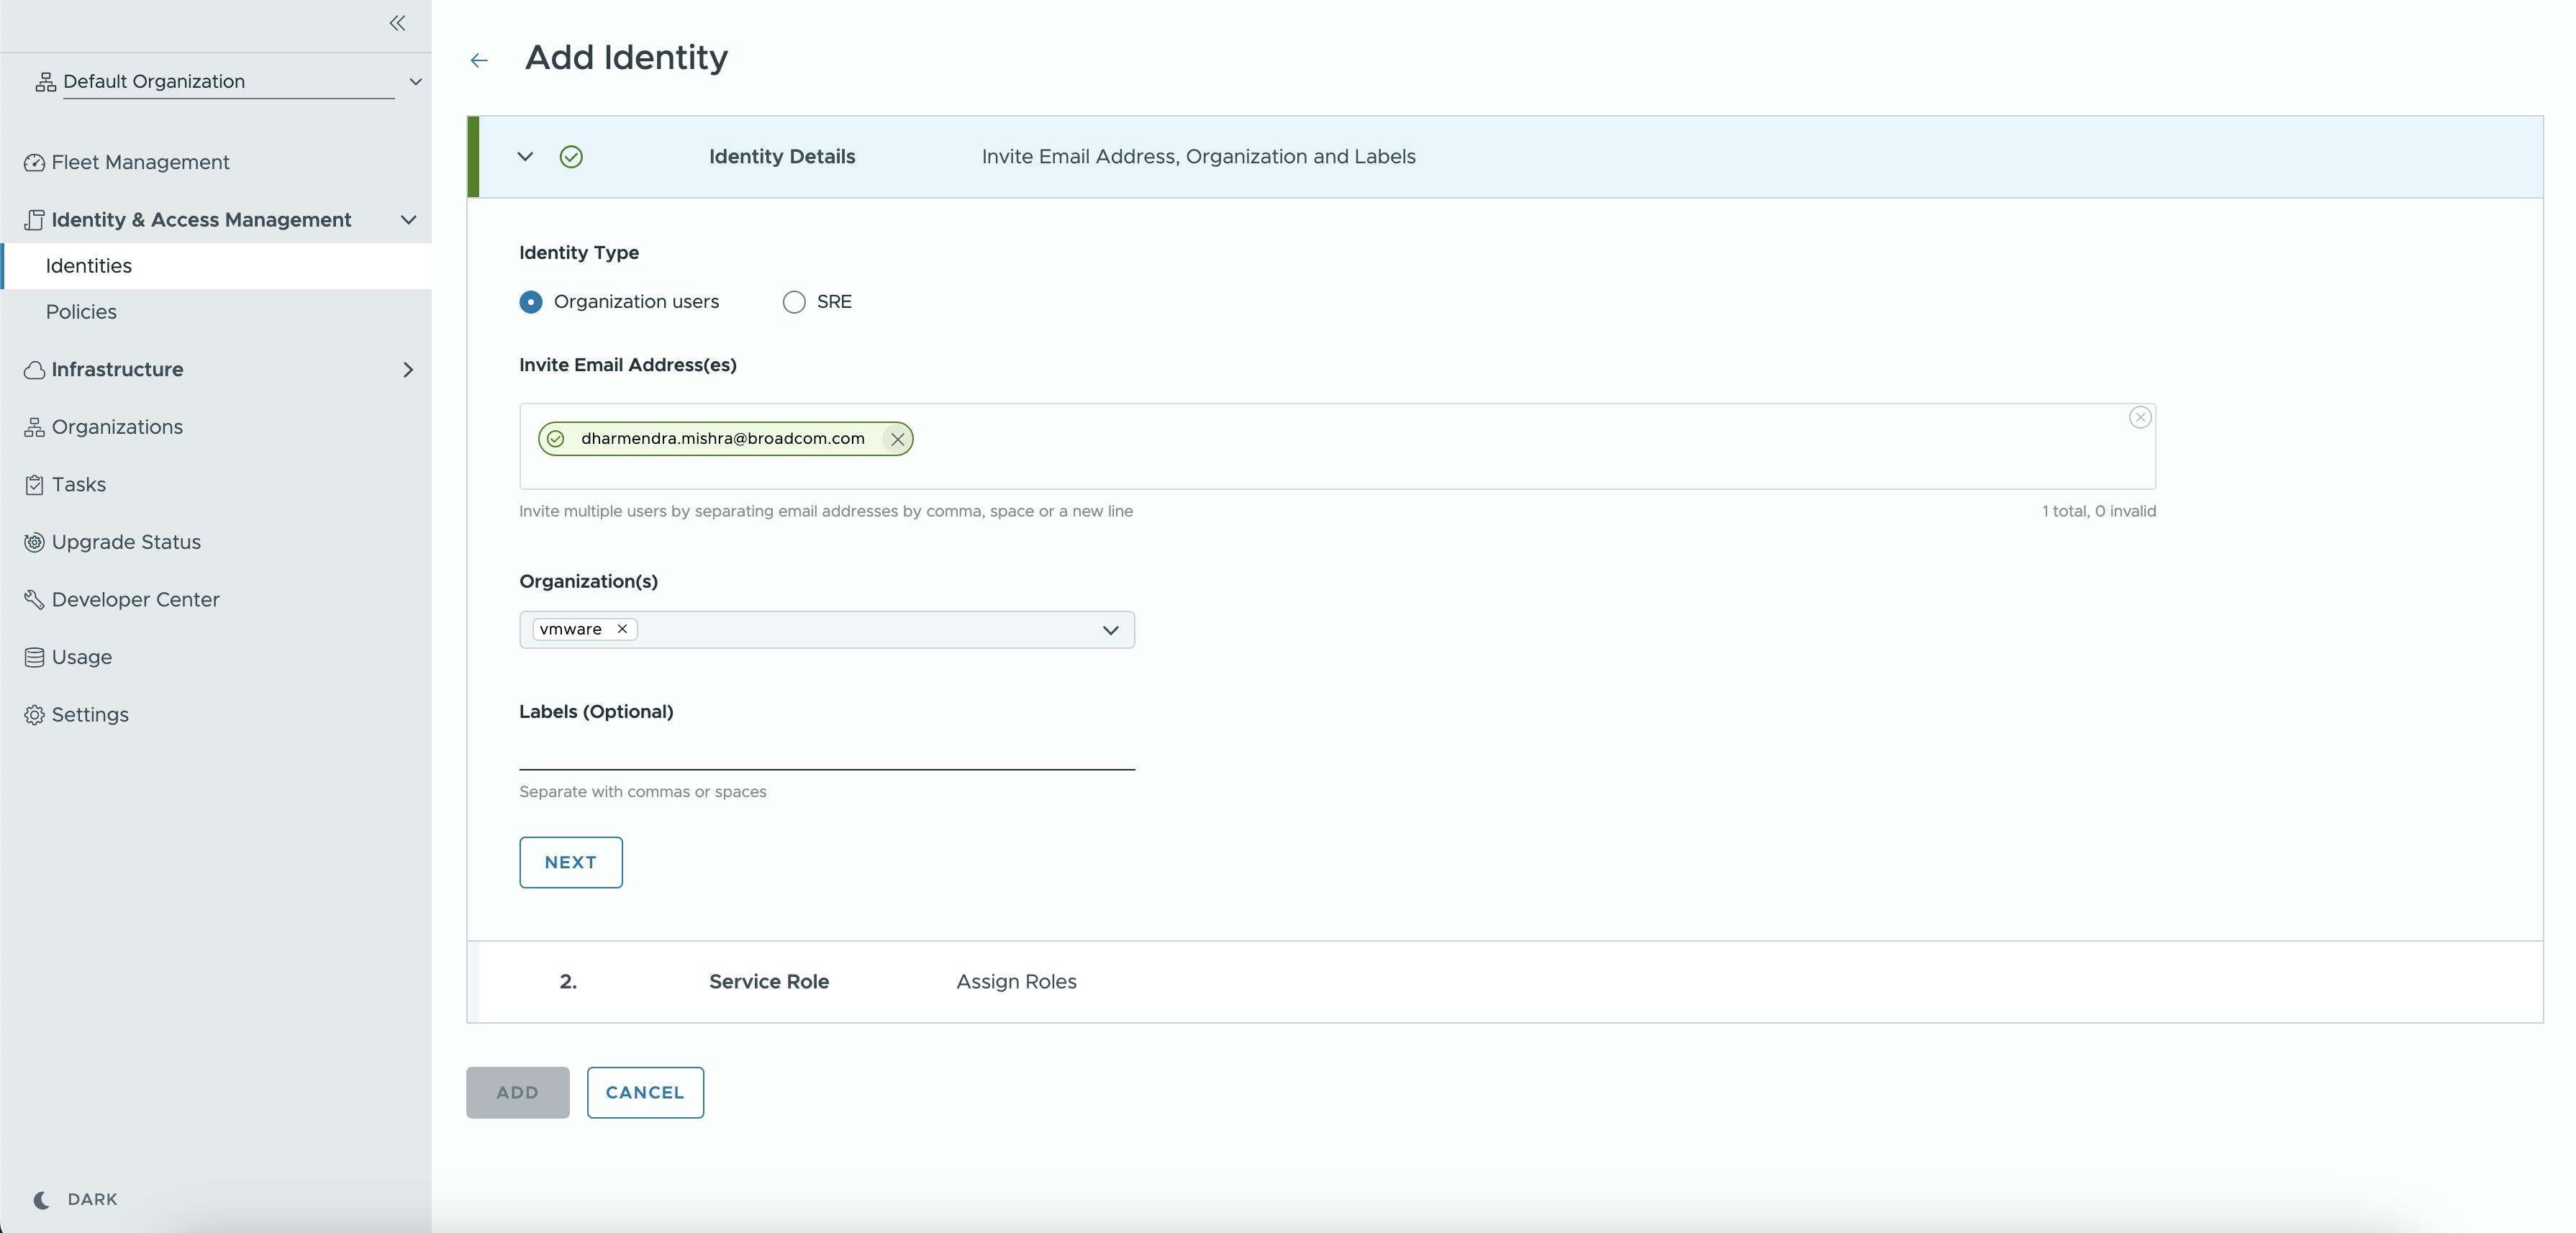
Click Add Identity at top right. An Add Identity page opens. Add the email address of the user you wish to invite to TDH. Multiple user email addresses can be added to invite the users.
-
Select the organization to which the user needs to be added. Multiple organizations can be selected here.
-
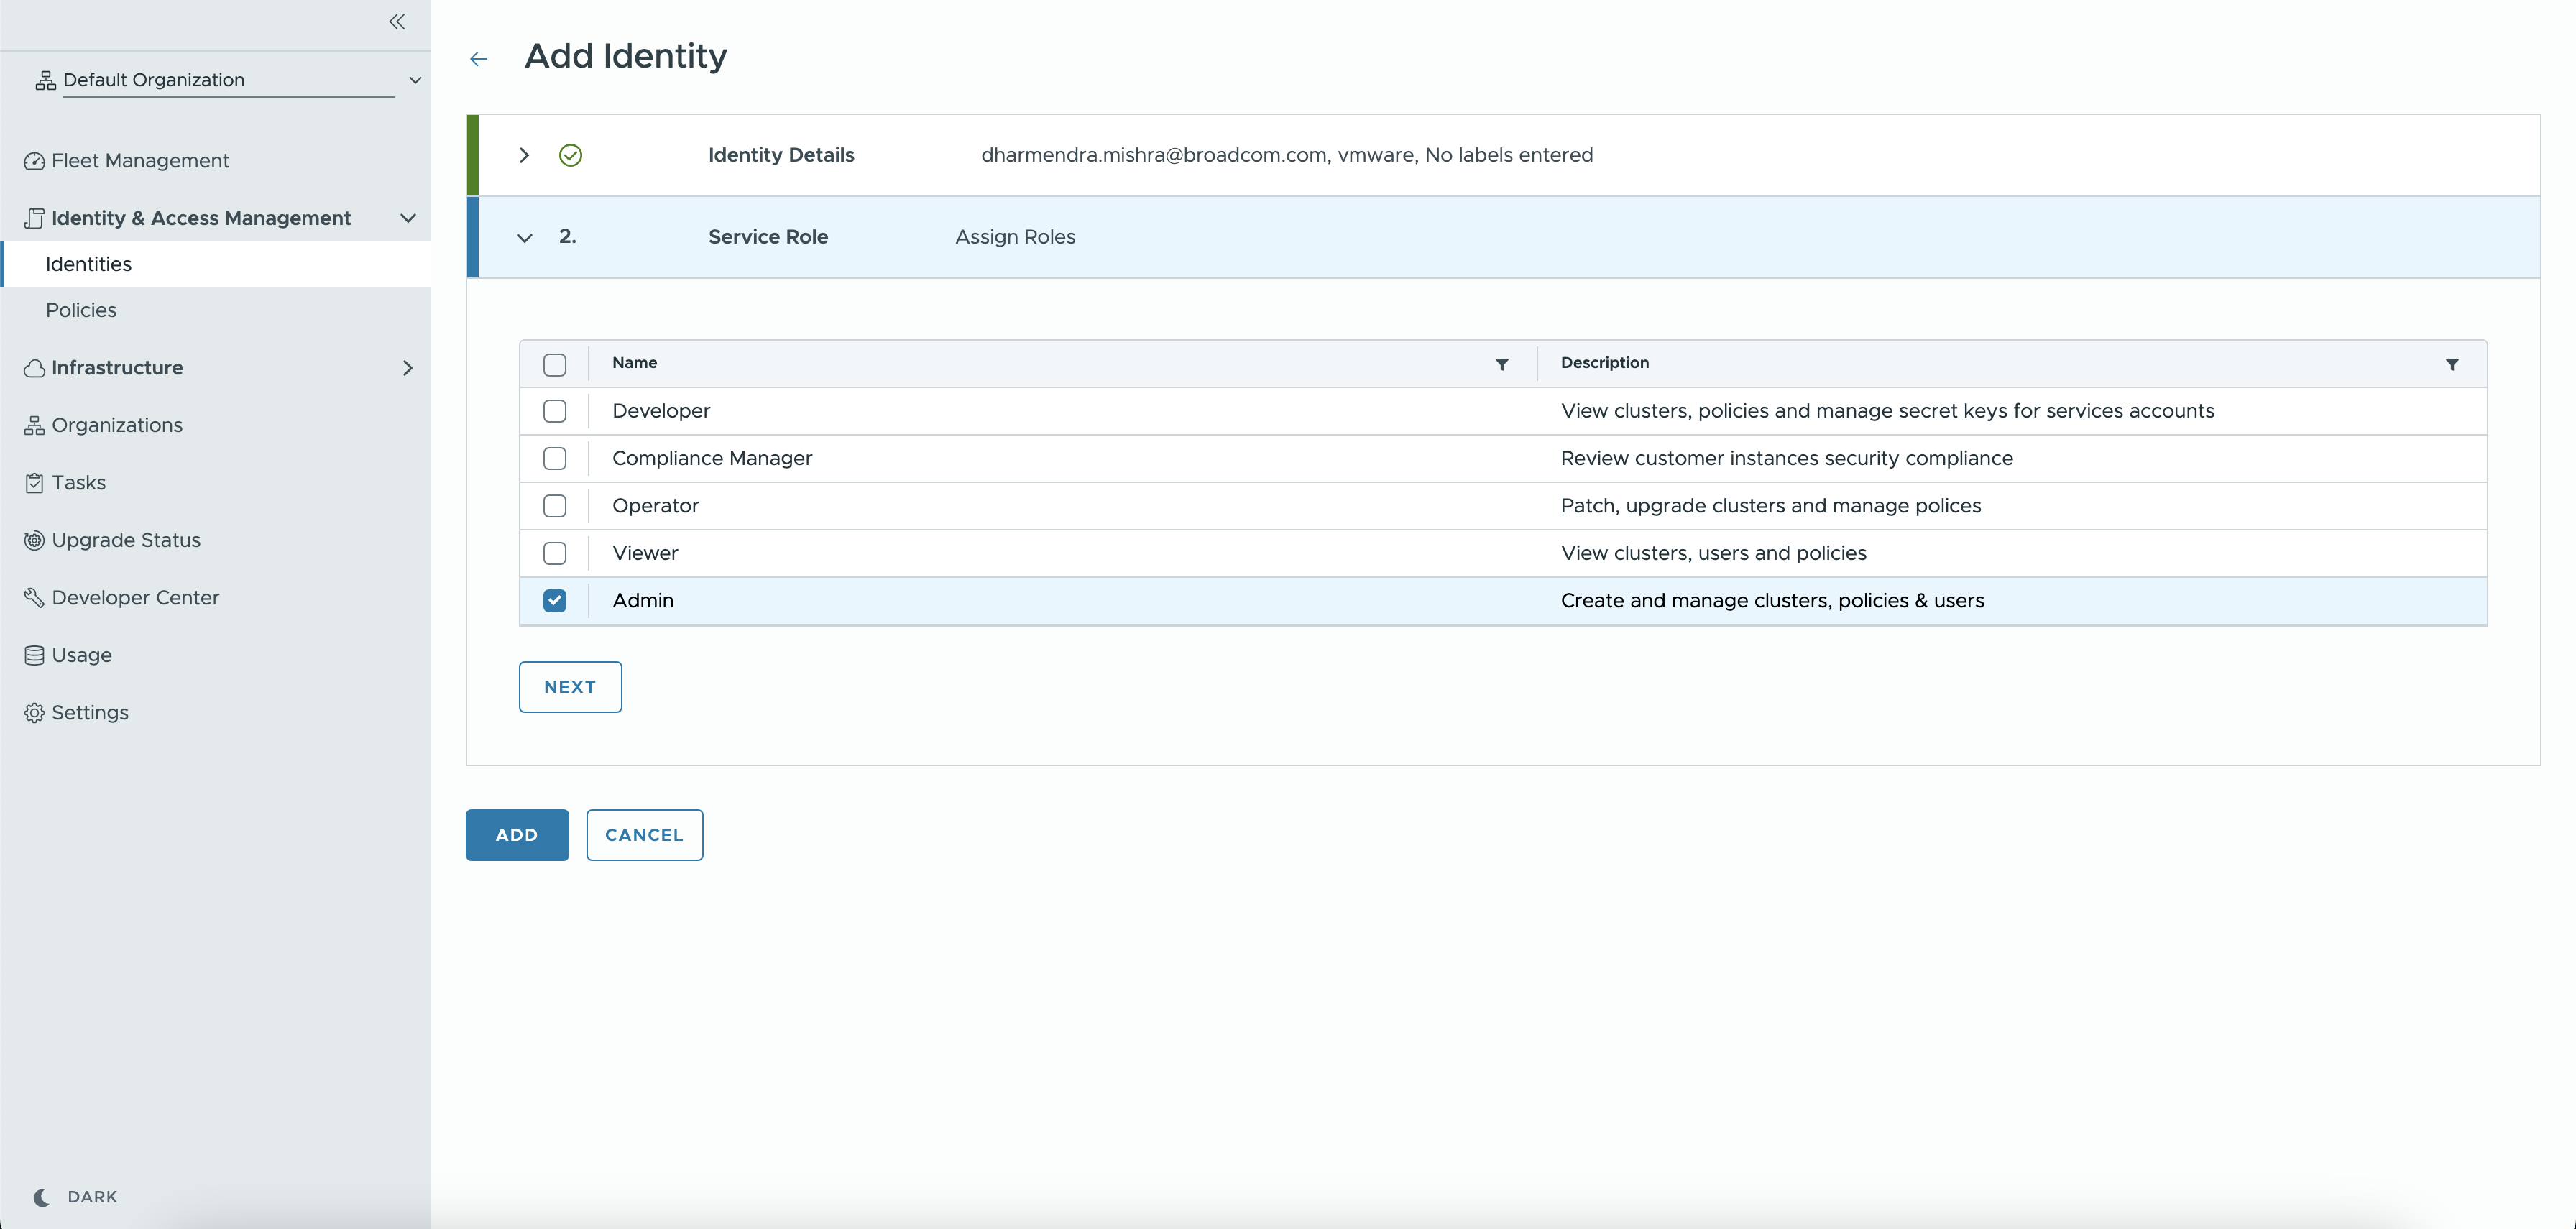
Click Next. Select the roles that apply to this user. The roles selected here controls access of this user to TDH control plane.
-
Once the user is created, an invitation email is sent to them. The newly-created identity appears in the Manage Identities pane.
Manage Identities
Users can view or manage identities by navigating to Identity & Access Management > Identities to open the Manage Identities pane.
The pane lists identities in user’s currently-selected organization, listed under their name in the top-right corner of the GUI.
All users can view details for an identity, such as roles and policies, by clicking the identity name. Admin users can click Edit User and Policies links on the Manage Identities pane or Actions > Update Service Roles on the identity details pane to change identity details.
- Changing an identity’s details triggers an email alert created from a template configured by an SRE as described in Email Templates.
Create a Service Account
To create a new Service account as an Admin user:
-
Navigate to Identity & Access Management > Identities > Service Account option from the left menu
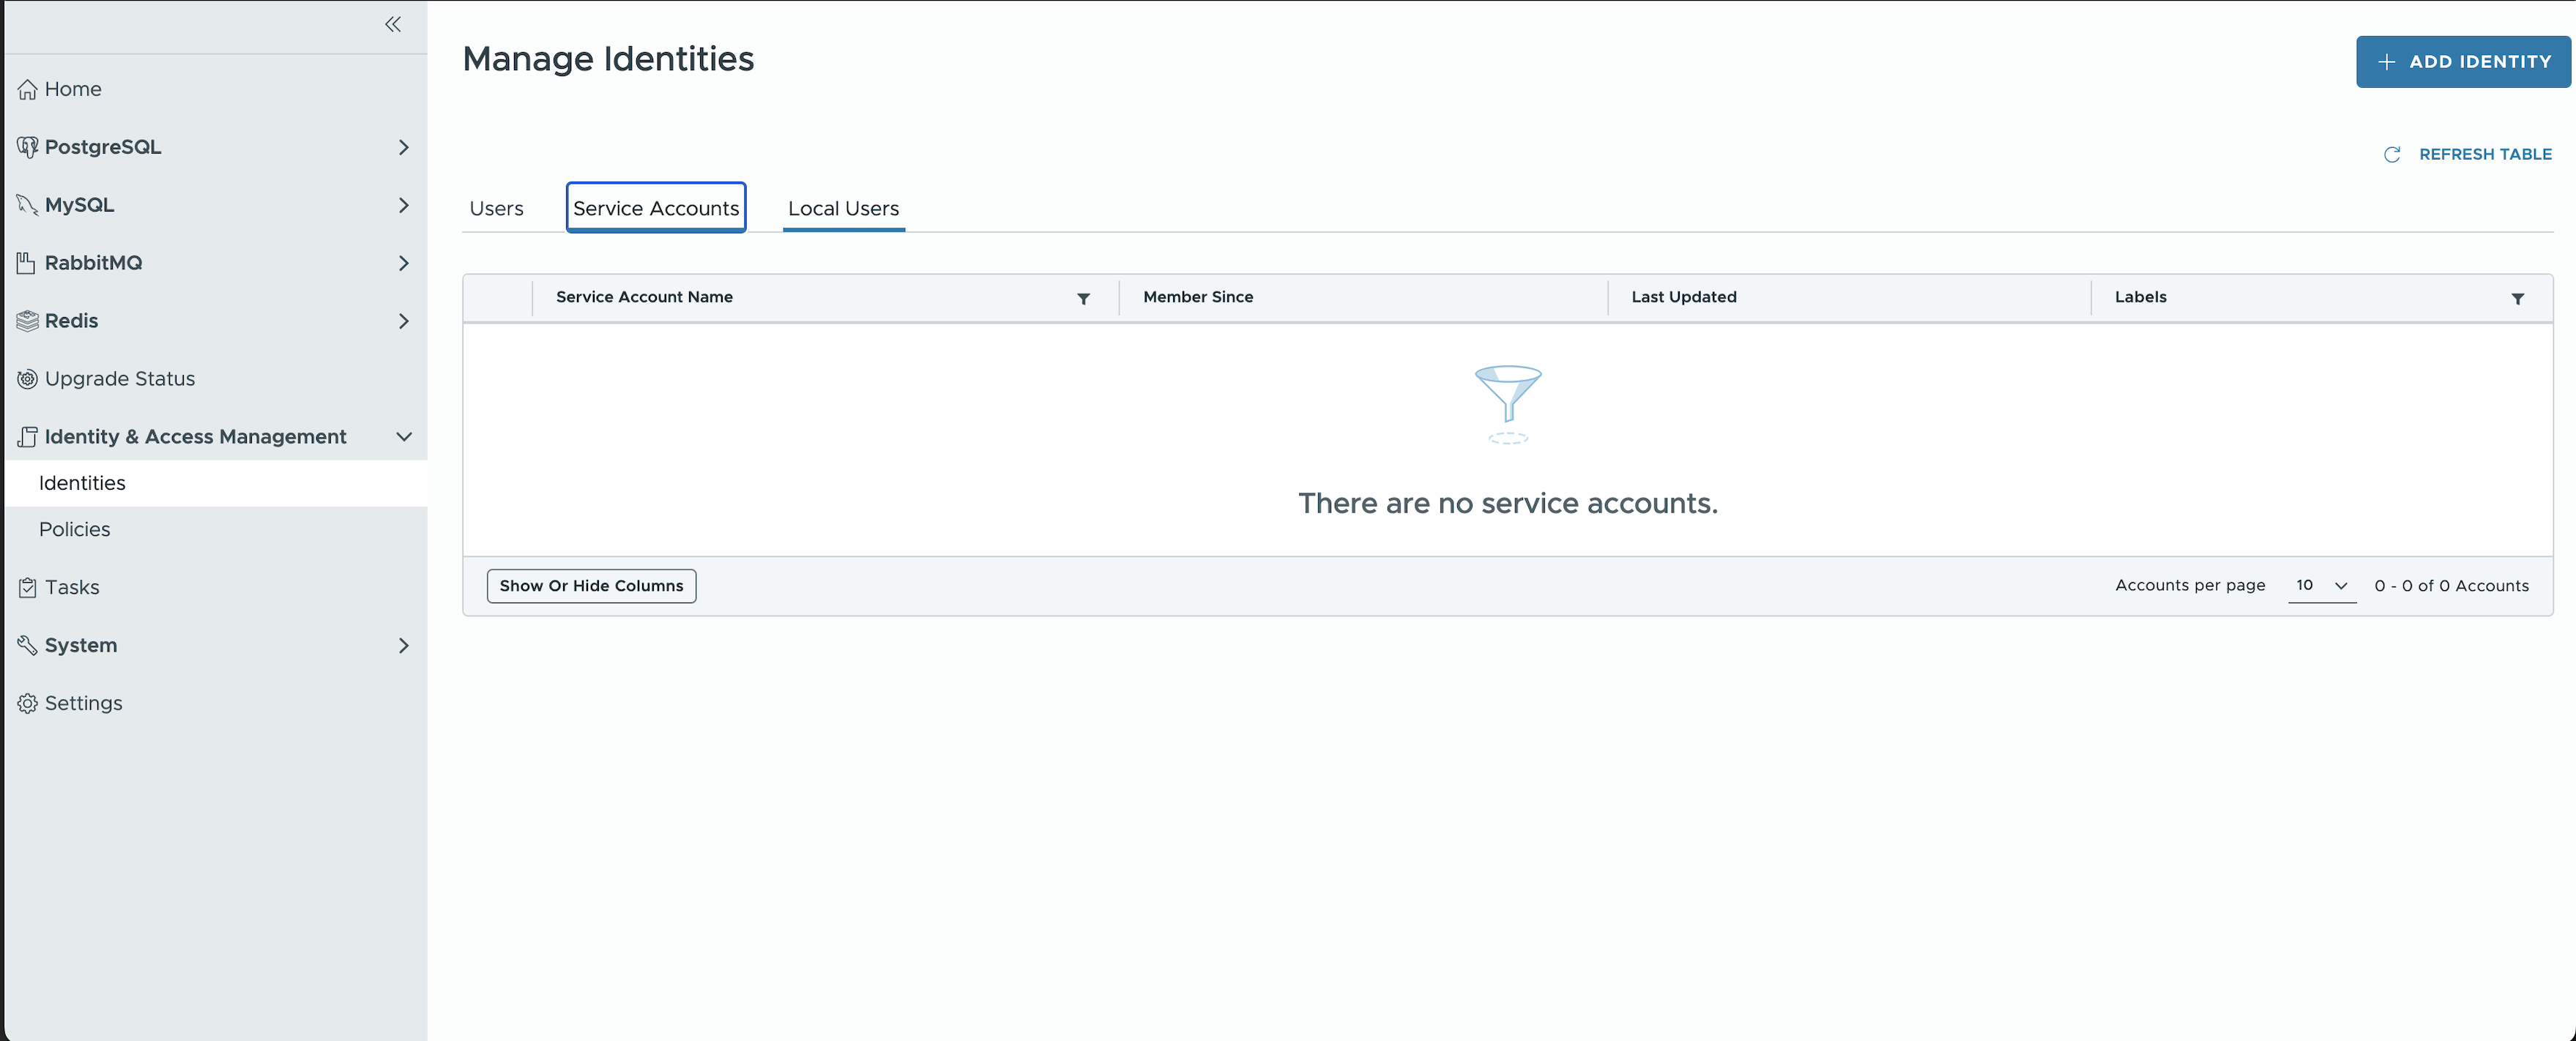
-
Click Add Identity, enter required details like name of service account and labels (optional). Associate the account with the correct policy created in the Create Policy step.
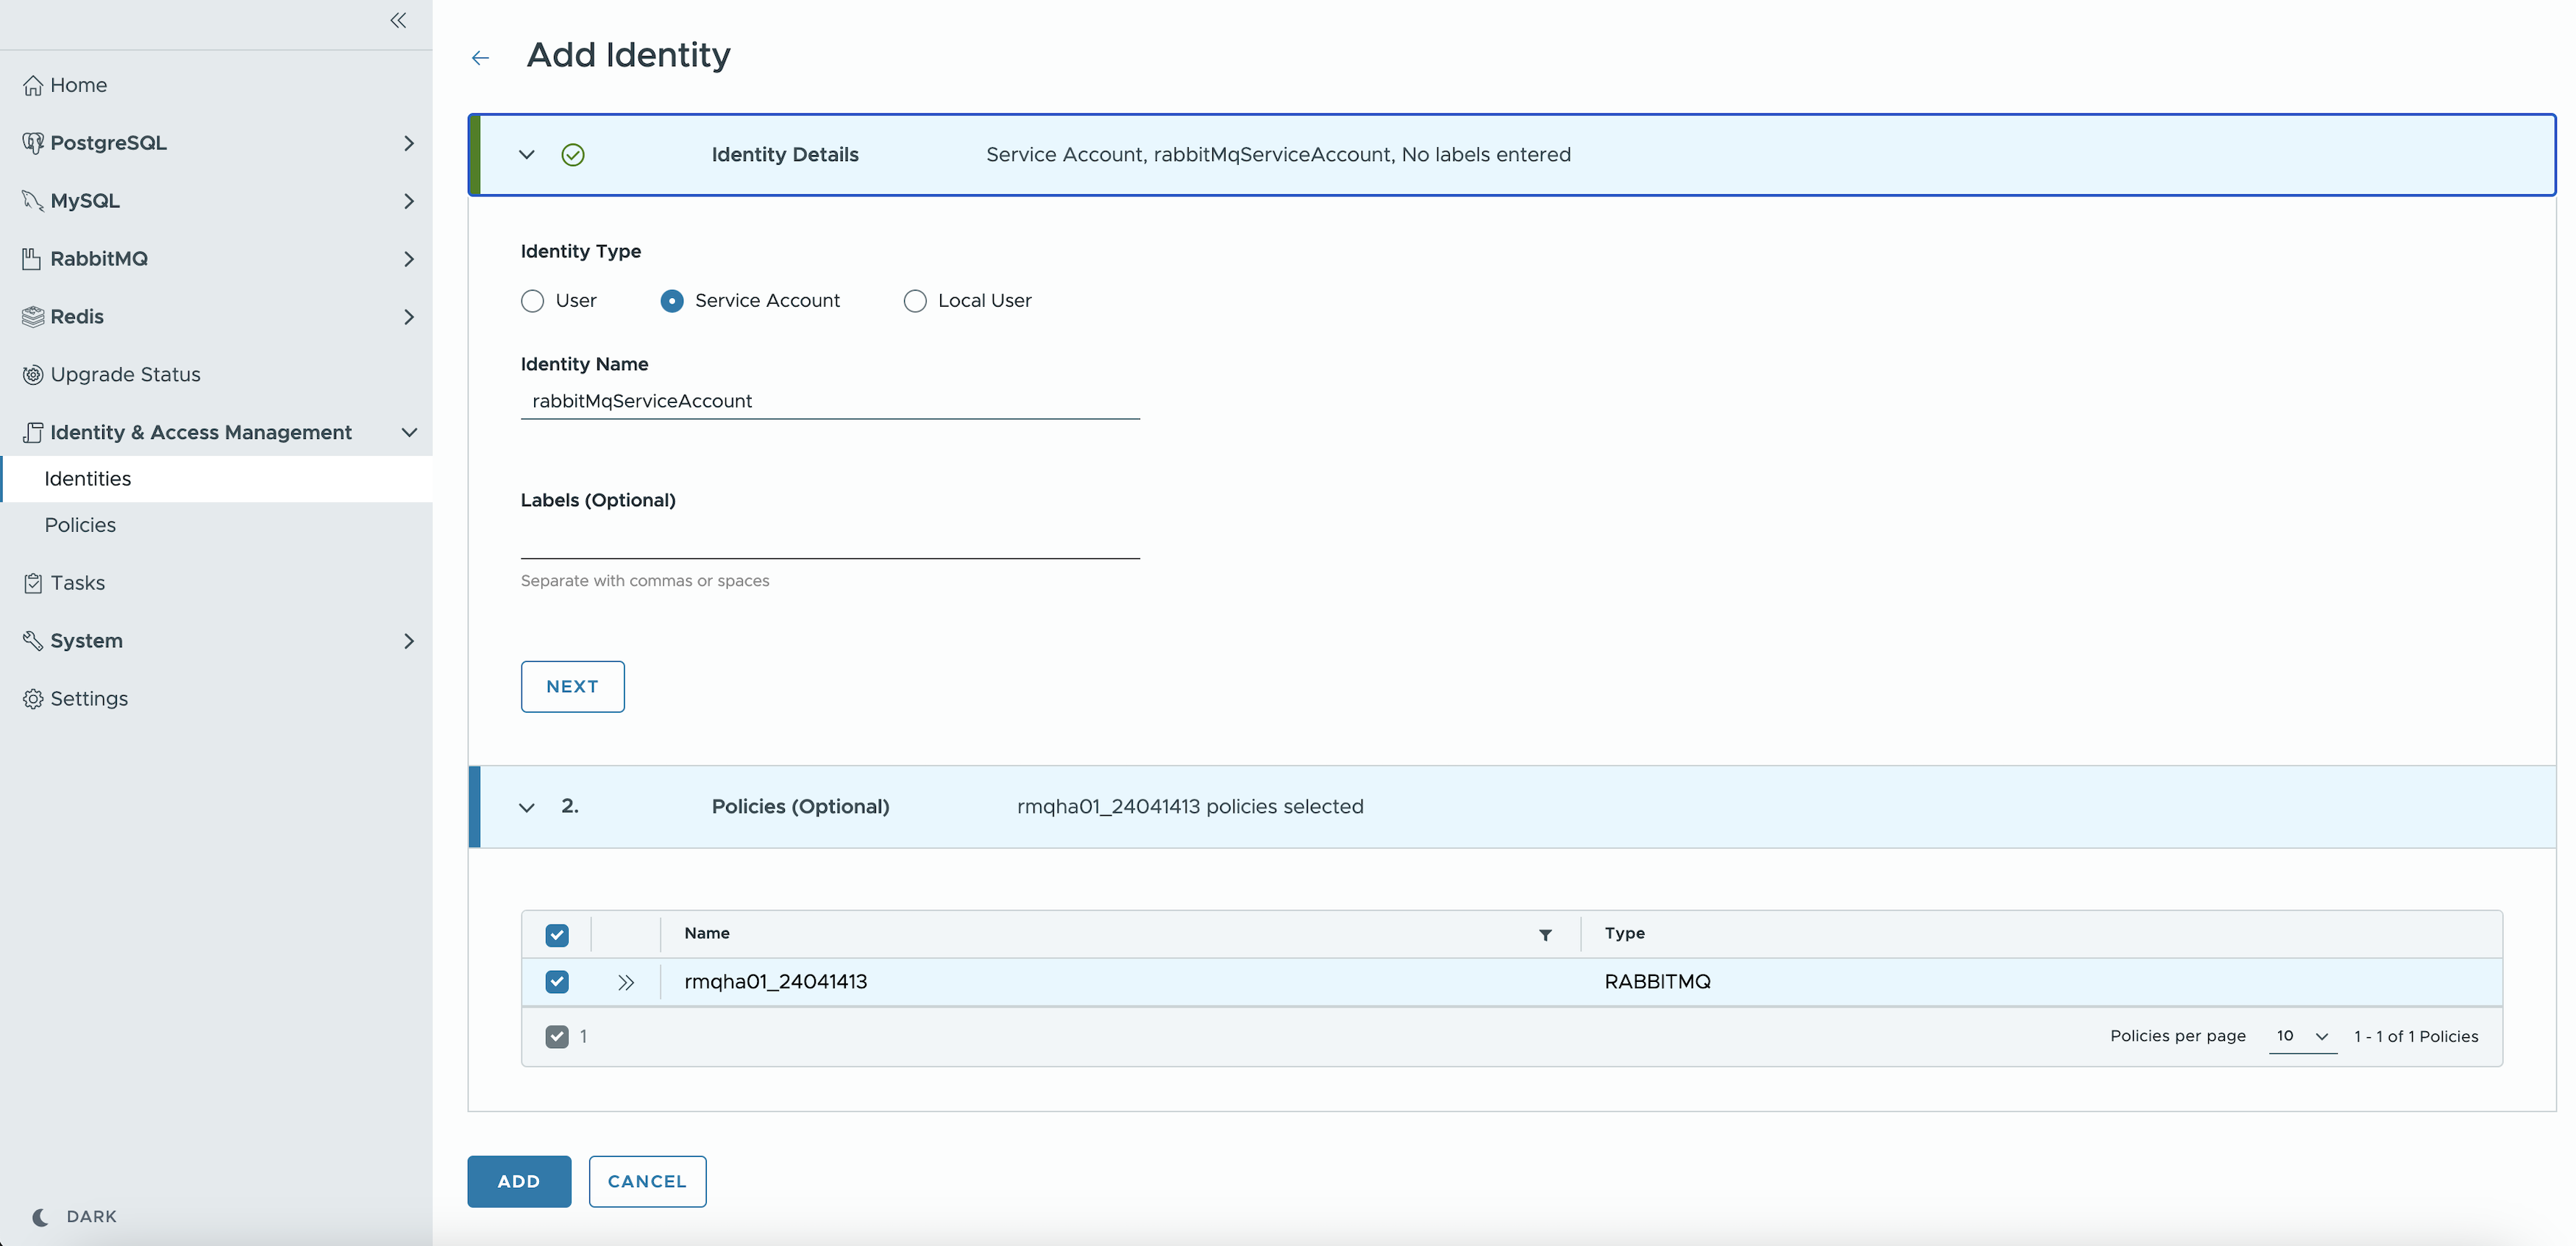
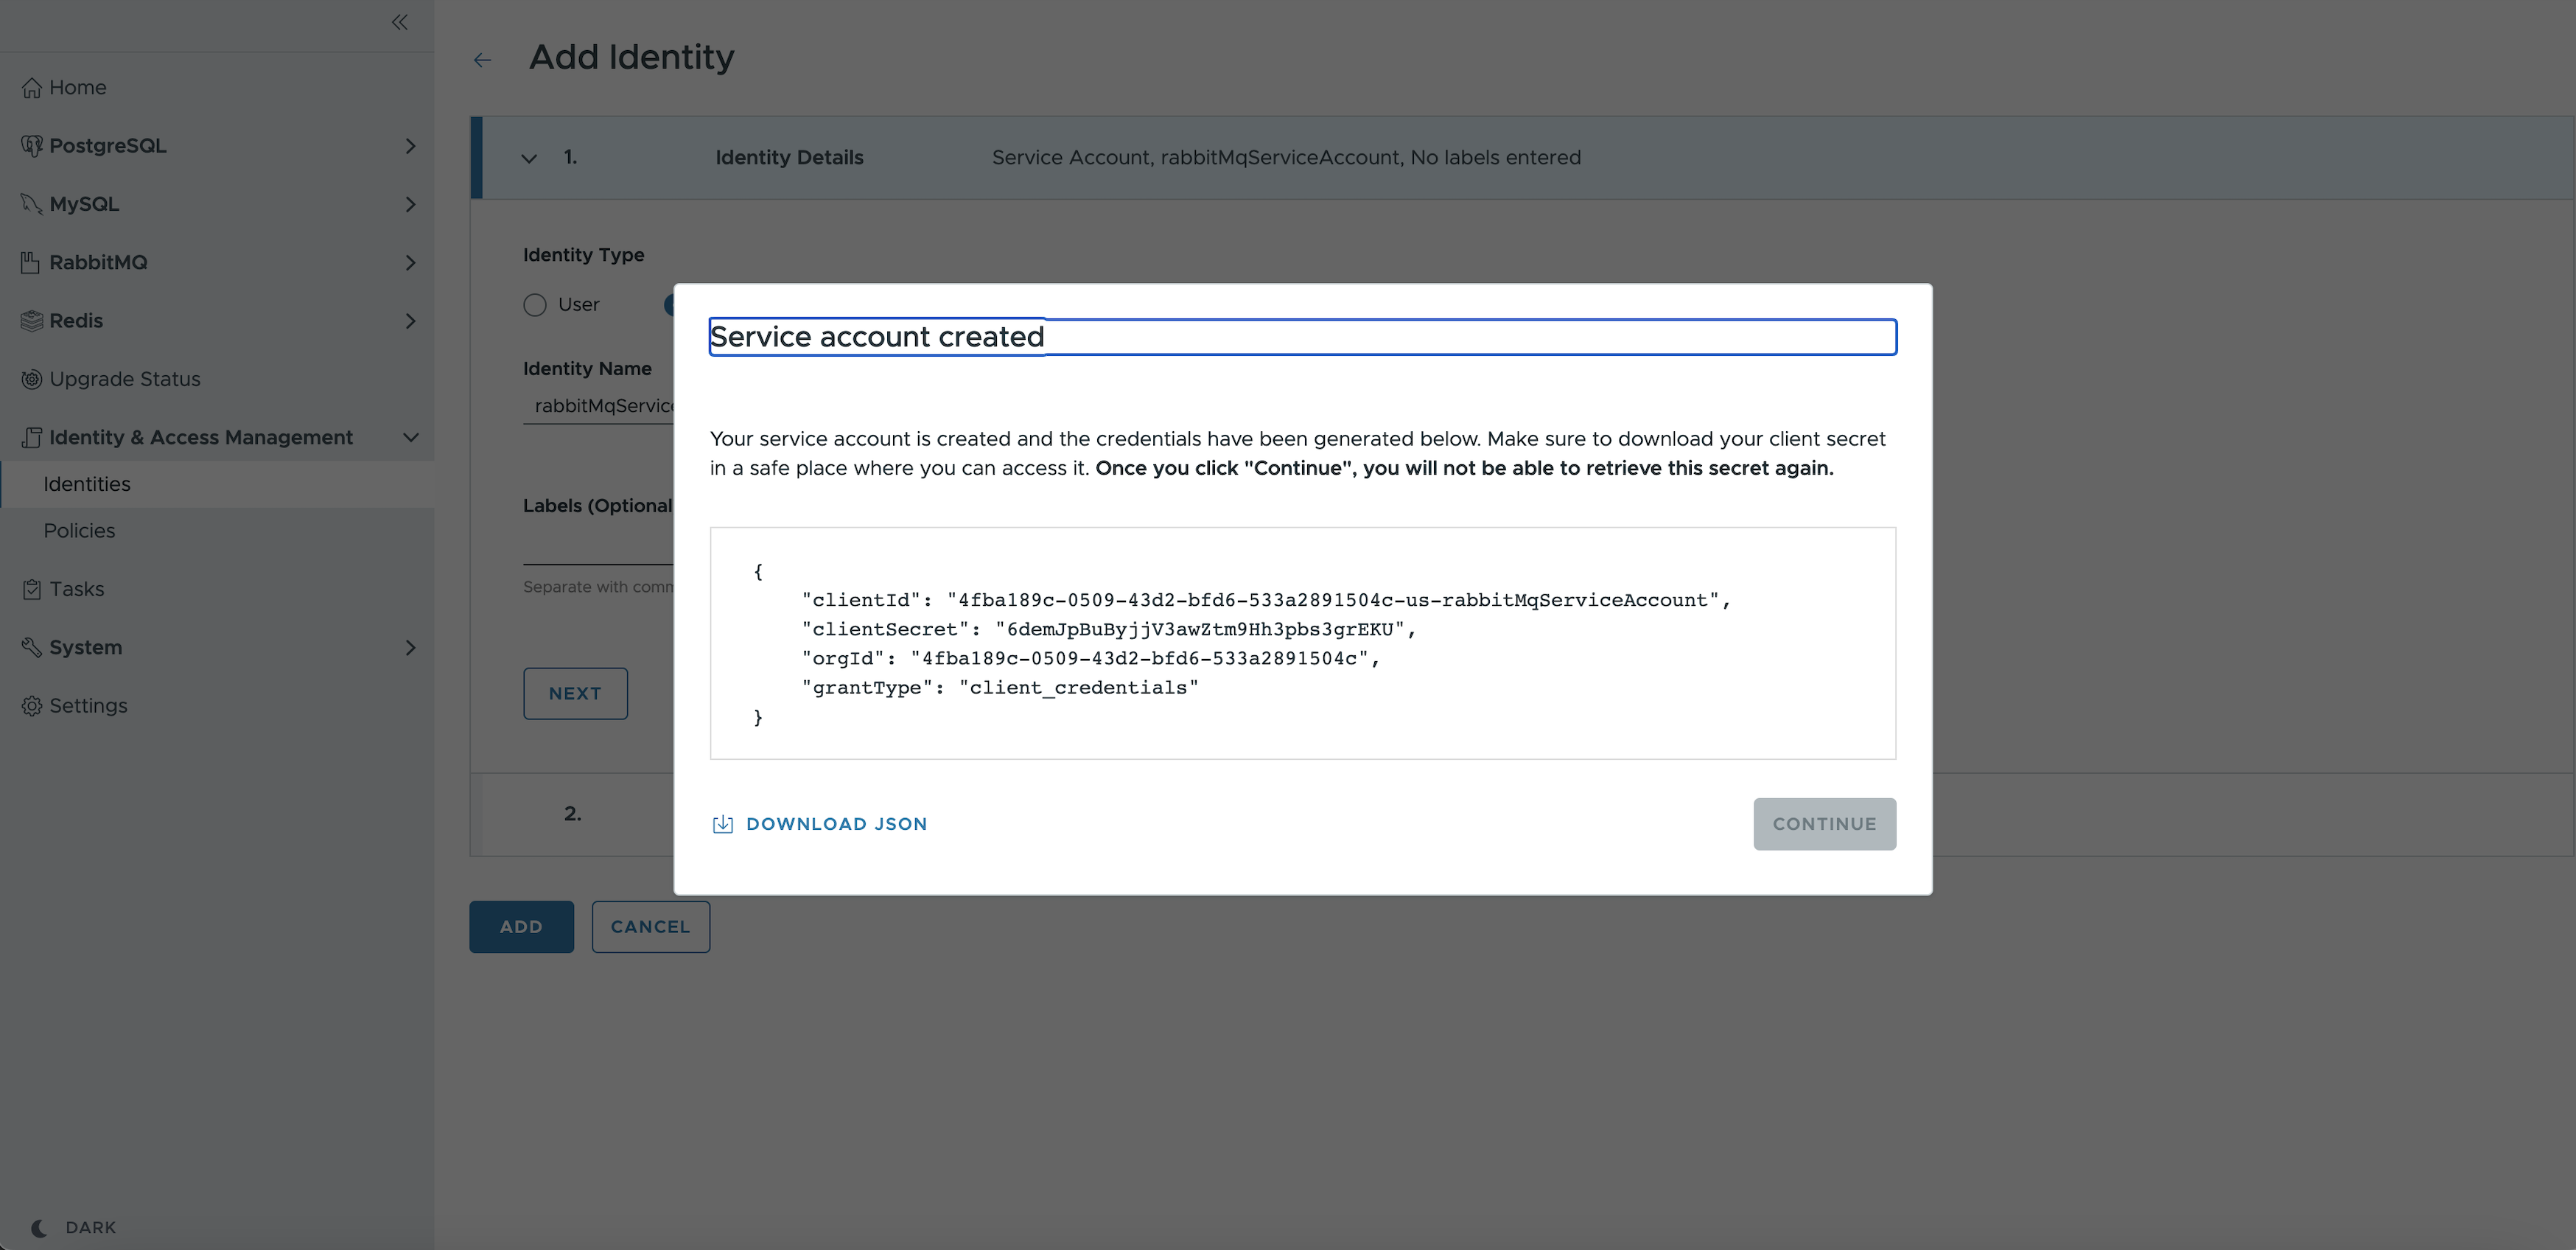
-
Click Add. The new service account is created. A pop up screen appears, prompting you to save the client id and client secret for the account, in JSON format. Record this information for use when accessing the TDH API programmatically.
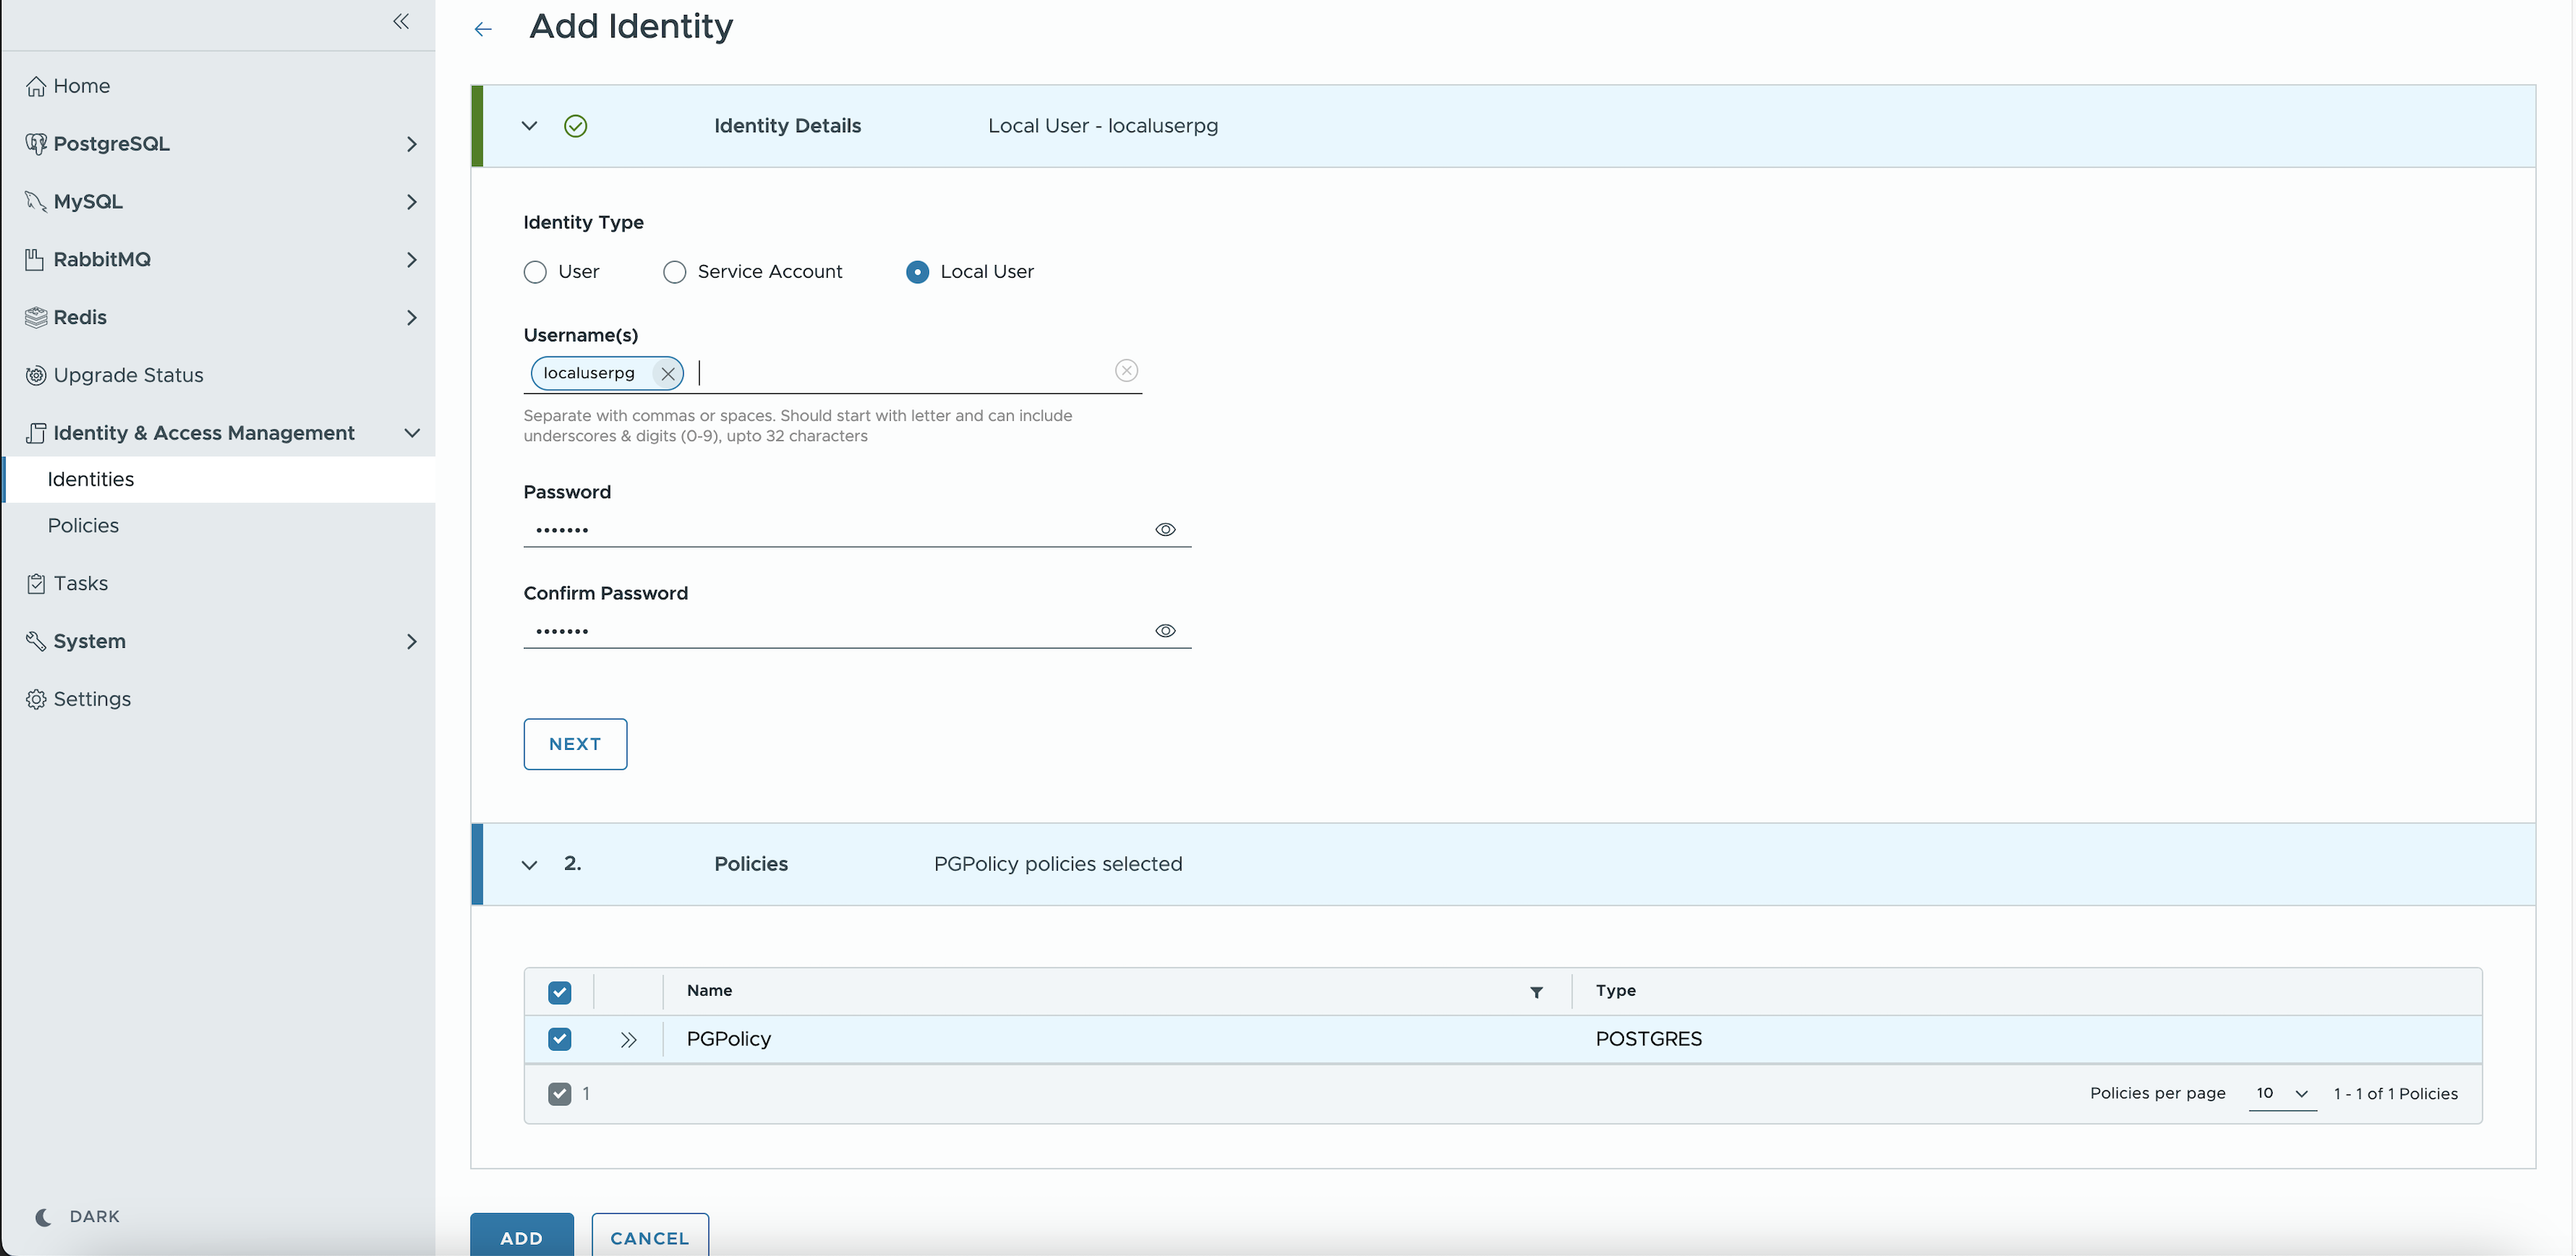
Create a Local User Account
To create a new Local User account you need to navigate to Identity & Access Management > Identities > Local Users option from the left menu
-
Click on Add Identity button, enter required details like local user name, password.
-
Associate this local user with any Policy and click Add. This runs a task that creates a local user account on the data service instance, with permissions governed by the associated Policy.
Create an Organization
To create a new organization as a SRE User:
-
Navigate to Organization option from the left menu.
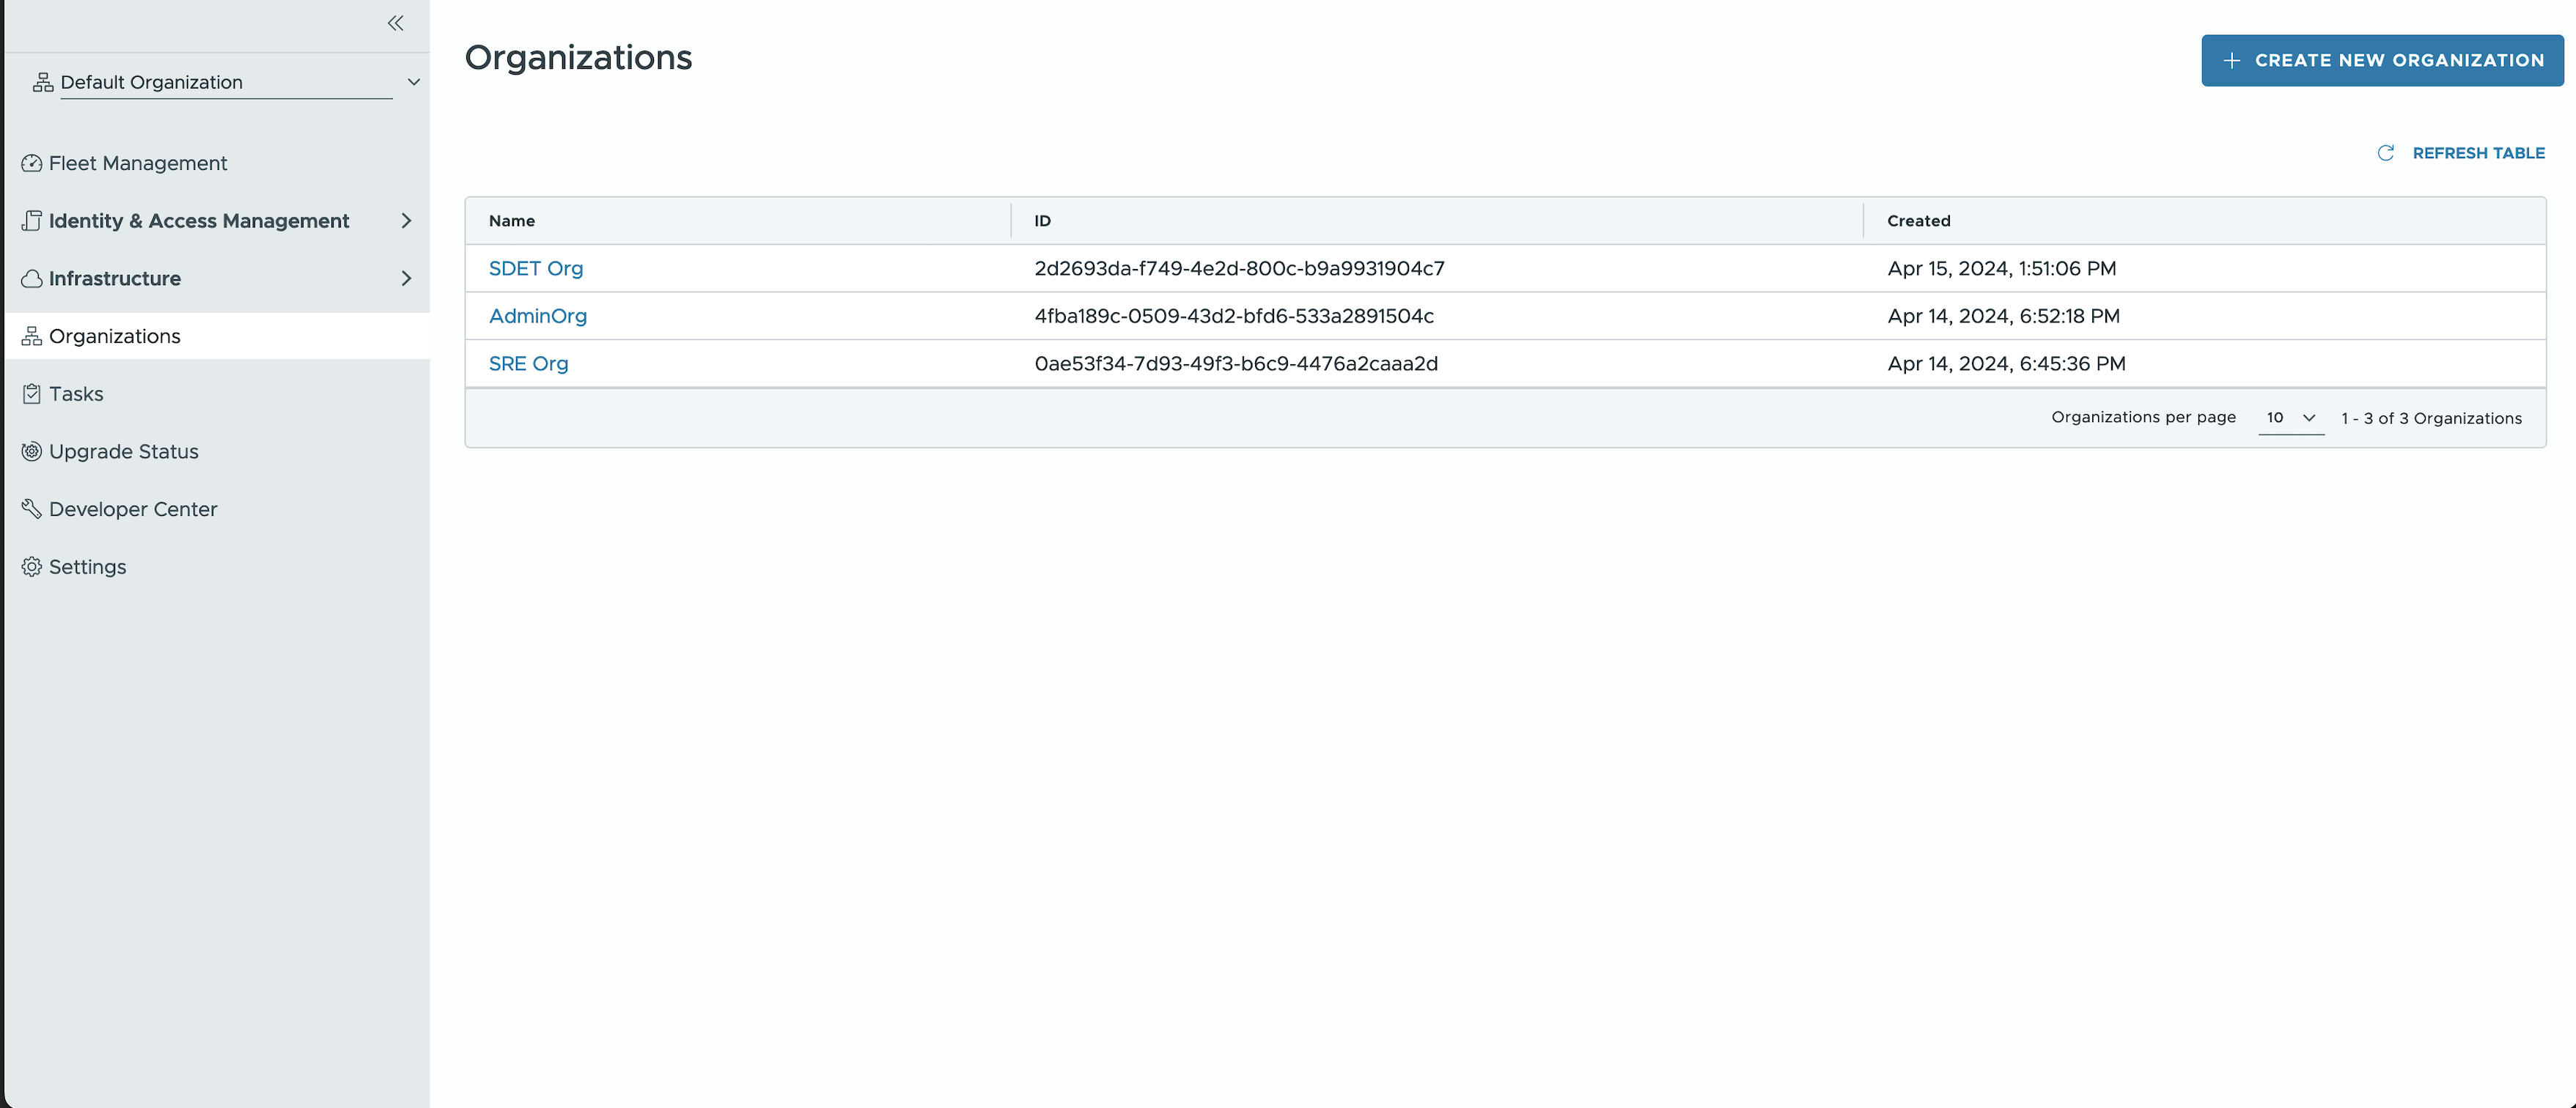
-
Click Create New Organization.
-
Enter the Organization name and an email address for its first admin user.
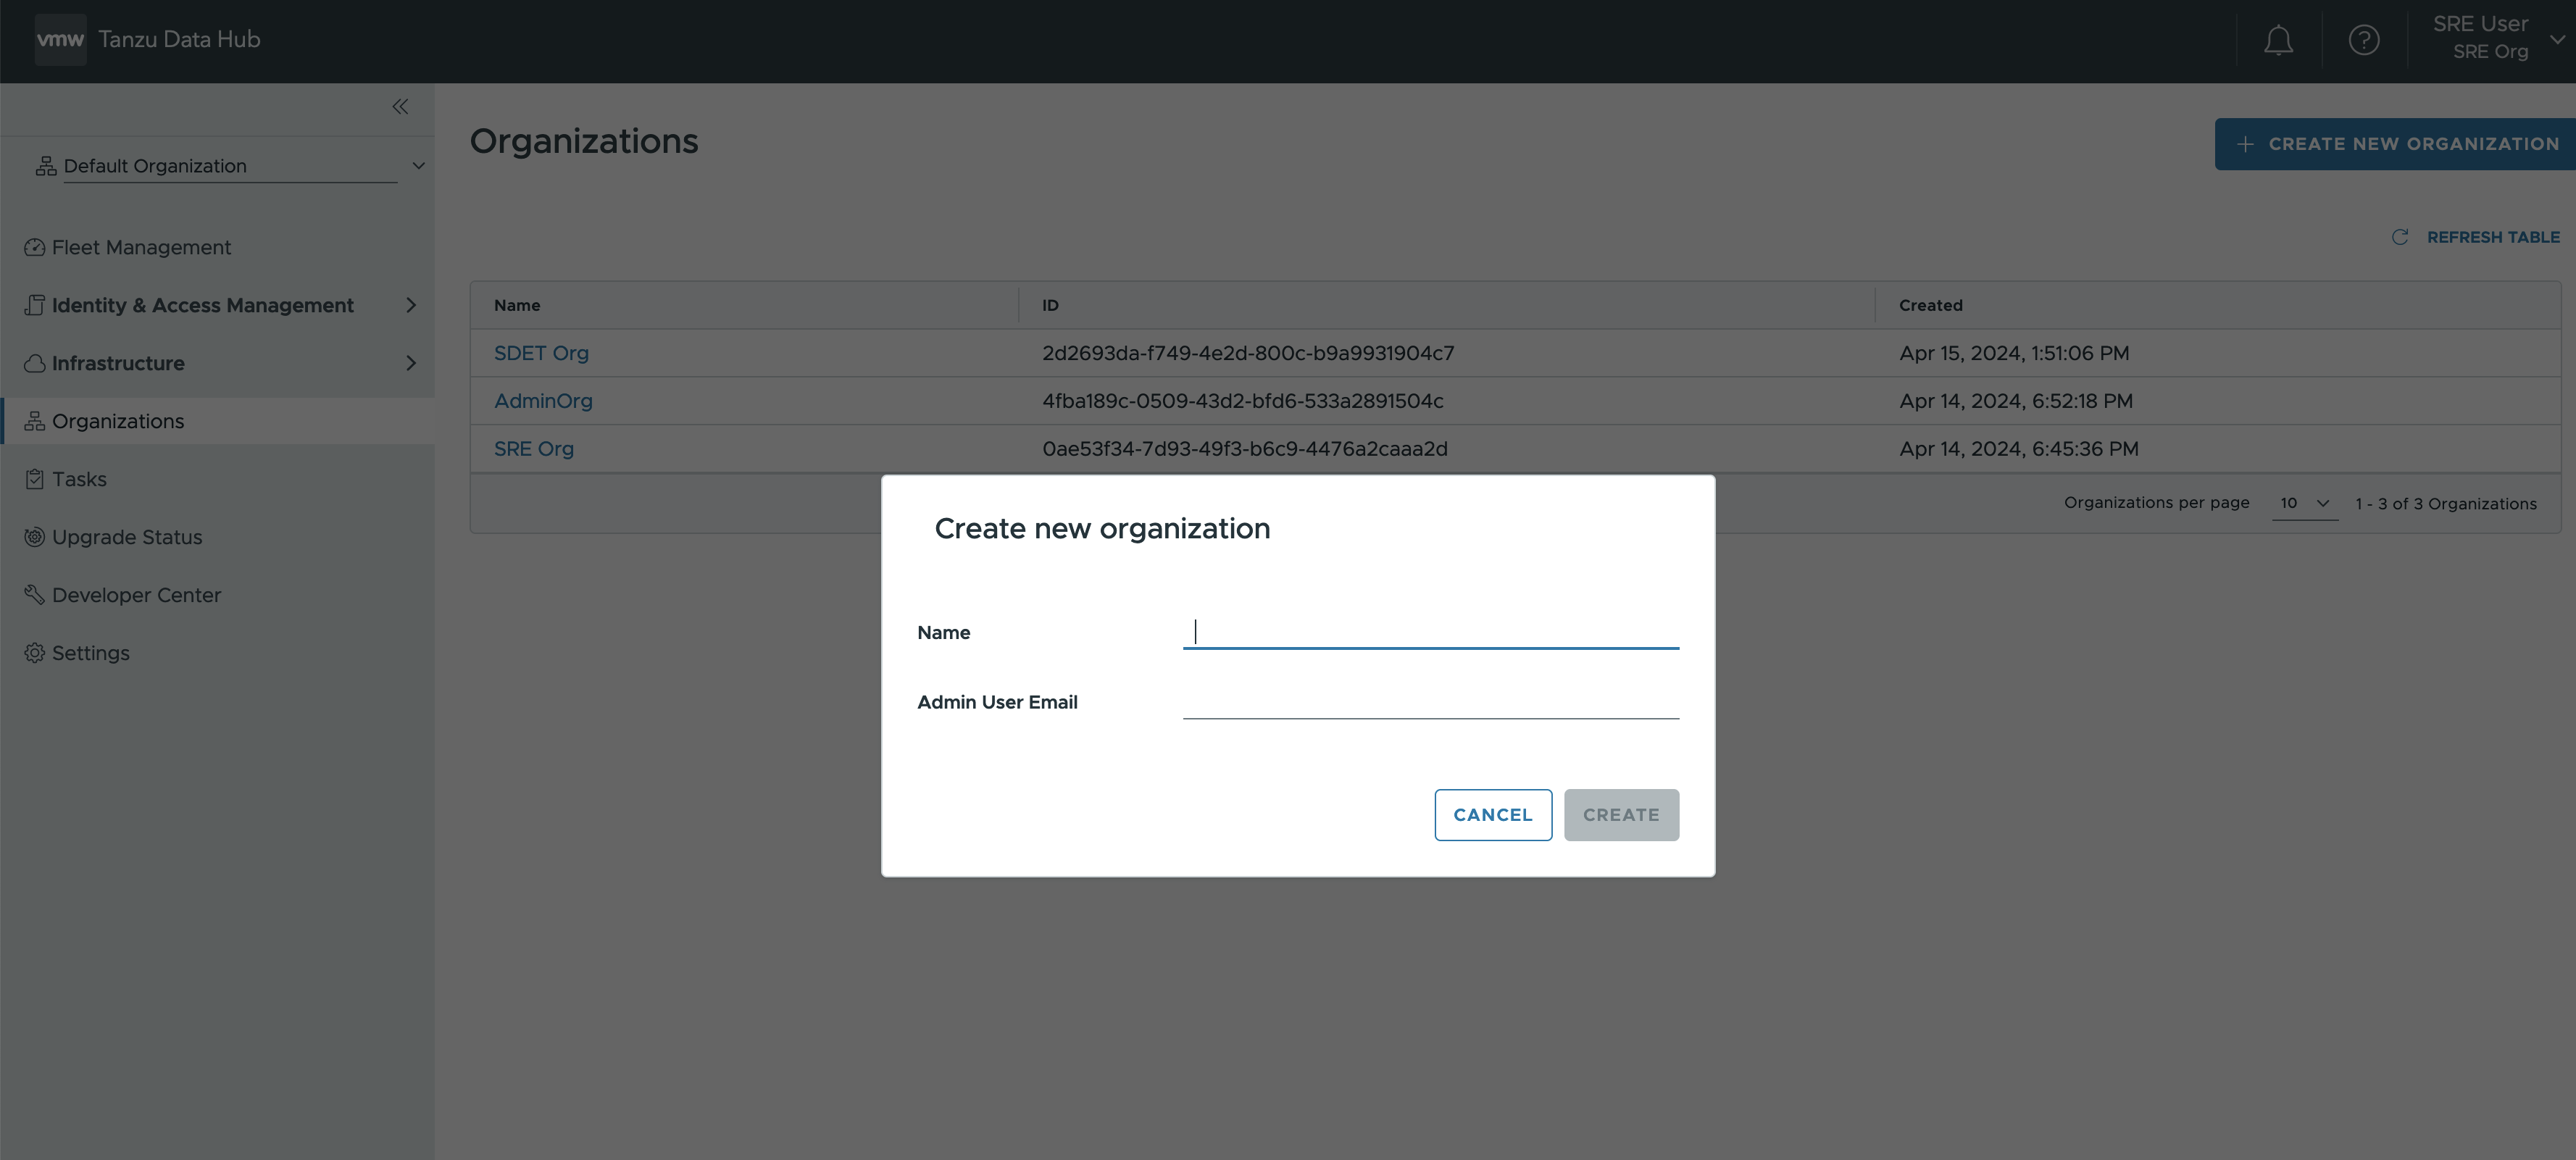
-
On clicking Create, new Organization is created and admin user is invited via email.
