Clone operation creates an exact duplicate of the source system into a new target system. The most common use case is to take a source development system and create a clone of that system for separate development work. Other use cases may apply.
Procedure
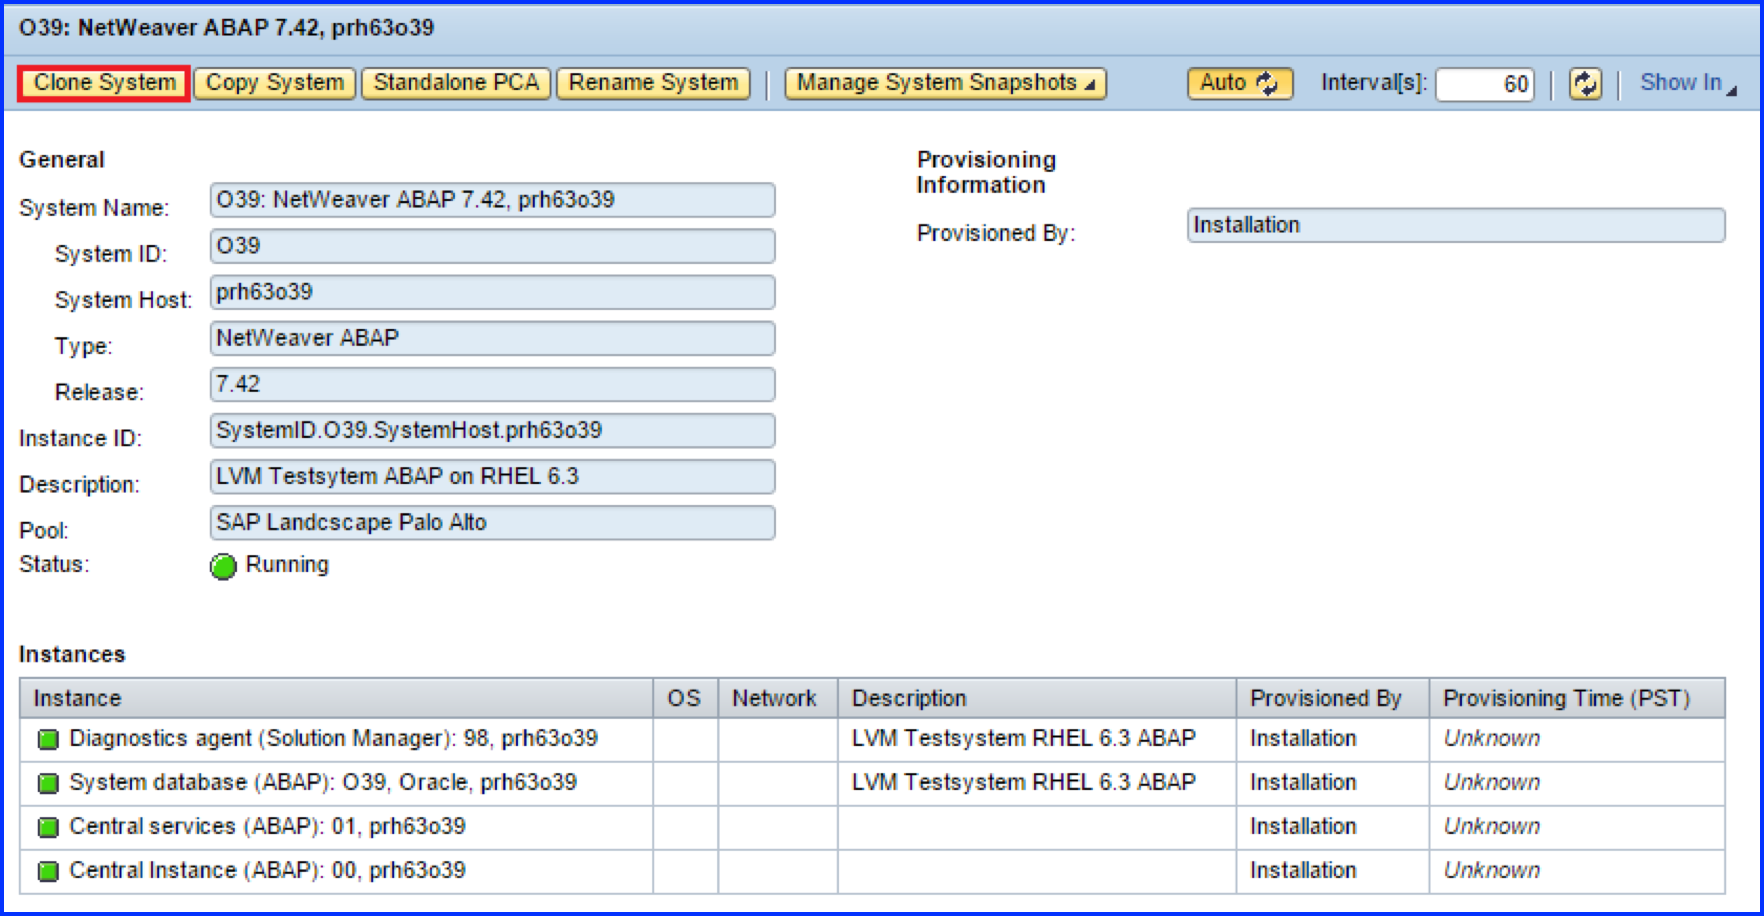
Login to the SAP LaMa's administrative console. Click on System and AS Provisioning tab under Provisioning option in the menu bar.
Figure 1. LaMa - Provisioning - System and AS Provisioning
Select the source host that you wish to clone
Click on the Clone System tab in the menu bar
A new
System Cloning dialog window will appear in the browser
Figure 2. Clone System
In the first step called Basic, type in a name for the new target host (the clone that you are creating). You can provide an optional Description of the new Clone System that you are about to create. Click Next tab in the menu bar.
Figure 3. System Cloning - Basic
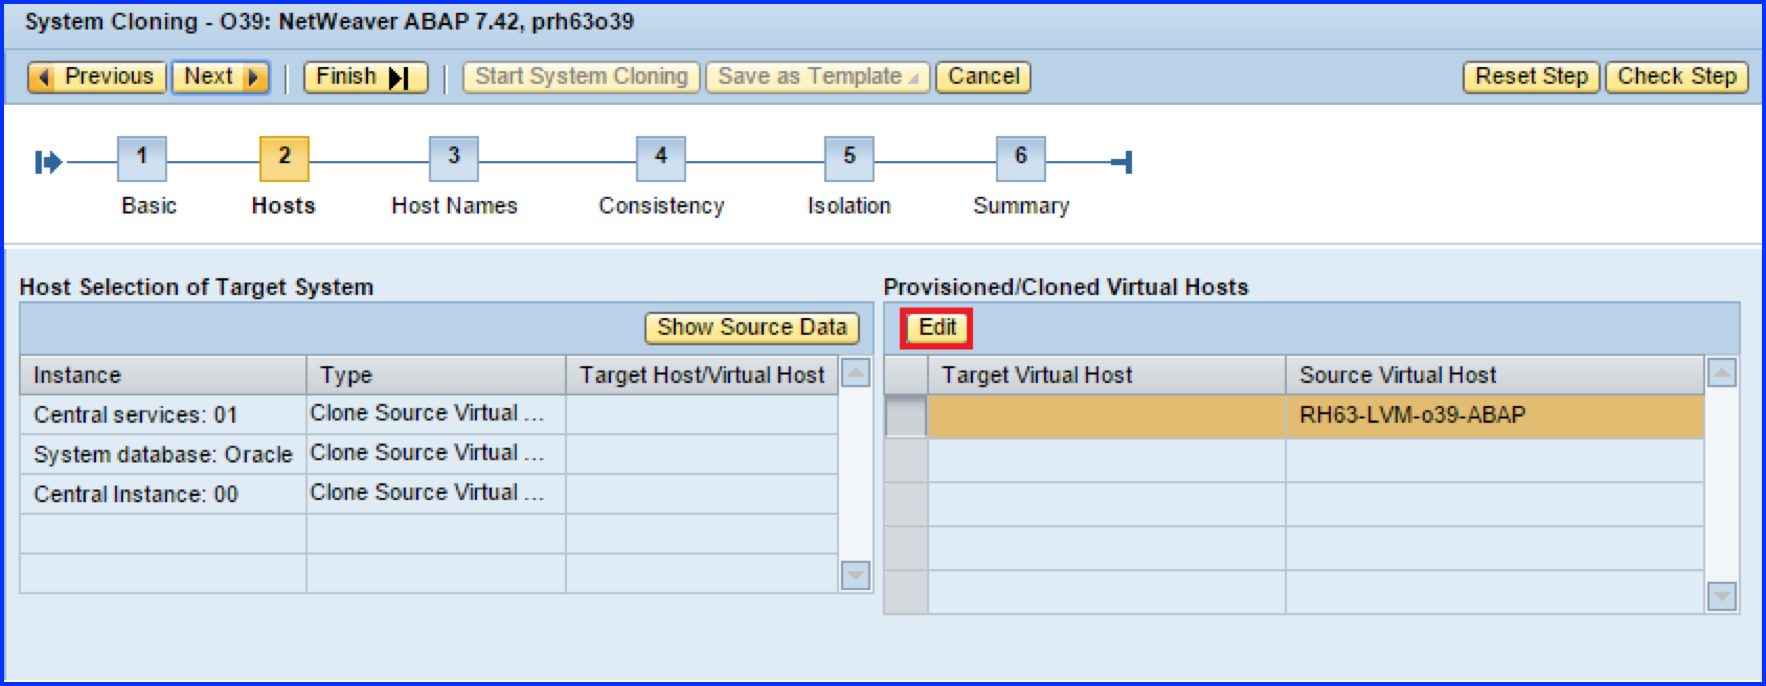
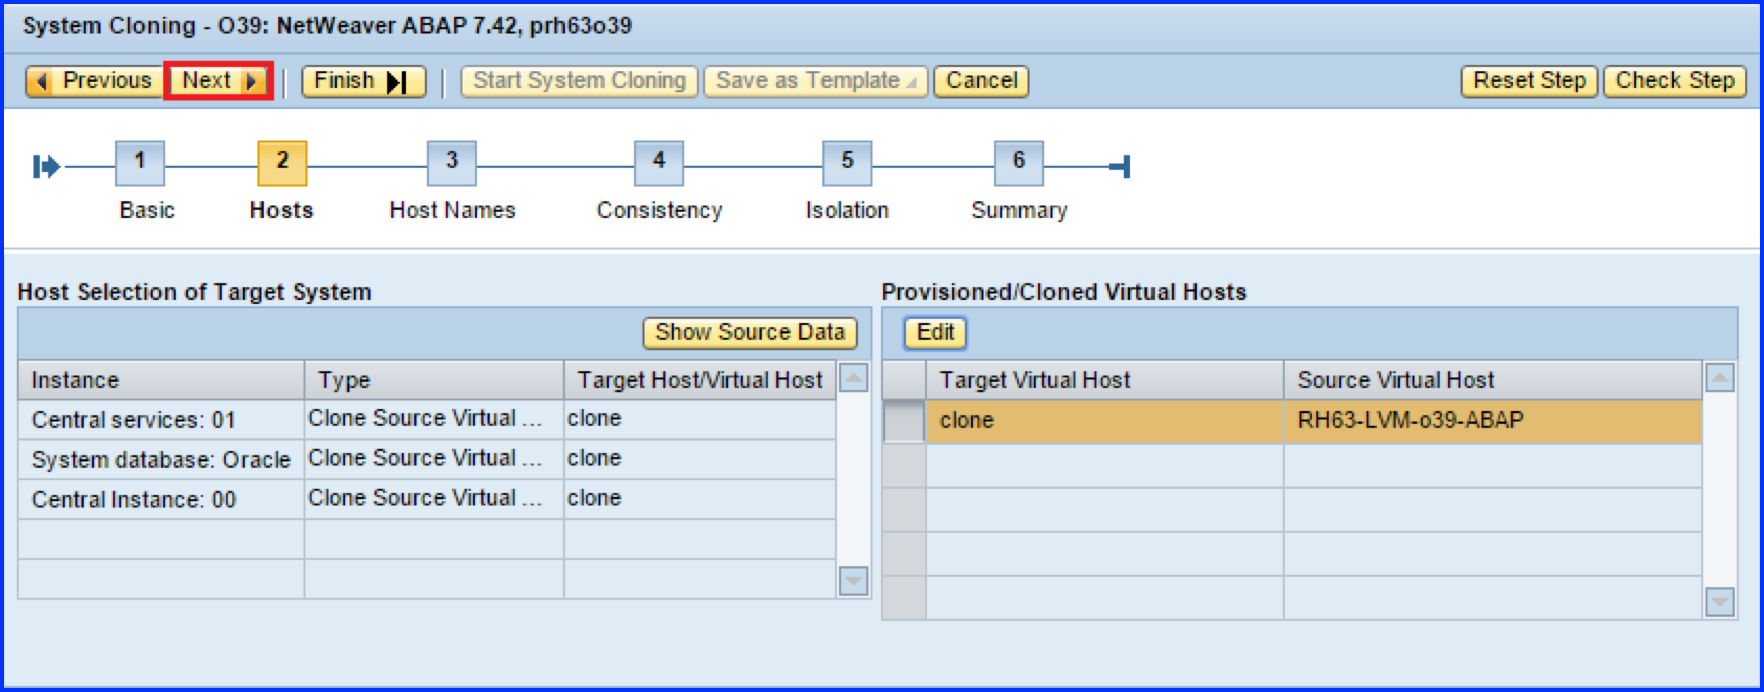
In the second step called Hosts, you define the virtual host settings of the new Clone System. Click the Edit tab that is highlighted for reference
Figure 4. System Cloning - Hosts
The
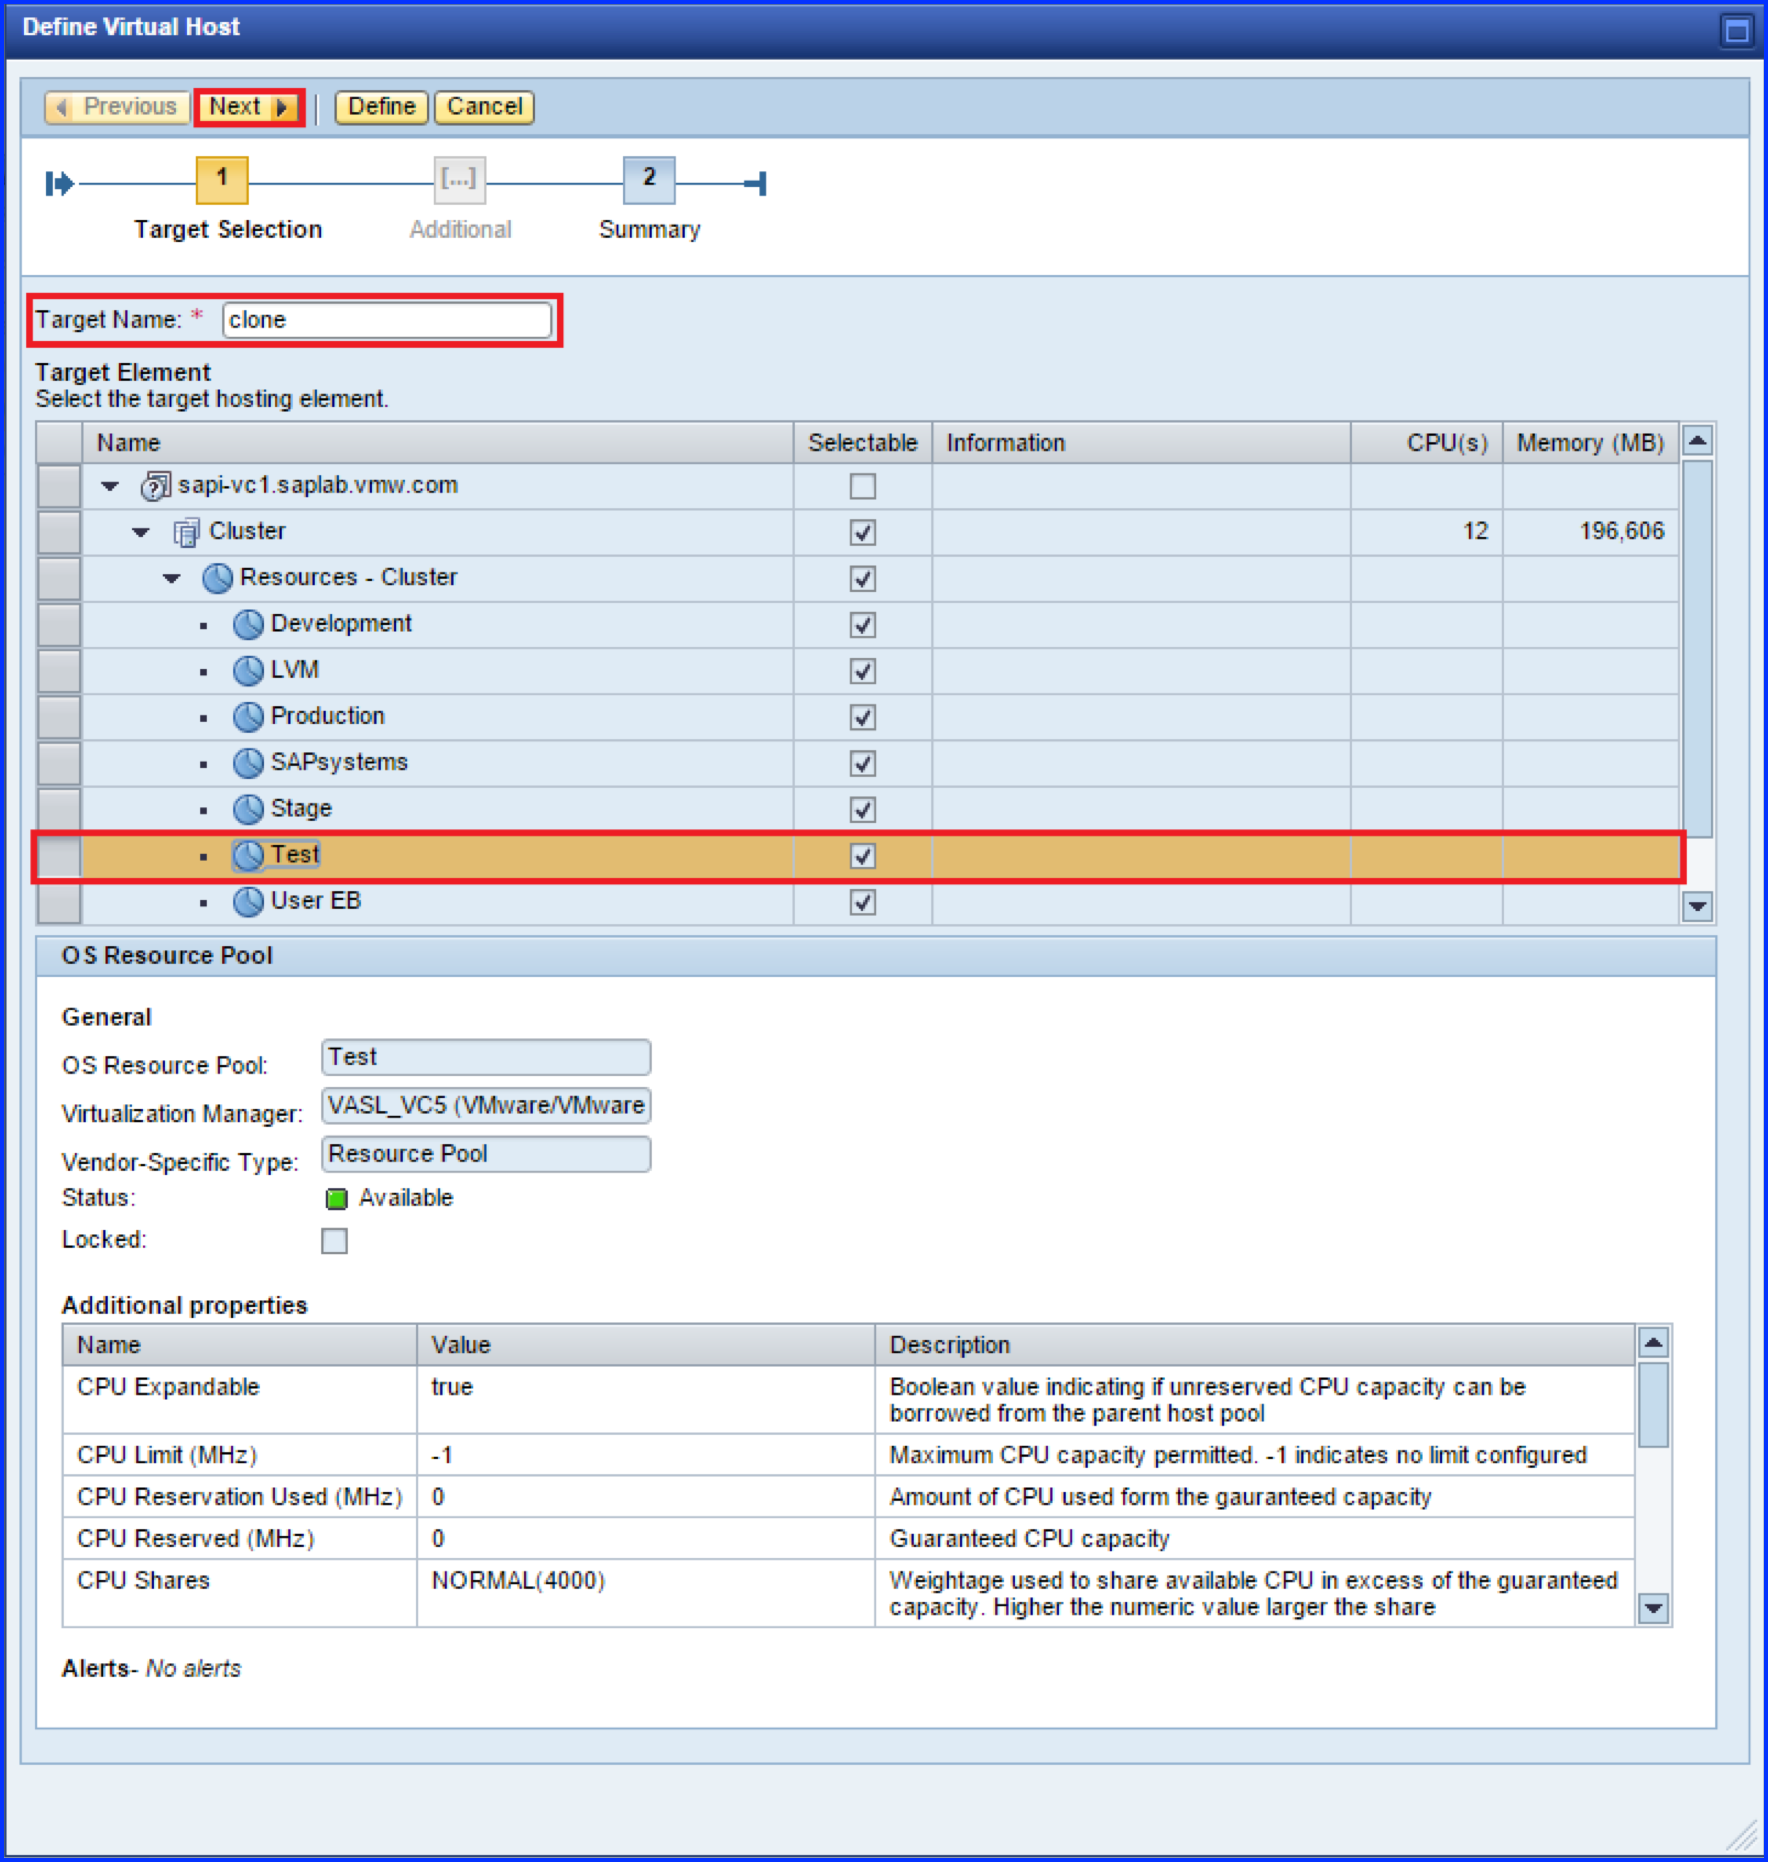
Define Virtual Host window opens up in the browser.
The first step here is Target Selection. Select a target resource pool or ESXi host. The dialog window presents useful information like current utilization levels for either the resource pool or host. This should enable you to take informed decision with regards to the resource pool / ESXi host to be used for placing the target clone system. Click the Next tab in the menu bar of the Define Virtual Host window.
Figure 5. Define Virtual Host - Target Selection
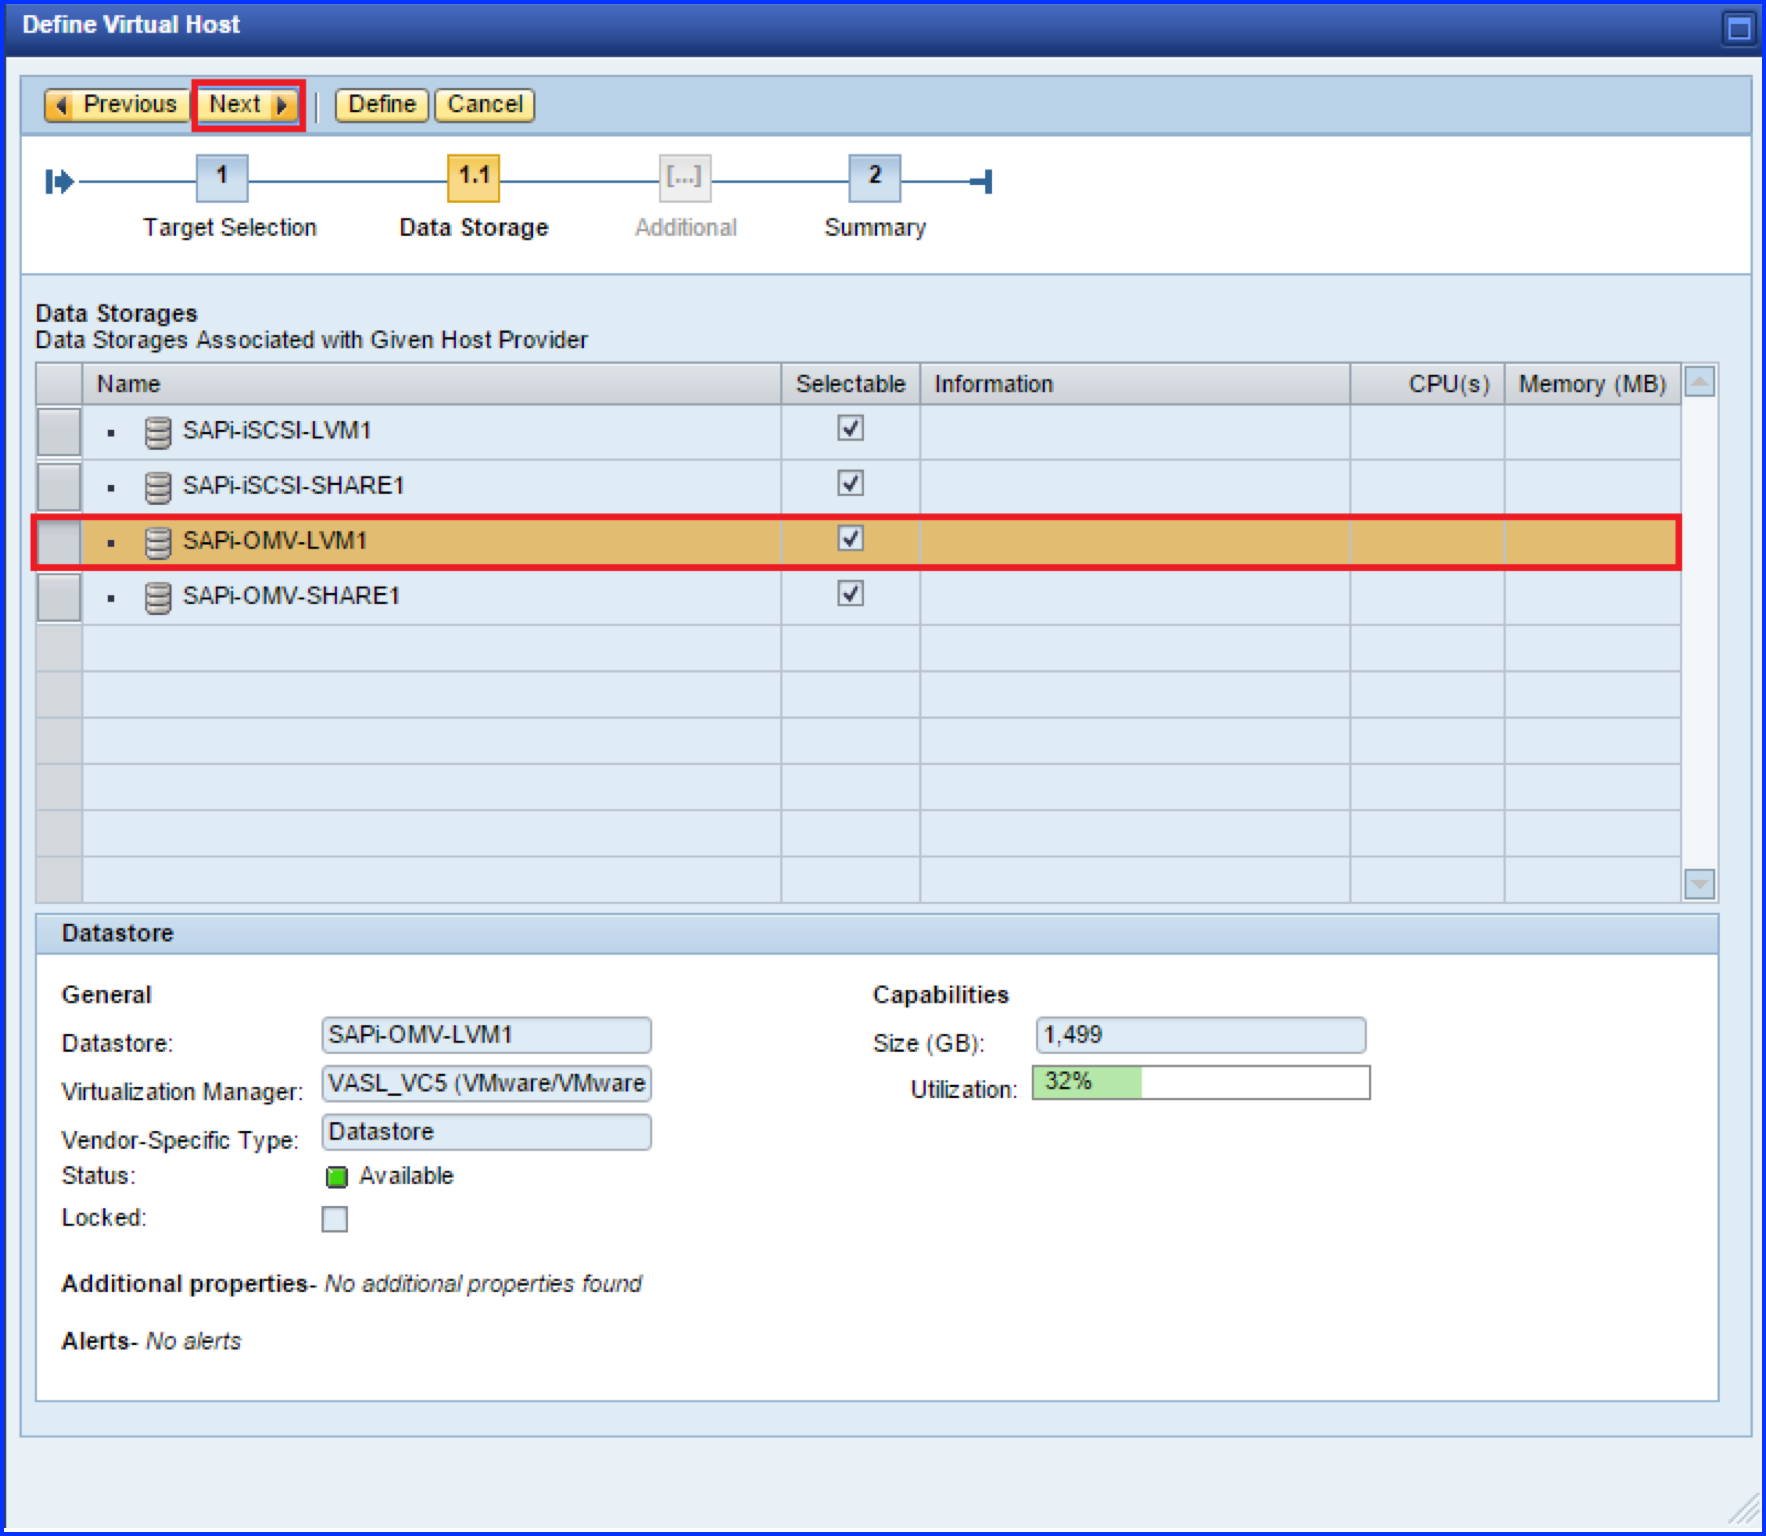
The next step is Data Storage. You select the target Datastore for the new clone system in this step. The dialog window presents useful information like size and current utilization levels for available datastores. This should enable you to take informed decision on the appropriate datastore to use for the new clone system. Click Next tab in the menu bar of the Define Virtual Host window.
Figure 6. Define Virtual Host - Data Storage
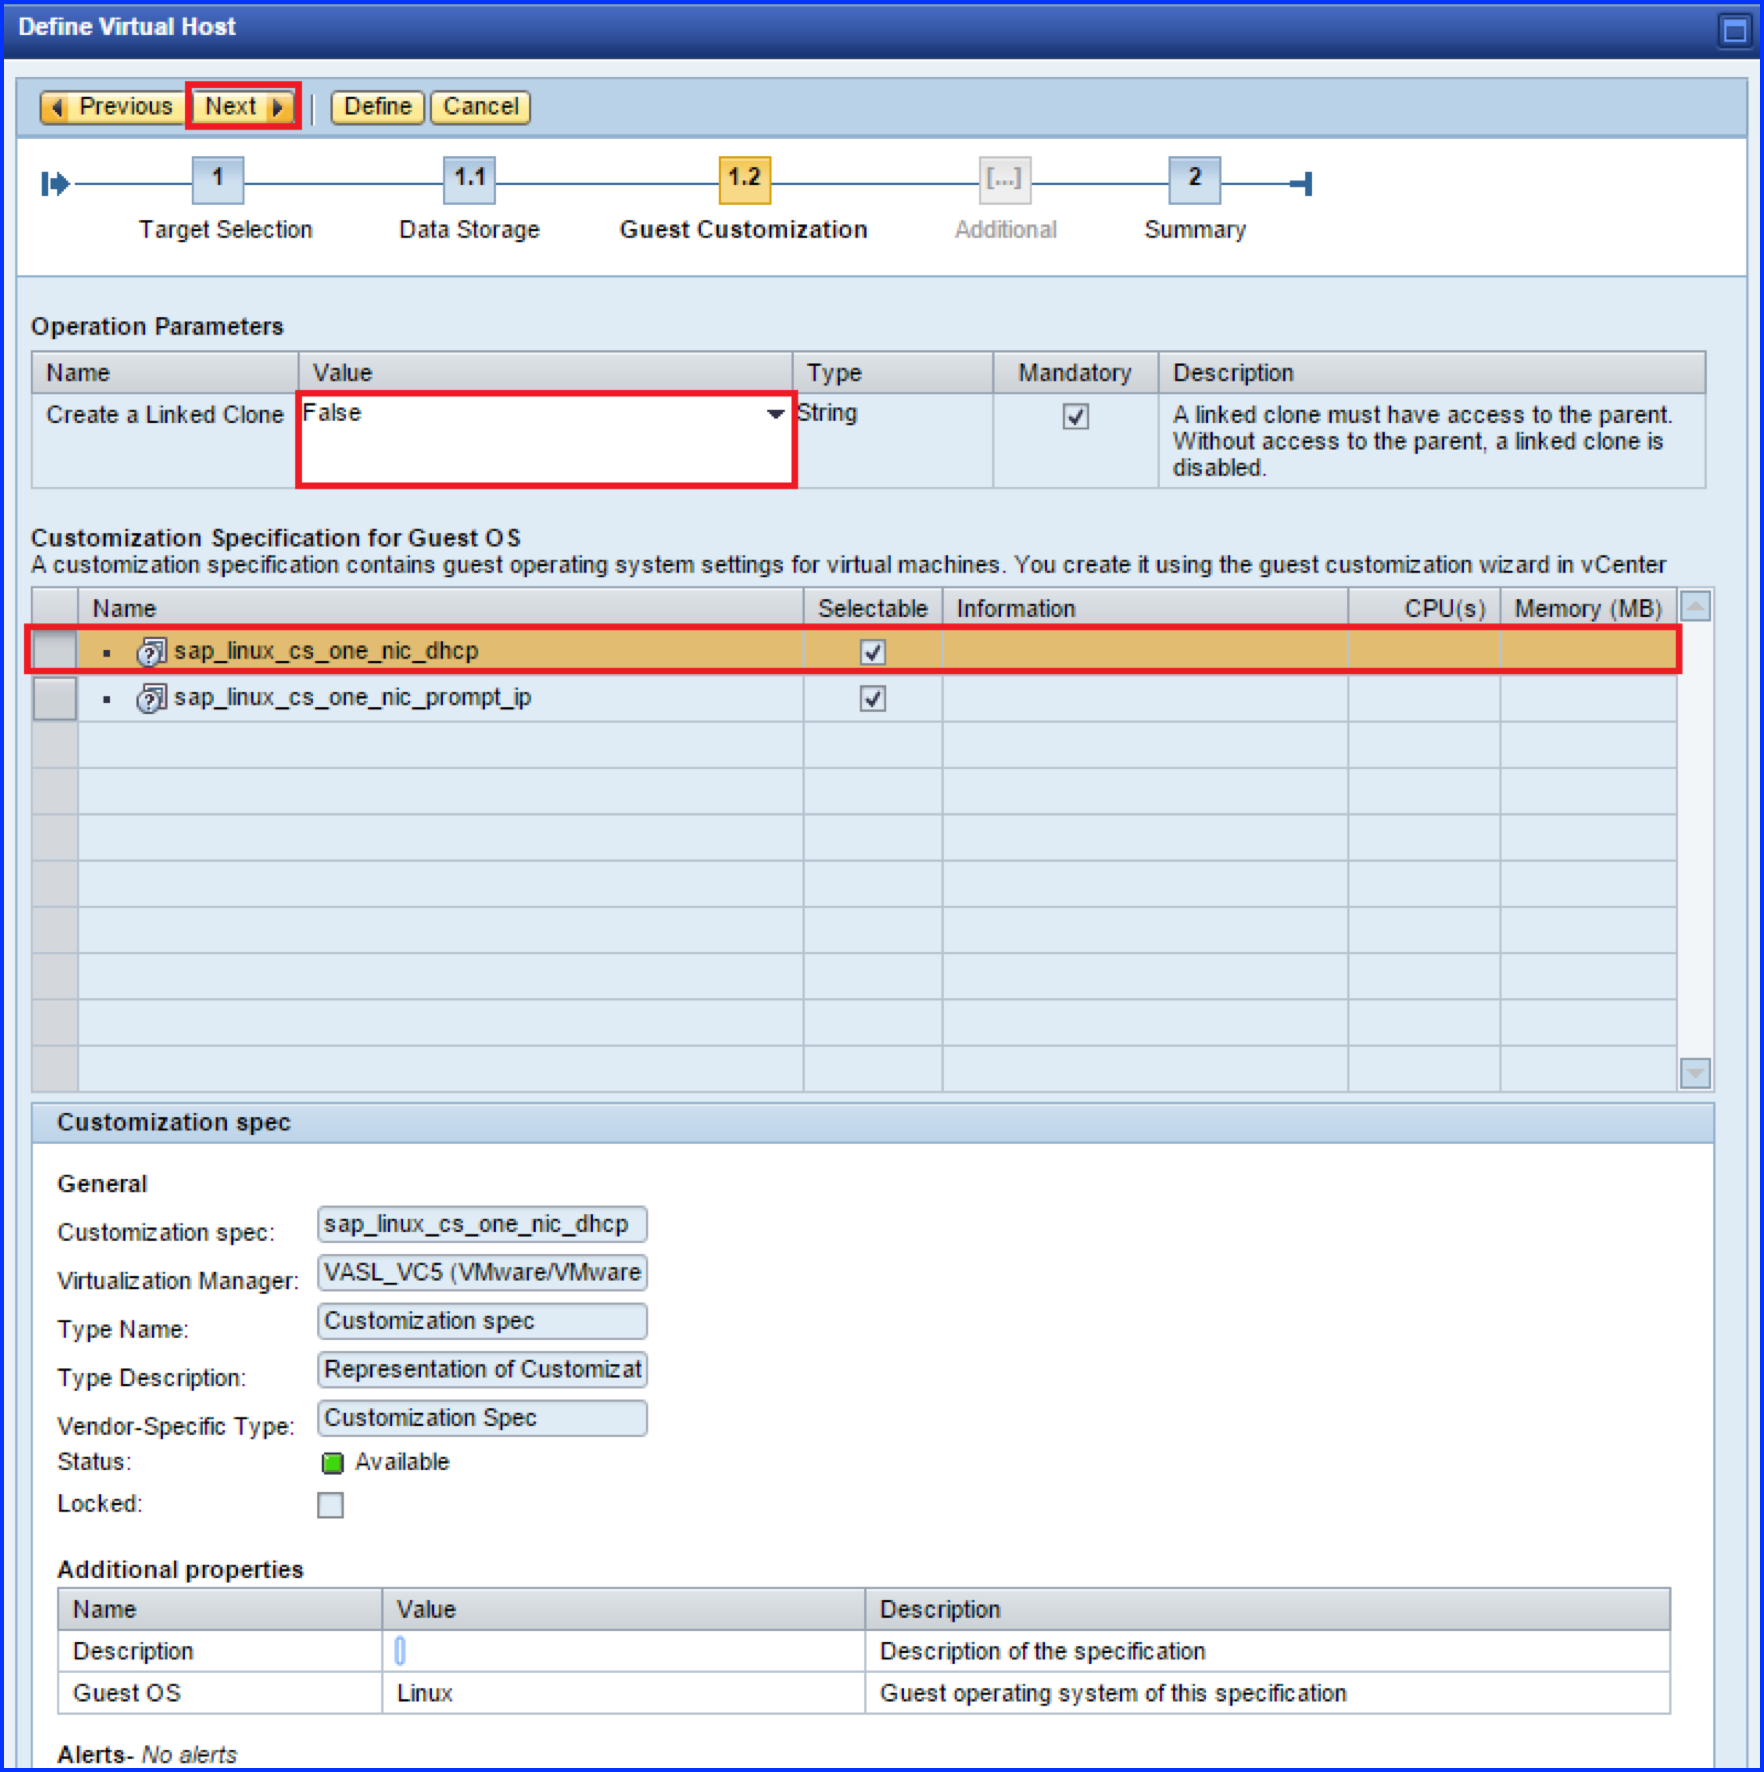
In the third step called Guest Customization, you —
Figure 7. Define Virtual Host - Guest Customization
Select the type of clone that you intend to create — either Linked Clone or Full Clone. You do this by selecting appropriate value in the Value drop down list.
Note:
A Linked Clone creates a target system that has a file link to the original source system. This reduces the utilized storage for the target system. It is most commonly used in development and sandbox systems. Linked Clones creation completes substantially faster than Full Clones.
A Full Clone creates a target system that has the same disk structure and size as the source system. There is no link between the source and target systems. Full clones are most often used to create production systems and /or systems that can be exported to be used in other datacenters.
Select the Guest Customization specification for the target Clone System.
Guest Customization specifications are created in the VMware vCenter Server and are made available via the VMware Adapter for SAP Landscape Management. You need to create a guest customization specification in order to clone a system
Work with your VMware Administrator to create Guest Customization specifications if none are present in the SAP LaMa.
Note that DHCP customization specifications may cause an inconsistent /etc/hosts file contents in the target system. PROMPT customization specifications is a more reliable option. Refer to section Known Issues for more information.
Click Next tab in the menu bar of the Define Virtual Host window.
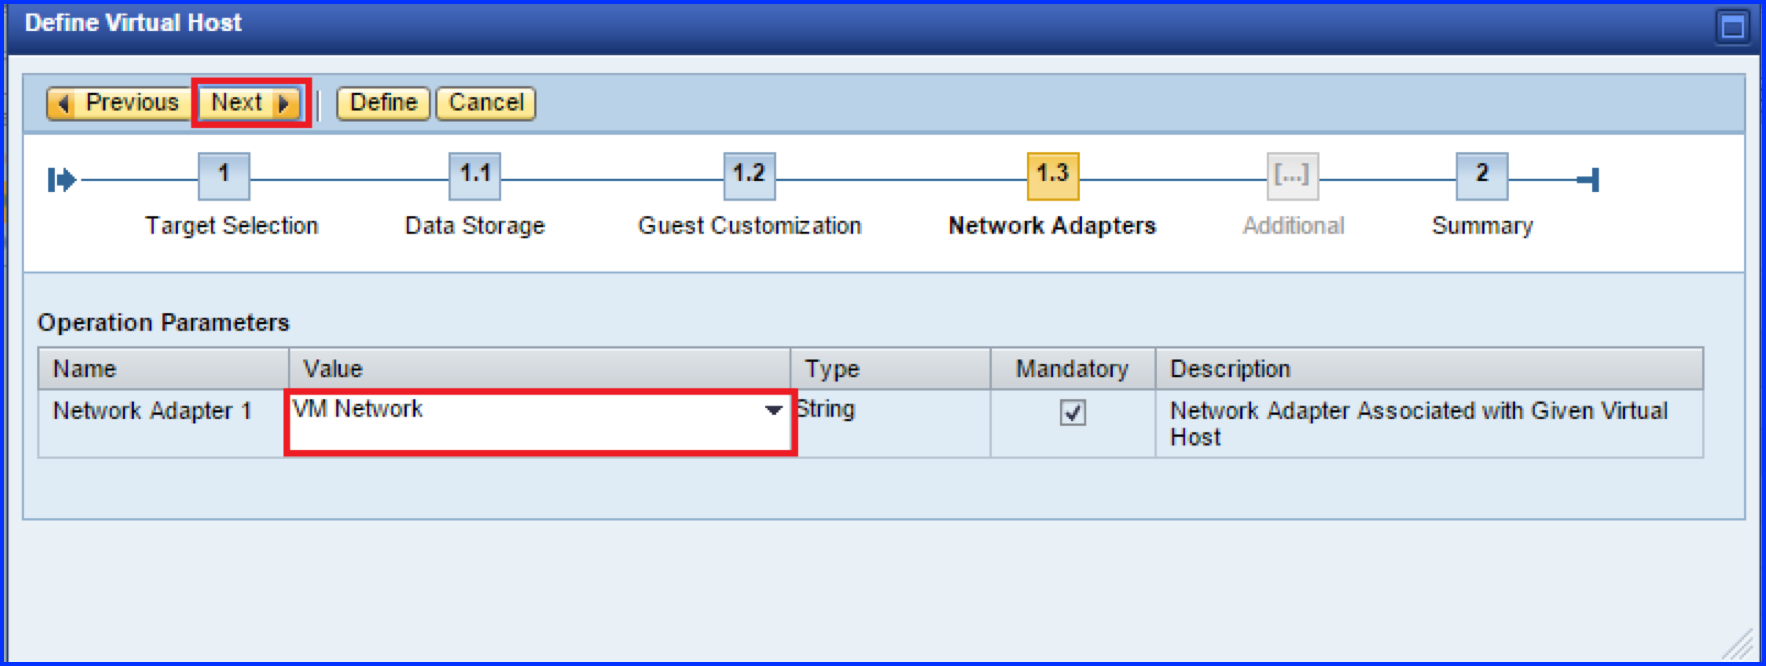
Figure 8. Define Virtual Host - Network Adapters
In the fourth step called Network Adapters, you select the target network for the network adapters of the target clone system.
Note: If you are changing the virtual network at this step, ensure that the network is reachable from the LaMa too. This is required for the LaMa to manage the target system
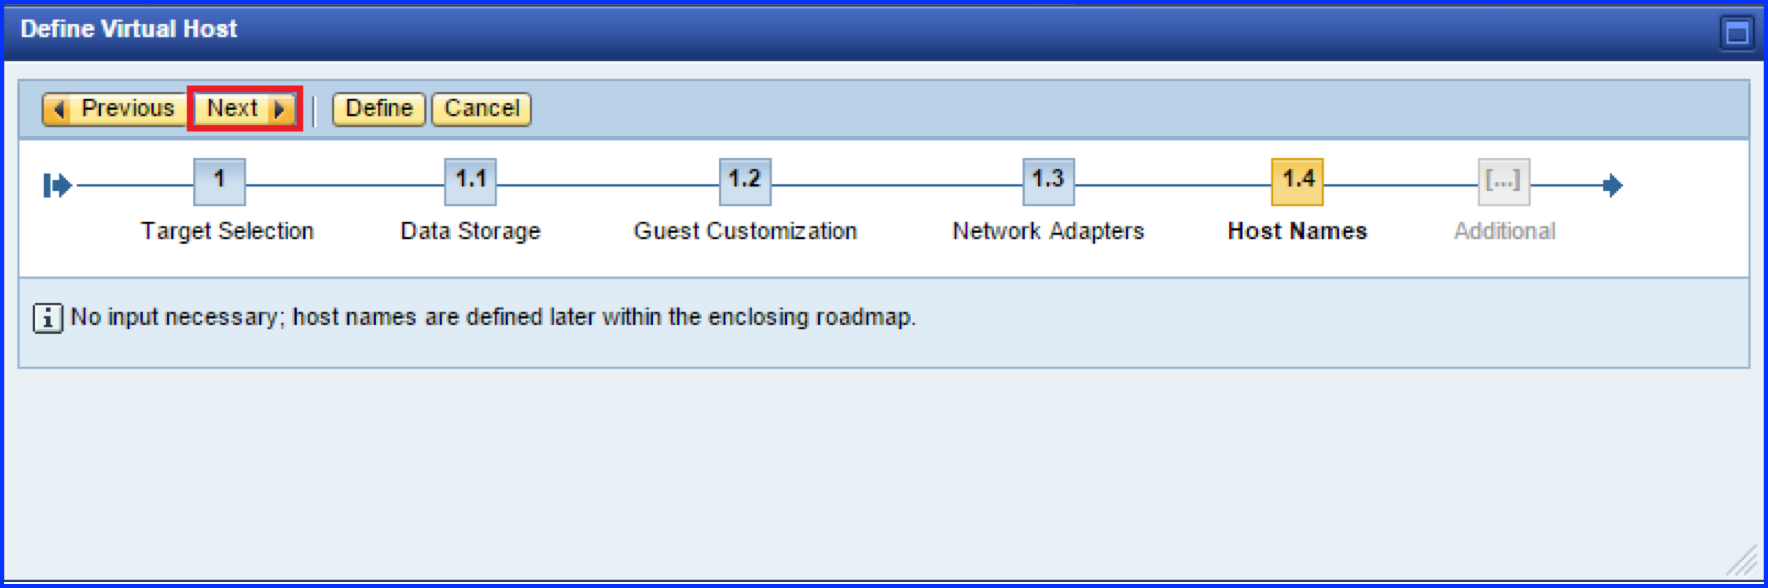
Figure 9. Define Virtual Host - Host Names
The next step is Host Names. Changing the virtual network should be considered on the Host Names step in order to assign consistent IP addresses and hostnames from the new network. There is no input required for the Host Names step. Click Next tab in the menu bar of the Define Virtual Host window to continue.
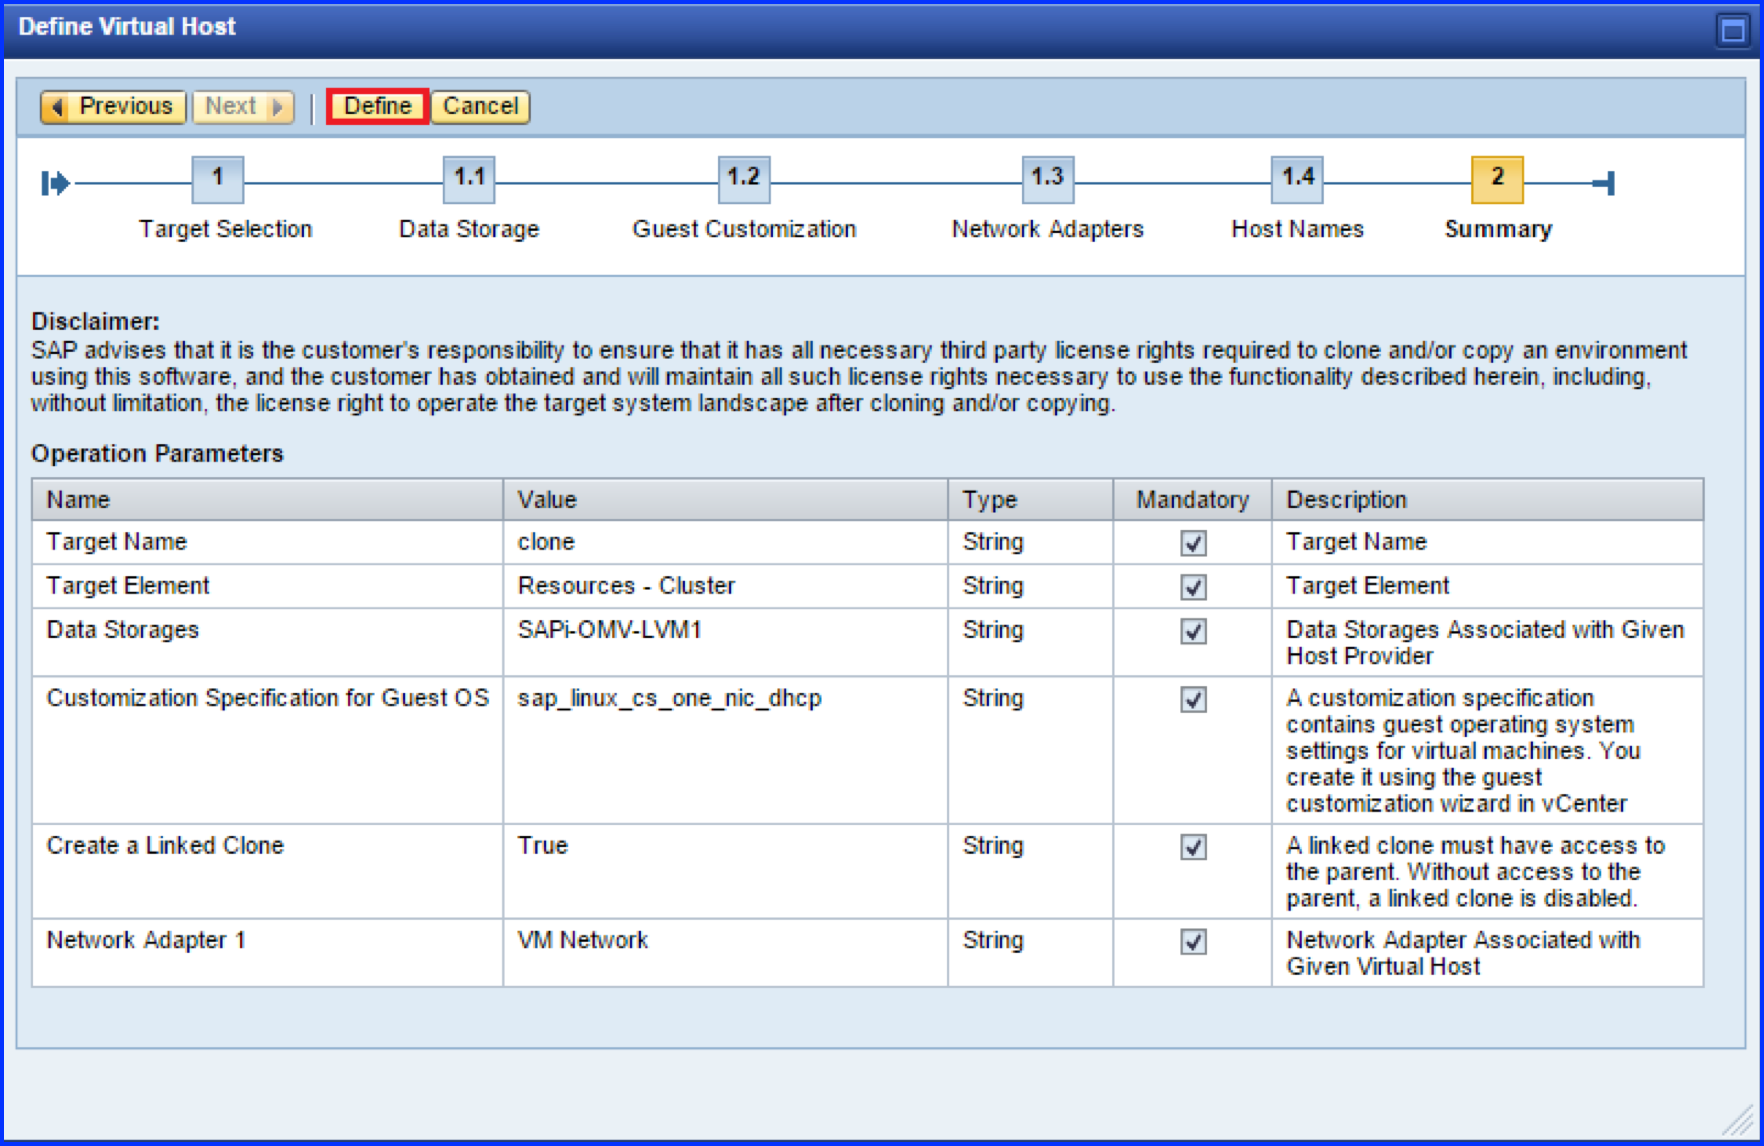
You are now at the last Summary step. In this step of the Define Virtual Host window in your browser, you can review the various settings that you have chosen so far. Use the Previous tab in the menu bar to go back and make appropriate changes to the settings if needed. If you are OK with the settings, Click on the Define tab to finish defining the new virtual host settings.
Figure 10. Define Virtual Host - Summary
You are now back to the
System Cloning window in your browser.
Figure 11.
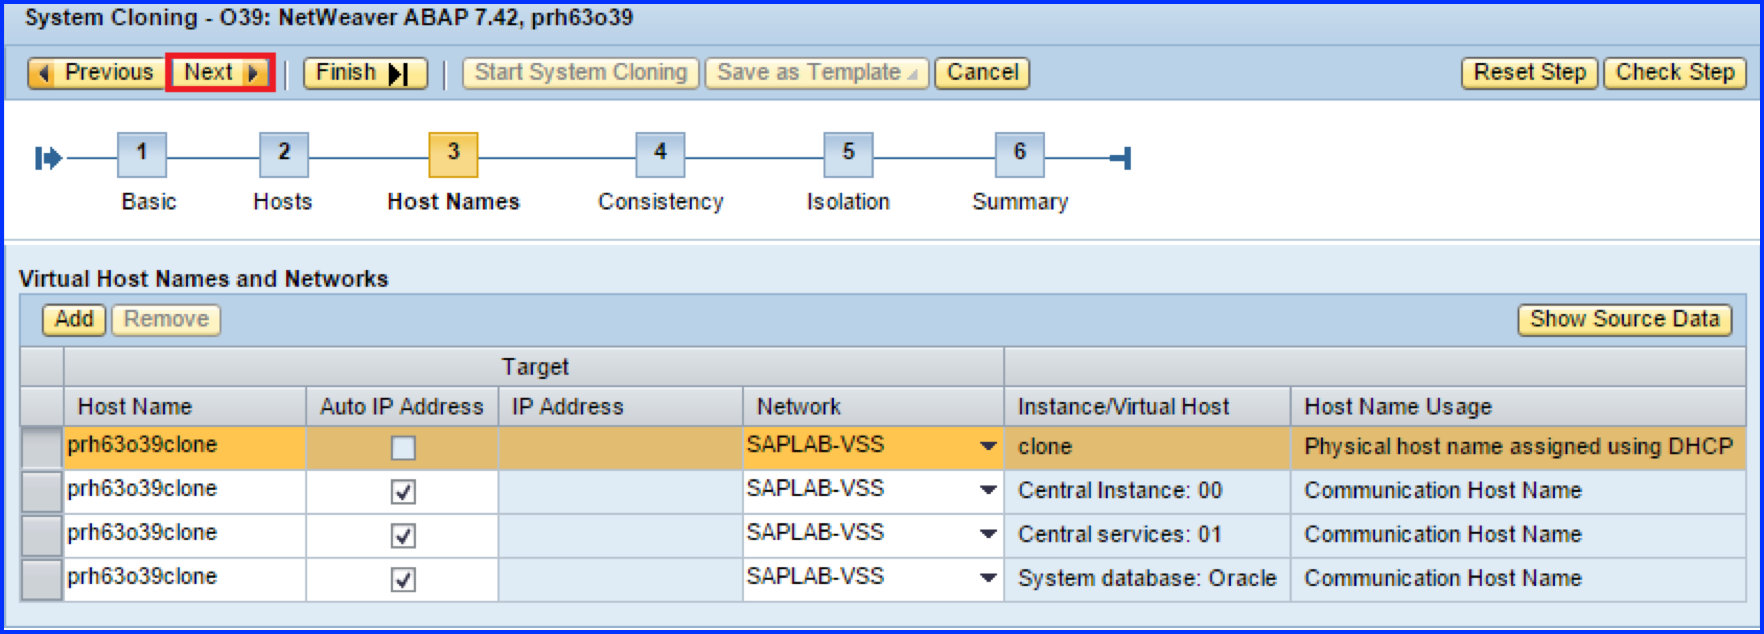
Click on Next tab to proceed to the third step in the System Cloning window. In this step called Host Names , you choose a different network for each component of the target SAP system. If the host is not configured as an adaptive instance you will see warning messages. You need to ignore these warnings by Clicking the Ignore Warnings for this step button.
Figure 12. System Cloning - Host Names
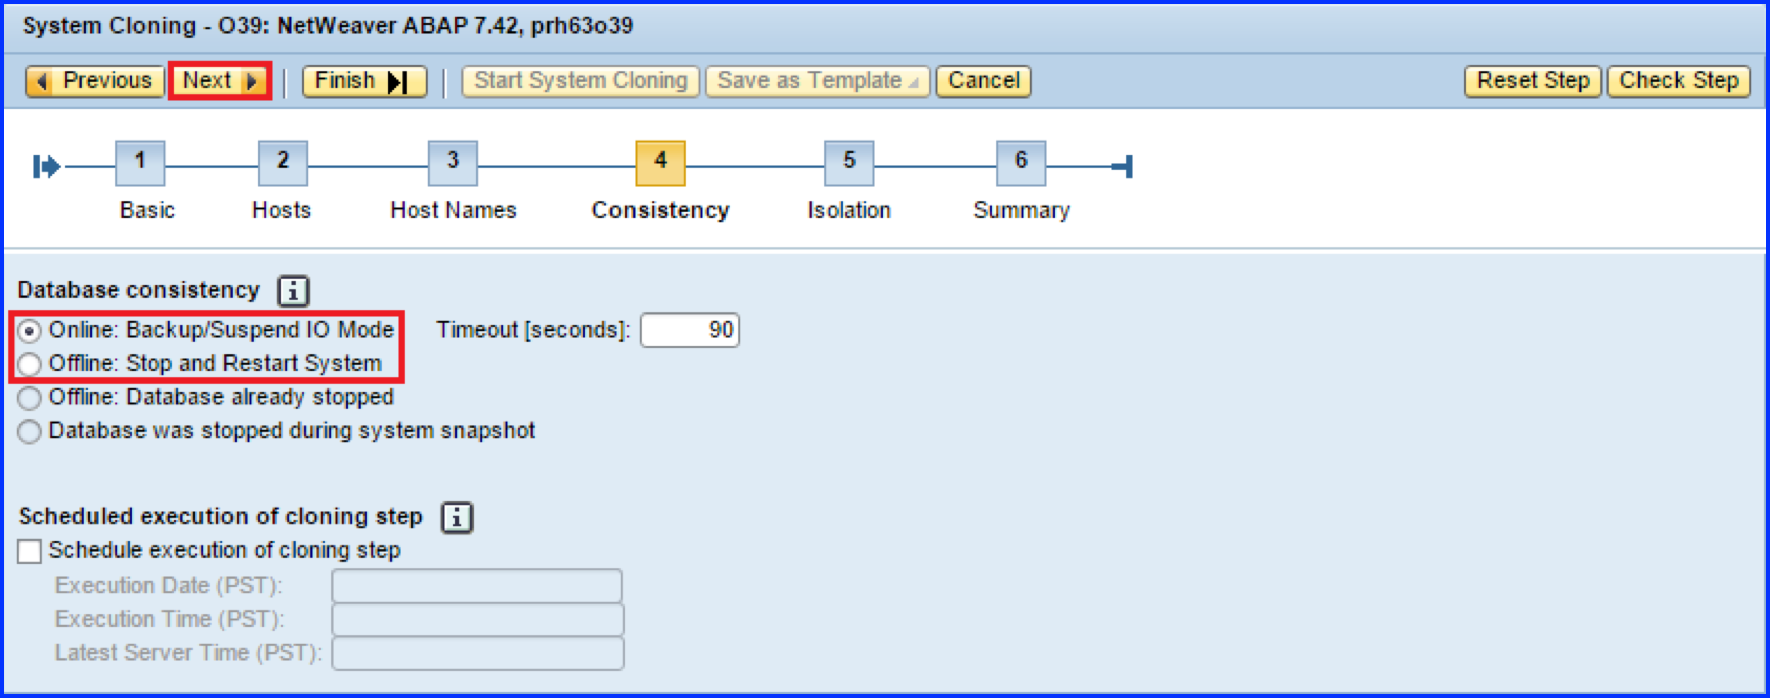
Click on Next tab in the menu bar of System Cloning window to go to the next step called Consistency. In this step you choose the database consistency method. Depending on what state the database is in, you can choose one of the following options by Clicking on the appropriate radio button —
Figure 13. System Cloning - Consistency
Online(Backup Suspend IO Mode and a Timeout value) — You use this option typically for cloning production systems to prevent system outages. You need to provide a Timeout value in seconds to ensure that consistency is done in a timely manner.
Offline(Stop and Restart System) — When you select his option the SAP LaMa will stop the system, make a clone of the system and then restart the clone.
Offline(Database already stopped) — You select this option when the database is already stopped.
Database was stopped during system snapshot — You select this option when the database has already been snapshotted prior to this process starting.
Scheduled execution of cloning step — You use this option to schedule the cloning operation at a specific date/time of your choice. You need to input the date and time when you want to schedule the cloning operation. This option is useful, for example if you want to ensure that the current ongoing system activity is not impacted.
Click the Next tab after selecting one of the above mentioned options.
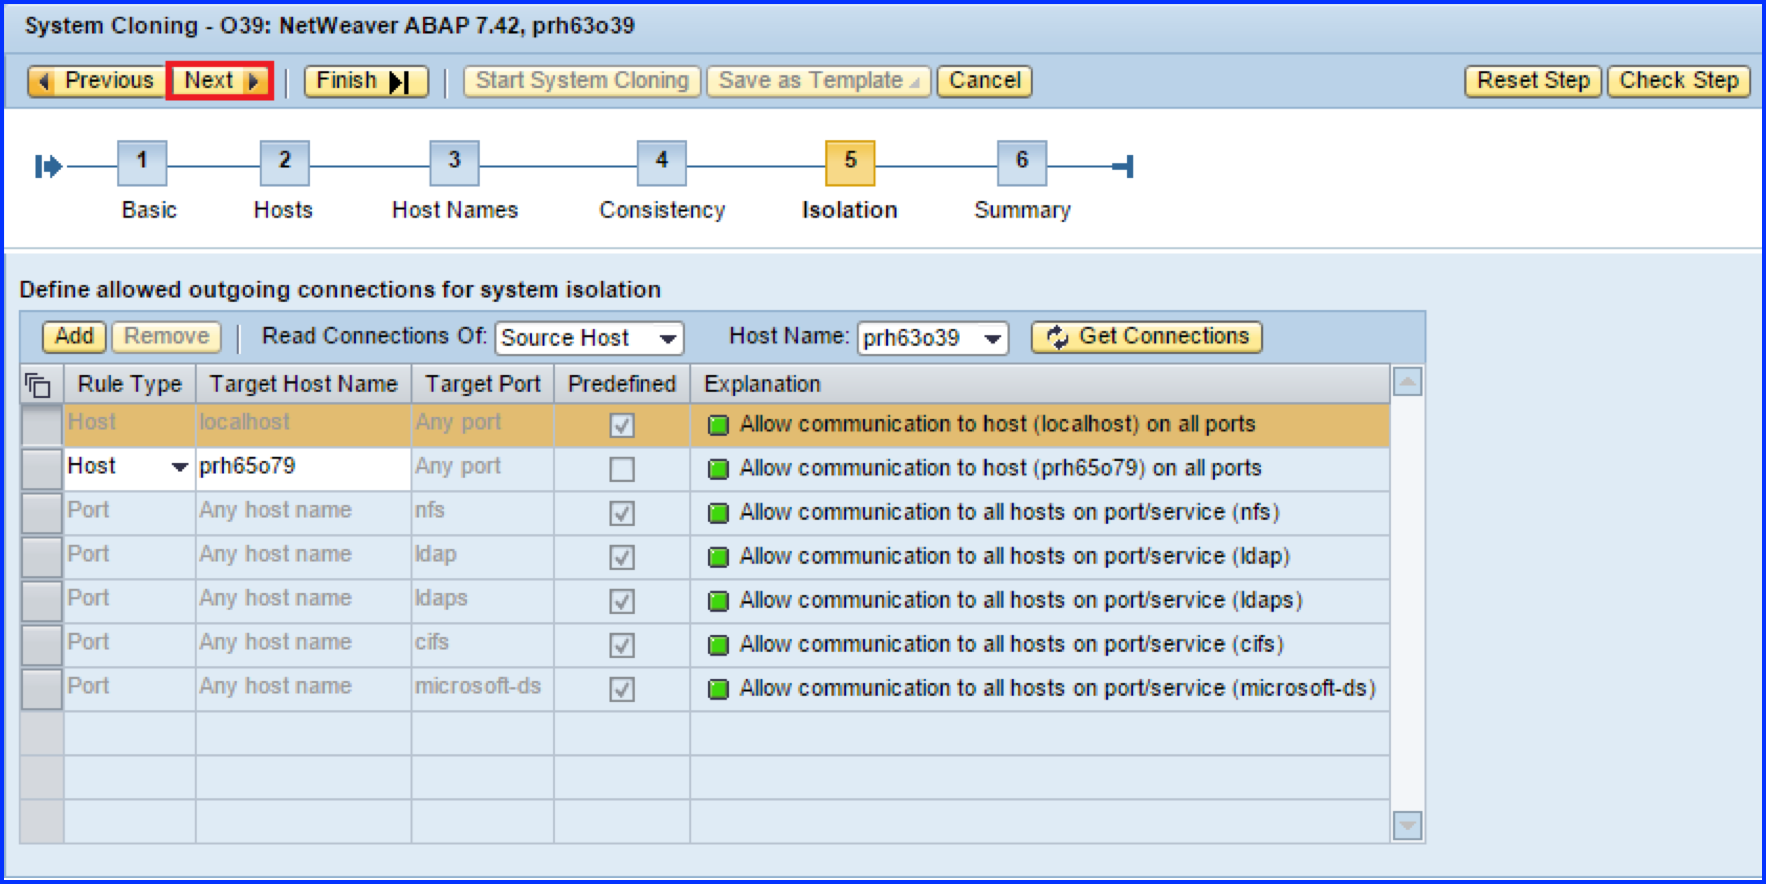
In this step called Isolation, you choose to isolate the new target system. By doing so the new target system will not be able to even accidentally communicate as the source system. Click Next tab to proceed to the last step.
Figure 14. System Cloning - Isolation
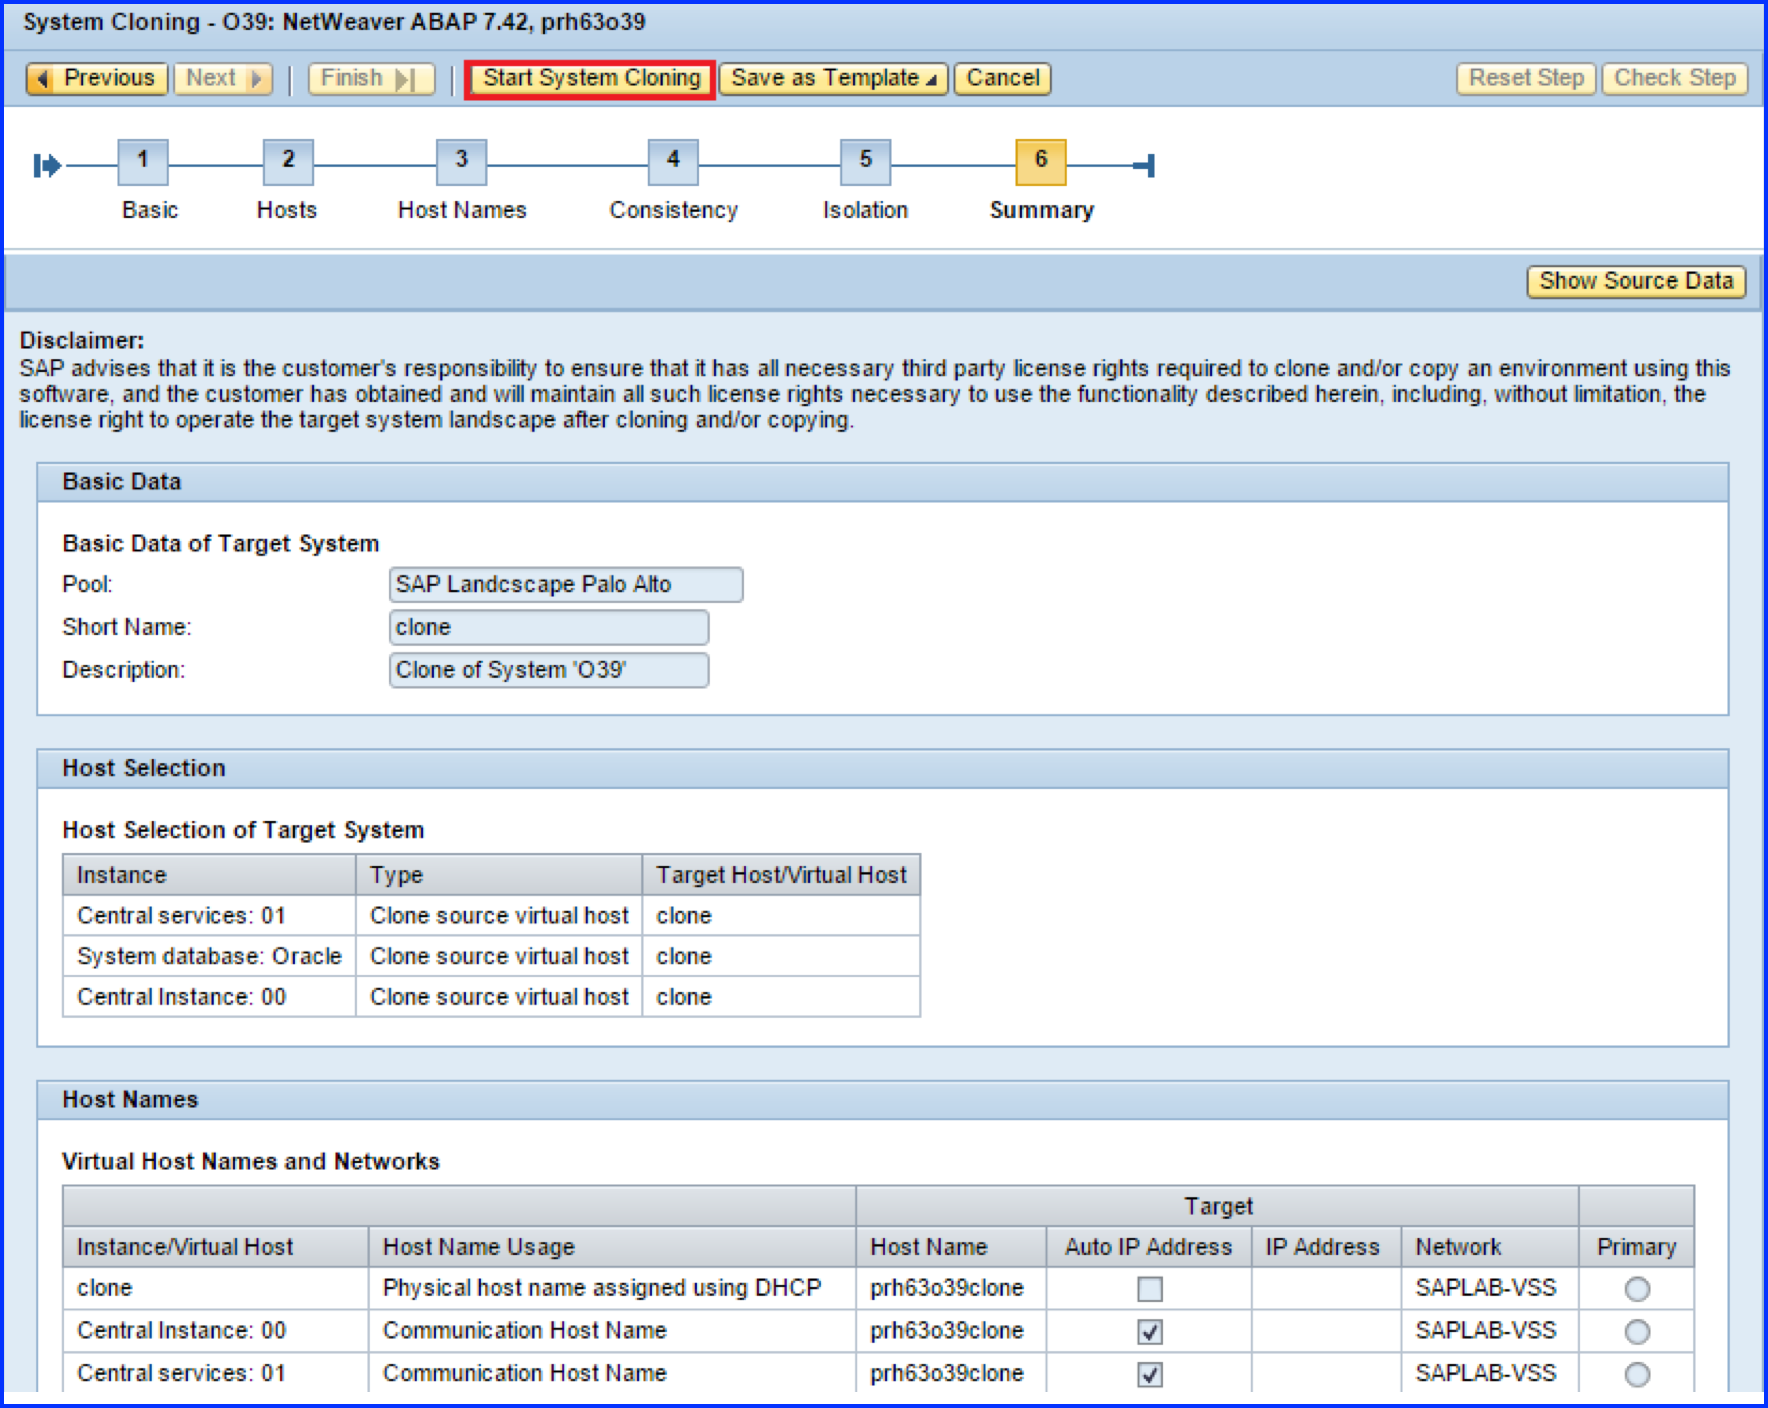
You are now on the Summary page in the System Cloning window. You can review the settings that you have made so far. If you are Ok with the settings, Click the Start System Cloning tab in the menu bar of the System Cloning window.
Figure 15. System Cloning - Summary
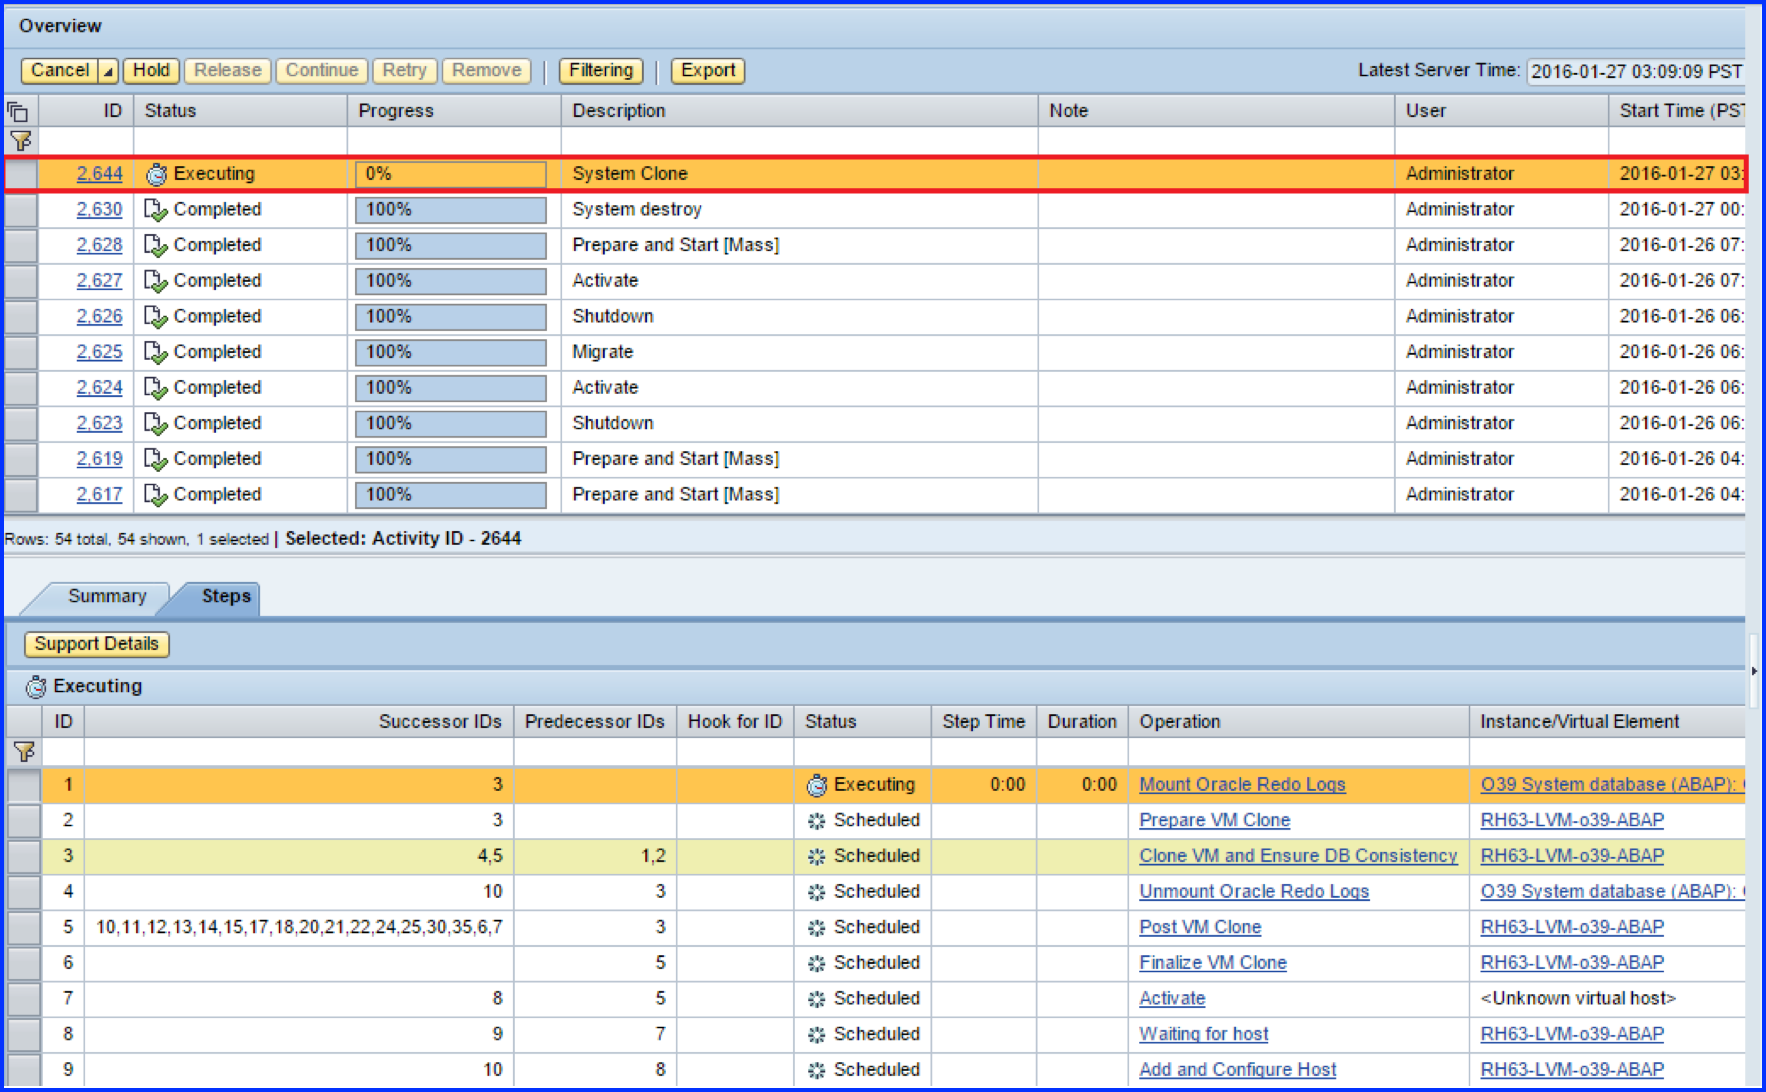
To monitor the system cloning progress, you Click on the Activity tab under the Monitoring option in the menu bar. Each activity in the cloning process has a corresponding line item in the log entry on this page. You can Click on any specific operation line item to get further details on the corresponding log entry.
Figure 16. Monitoring - Activities
Figure 17. Monitor Cloning - Read Log Entry
Results
At the end of this task you should be able to successfully create a clone of an existing SAP system.