


Rule Management in VMware Aria Automation for Secure Clouds
Rules represent configuration states that VMware Aria Automation for Secure Clouds checks against an actively monitored cloud resource. Rules trigger findings when the service detects a violation on one or more resources.
Overview
Rules are not a static feature of VMware Aria Automation for Secure Clouds. You can control the scope of your cloud security posture by choosing which rules you want to enforce. Rules can be further edited, copied, and customized to cover edge cases specific to your organization that may not be supported by the native rules set.
Understanding rules
VMware Aria Automation for Secure Clouds takes a scheduled inventory of all your onboarded cloud resources once every 12 hours. When this happens, every rule is checked against your resources based on provider, and any new violations are reported as findings.
You can review all available rules by navigating to Governance > Rules in the browser client.
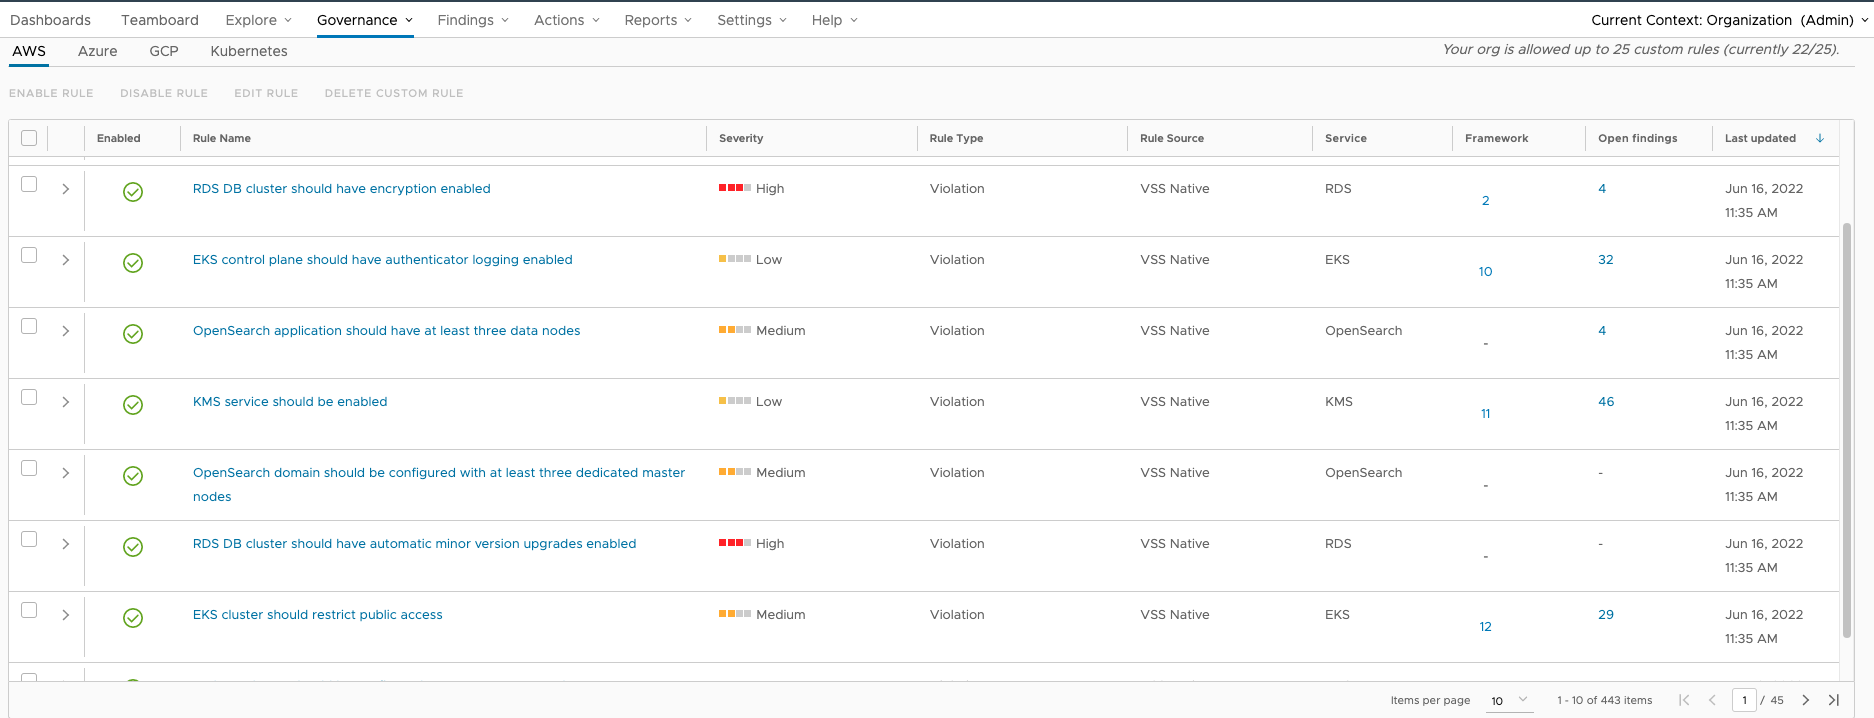
To see more information about an individual rule, click on its name go to the rule details page.
Rule properties and change log
The details page opens on the Properties tab, which lists key information about the rule.
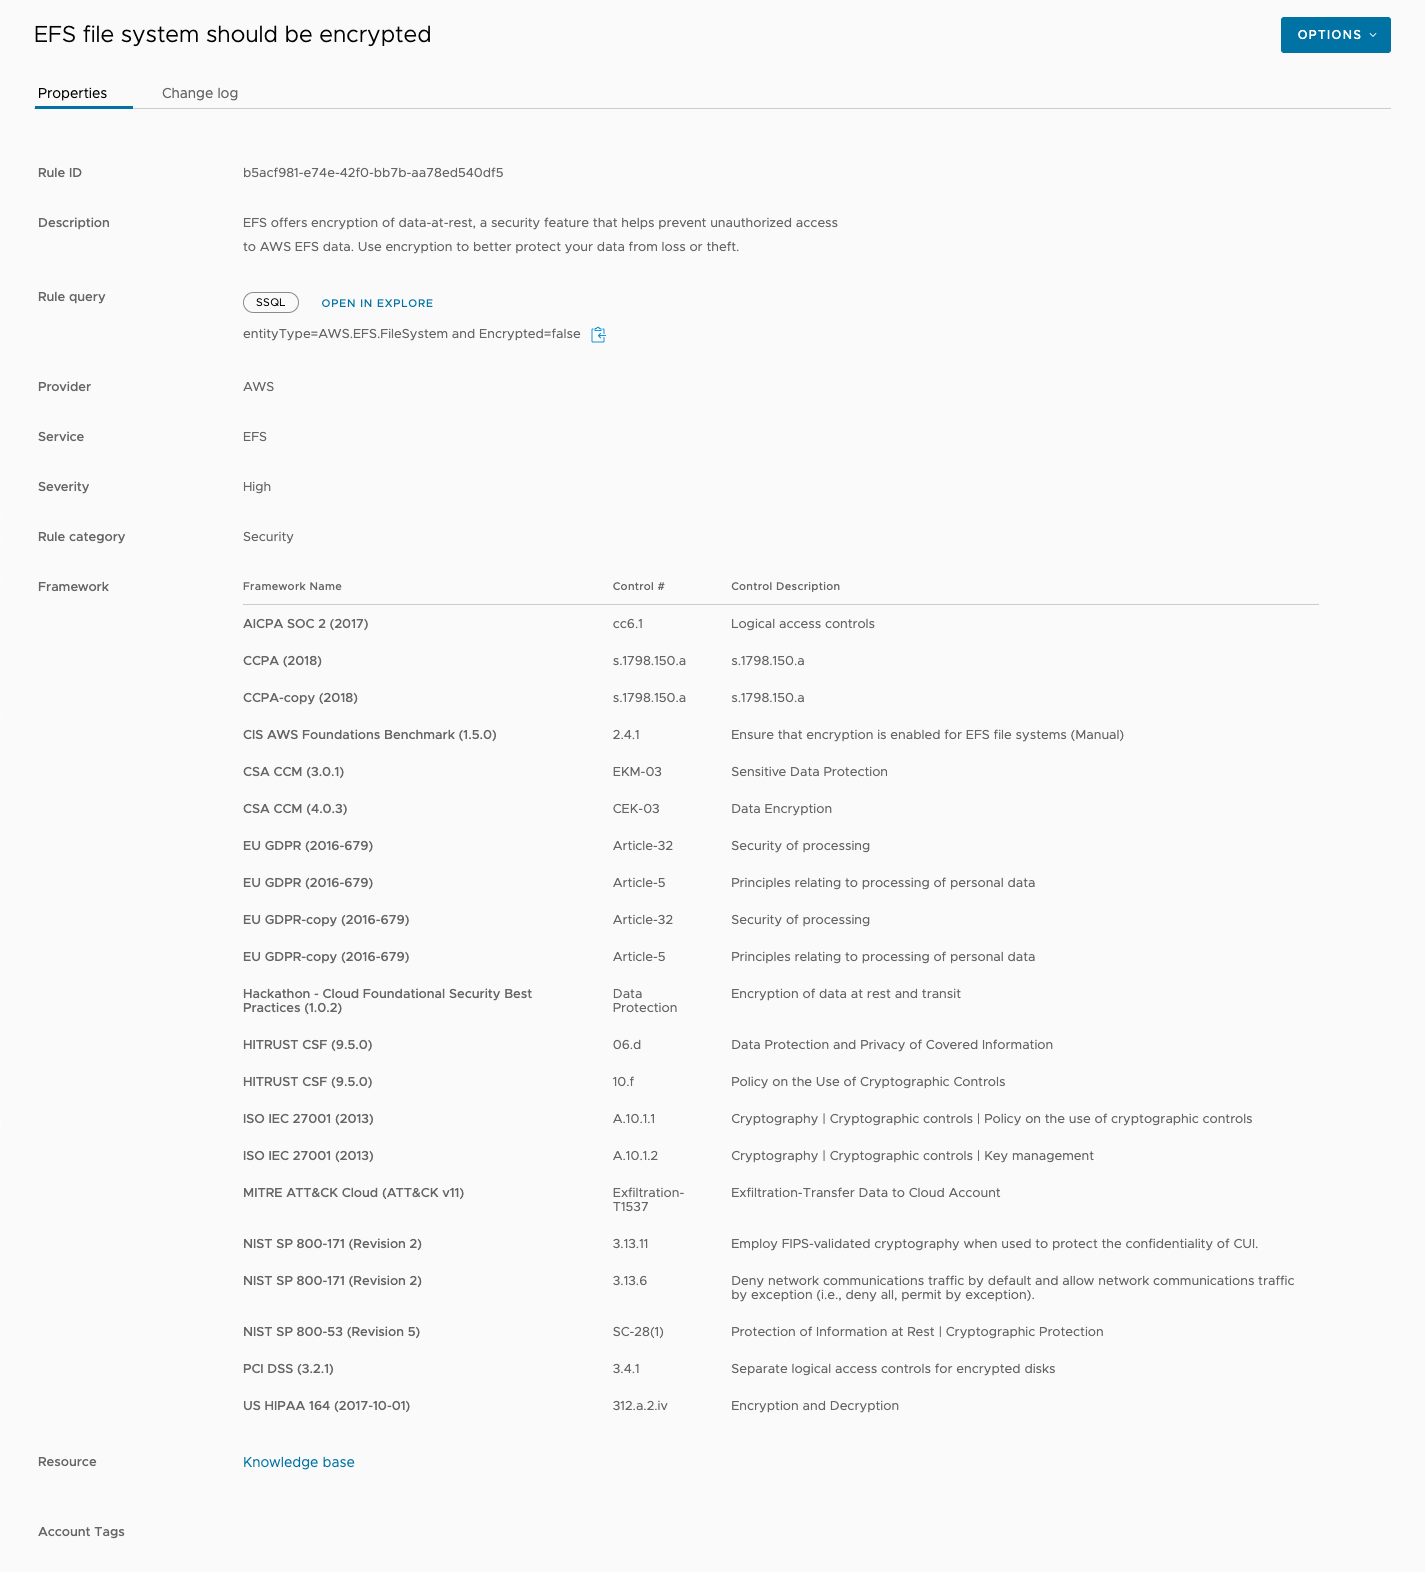
In addition to the rule display name, which is listed at the top of the page, the other properties are defined as follows:
- Rule ID - A unique ID associated with a rule.
- Description - A brief summary of the scenario a rule is meant to protect against.
- Rule Query - The query statement the rule matches a resource against.
- Provider - The cloud provider a rule is associated with. All supported public clouds have their own specific rules.
- Service - The cloud provider service a rule is designed to monitor (for example, EC2 or Azure SQL).
- Severity - The urgency with which you should act on a violation for a rule. Can be low, medium, high, or critical.
- Rule category - The type of service a rule provides. The majority of native rules are related to security, but there are several other types related to operations, logging, networking, and more.
- Framework - The compliance frameworks and controls a rule is associated with.
- Resource - A link to a rule's knowledge base article, where you can review further information on how to research and resolve a violation.
- Account Tags - Any tags entered for a rule are displayed here.
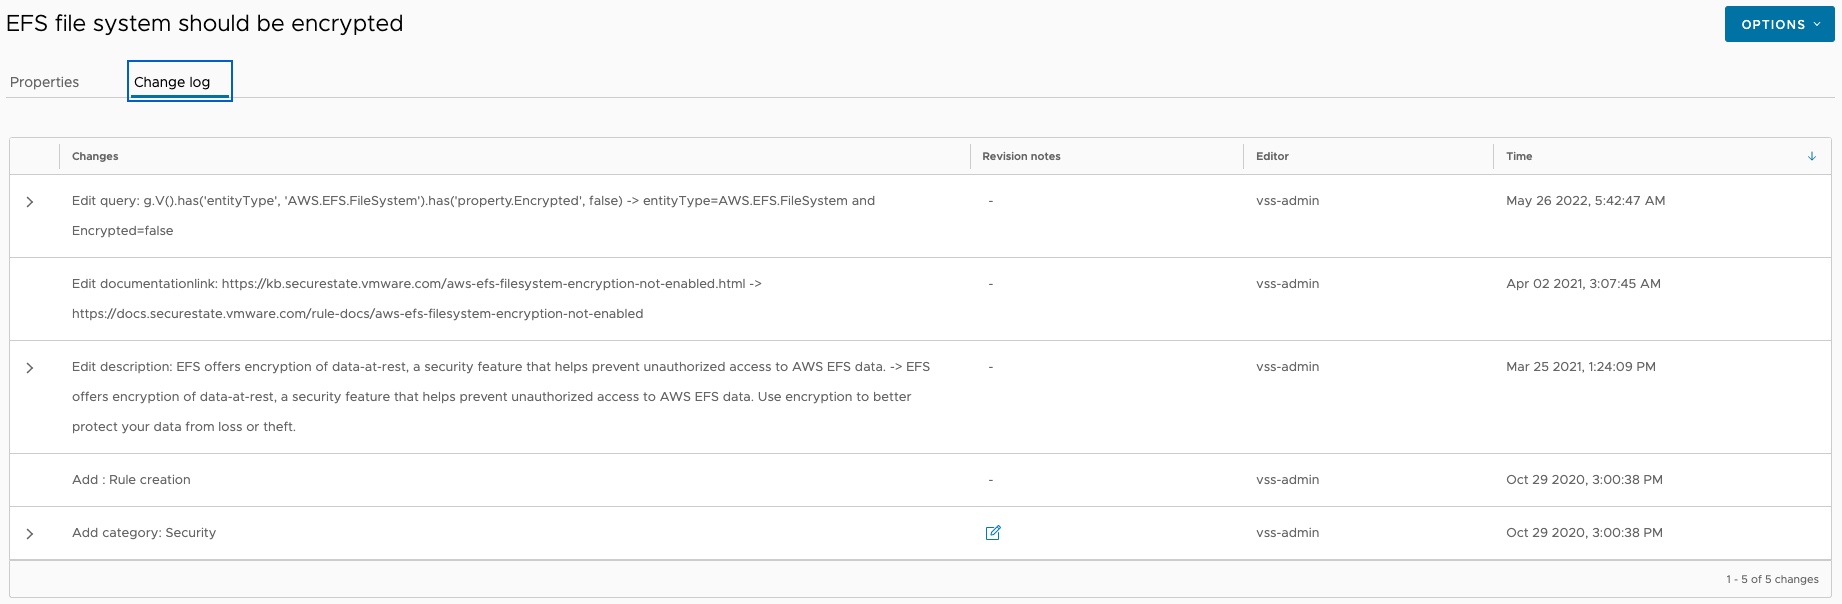
You can also select the Change log tab to review any changes that have been made to the rule. This includes updates pushed to native rules by the VMware Aria Automation for Secure Clouds development team and any changes you make to your own custom rules.
Rule queries
The final key component to a rule is the rule query. A rule query is a statement written in either simple search query language (SSQL) or Gremlin that checks your cloud account for a matching configuration state based on the rule. The service returns a finding for a rule any time it detects a match to the rule query on your cloud account.
Here is an example of a rule query statement in SSQL:
entityType=AWS.EFS.FileSystem and Encrypted=false
Try copying this statement into Explore Search and see if you locate any resources with findings on them. The results should be consistent with what's reported by the service in the Findings tab of the browser client. Rule queries in the properties tab for the specified rule.
NoteOnly SSQL statements appear in the rule query field. Gremlin query statements can be viewed by going to the change log tab and reviewing edit history.
Managing rules
There are many tools available to you for controlling how rules interact with your organization. You can disable rules you don't need, or edit them to better fit a pre-existing classification. It's also possible to create custom rules for situation where a native rule doesn't capture a particular security violation you want to monitor.
Note: You must be an organization admin in VMware Aria Automation for Secure Clouds to perform the actions described in this section.
Enable or disable a rule
When a rule is enabled, VMware Aria Automation for Secure Clouds actively scans your cloud resources for any violations of that rule and reports a finding if one is found. Not every rule available may be relevant to your cloud security posture management goals, and some may be contrary to practices required by your business. In these cases, you can disable a rule to prevent the service from scanning and reporting any findings at all.
Before you disable a rule, consider the following:
- Rules can only be disabled at the organization context, meaning a disabled rule is disabled for all projects and cloud accounts.
- Any outstanding findings for a rule become resolved when it is disabled.
- If you enable a rule that was previously disabled, any outstanding findings are reported with a Finding Age based on when you re-enabled the rule. This may not correspond with when the finding actually occurred on your resources.
To summarize, a team may choose to disable a rule for their organization if it has no application to their line of business and there is little value in keeping an accurate record of monitoring findings from that rule. If it's important to demonstrate accurate monitoring of findings or to keep generating findings normally on other resources, suppression may be a better option.
If you do choose to disable a rule, follow this process:
- From the VMware Aria Automation for Secure Clouds browser client, navigate to Governance > Rules.
- Select one or more rules you wish to disable.
- Click on Disable Rule.
- Enter a reason for disabling the rule when prompted.
- Click on Disable.
Create a custom rule
One of VMware Aria Automation for Secure Clouds's most powerful features is the ability to create your own custom rules to monitor and capture security violations that are unique to your organization or line of business. Custom rules also offer a way to adjust existing rules slightly so that they better meet your organization's specific needs.
The following example demonstrates how to create a custom rule that scans for AWS IAM passwords that are configured to expire after 60 days or less instead of the 90 day interval scanned for by the native rule set.
Copy the query for the native rule IAM password should be configured to expire after 90 days:
entityType=AWS.IAM.AccountPasswordPolicy and ExpirePasswords=true and MaxPasswordAge>90Note: You can also find the query yourself by checking the change log.
Navigate to Governance > Rules in the browser client, then click the Add New button.
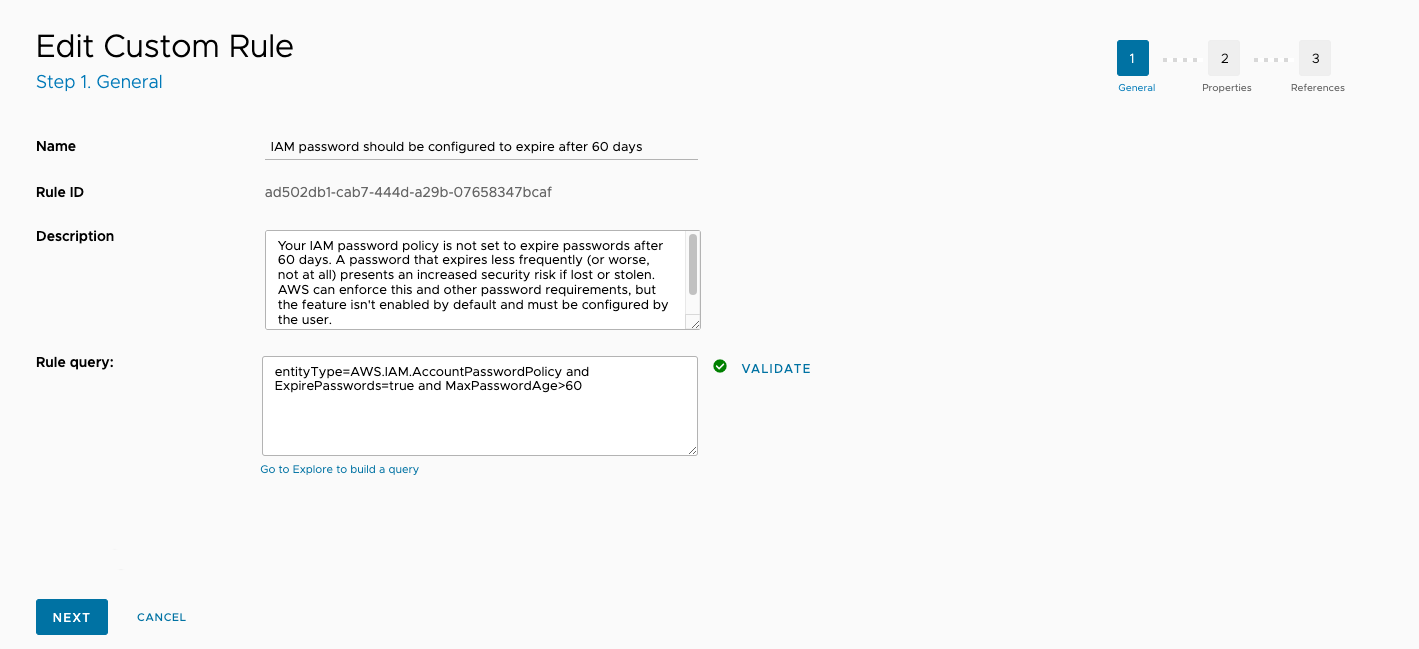
Fill out the Name, Description, and Rule query fields with as demonstrated. Note that the query is changed from
MaxPasswordAge>90toMaxPasswordAge>60.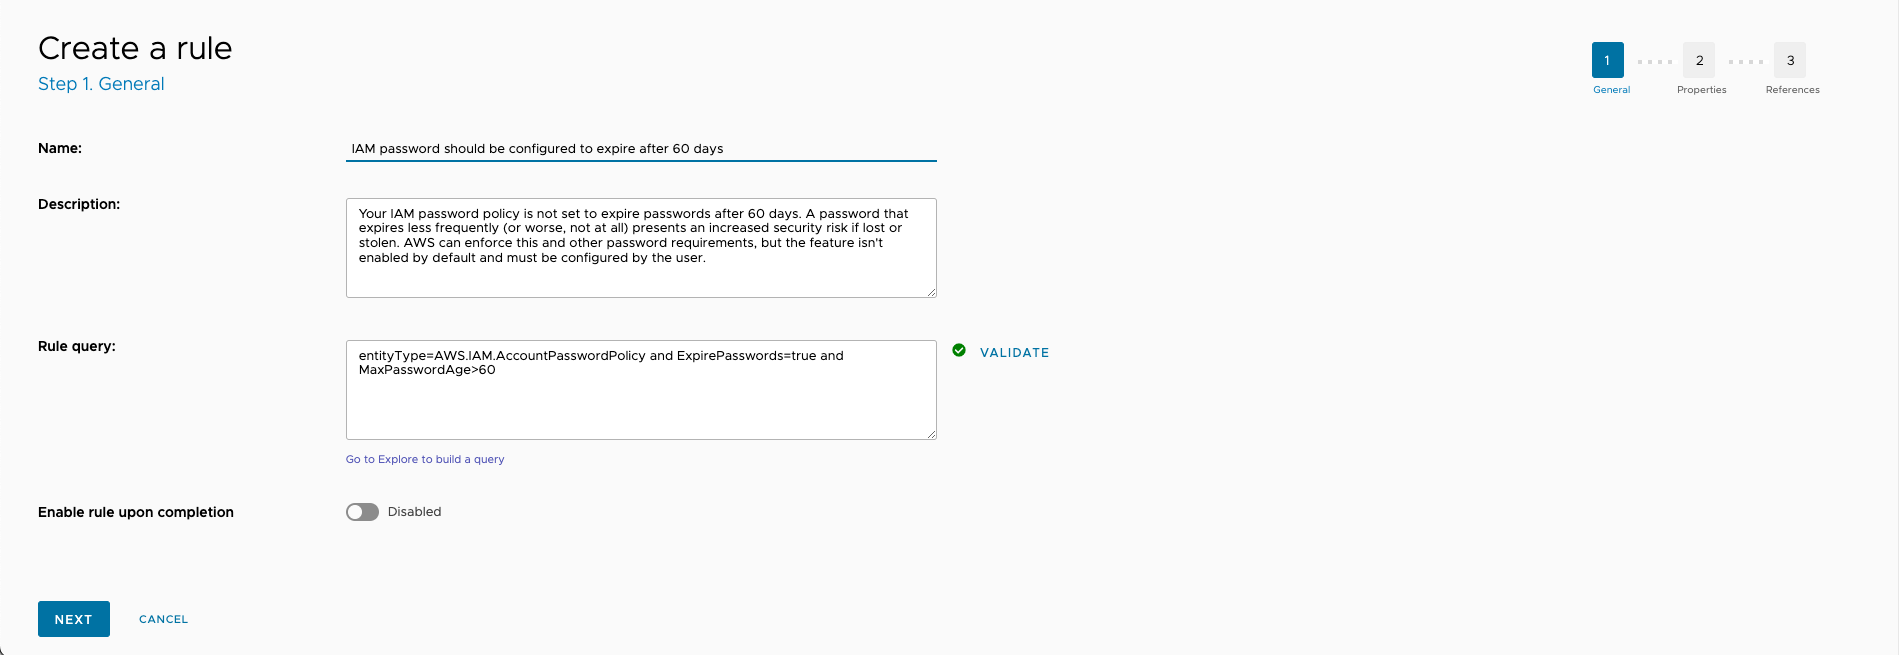
Click Next.
Select the properties for this custom rule. Since this example is based off of a native rule for AWS, the Provider and Service fields should match for that rule. You may wish to choose a different option for the Severity or Rule category fields, however.

Click Next.
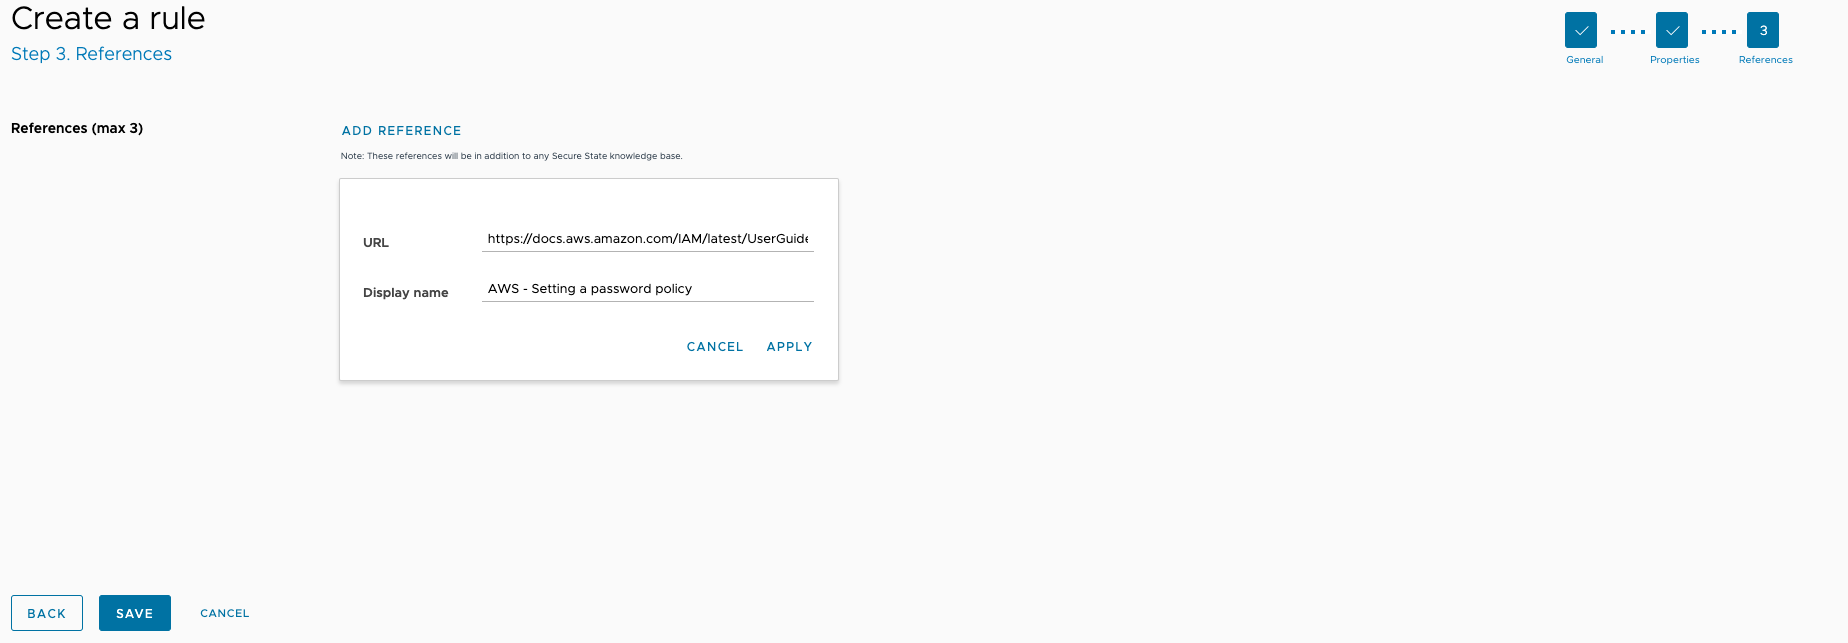
Add any necessary information associated with the rule by clicking on Add Reference and entering the appropriate URL and display text. This example links to AWS documentation, but you could also link processes maintained on your own company intranet or another third-party website.
Click Save.
You now have a custom rule that informs you when an IAM password is configured with an expiration date longer than 60 days. Custom rules are disabled by default unless you select otherwise while creating them, so make sure to enable them after creation. In this scenario, you may also want to disable the native rule for 90 day expiration dates if it's not relevant to your organization.
VMware Aria Automation for Secure Clouds enterprise users are permitted up to 25 custom rules for an organization. If you need more, reach out to your customer success representative to inquire about a limit increase.
Custom rules and compliance frameworks
Custom rules can only be added to custom compliance frameworks, not native ones. When creating a custom compliance framework, you can associated a custom rule to a control just as you would any other, or edit after the fact.
For specific details on the process, see the custom compliance framework documentation.
Edit the information for a native rule
You can edit a native rule to change key properties of that rule if it's more accurate to your organizational needs, or add more links to the reference section if you have company processes or other external guides you want to include. The following steps guide you through the native rules editing process.
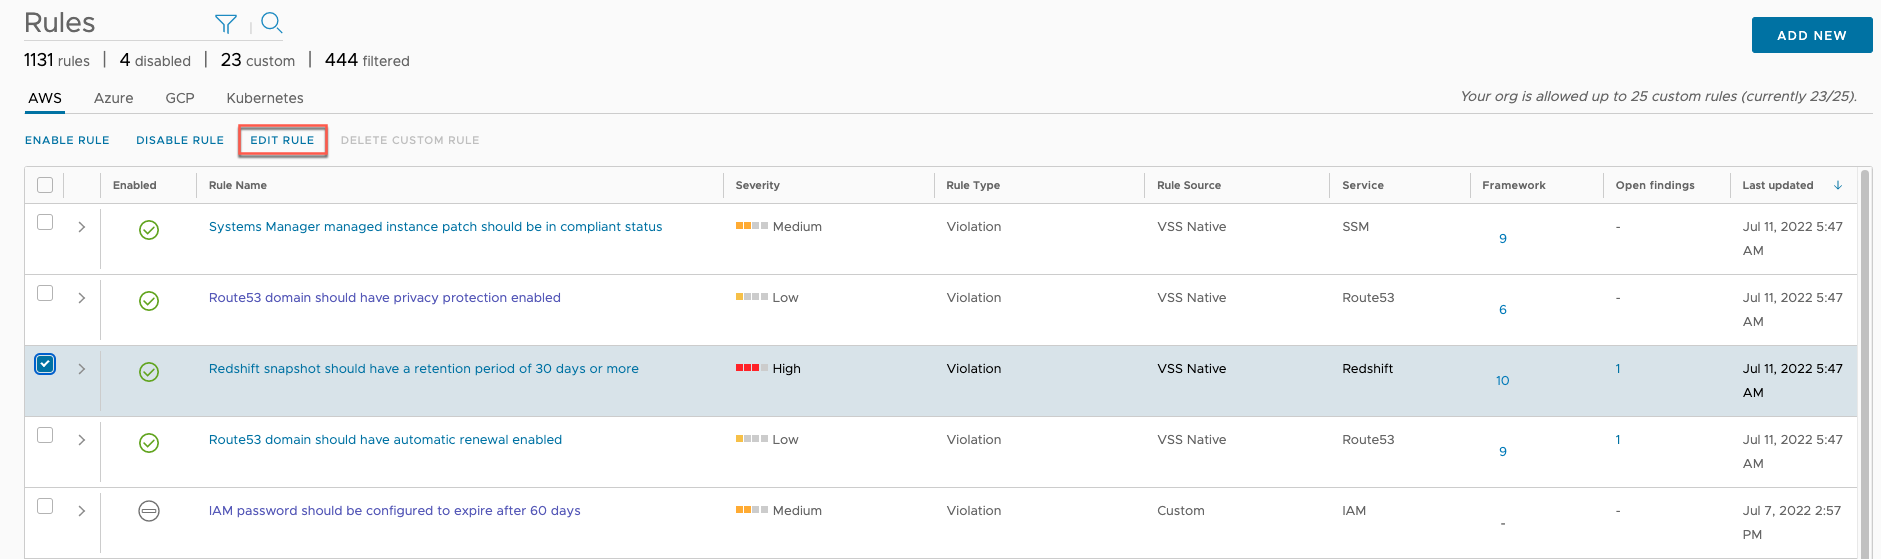
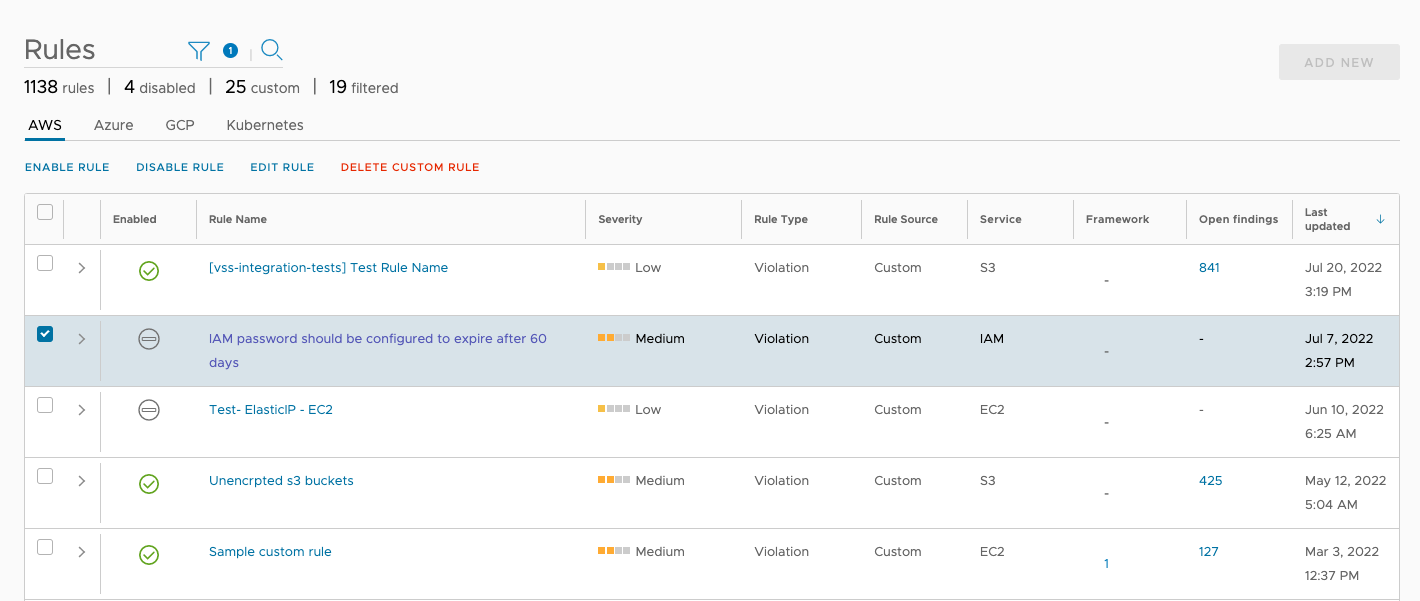
To edit any native rule, select it from the Rules > Governance page and click on Edit Rule. You can only select one rule to edit at a time.
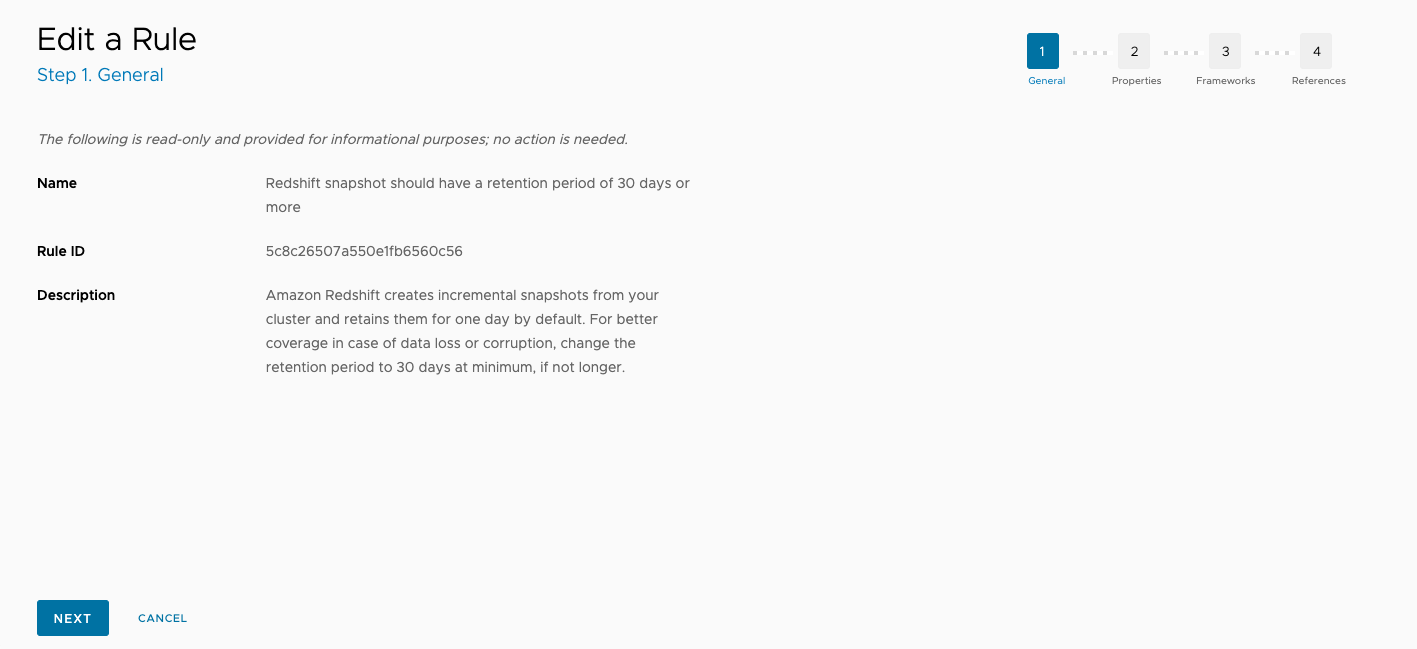
Review the information on the first page (read-only for native rules), then click Next.
The next page lists rule properties that can be edited. You can update the Service, Severity, and Rule category fields as well as add any tags specific to VMware Aria Automation for Secure Clouds.
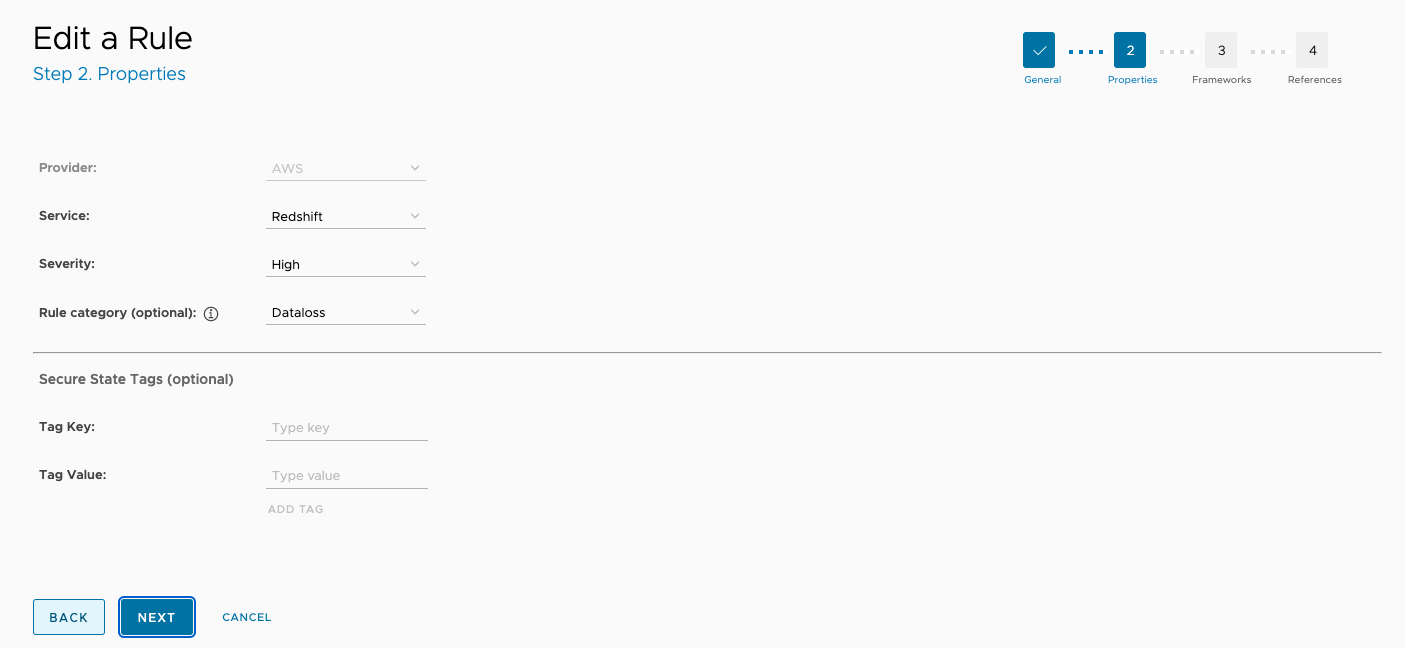
Click Next to continue.
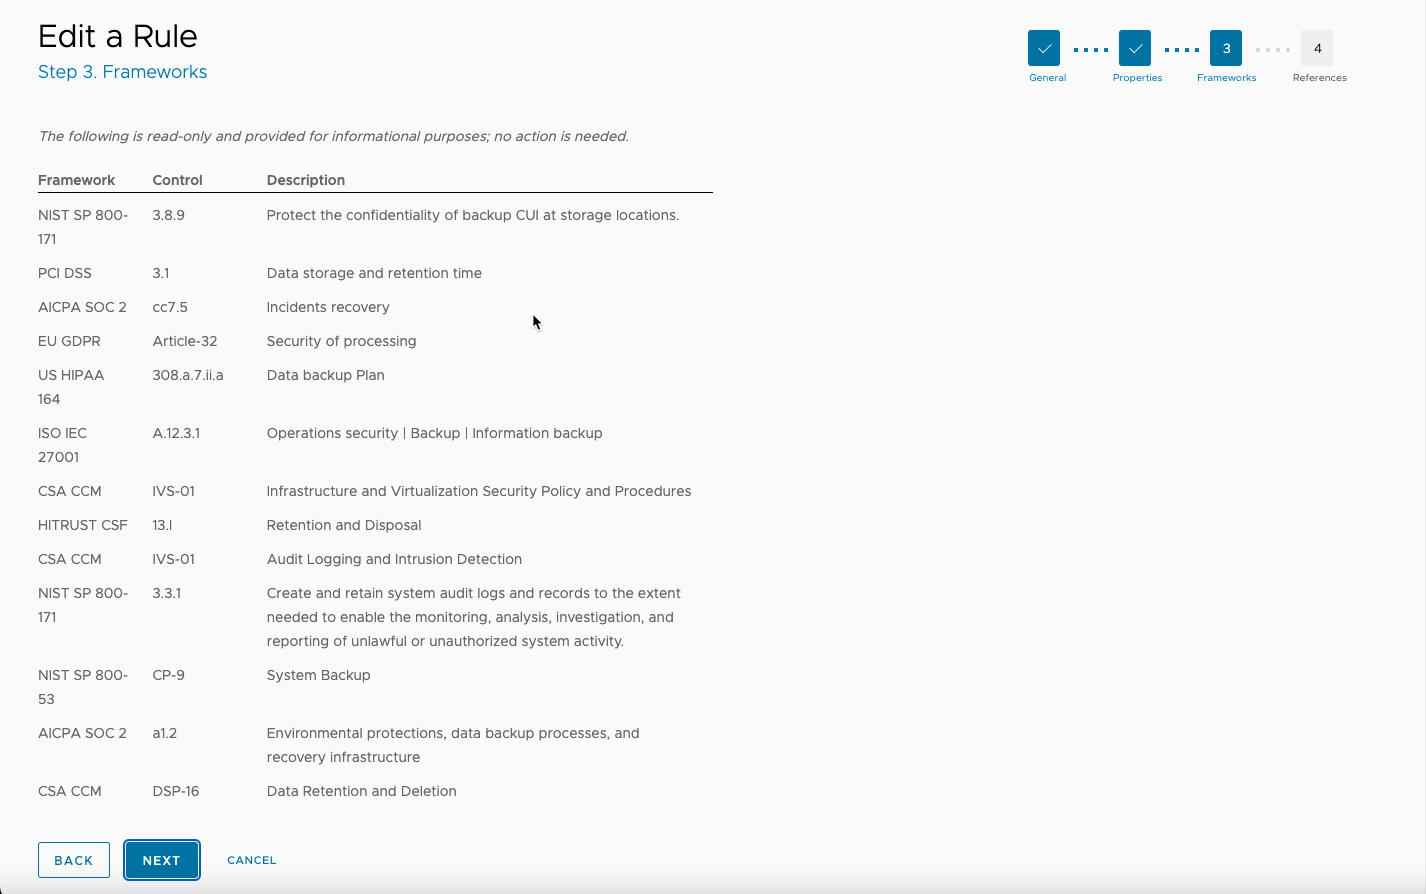
The next page information about compliance frameworks associated with rule. Review if necessary, then click Next.
The final edit page allows you to add up to three more links to display in the reference field for the rule. To add a new reference link, click Add Reference, enter the URL and a name to display for the link, then click Apply.

Once all changes are final, click Save.
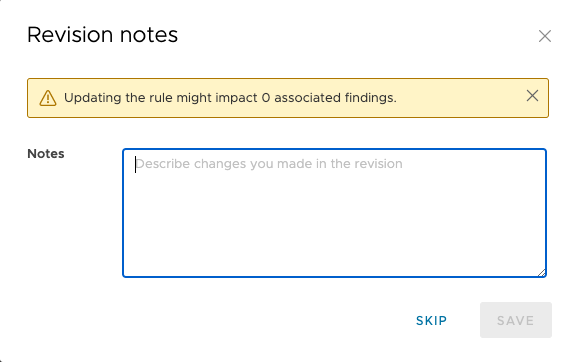
Enter any revision notes when prompted, then click Save (you may also skip if notes are unnecessary). The message is available in the change log after the edits are complete.
Edit the information for a custom rule
Custom rules can be edited the same way as native ones, but you change more fields than native rules permit. The following steps guide you through the native rules editing process.
To edit any custom rule, select it from the Rules > Governance page and click on Edit Rule. You can only select one rule to edit at a time.
Make changes to the the Name, Description and Rule query field as necessary, then click Next.
The next page lists rule properties that can be edited. You can update the Provider, Service, Severity, Rule type, and Rule category fields as well as add any tags specific to VMware Aria Automation for Secure Clouds. When editing a custom rule, you can update the Provider and Rule type fields as well.
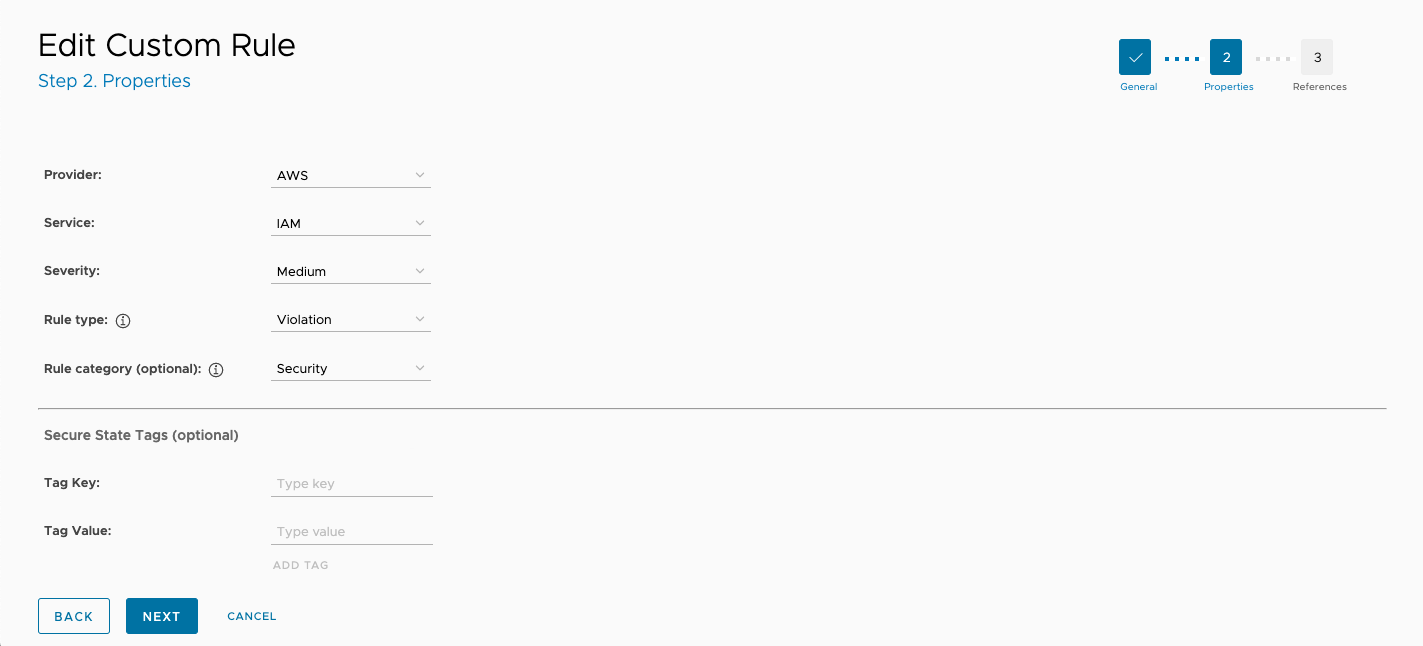
Click Next to continue.
The final edit page allows you to add up to three more links to display in the reference field for the rule.
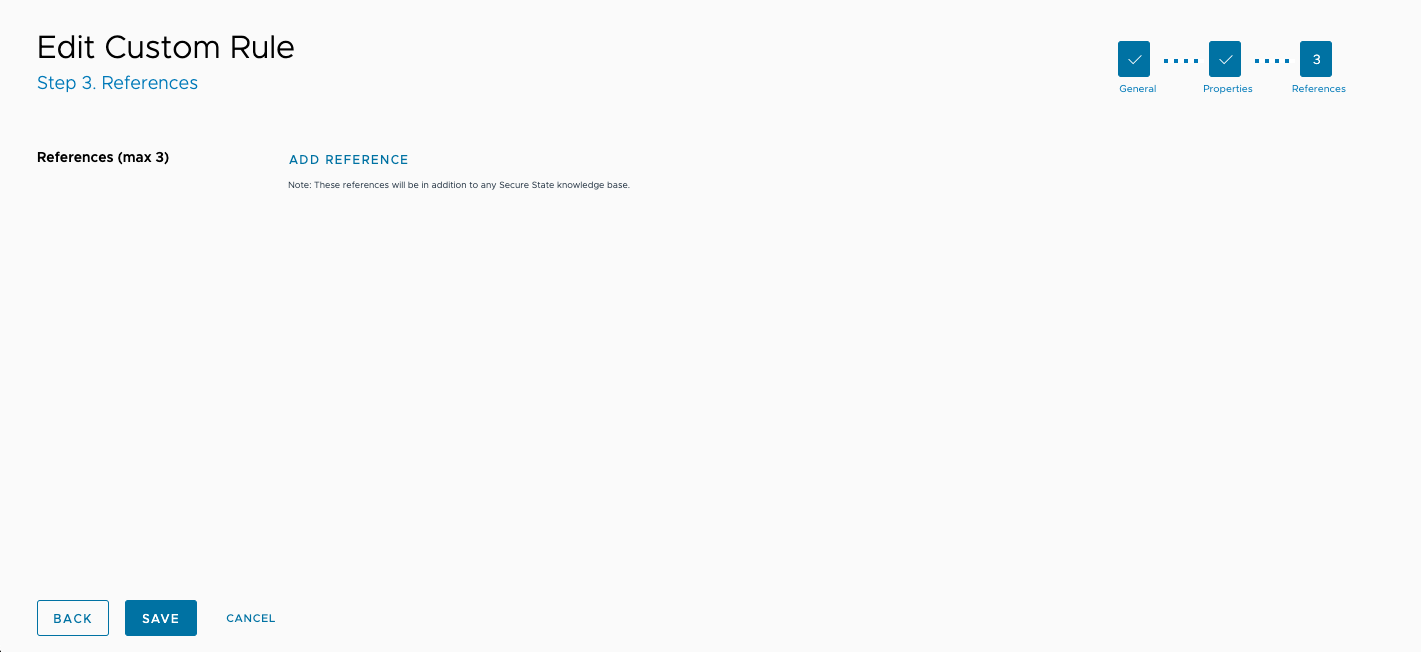
To add a new reference link, click Add Reference, enter the URL and a name to display for the link, then click Apply.
Once all changes are final, click Save.
Enter any revision notes when prompted, then click Save (you may also skip if notes are unnecessary). The message is available in the change log after the edits are complete.
