


As part of the post-installation process, you need to install, configure, and upgrade the Master Plugin. The Master Plugin enables your Salt masters to communicate with Automation Config. The Master Plugin includes a variety of settings you can adjust to improve performance, which are particularly useful for large or busy environments.
Typically, you install the Master Plugin on every Salt master in your environment that communicates with Automation Config. For example, if you are using a configuration with more than one Salt master (sometimes called a multi-master setup), you must install the Master Plugin on each Salt master.
Before you start
Installing and configuring the Master Plugin is one post-installation step in a series of several steps that should be followed in a specific order. First, complete one of the installation scenarios and then read the Install the license key post-installation page.
If you are in a non air-gapped environment, dependencies are installed automatically with the Master Plug-in. For air-gapped environments, refer to the Install the Salt Master Plugin on air-gapped systems knowledge base article.
When do you need to install the Master Plugin?
You need to install the Master Plugin on all of your Salt masters before you connect them to Automation Config Cloud. The Master Plugin is not necessary on Salt masters that do not need to communicate with Automation Config.
You need to install the Master Plugin on all of your Salt masters after a fresh installation of Automation Config. The Master Plugin is not necessary on Salt masters that do not need to communicate with Automation Config.
If you already have existing Salt masters, you should upgrade the Master Plugin. For the full instructions on upgrading and installing the Master Plugin, see How do I upgrade the Master Plugin.
If you are manually installing Automation Config (not recommended), you should complete the following before you install the Master Plugin:
- Install and configure the PostgreSQL database
- Install and configure the Redis database
- Enable SSL (optional)
# sseapi-config --default >/tmp/raas.conf
# cd /etc/salt/master.d
# vim -d raas.conf /tmp/raas.conf
...
If you installed Salt using onedir, the path to this executable is /opt/saltstack/salt/extras-3.10/bin/sseapi-config.
Install the Master Plugin Using the Master Plugins Workspace
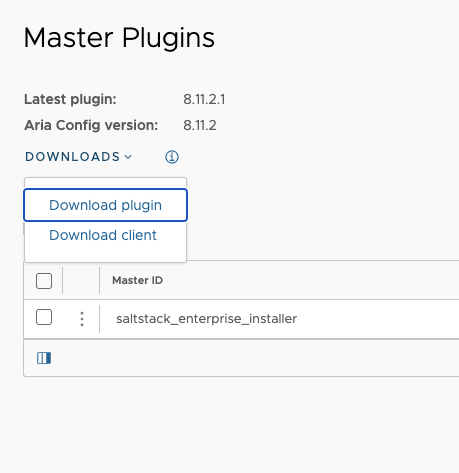
You can download and install the latest master plugin version from the Automation Config user interface by navigating to . From the Master Plugins tab, you can either download the plugin or download the client.
After downloading the master plugin, you must then Configure the Master Plugin.
Install the Master Plugin Using CLI
To install the Master Plugin on your Salt master:
Starting with the 8.13.0 release, the Master Plugin includes a tgtmatch engine that now offloads target group matching from the RaaS server to the Salt Masters. It is recommended to enable and configure that tgtmatch engine to make target group matching more responsive, especially in environments with:
- A large number of target groups (100 or more)
- A large number of minions (3000 or more)
- Frequent changes to minion grains (daily or more frequent)
- Frequent creation and deletion of minions (daily or more frequent)
target_groups_from_master_only: true
- Log in to your Salt master.
- If necessary, download the Master Plugin wheel from Customer Connect.
The Master Plugin is included in the Automated Installer .tar.gz file. After you download and extract the .tar.gz file, you can find the Master Plugin in the
sse-installer/salt/sse/eapi_plugin/filesdirectory. - Upgrade the Master Plugin by manually uninstalling and reinstalling the updated Python wheel. Use the following example commands, replacing the exact name of the wheel file:
Note: The existing plugin must be uninstalled to prevent multiple instances of sseapi-config.
pip3 uninstall SSEAPE-8.12.1.3-py3-none-any.whl
mv /etc/salt/master.d/raas.conf /tmp
salt-call pip.install SSEAPE-8.12.1.3-py3-none-any.whl
cp /tmp/raas.conf /etc/salt/master.d/raas.conf
systemctl restart salt-master
Configure the Master Plugin
To configure the Salt master after installing the Master Plugin:
- Log in to your Salt master and verify the
/etc/salt/master.ddirectory exists, or create it. - Generate the master configuration settings.
Caution: If you want to preserve your settings when upgrading your installation, make a backup of your existing Master Plugin configuration file before running this step. Then copy relevant settings from your existing configuration to the newly generated file.Note: If you want to preserve your configuration settings, make a backup of your existing Master Plugin configuration file before running this step. Then copy relevant settings from your existing configuration to the newly generated file.
sudo sseapi-config --all > /etc/salt/master.d/raas.conf
Important: If you installed Salt using onedir, the path to this executable is /opt/saltstack/salt/extras-3.10/bin/sseapi-config. - Edit the generated
raas.conffile and update the values as follows:Value Description sseapi_ssl_validate_certValidates the certificate the API (RaaS) uses. The default is
True.If you are using your own CA-issued certificates, set this value to
Trueand configure thesseapi_ssl_ca,sseapi_ssl_cert, andsseapi_ssl_cert:settings.Otherwise, set this to
Falseto not validate the certificate.sseapi_ssl_validate_cert:False
sseapi_serverHTTP IP address of your RaaS node, for example,
http://example.com, orhttps://example.comif SSL is enabled.sseapi_command_age_limitSets the age (in seconds) after which old, potentially stale jobs are skipped. For example, to skip jobs older than a day, set it to:
sseapi_command_age_limit:86400
Skipped jobs continue to exist in the database and display with a status of
Completedin the Automation Config user interface.Some environments might need the Salt master to be offline for long periods of time and will need the Salt master to run any jobs that were queued after it comes back online. If this applies to your environment, set the age limit to
0.sseapi_windows_minion_deploy_delaySets a delay to allow all requisite Windows services to become active. The default value is 180 seconds. sseapi_linux_minion_deploy_delaySets a delay to allow all requisite Linux services to become activate. The default value is 90 seconds. sseapi_local_cache load: 3600 tgt: 86400 pillar: 3600 exprmatch: 86400 tgtmatch: 86400Sets the length of time that certain data is cached locally on each salt master. Values are in seconds. The example values are recommended values.
-
load- salt save_load() payloads
-
tgt- SSE target groups
-
pillar- SSE pillar data (encrypted)
-
exprmatch- SSE target expression matching data
-
tgtmatch- SSE target group matching data
-
- OPTIONAL: This step is necessary for manual installations only. To verify you can connect to SSL before connecting the Master Plugin, edit the generated
raas.conffile to update the following values. If you do not update these values, the Master Plugin uses the default generated certificate.Value Description sseapi_ssl_caThe path to a CA file. sseapi_ssl_certThe path to the certificate. The default value is /etc/pki/raas/certs/localhost.crt.sseapi_ssl_keyThe path to the certificate’s private key. The default value is /etc/pki/raas/certs/localhost.key.idComment this line out by adding a #at the beginning. It is not required. - OPTIONAL: Update performance-related settings. For large or busy environments, you can improve the performance of the communications between the Salt master and Automation Config by adjusting the following settings.
- Configure the master plugin engines:
The master plugin
eventqueueandrpcqueueengines offload some communications with Automation Config from performance-critical code paths to dedicated processes. While the engines are waiting to communicate with Automation Config, payloads are stored in the Salt master’s local filesystem so the data can persist across restarts of the Salt master. Thetgtmatchengine moves the calculation of minion target group matches from the RaaS server to the salt-masters.To enable the engines, ensure that the following settings are present in the Salt Master Plugin configuration file (raas.conf):
engines:
     - sseapi: {}
     - eventqueue: {}
     - rpcqueue: {}
     - jobcompletion: {}
     - tgtmatch: {}
To configure the
eventqueueengine, verify that the following settings are present:sseapi_event_queue: name: sseapi-events strategy: always push_interval: 5 batch_limit: 2000 age_limit: 86400 size_limit: 35000000 vacuum_interval: 86400 vacuum_limit: 350000
The queue parameters can be adjusted with consideration to how they work together. For example, assuming an average of 400 events per second on the Salt event bus, the settings shown above allow for about 24 hours of queued event traffic to collect on the Salt master before the oldest events are discarded due to size or age limits.
To configure the
rpcqueueengine, verify the following settings in raas.conf:sseapi_rpc_queue: name: sseapi-rpc strategy: always push_interval: 5 batch_limit: 500 age_limit: 3600 size_limit: 360000 vacuum_interval: 86400 vacuum_limit: 100000
To configure the tgtmatch engine, ensure that these settings are present in the Master Plugin config file (/etc/salt/master.d/raas.conf)engines: - sseapi: {} - eventqueue: {} - rpcqueue: {} - jobcompletion: {} - tgtmatch: {} sseapi_local_cache: load: 3600 tgt: 86400 pillar: 3600 exprmatch: 86400 tgtmatch: 86400 sseapi_tgt_match: poll_interval: 60 workers: 0 nice: 19Note: To make use of target matching on the salt-masters, the following config setting must also be present in the RaaS configuration:target_groups_from_master_only: true. - Limit minion grains payload sizes:
sseapi_max_minion_grains_payload: 2000
- Enable skipping jobs that are older than a defined time (in seconds). For example, use
86400to set it to skip jobs older than a day. When set to0, this feature is disabled:sseapi_command_age_limit:0
Note:During system upgrades, enabling this setting is useful to prevent old commands stored in the database from running unexpectedly.
Together, event queuing in Salt and the queuing engines, salt-master target matching, grains payload size limit, and command age limit in the Salt Master Plugin increase the throughput and reduce the latency of communications between the Salt master and Automation Config in the most performance-sensitive code paths.
- Configure the master plugin engines:
- Restart the master service.
sudo systemctl restart salt-master
- OPTIONAL: You might want to run a test job to ensure the Master Plugin is now enabling communication between the master and the RaaS node.
salt -v '*' test.ping
Even if no activity shows, such as if no minions are connected, this is likely a sign of a correct configuration.
Configuration settings reference
These settings in the configuration file enable each Salt master to connect to the API (RaaS). You can find these settings in the /etc/salt/master.d/raas.conf configuration file.
Salt master settings in the raas.conf file take precedence over existing settings in /etc/salt/master. If you have customized the fileserver_backend or ext_pillar settings in /etc/salt/master, you need to manually merge these settings so that they appear in one file only. You can optionally re-order the backends to change precedence.
The following table explains the general configuration settings:
| Option | Description |
|---|---|
id |
Salt master ID, autogenerated if not set |
sseapi_server |
URL of SSEAPI server, e.g. https://sse.example.com:443 |
engines |
Salt engines to enable, recommend sseapi, eventqueue, rpcqueue, jobcompletion. |
master_job_cache |
sseapi to use the Automation Config master job cache |
event_return |
Salt event returner, recommend sseapi to use the Automation Config event returner |
ext_pillar |
external pillar sources, recommended sseapi |
fileserver_backend |
file server backends, recommended sseapi and roots |
sseapi_update_interval |
how frequently to update from file server (seconds, default 60) |
sseapi_poll_interval |
how frequently to poll Automation Config for new data (seconds, default 30) |
sseapi_jce_poll_interval |
adds a delay between iterations in the jobcompletion engine so a maximum of 5760 find_job commands are sent per day per Salt master (seconds, default 15) |
sseapi_timeout |
timeout for API (RaaS) calls (seconds, default 200) |
sseapi_key_rotation |
Salt master Automation Config authentication key rotation interval (seconds, default 86400) |
sseapi_cache_pillar |
whether to cache pillar data within Automation Config (True or False, default False) |
sseapi_cluster_id |
(optional) Salt master cluster name, for grouping Salt masters into clusters within Automation Config |
sseapi_failover_master |
whether this Salt master is a failover Salt master (True or False, default False) |
sseapi_command_age_limit |
whether to skip API (RaaS) commands older than a defined time (seconds, 0 to disable, default 0) |
The following table explains the SSL settings:
| Option | Description |
|---|---|
sseapi_ssl_key |
path to the certificate’s private key |
sseapi_ssl_cert |
path to the certificate |
sseapi_ssl_validate_cert |
whether to validate the Automation Config SSL certificate (True or False, default True) |
The following table explains the Event Queue Engine settings, which appear under the sseapi_event_queue heading:
| Option | Description |
|---|---|
name |
Event queue name (default sseapi-events, no need to change this) |
strategy |
When to queue events (always, on_failure, or never, default never) |
push_interval |
How often to push events to Automation Config (seconds, default 5) |
batch_limit |
Maximum number of events to push to Automation Config per interval (default 2000) |
age_limit |
Maximum queued event age; drop oldest events (seconds, default 86400) |
size_limit |
Maximum queue size; drop oldest events (events, default 35000000) |
vacuum_interval |
How often to vacuum the queue database (seconds, default 86400) |
vacuum_limit |
Maximum queue size when vacuuming the queue database (events, default 350000) |
The following table explains the RPC Queue Engine settings, which appear under the sseapi_rpc_queue heading:
| Option | Description |
|---|---|
name |
Event queue name (default sseapi-rpc, no need to change this) |
strategy |
When to queue events (always, on_failure, or never, default never) |
push_interval |
How often to send calls to Automation Config (seconds, default 5) |
batch_limit |
Maximum number of calls to push to Automation Config per interval (default 500) |
age_limit |
Maximum queued call age; drop oldest entries (seconds, default 3600) |
size_limit |
Maximum queue size; drop oldest entries (events, default 360000) |
vacuum_interval |
How often to vacuum the queue database (seconds, default 86400) |
vacuum_limit |
Maximum queue size when vacuuming the queue database (entries, default 100000) |
sseapi_tgt_match heading:
| Option | Description |
|---|---|
| poll_interval | How often, in seconds, the engine should request updated target group information from RaaS (default 60) |
| workers | How many worker processes should be created to do target group matching calculations. The default value (0) creates one process per CPU core up to a limit of 8. |
| nice | The priority niceness of target group matching workers. The default (19) gives the workers the lowest scheduling priority to prevent interference with other processes running on the salt-master. |
The following table explains the Path settings. After initial configuration generation be careful changing these settings. Modules will be copied into these directories from the installation process. However, adding extra paths will not have an adverse effect.
| Option | Description |
|---|---|
beacons_dirs |
beacons External Modules Path(s) |
engines_dirs |
engines External Modules Path(s) |
fileserver_dirs |
fileserver External Modules Path(s) |
pillar_dirs |
pillar External Modules Path(s) |
returner_dirs |
returner External Modules Path(s) |
roster_dirs |
roster External Modules Path(s) |
runner_dirs |
runner External Modules Path(s) |
module_dirs |
Salt External Modules Path(s) |
proxy_dirs |
proxy External Modules Path(s) |
metaproxy_dirs |
metaproxy External Modules Path(s) |
states_dirs |
states External Modules Path(s) |
What to do next
After installing and configuring the Master Plugin, you must complete additional post-installation steps. The next step is to configure the RaaS node. To continue the post-installation process, see Check the RaaS configuration file.
After installing and configuring the Master Plugin, you can request access to the Automation Config Cloud service in the VMware Cloud Services Platform (CSP).
