As an Automation Assembler administrator, you can deploy a simple virtual machine that does not require that you know how to create a cloud template. If you are new to Automation Assembler this tutorial guides you through the set up process, creating the virtual machine, and shows you where to manage the deployed machine.
This method is an easy way to quickly deploy a machine based on image templates, sizing flavors, storage, and networks defined by the cloud provider. It is a quick test of your cloud account and projects.
You can create a virtual machine for any of the following cloud services providers.
- Amazon Web Services
- Google Cloud Platform
- Microsoft Azure
- vCenter Server
- VMware Cloud on AWS
The Google Cloud Platform is the example in this tutorial.
Before you begin
- Verify that you have the Assembler Administrator role. See Organization and service user roles in VMware Aria Automation. If you do not have this user role, you do not even see the option create a new VM.
- Verify that catalog users can deploy simple virtual machines. The Create New Resource option on the page must be activated.
Step 1: Add a cloud account
The cloud accounts provide the credentials that Automation Assembler uses to connect to the cloud provider.
- Select .
- Click Add Cloud Account and select the account type.
You can access the configuration details using the following links.
After you add the cloud account, Automation Assembler collects resource information from the target cloud provider account that you later use to deploy a virtual machine.
Step 2: Create a project
The project associates the users and the cloud account cloud zones.
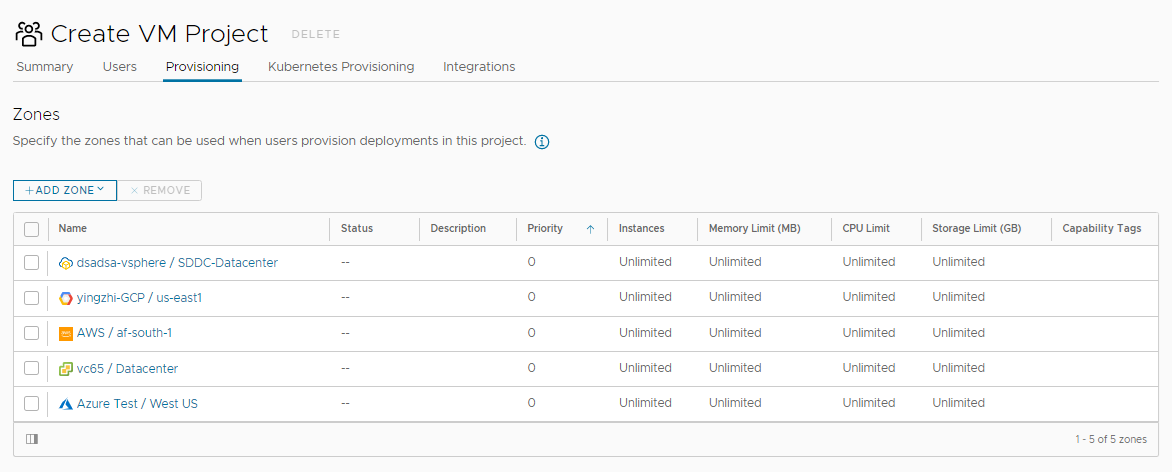
In this tutorial, the project name is Create VM Project. This project is a demonstration project that includes cloud zones for all the supported platforms.
- Select .
- Click New Project.
- Enter a name.
In this tutorial, the name is Create VM Project.
- If you want other to use this project, click the Users tab and add any users to the project.
- Click the Provisioning tab and click Add Zone to add at least one cloud zone for the cloud accounts that you are deploying to.
Remember, this is a demonstration project that includes a cloud zone for each support cloud vendor platform.
- Click Create.
Step 3: Create and deploy a virtual machine
- Select , and then click New VM.
- Configure the required settings on the General page of the wizard and click Next.
This tutorial uses Google Cloud Platform as the cloud account where you want to deploy the virtual machine.
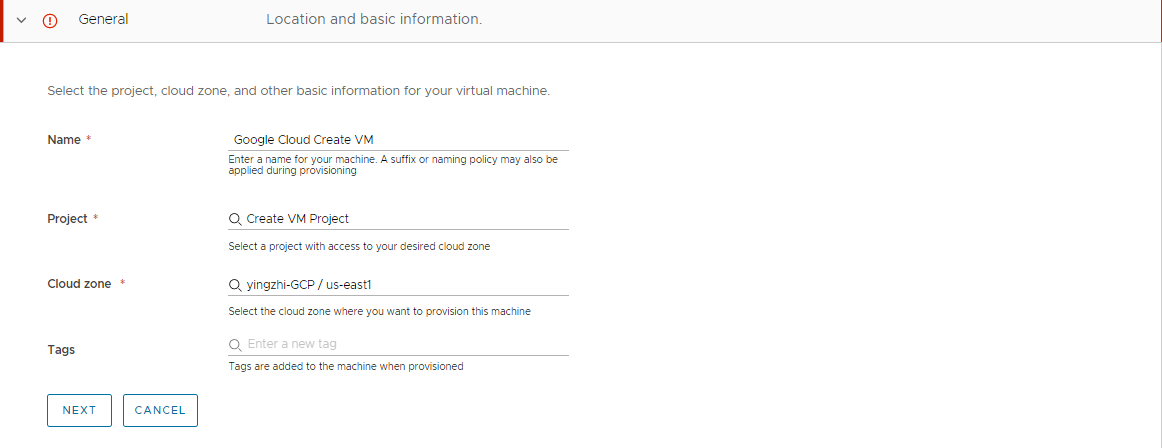
Remember that these values are samples only. Your values must be specific to your environment.
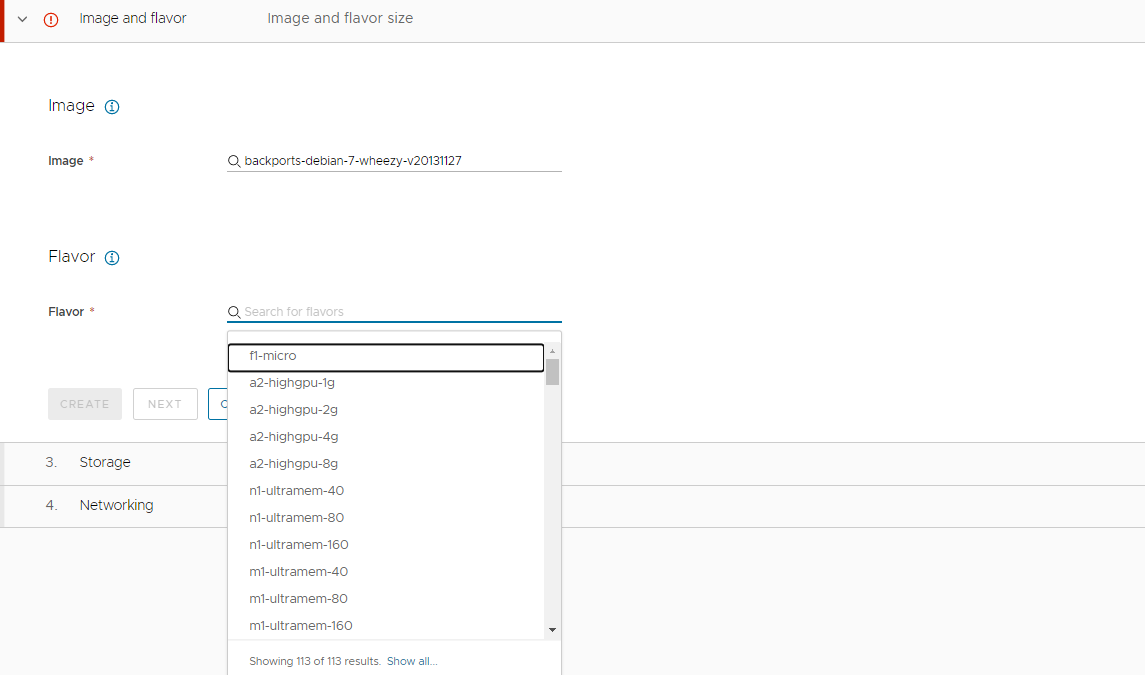
Table 1. Sample values for the first wizard page Setting Sample Value Name Google Cloud Create VM Project Create VM Project Cloud zone yingzhi-GCP/us-east1 - Select the image and flavor that are used to create the virtual machine.
The available values are collected from the target cloud zone. The image is the operating system and the flavor is the defined size options. Some target provider types require you to specify the CPU and memory. This target requires you to select from the defined options.
- Click Next.
To deploy only the machine, click Create. For this tutorial, click Next to add the optional storage and network for this virtual machine.
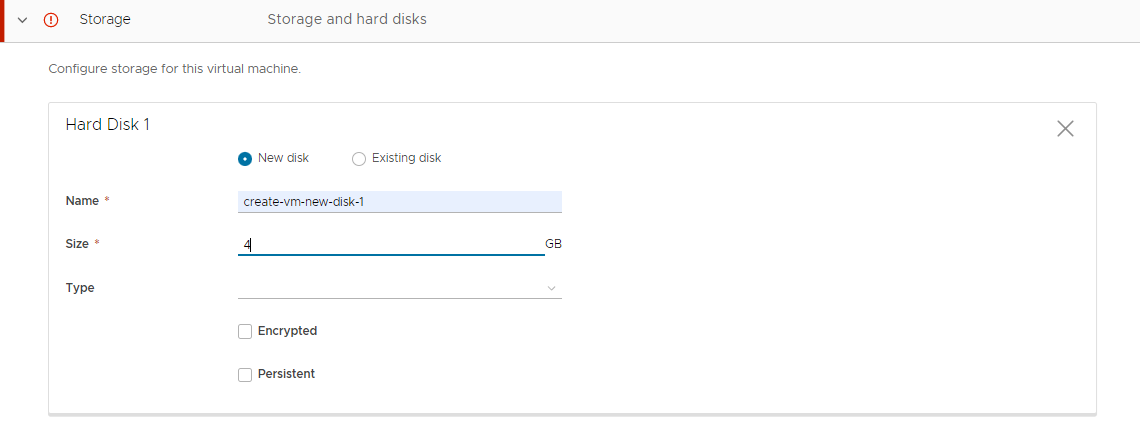
- To add a new disk, click Add hard disk and enter a Name and Size.
- Click Next.
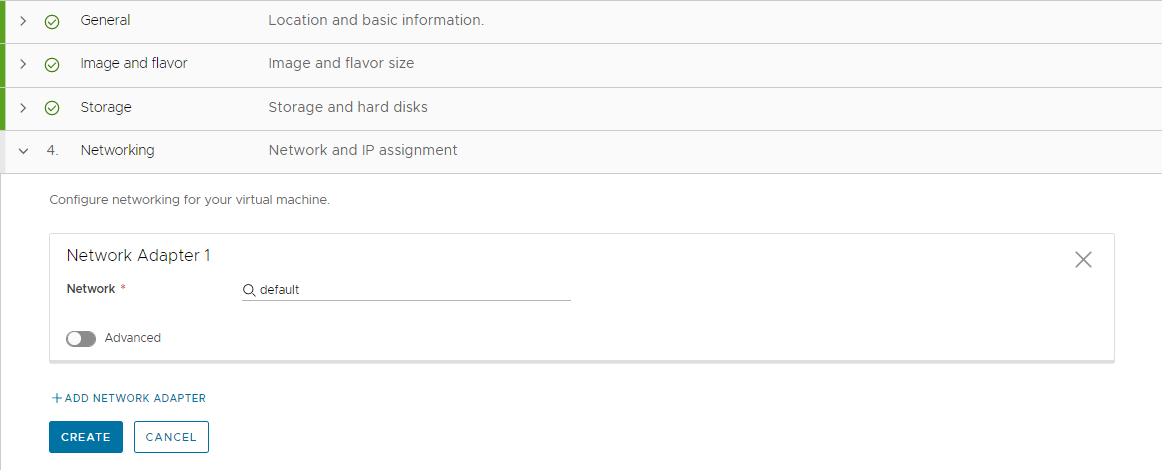
- To add a network adapter, click Add network adapter.
- Select from the search results.
- Click Create.
Your view switches to the Deployments page so that you can monitor the progress of the deployment.
Step 4: Manage the new virtual machine as a deployment
When the deployment process is completed successfully, you can begin managing the deployment.
For more about managing your deployments, see Managing Automation Assembler deployments.
For a list of all possible day 2 actions on all resource types, see What actions can I run on Automation Assembler deployments or supported resources.
- Select and locate your virtual machine.
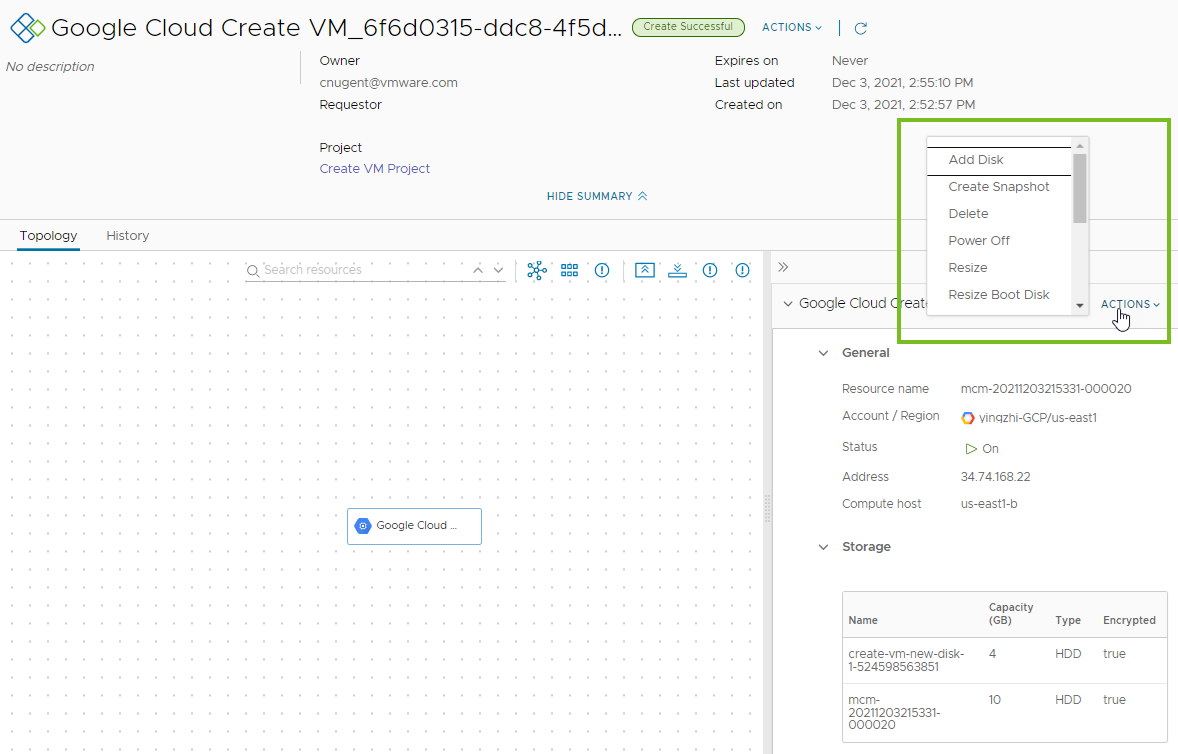
In this tutorial, the deployment name is Google Cloud Create VM.
- To run an allowed deployment-level action on the deployment from this view, click the vertical ellipsis and select the action.

- To learn more about the deployment, including the topology, click the deployment name.
Notice that the topology of this deployment is simple. More complex deployments also provide the complete topology that might include machines, load balancers, network connections, and other components.
You can also view the deployment history, which is a log of all the actions on the deployment components, and run allowed machine-level actions.
Step 5: Manage the new virtual machine as a resource
In addition to managing the virtual machine as a deployment, you can also manage it along with the other resources. Resources can include deployed, discovered, and onboarded virtual machines, storage volumes, and network and security resources.
Discovered resources are those that are collected from the cloud instance. You can manage discovered resources with a limited set of day 2 actions, such as power on and power off. For more information about working with discovered resources, see How do I work with discovered resources in Automation Assembler.
Onboarded resources are discovered resources that you brought under full management. They can be managed with the more robust day 2 action options. For more information about how to onboard discovered resources, see What are onboarding plans in Automation Assembler.
As you work with this deployed machine, it is eligible for more day 2 actions. The availability of the actions depends on the state of the machine and what day 2 actions you have permission to run.
- Select .
- Locate the machine.
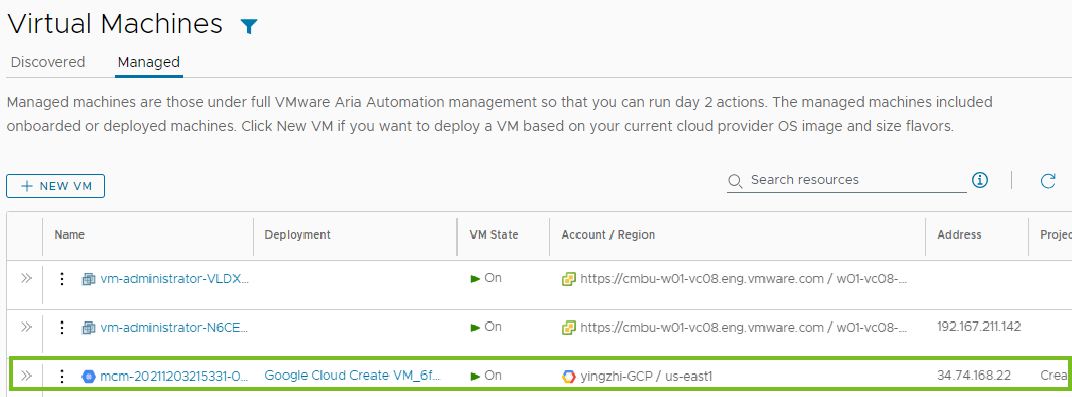
- To run an allowed machine-level action on the machine from this view, click the vertical ellipsis and select the action.
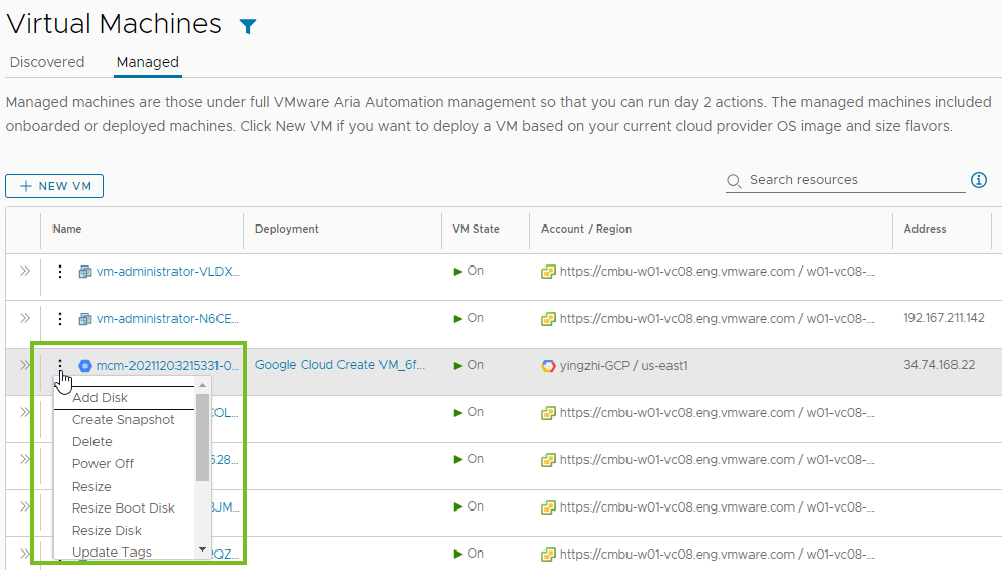
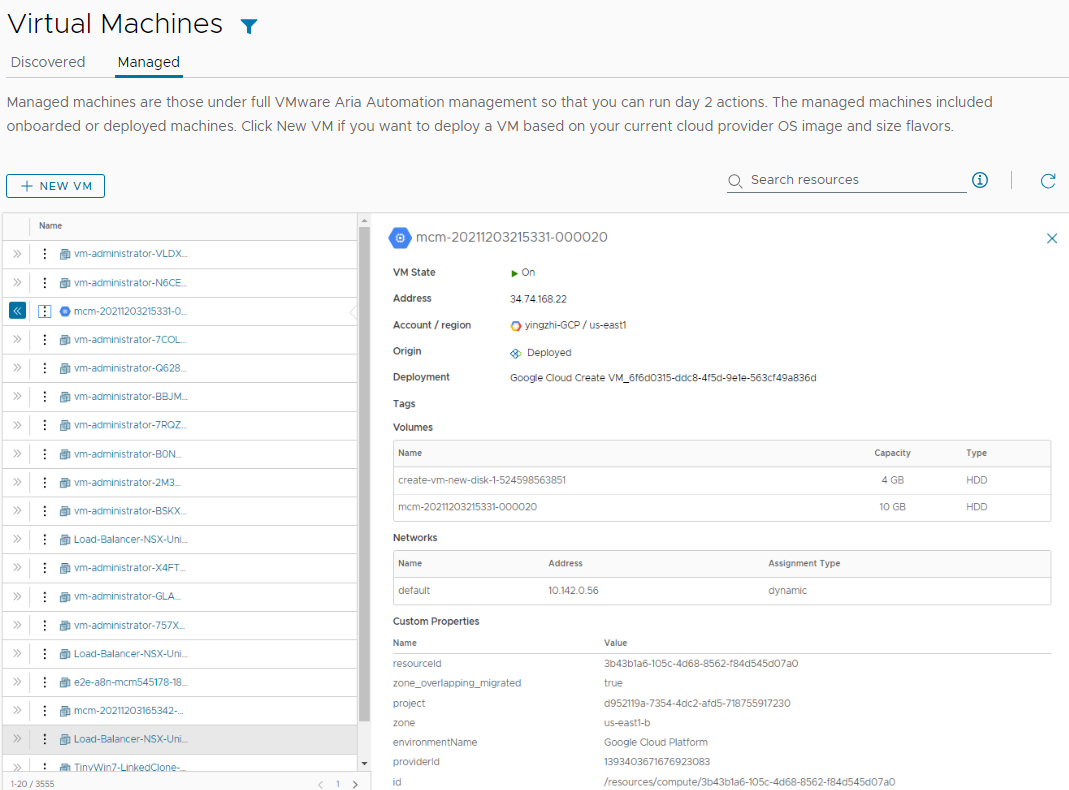
- To review the machine resource details, click the double arrows in the left column.
The useful details in this example include the storage, network, and custom properties.
