


You must add an active VMware Cloud Proxy in VMware Aria Operations for Logs (SaaS) to ingest logs from your VMware Aria Operations for Logs on-premises instances to VMware Aria Operations for Logs (SaaS) and to forward logs from VMware Aria Operations for Logs (SaaS) to your VMware Aria Operations for Logs on-premises instances using the log forwarding configuration.
The Cloud Proxy is deprecated. You can continue to use your existing Cloud Proxy configurations, but there will be no new feature updates to the Cloud Proxy.
Prerequisites
Ensure that you have firewall access for the required endpoints. See the Getting Started Checklist
Procedure
- In the Deploy OVF Template form, perform the following actions.
- Click Select template, then Local File. Enter the path to the OVA Cloud Proxy file you downloaded. Click Next.
- Click Select name and location and enter the name of your OVA file. Select the cluster where you want to install the Cloud Proxy, and click Next.
- Click Select a resource and the cluster where you want to run the Cloud Proxy, and then click Next.
- Review the details of your Cloud Proxy deployment. Notice the Size on disk text box. The location where you deploy the Cloud Proxy in the following steps must have enough space available. Click Next.
- Accept the License Agreement. Click Next.
- Click Select storage and select a datastore from the list with enough free space for the OVA file. Click Next.
- Click Select networks and select a destination network, and then click Next.
- Click Customize template and enter the required information. Do not click Next.
- For Root User Password, choose a unique password. It does not need to match the vCenter password.
- Return to VMware Aria Operations for Logs (SaaS) and collect the token key provided on the Setup a Cloud Proxy Virtual Appliance form. Click Copy to copy the key. Use the Copy control to ensure you are copying the entire key.
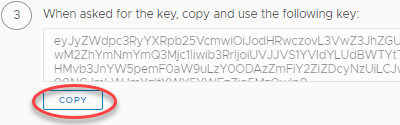
Token keys are should be used within 24 hours and should be used for only one Cloud Proxy.
- Return to the template form and click Networking Properties. If you use DHCP in your vCenter network, do not enter any information. If you do not use DHCP, then you must provide information for each setting. Click Next.
- Click Ready to complete and review your configuration data. Click Finish.
The Cloud Proxy is installed.
What to do next
Consult Port Requirements of Remote Cloud Proxy and then enable log and event forwarding to the Cloud Proxy.
To learn more about Cloud Proxy for VMware Aria Operations for Logs (SaaS), access the frequently asked questions related to Cloud Proxy.
