


This section covers the specific configuration for the DNS health monitor type. The DNS health monitor validates the health of DNS servers by sending a UDP DNS request and comparing the response IP address.
Creating or Editing DNS Health Monitor
You can edit the DNS health monitor by checking the System-DNS box and then click the edit icon.
To create a new DNS health monitor, click Create button. Select the DNS option from the drop-down list of the Type field. The following screen is displayed:
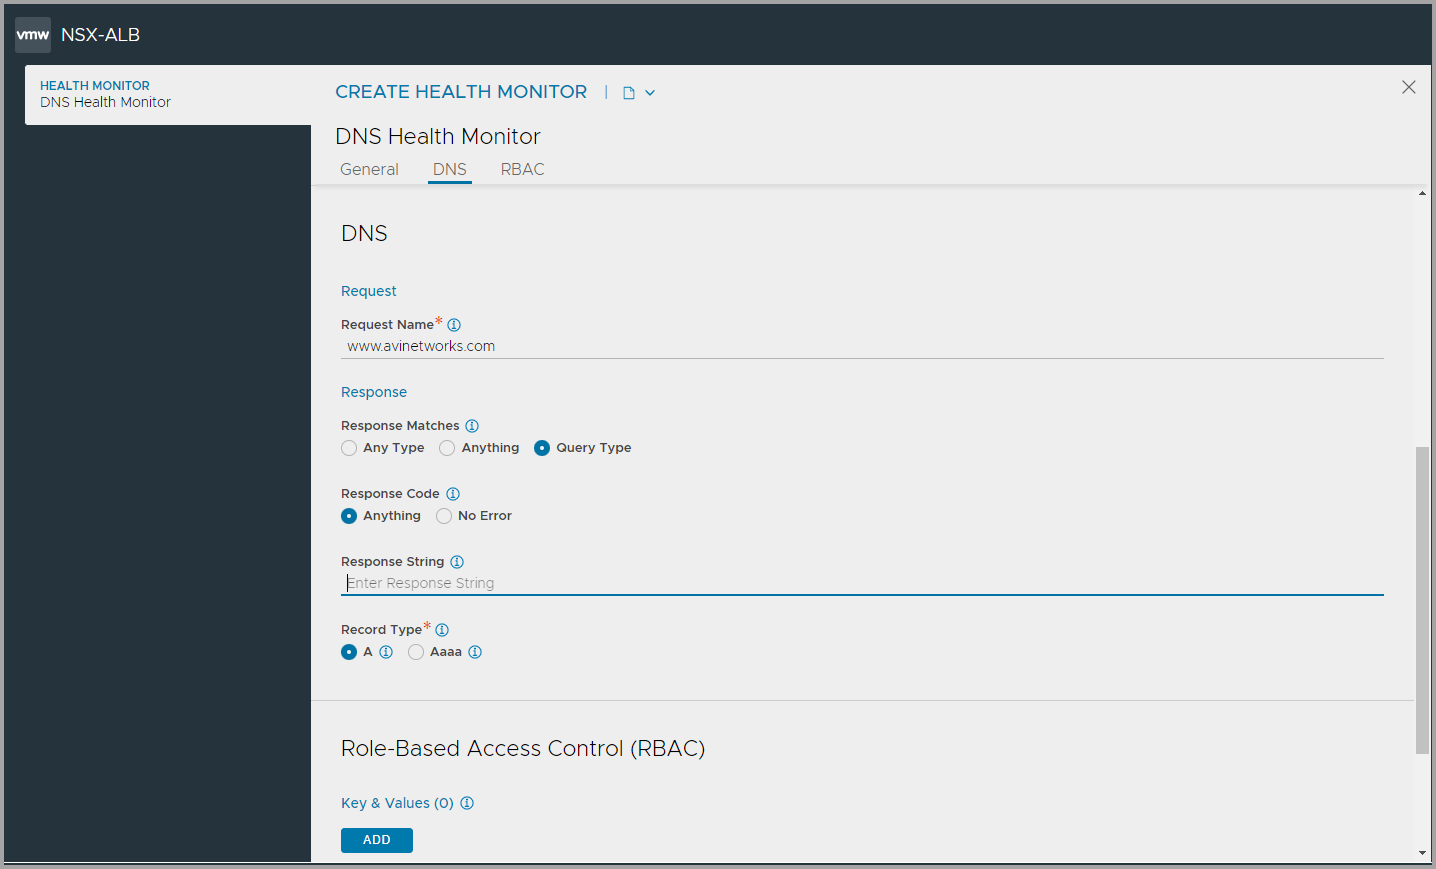
You can specify the following details related to DNS request and response settings:
DNS Request Settings
Request Name — Specify the request name. The DNS monitor will query the DNS server for the fully qualified name in this field. For instance, www.avinetworks.com.
DNS Response Settings
Response Matches — Select one of the appropriate response matches. The following are the options:
Anything — Any DNS answer from the server will be successful, even an empty answer.
Any Type — The DNS response must contain at least one non-empty answer.
Query Type — The response must have at least one answer of which the resource record type matches the query type.
Response Code — Select one of the appropriate response code. The following are the options:
Anything — The monitor ignores the DNS server’s response code, and any potential errors, hence will not result in a health check failure.
No Error — The monitor marks the DNS query as failed if any error code is returned by the server.
Response String — Specify the IP address. The DNS response must contain this IP address to be considered successful.
Record Type — Select the record types used in the health monitor DNS query. The following are the options:
A
AAAA
After specifying the necessary details, click Save.
