This topic discusses the steps to configure the Avi Load Balancer SE interfaces.
This step is applicable only for No Orchestrator mode.
Avi Load Balancer Service Engine requires an IP address in each of the virtual service networks and server networks. This process is automatic in write access mode. For no orchestrator mode, the following is the process:
On Avi Load Balancer UI, navigate to , and select the SE that was deployed in the previous section and click edit icon.
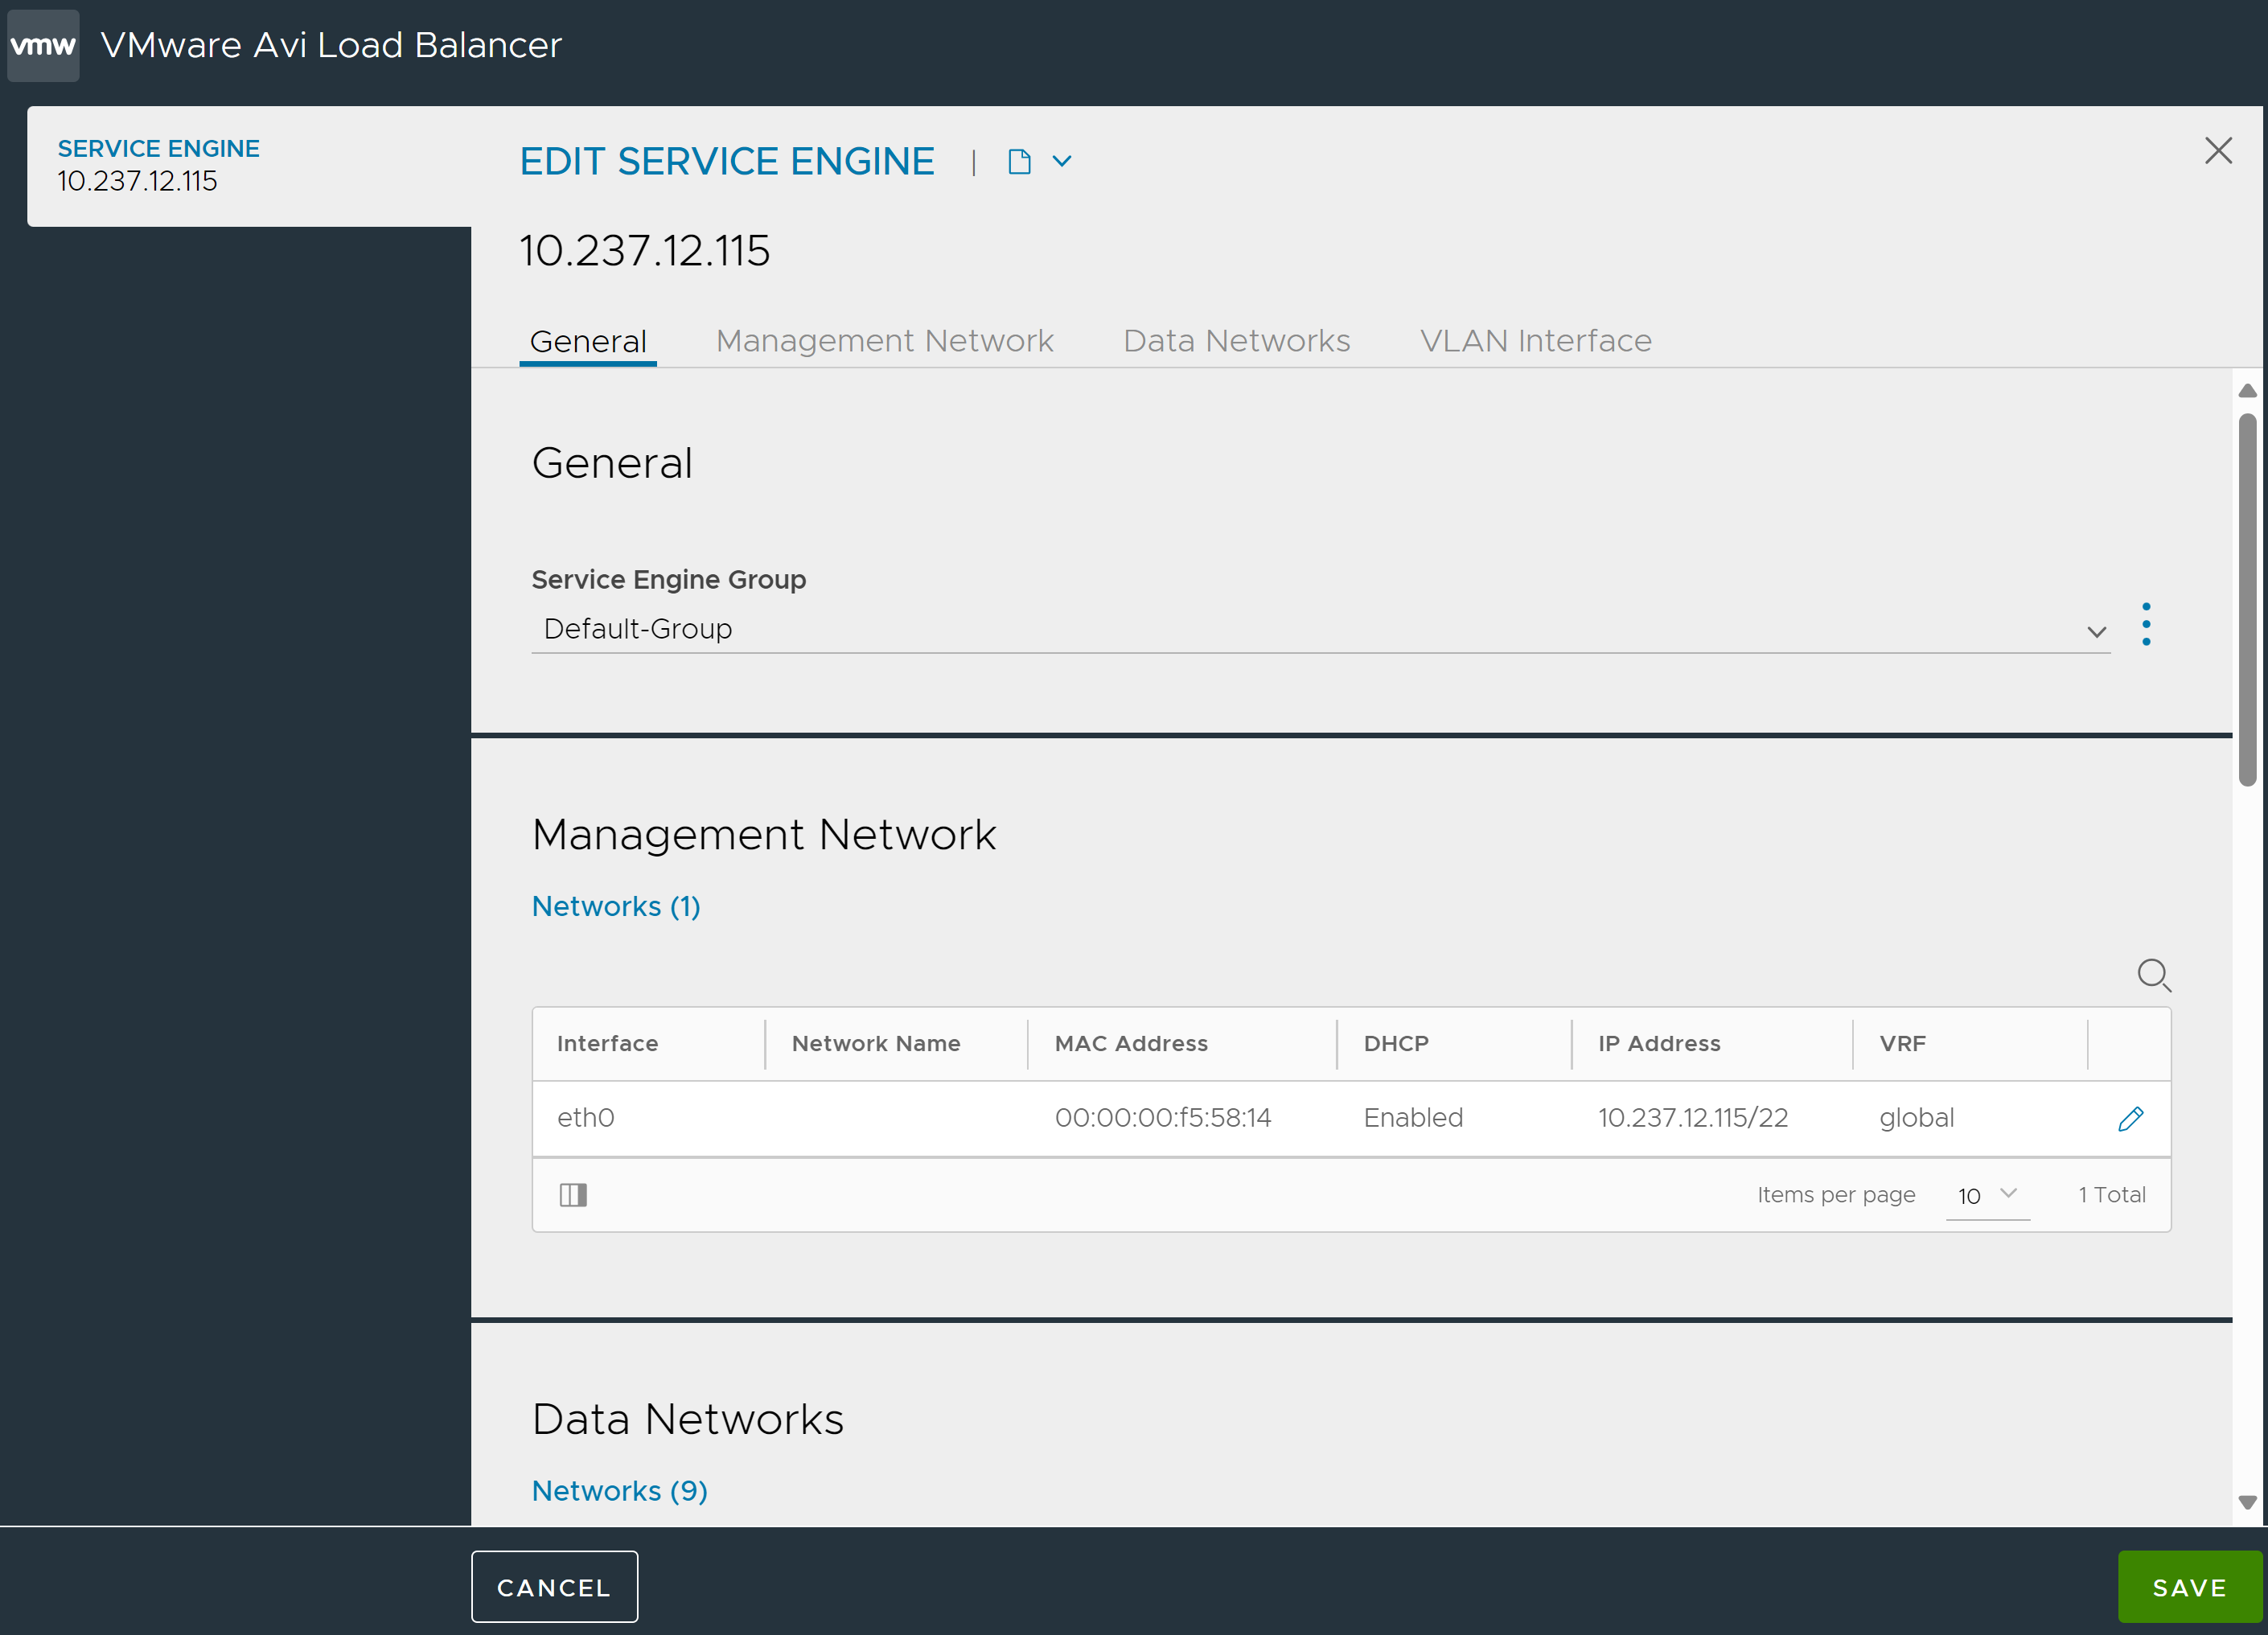
Service Engine Group: The system displays the name of the selected Service Engine.
Data Networks
You can edit an existing data networks by clicking the pencil icon. The Edit Data Network window opens.
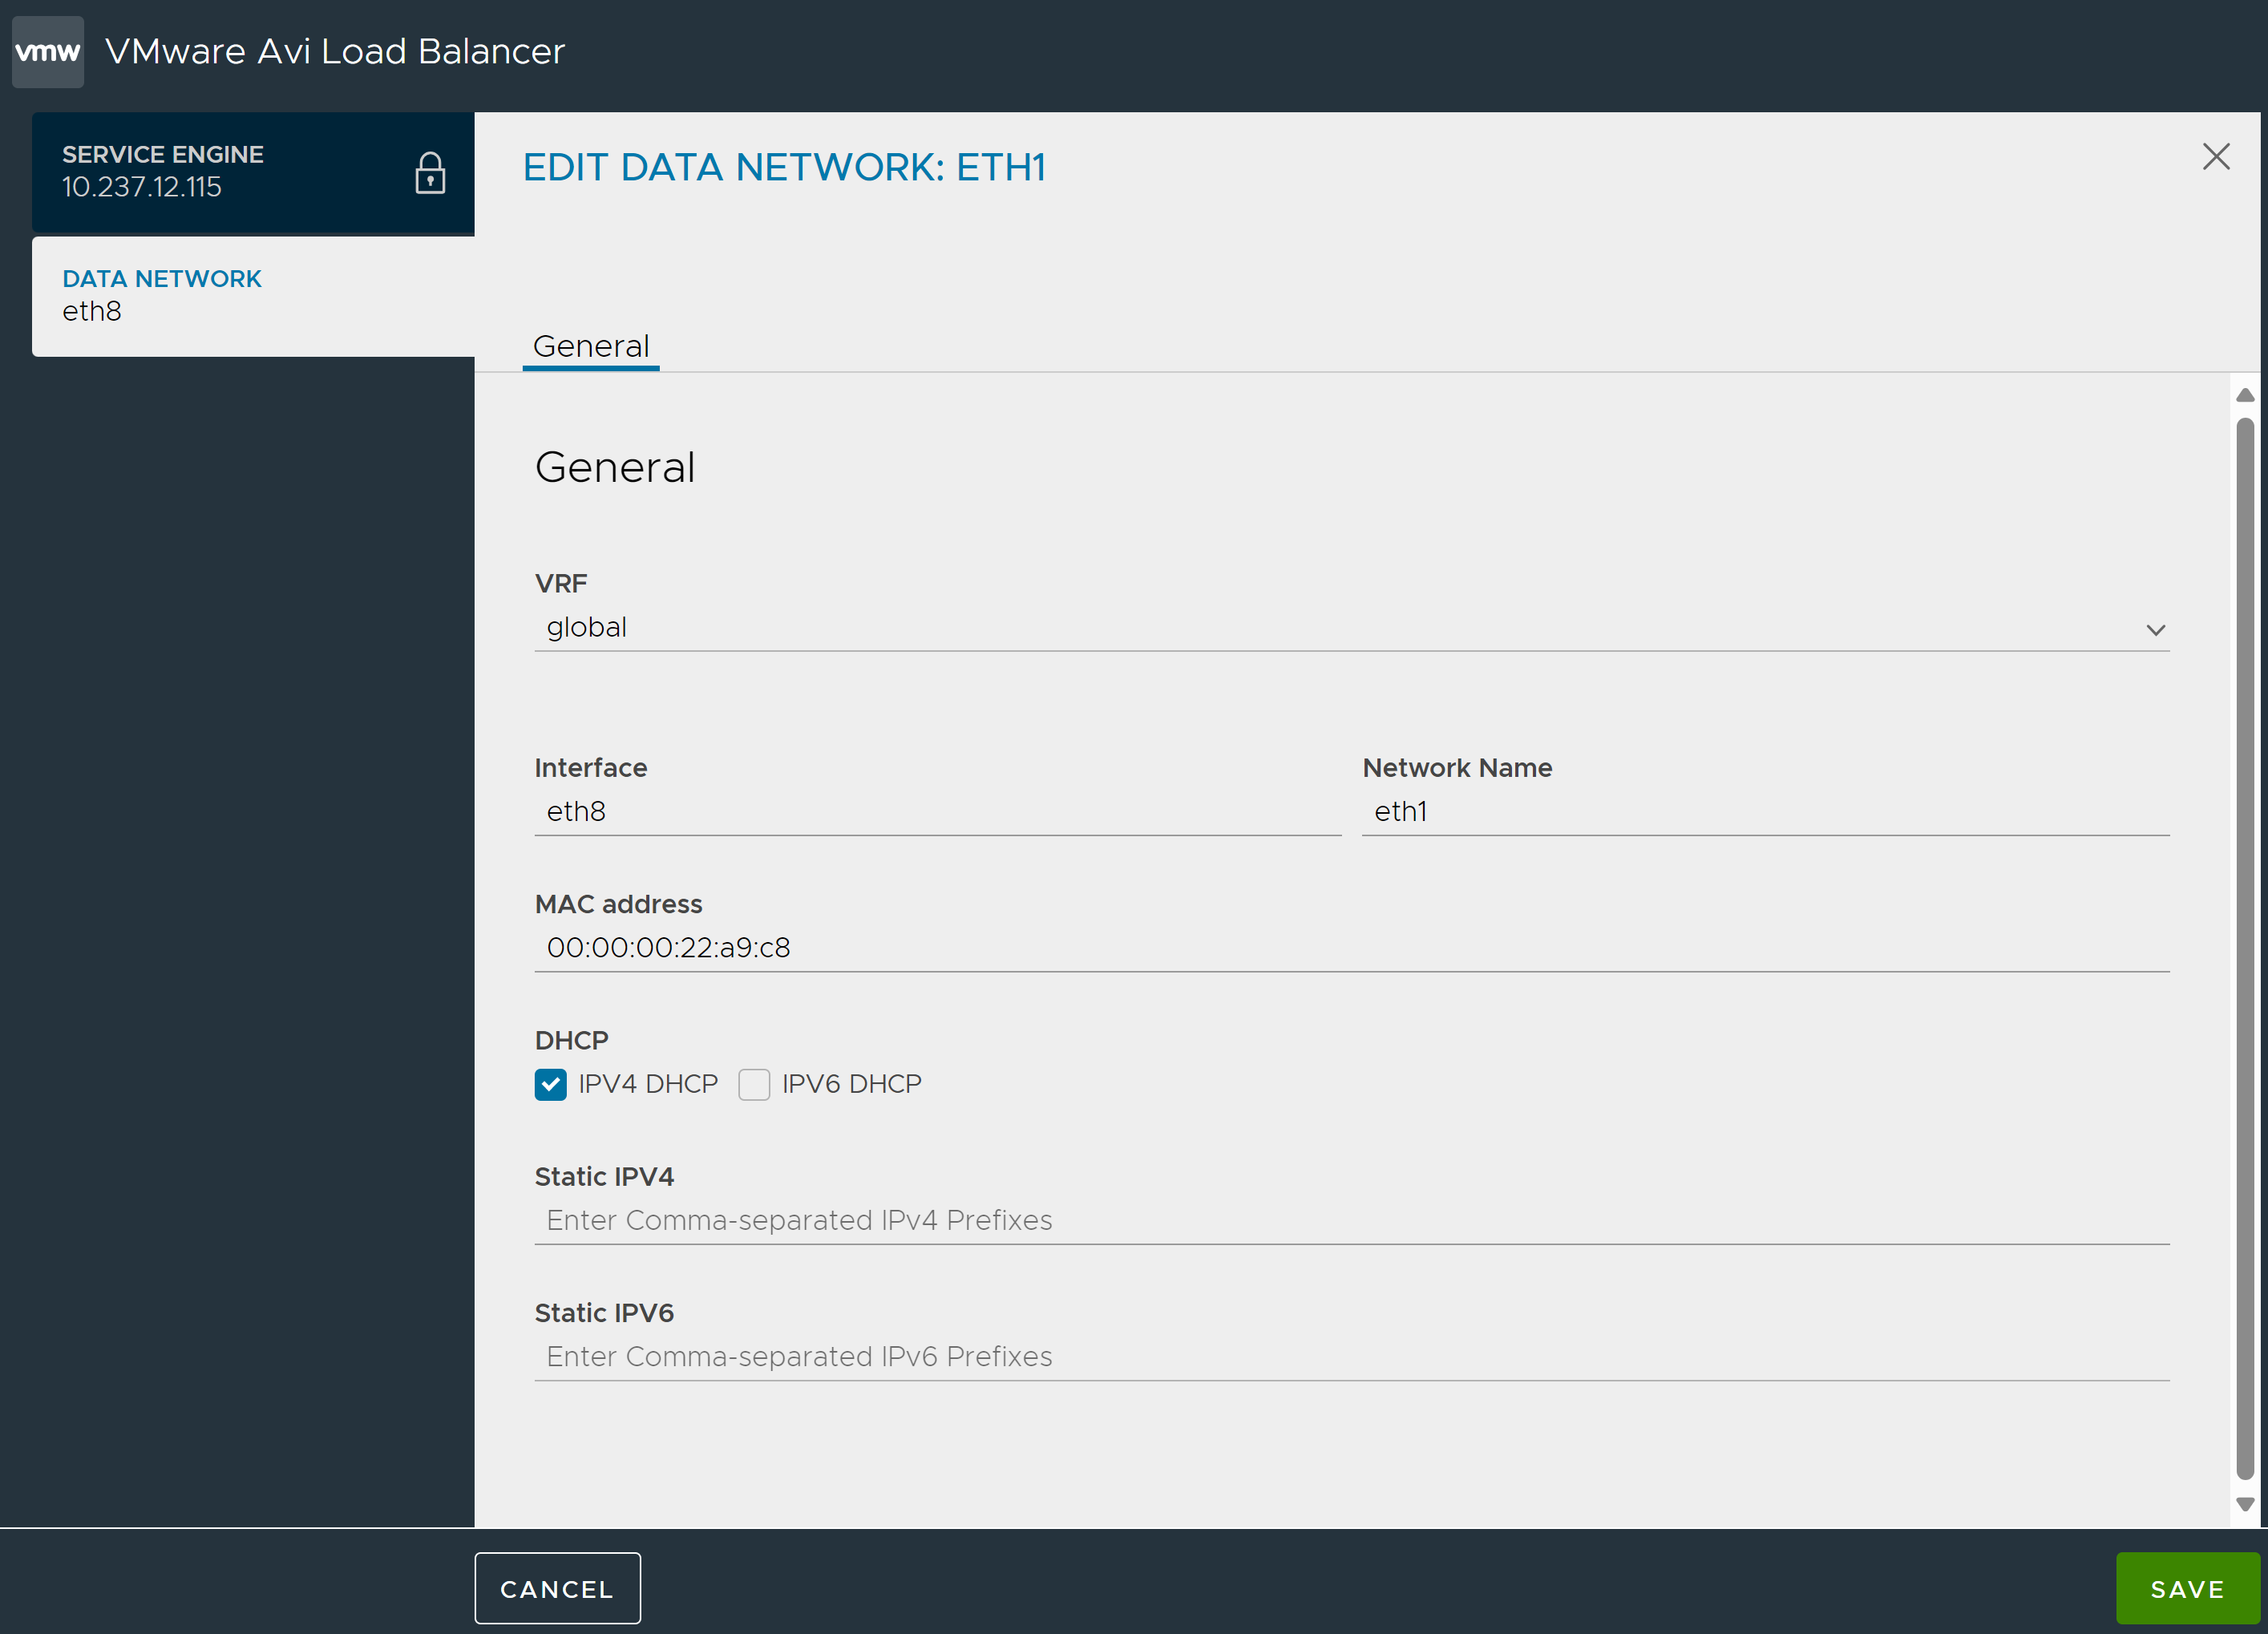
The system displays the following values:
VRF
Interface: Find the interface that matches the list of MAC addresses that were noted down during the the SE deployment.
Network Name
MAC Address
IPv4 DHCP: If you select this option, you can specify static IPv6 details.
IPv6 DHCP: If you select this option, you can specify static IPv4 details.
Static IPv4 address
Static IPv6 address
If you select both IPv4 DHCP and IPv6 DHCP options, you cannot amend or add static IPv4 and IPv6 details. However, you can add static IPv4 and IPv6 details, if both IPv4 and IPv6 DHCP options are not selected.
Repeat the above steps for all connected interfaces of the virtual service and server networks.
VLAN Interface
Click ADD to create VLAN interface.
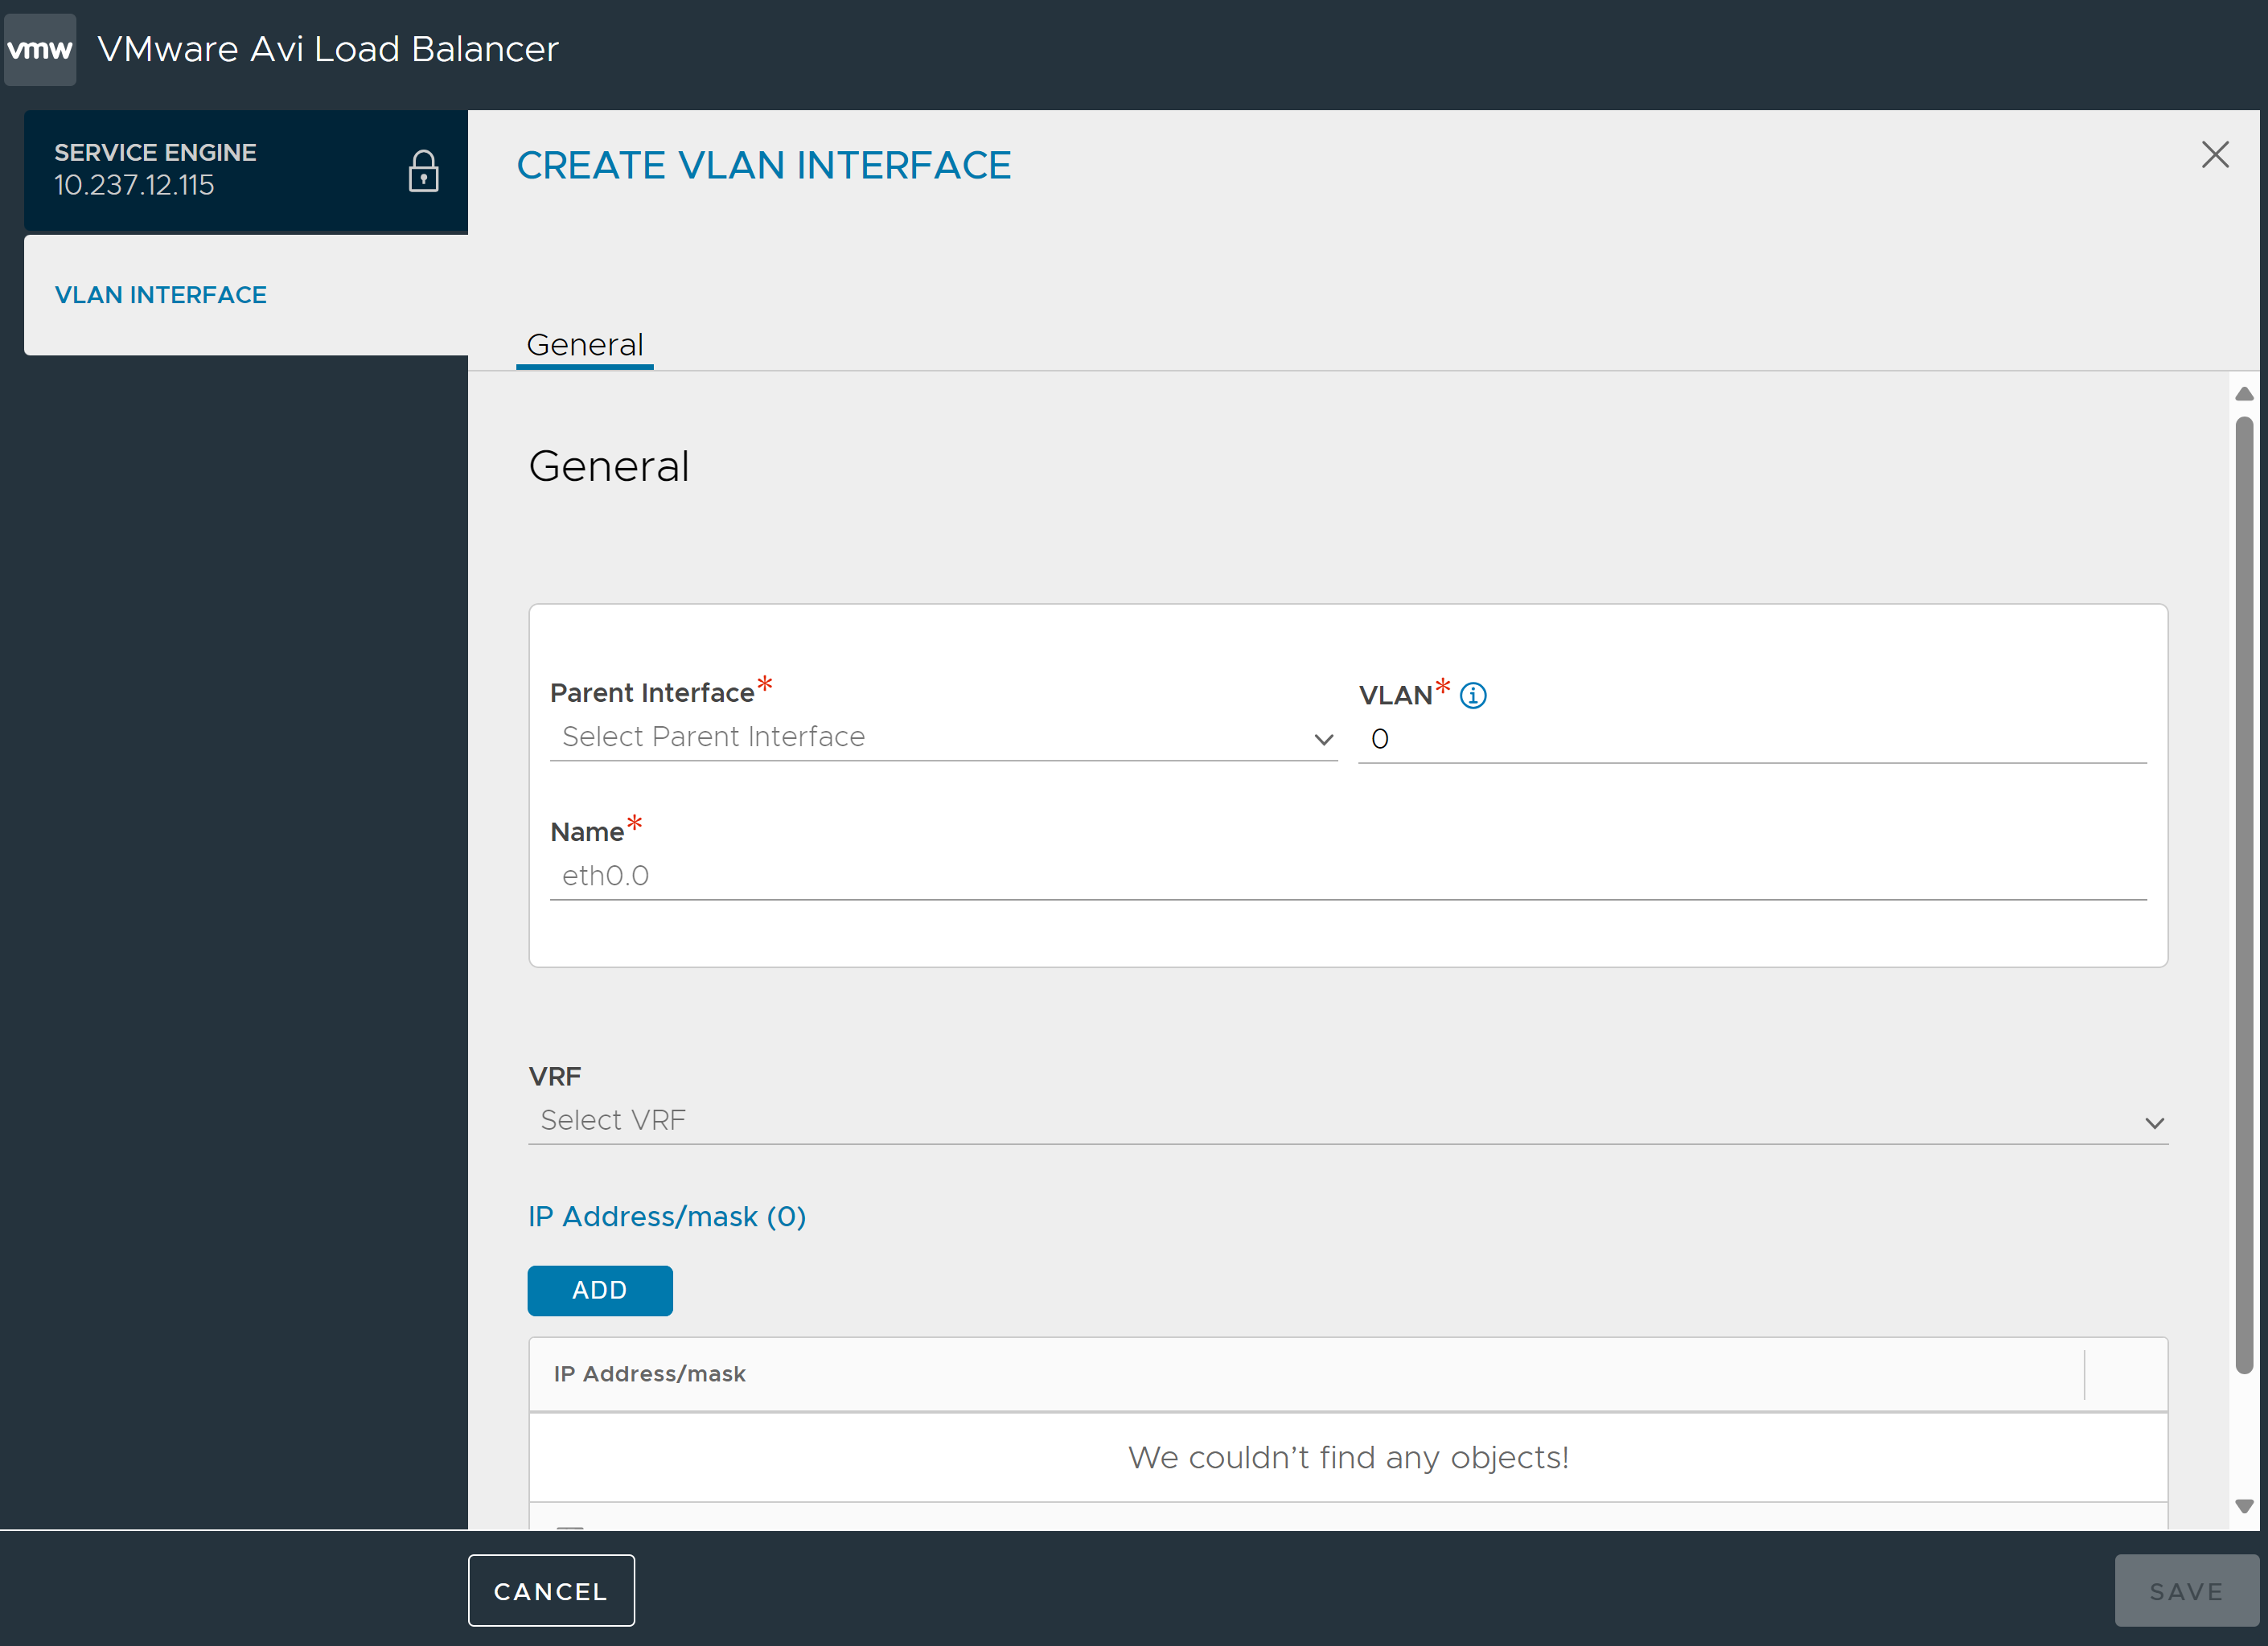
Parent Interface: Select parent interface from the drop-down menu.
VLAN: Specify VLAN ID.
Name: The system displays the interface name.
VRF: Select the VRF details from the drop-down menu.
IP Address/ Mask: Click ADD to specify IP address details.
After specifying all the necessary detils, click SAVE the Service Engine.
Management Network
You can edit an existing management networks by clicking the pencil icon. The Edit Management Network window opens.

The system displays the following values:
VRF
Interface
Network Name
MAC Address
IPv4 DHCP
IPv6 DHCP
Static IPv4 address
Static IPv6 address
DHCP value: Enable the DHCP option for the interface, if it is available. Otherwise, provide a static IP address.
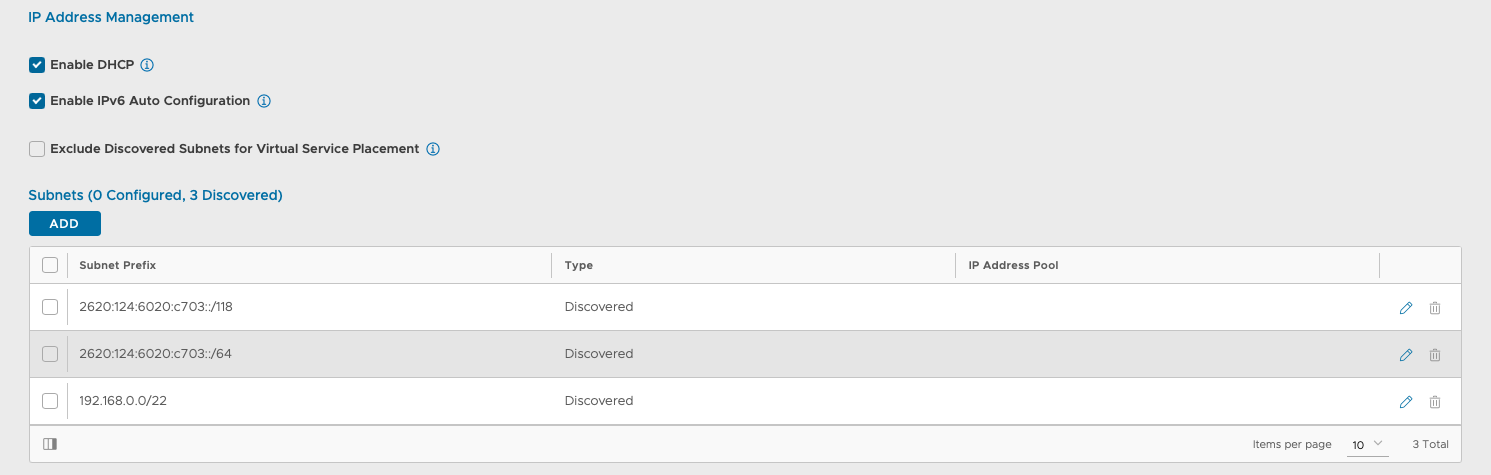
You can use mgmt_ip_v4_enabled and mgmt_ip_v6_enabled flags to control what kind of IP management interface of the SE will get.
mgmt_ip_v6_enabled will only be set to True, if there is any configuration on the Controller that suggests that the SE Management network is using IPv6, either ip6_autocfg_enabled is set to True, or there is a static IP pool configured with V6 IPs.
Enable DHCP and Enable IPv6 Auto Configuration fields are enabled by default for all newly created clouds.
v4 Service Engine Management Network
If SE Management interface needs to only have v4 IP, Enable IPv6 field on the Cloud can be disabled. This will prevent the Management interface on the SE from getting a v6 IP address in dual-stack environments.
v6 Service Engine Management Network
If SE Management interface needs to only have v6 IP, Enable IPv4 field on the Cloud can be disabled. This will prevent the Management interface on the SE from getting a v4 IP address in dual-stack environments.
The above two settings will allow you to configure SE Management interface with Autoconfig v6 IP Addresses. Additionally, v6 IPAM for SE Management Network is supported as shown below.
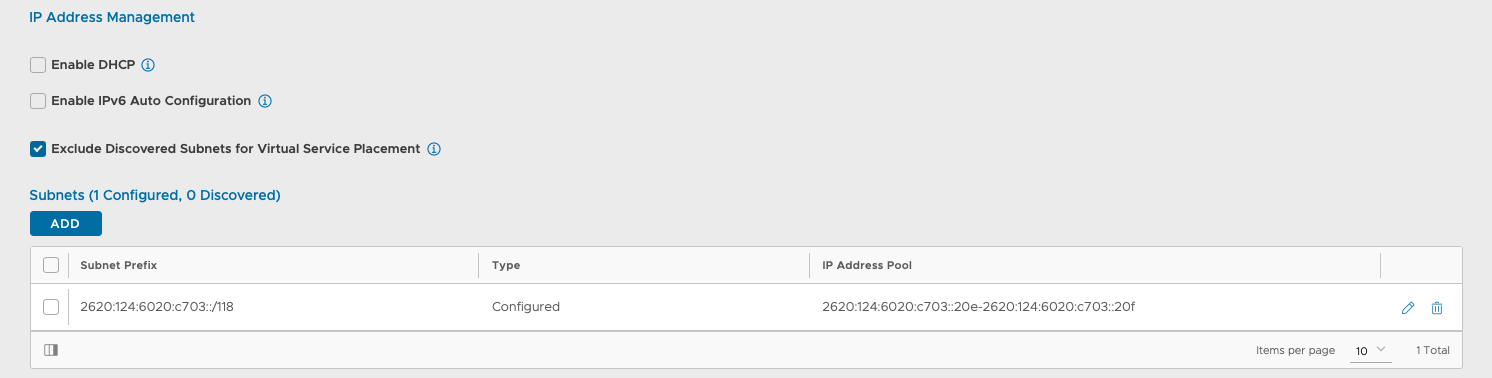
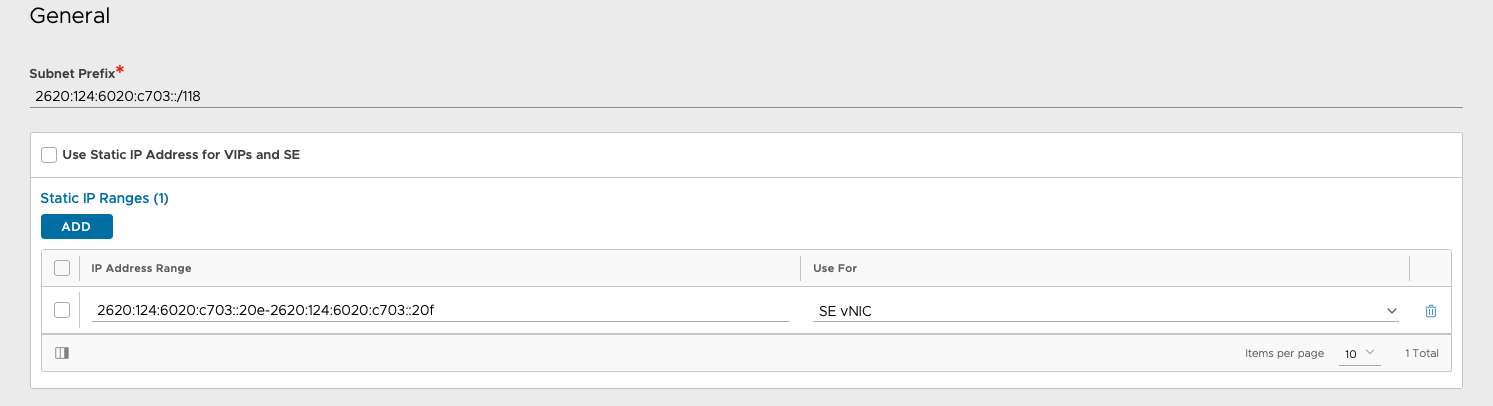
Dual Stack Service Engine Management Network
You can specify the desired configuration for their dual-stack environments. For instance, in the case given below, the SE Management Interface is chosen to be dual-stack, and the SE Management network has dhcp_enabled and ip6_autocfg_enabled to automatically get v4 and v6 IPs on the SE Management interface.