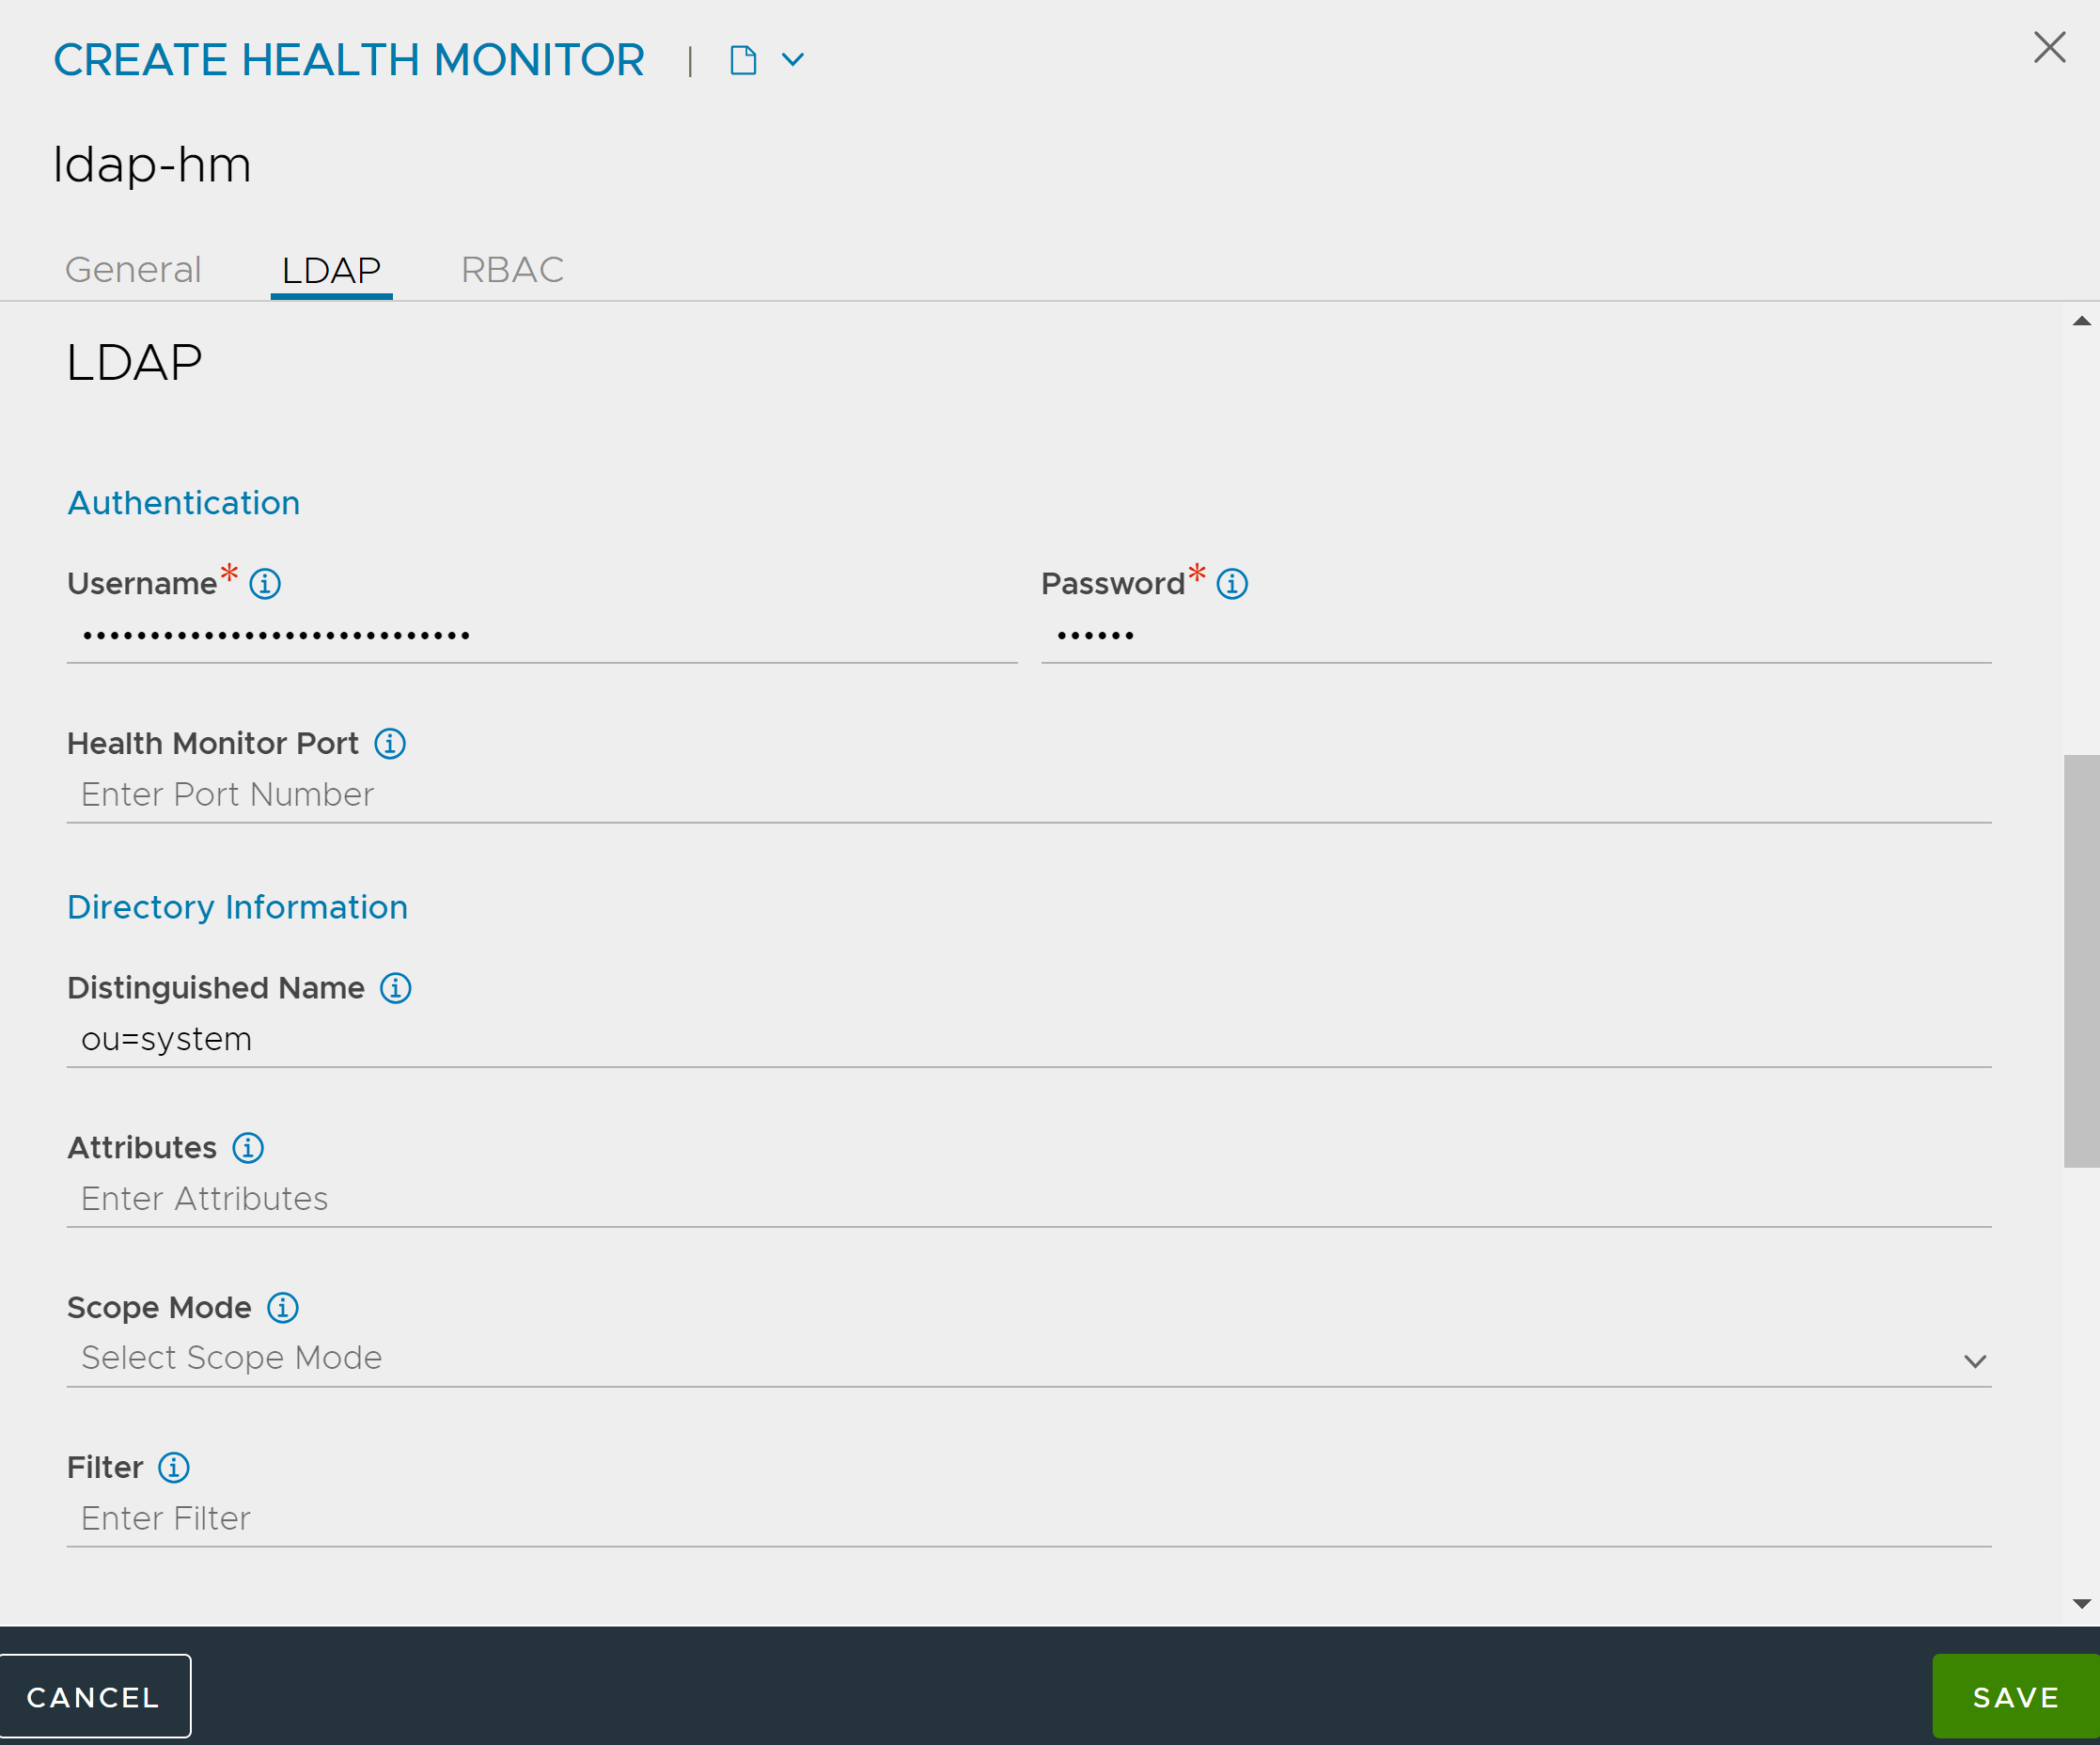
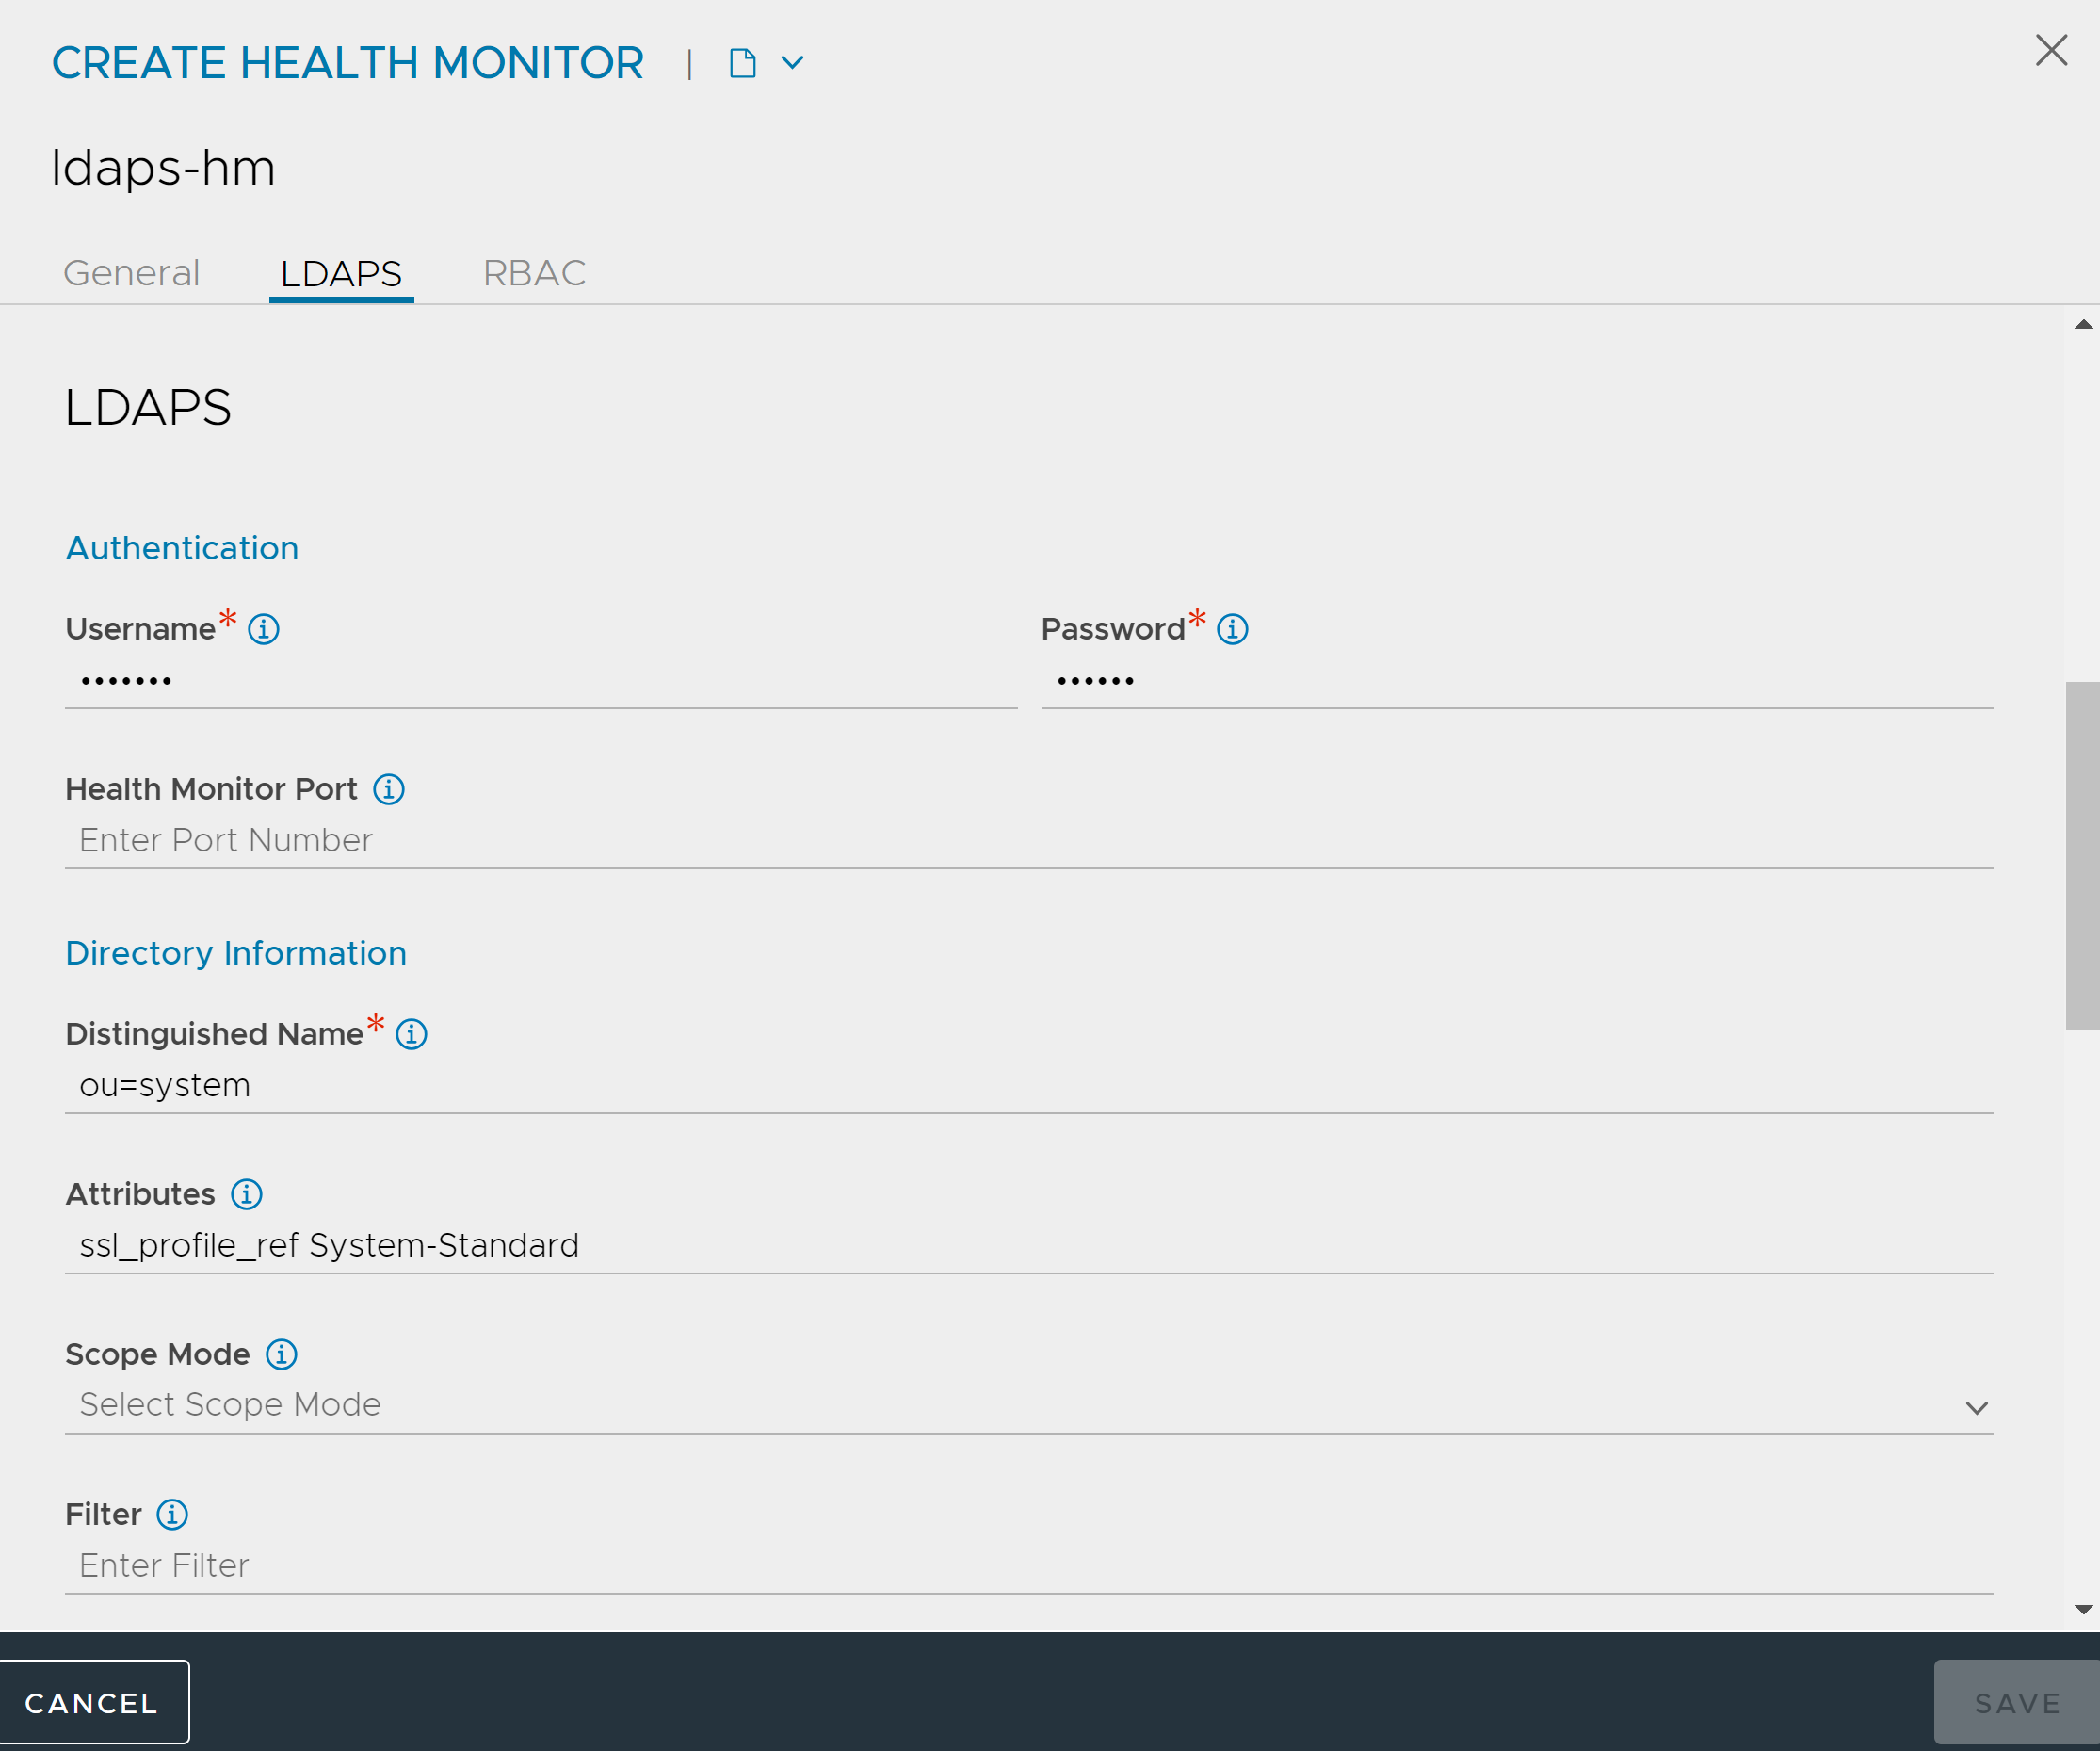
To monitor the health of the LDAP servers, LDAP health monitor is used. This section covers the configuration for searching the LDAP servers using the LDAP health monitor. On successful search, the server will be marked UP else, it will be marked DOWN.
Configuring LDAP/LDAPS Health Monitor
Field |
Description |
|---|---|
Distinguished Name |
Enter the distinguished name (DN) of an entry. |
Attributes |
Use this to define the attributes to be returned on search. To configure multiple attributes, use commas to separate the attributes (for example, cn,address,email). |
Scope Mode |
Select the scope of search from one of the following:
|
Filter |
Filter to search entries within the specified scope |
Username |
Enter the DN of the user, if the LDAP server requires authentication (present under general health monitor configuration under authentication) |
Password |
Enter the password of user if the LDAP server requires authentication (present under general health monitor configuration under authentication) |
Health Monitor Port |
It is used instead of the port defined for the server in the pool. If the monitor succeeds at this port, the load-balanced traffic will still be sent to the port of the server defined within the pool. |
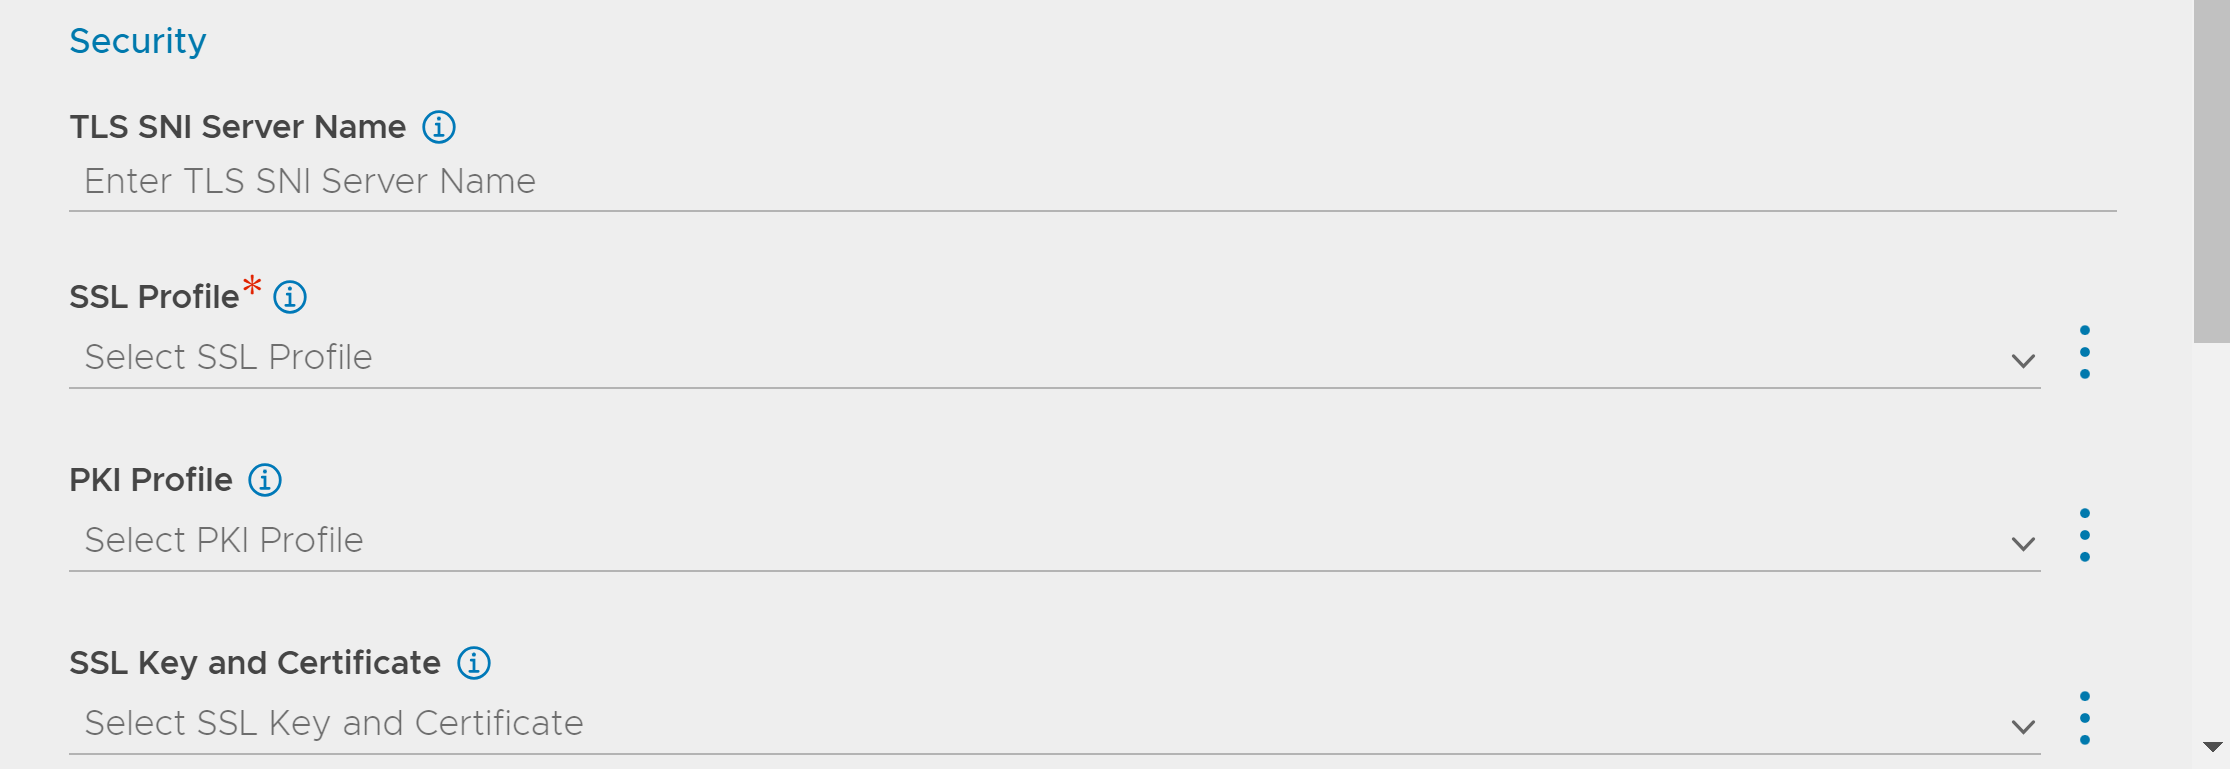
TLS SNI Server Name |
It is an FQDN hostname that is used in the TLS SNI extension in server connections indicating SNI is enabled. |
SSL Profile |
This defines the ciphers and SSL versions to be used for the health monitor traffic to the backend servers. |
PKI Profile |
This is used to validate the SSL certificate presented by the server. See Creating PKI Application Profile for more information. |
SSL Key and Certificate |
This SSL certificate will be presented to the server by service engines. |
|
Enter SSL Attributes in the case of LDAPS health monitor |
Configuring LDAP Health Monitor using UI
Navigate to .
Under General, select LDAP as Type and enter the details in the fields. For more information, see Creating New Health Monitor.
Under LDAP, enter the details in the fields.

Under RBAC, click Add to add the Key & values as required. For more information, see RBAC.
Click SAVE.
Configuring LDAP Health Monitor using CLI
An LDAP health monitor can be configured as shown below:
[admin:avi-controller]: > configure healthmonitor ldap-hm
[admin:avi-controller]: healthmonitor> type health_monitor_ldap
[admin:avi-controller]: healthmonitor> authentication username cn=aviuser,ou=users,ou=system
[admin:avi-controller]: healthmonitor:authentication> password xyz123
[admin:avi-controller]: healthmonitor:authentication> save
[admin:avi-controller]: healthmonitor> ldap_monitor base_dn ou=system
[admin:avi-controller]: healthmonitor:ldap_monitor> save
[admin:avi-controller]: healthmonitor> save
Configuring LDAPS Health Monitor using UI
Navigate to .
Under General, select LDAPS as Type and enter the details in the fields. For more information, see Creating New Health Monitor.
Under LDAPS, enter the details in the fields.

Under Security, enter the details in the fields.

Under RBAC, click Add to add the Key & values as required. For more information, see RBAC.
Click SAVE.
Configuring LDAPS Health Monitor using CLI
An LDAPS health monitor can be configured as shown below:
[admin:avi-controller]: > configure healthmonitor ldaps-hm
[admin:avi-controller]: healthmonitor> type health_monitor_ldaps
[admin:avi-controller]: healthmonitor> authentication username cn=aviuser,ou=users,ou=system
[admin:avi-controller]: healthmonitor:authentication> password xyz123
[admin:avi-controller]: healthmonitor:authentication> save
[admin:avi-controller]: healthmonitor> ldaps_monitor base_dn ou=system
[admin:avi-controller]: healthmonitor:ldaps_monitor> ssl_attributes ssl_profile_ref System-Standard
[admin:avi-controller]: healthmonitor:ldaps_monitor:ssl_attributes> save
[admin:avi-controller]: healthmonitor:ldaps_monitor> save
[admin:avi-controller]: healthmonitor> save
When attributes are configured, the SE will match configured attributes in server response data. When the match is not found, it marks the server DOWN.
For lesser consumption of resources, configure specific base_dn having less number of entries with the base scope so that server response data will not be large.