The structure of every workflow relies on inputted user and system variables. They are added and managed within the Start block. By default, workflows contain a Start block, an Assign block, and an End block that designate the start, middle, and end of the workflow. Start block is the first block in the workflow editor and the workflow’s basic functioning depends on it. The variables defined here can later be assigned in the Assign block. When you create a workflow, a default user variable result is created in the Start block. You can add and define more user variables for your workflow in the Start block. On the left-hand side of the workflow editor, groups of default and installed integrations are present. You can use them to build a workflow. You can store blocks and entire workflows in custom folders like Favorites, User, Shared, and Common. Using the search option, you can search for a particular block or group folder.
Workflow editor helps you to build and edit a workflow. You can also assign authentication to a workflow, deploy a workflow, run a workflow, debug a workflow, and add or modify variables in the
Start block and assign variables in the
Assign block.
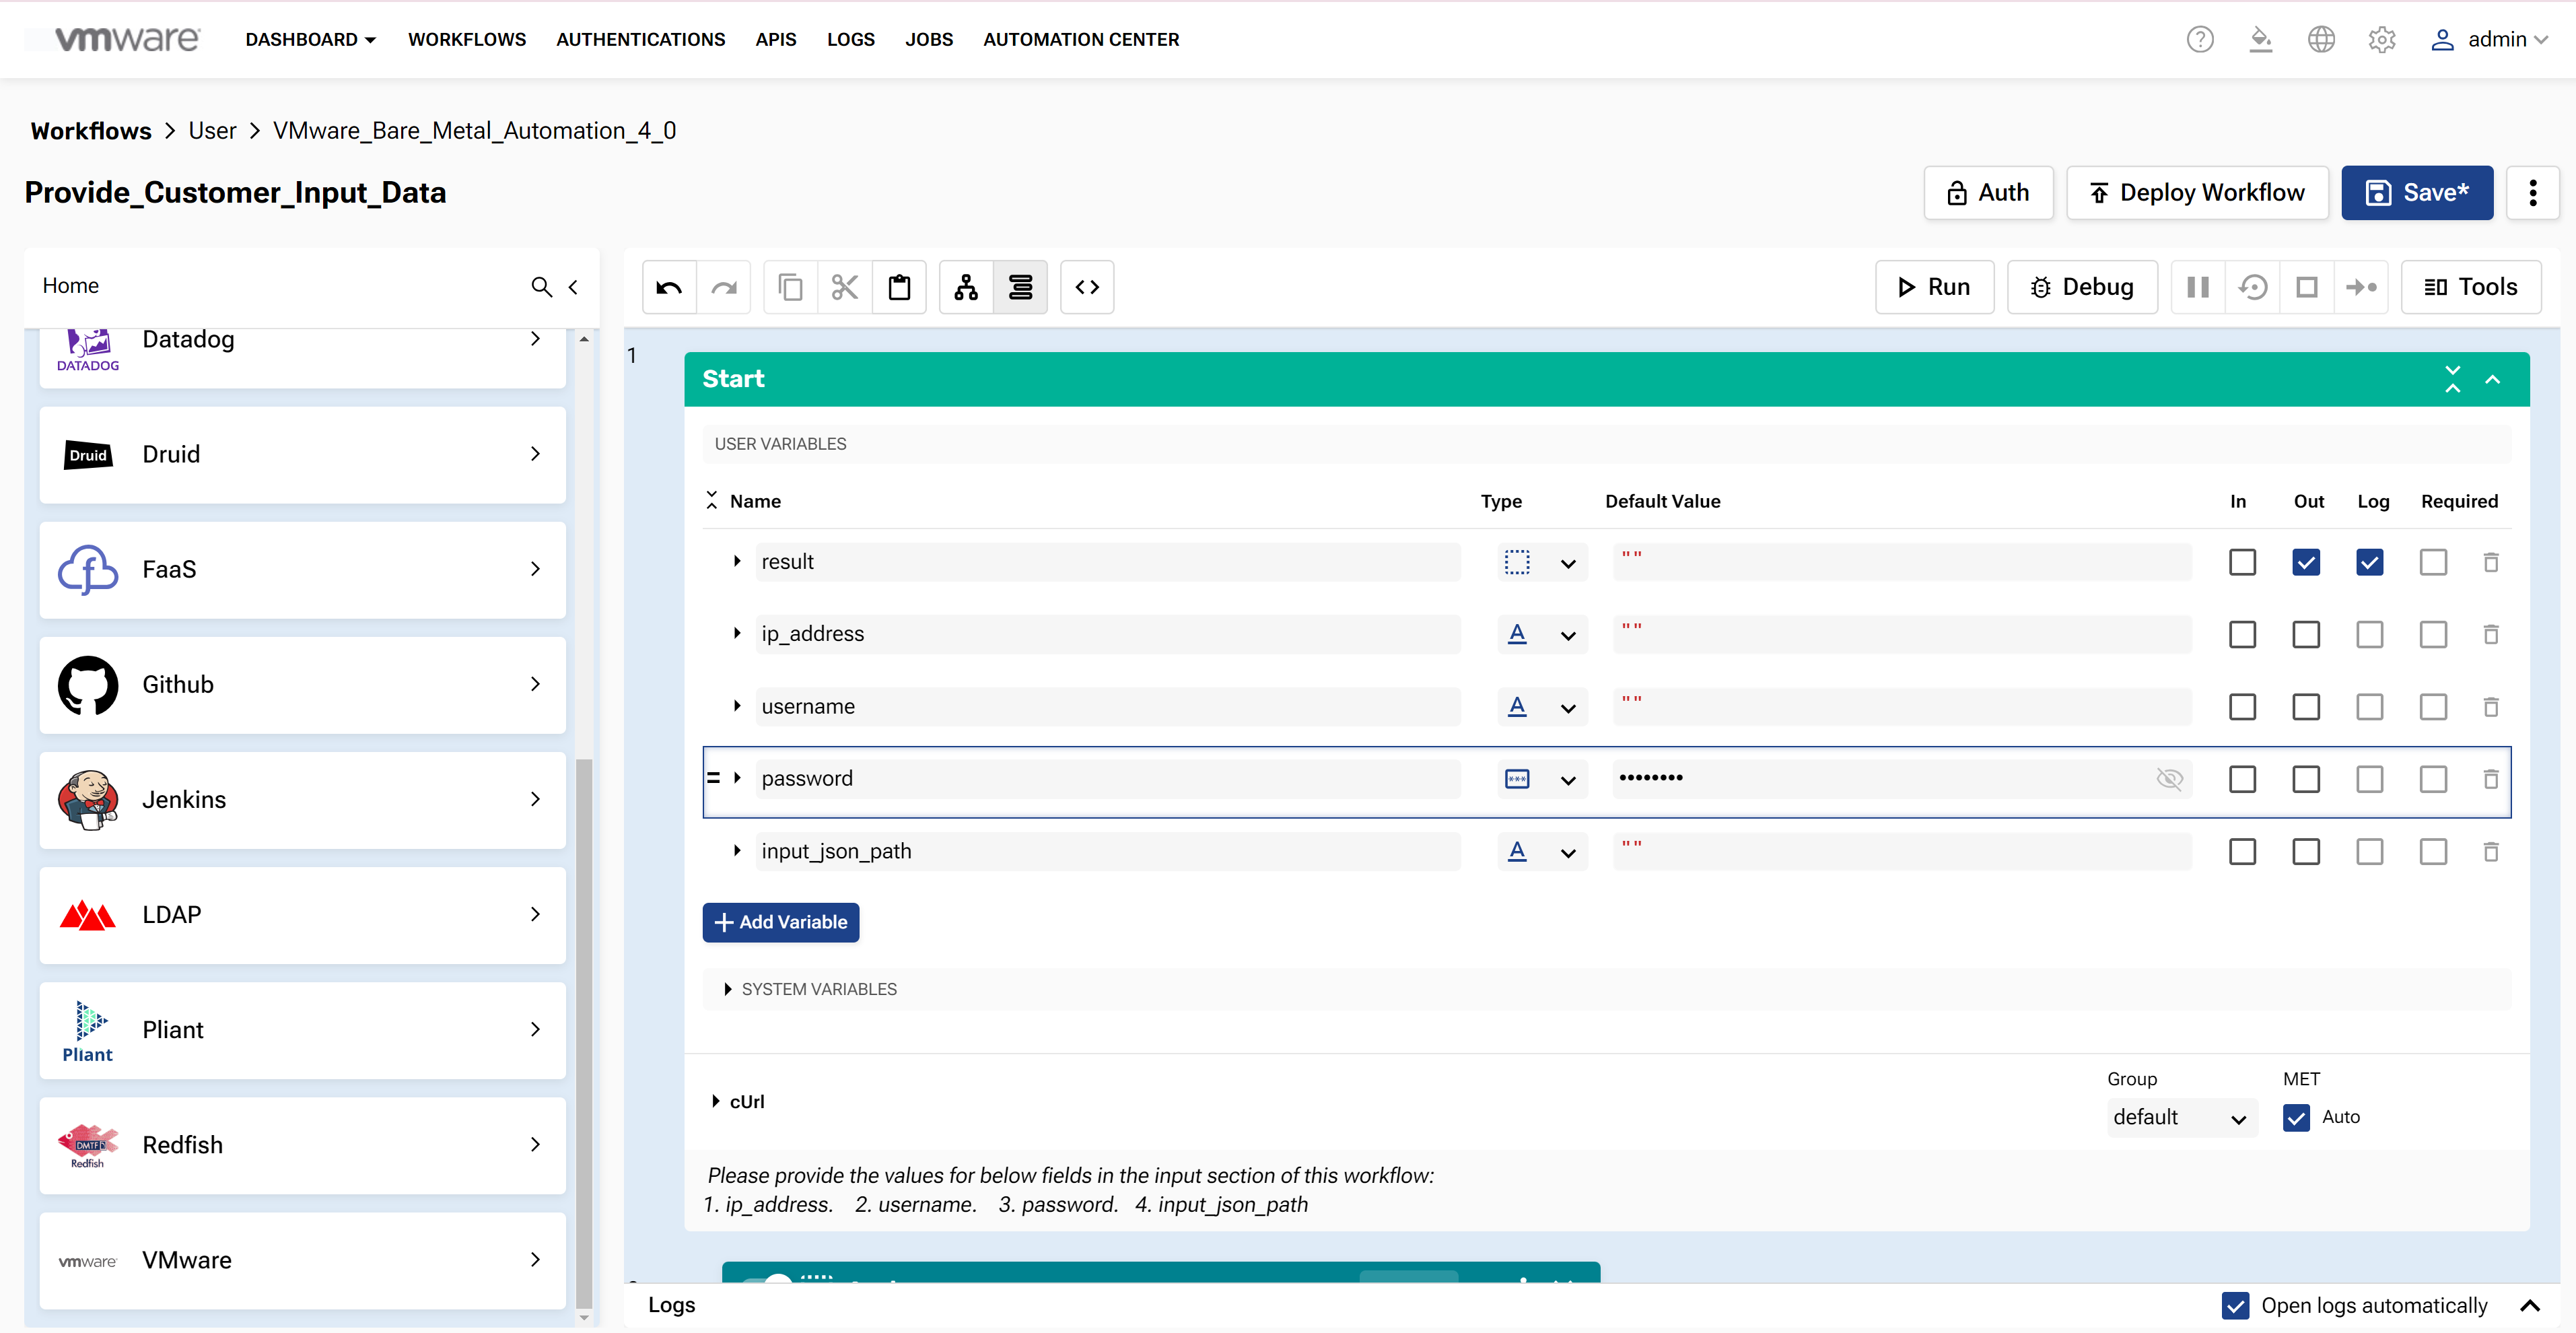
Password Option in the Type drop-down Menu
The
Password option in the
Type drop-down menu in the
Workflow Editor window allows you to hide the input in the fields. You can access it by selecting the
Password option from the
Type drop-down menu of the
password field. After you select the
Password option from the
Type drop-down menu of the
password field, the password you type is masked. When you select the
Password option from the
Type drop-down menu of the
password field, the password that you have entered in string, number, boolean, or any other format is also encrypted.
Note: If you are using the JSON/YAML editor all password-type field content will be displayed as plain text.
Procedure
- In the VMware BMA window, click the Workflows tab.
- Click the ellipse icon
 next to the workflow that you want to open in workflow editor.
- Click Open.
The workflow editor opens.
- Click Auth to assign an authentication to the workflow.
The
Authentications window opens.
- Select the required authentication and click Use Default.
- Click Deploy Workflow to deploy a workflow and make it active and accessible from outside environments. For more information, see Deploy a Workflow.
- Click Run to run a workflow.
- Click Debug to debug a workflow.
- In the Start block, click inside the Name box to edit the variable name.
- Click the Type drop-down menu to select the variable type.
Note: When you select
Authentication from the
Type drop-down menu, the
Select authentication type window opens. This window allows you to select a specific type of provider you want to authenticate with.
- In the Default Value field, enter the default value for the variable.
Note: The default value must be entered within the quotation marks.
- Select the Out checkbox.
Note: When you select the
Out checkbox, the
Log checkbox is selected automatically. This helps you to send the output to a parent workflow inside the worker and the output will not be sent outside the worker.
- Select the In and Required checkboxes when you want the input variable to have a value for the workflow to execute.
- Click Add Variable to add a variable.
- Click the delete button corresponding to the variable that you want to delete.
- Click System Variables.
- Select headers and body to add them as user variables to the workflow.
- Click cUrl to test call the workflow from a remote system.
- From the Groups drop-down menu, select a worker group to aid in task completion and observe state of the workflow.
- Select the Auto checkbox under MET to show the time that is saved by running the workflow as opposed to completing the tasks manually.
Note: You can deselect the
Auto checkbox to disable automatic Manual Execution Time (MET) calculation and input a manual calculation of MET in minutes.
- In the Assign block , click the toggle button to assign a variable to the workflow.
- Click the ellipse icon in the Assign block and select appropriate option to move, clone, copy, cut, or locate a variable.
Note: You can clone the
Assign block, change the variable and its value to assign it to the workflow.
- Click Save to save the changes that you have made to workflow.


