


This topic describes how to enable the reputation approvals feature for your Carbon Black App Control Server.
You can add file and publisher exceptions after you enable reputation approvals for the Carbon Black App Control Server; however, the publisher exceptions do not reverse any local approvals that have already occurred due to publisher reputation.
Prerequisites
- Consider exceptions for files and publishers that you do not want approved by reputation. These exceptions should be created before you enable the feature. See Creating Exceptions for Files and Publishers.
- Consider whether you want reputation approvals to be available for all of your agent-managed computers or only those in certain policies. This choice is covered in the following procedure.
- Carbon Black File Reputation must be activated before you can enable Reputation Approvals. Follow the instructions in Activating Carbon Black File Reputation to activate Carbon Black File Reputation.
Procedure
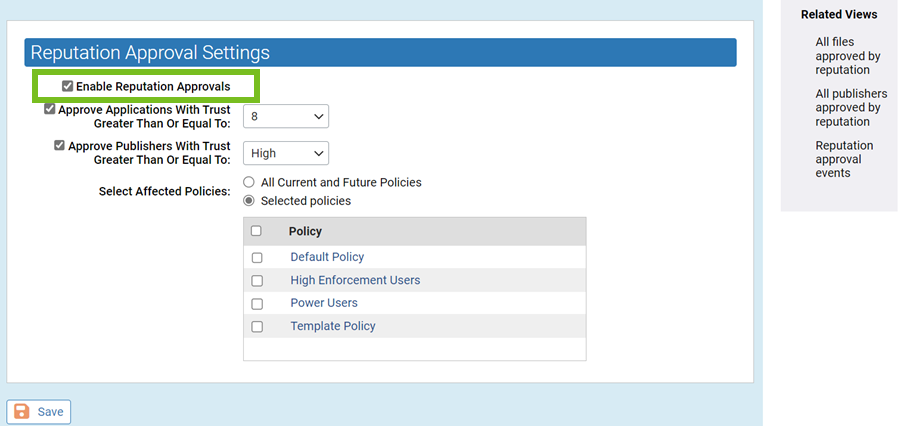
- Select the check box labeled Enable reputation approvals to open the fields on the page for editing.
Results
Note: Enabling file reputation approvals can require that very large numbers of file states are re-evaluated. You will not necessarily see changes in file state immediately in the console, but the server continues to process these changes in the background until all are up-to-date with the new approval rules. Full processing of the approvals can take several minutes.
