


The following procedure shows how to configure an AD mapping rule. Although most parameters are reasonably straightforward, pay particular attention to the Directory Object field, which requires use of a special AD browser.
Procedure
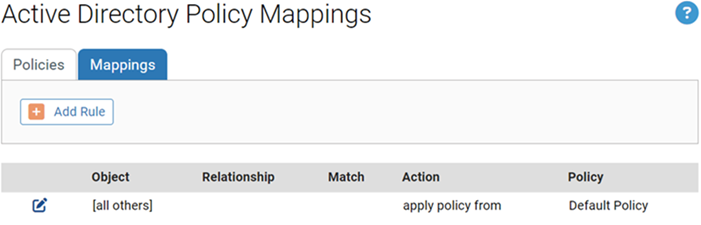
- Click the Mappings tab.
The Active Directory Policy Mappings page displays together with the Policy Mappings table, initially showing only the default rule.
 Note: If no Mapping tab appears, the AD mapping interface has not been enabled. Go to the General tab of the System Administration page and enable the feature.
 - On the Active Directory Policy Mappings page, click Add Rule to display the Active Directory Policy Mapping Rule panel in which you enter the rule parameters.
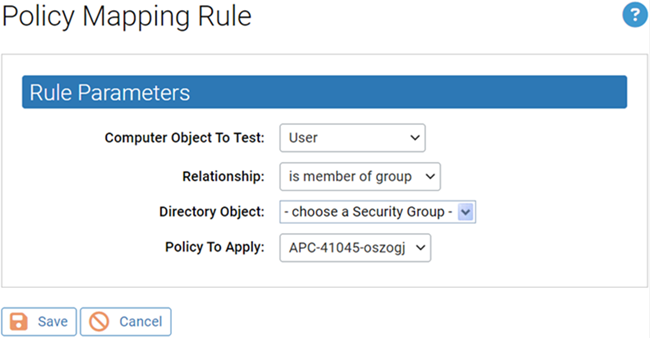
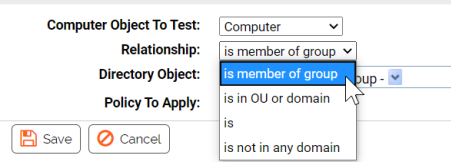
- Select the Relationship between the data of the object tested and the Directory Object specified in the rule.
The choice for this field changes the choices available in the other fields.
In this field, you can specify that objects must be in a OU or domain, a security group, in no domain, or that they exactly match the directory object you choose (the “is” choice on the Relationship menu). Generally, it is best to choose a relationship that maps multiple computers to a policy rather than one that singles out an individual computer or user.
- Choose the Directory Object that the data from the tested computer must match.
- Click in the Directory Object field to open the AD browser.
The browser opens immediately below the Directory object field. The left panel is labeled Search in, and shows a tree of your AD domains.
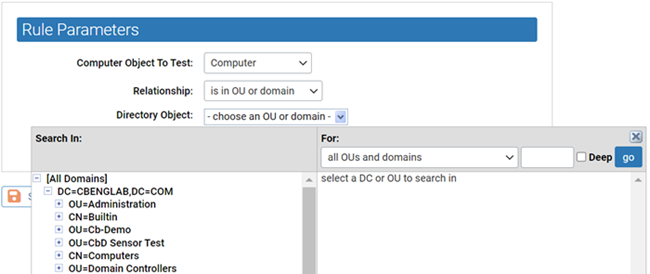
- To expand the AD tree in the left panel, click on the plus button next to the node to expand.
- To collapse the view on the left, click the minus button next to the node to collapse.
- Click the object in the left pane that defines the scope of your search.
Example: If you have two domains, you might click one of them, such as DC=hq,DC=xycorp,DC=Local.
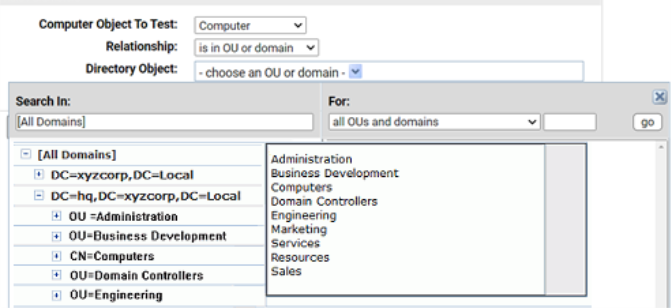
- If you see the object in the right panel that you want to use for this rule, double-click it. The object, including full information about its location in the AD object tree, appears in the
Directory Objectfield of the Rule Parameters panel and the browser will close.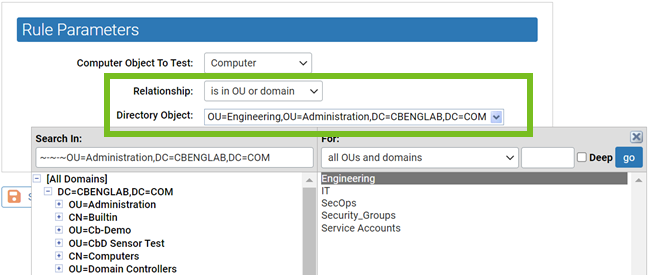
- If your actions did not automatically close the browser, click the X button in the top right corner to close it.
There are additional options for using the directory object browser. See AD Object Browser Options for more information.
- Click in the Directory Object field to open the AD browser.
- From the Policy to Apply dropdown menu, select the policy you want assigned to computers that meet the requirements of this rule. Only existing policies appear on the dropdown — if the policy for this rule has not been created yet, cancel the creation of this rule and go to the Policies page to create the new policy.
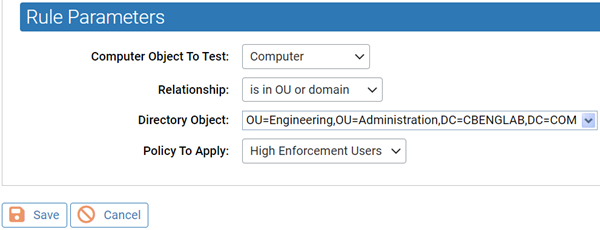
- When you have entered all of the parameters for the rule, click Save. A newly created rule goes to the bottom of the table of AD rules, just above the default rule, and all rules above it take precedence. In the example, the rule instructs the Carbon Black App Control server to assign any computer belonging to the Engineering OU in the domain hq.xyzcorp.local to the Research Group policy.
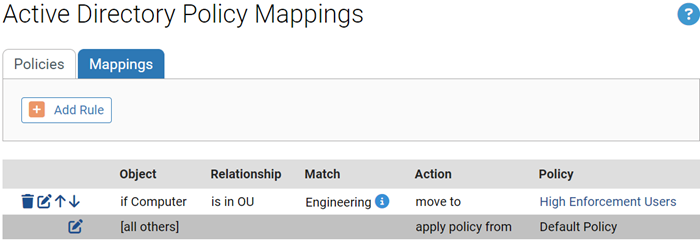 Tip: Rolling the mouse cursor over the i button next to an object in the Match column provides a description of the object.
