You must enable Carbon Black on the virtual machines (VM) where your application workloads are running.

Prerequisites

Procedure

  1. Log in to the vSphere Client using your administrator credentials.
  2. In the left navigation pane, click Carbon Black.
  3. Go to the Inventory > Not Enabled tab.
  4. Verify the VM eligibility in the Status column. You can enable Carbon Black only on the eligible VMs.
    Status Description
    Eligible A correct version of the VMware Tools and the Carbon Black launcher is available on the VMs. You can go ahead and enable Carbon Black on the VMs.
    Not Eligible Due to few reasons, your VMs might not be eligible to enable Carbon Black. For example,
    • VM is powered off.
    • The required version of the VMware Tools or Carbon Black launcher is not available.
    • If the isolation.tools.setinfo.disable parameter for the VM is set to true.

      To make your VM eligible, you can perform any of the following actions based on the non-eligibility criteria.

    • Power on the VM.
    • For Windows VMs: Install or upgrade VMware Tools to 11.2 or later.
    • For Linux VMs: Install the launcher manually. For details, see Carbon Black Launcher for Linux VMs.
    • Set the isolation.tools.setinfo.disable parameter to false. For details, see vSphere documentation.
    Not Supported Carbon Black Cloud Workload does not support the Operating System (OS) or the OS version. Upgrade to the supported OS and version as per the software requirements. For details, see Preparing to Enable Carbon Black in Your vSphere Environment.
  5. Select one or more eligible VMs for which you want to enable Carbon Black, and then click Enable.
    Option Description
    To enable Carbon Black with the latest available version. Proceed to the next step. Carbon Black is enabled with the latest available sensor version.
    To enable Carbon Black with a particular version.
    1. Click Advanced. A list of available version appears for each Operating System (OS).
    2. Only the supported sensor versions are listed. Select the required version from the drop-down menu.
    3. (Optional) You can preconfigure Carbon Black Cloud settings using the configuration file. You can upload the configuration file in a .ini file format. Click Upload File. Browse and select the configuration file.

      To view the sample configuration file and the parameter details, refer Configuration File Details.

  6. A confirmation dialog box appears. Click OK.

Results

Carbon Black is enabled.

  • Go to the VM > Summary > Carbon Black widget. You can view the installed version.
  • Go to the Carbon Black > Inventory > Enabled tab. You can view VM status is Active.

What to do next

After enabling Carbon Black on VMs where your workloads are running, you can start using the Carbon Black Cloud Workload Plug-in in the vSphere Client to monitor inventory in your data center. You can perform life-cycle management with a direct visibility in the vCenter Server.

The Carbon Black Summary page in the vSphere Client shows a summary of the VMs where Carbon Black is enabled.

You can navigate to your Carbon Black Cloud console and create sensor groups and set policies to meet your organization's security needs. You can identify, investigate, and remediate potential threats from the Carbon Black Cloud console.

For more information on Carbon Black Cloud, refer to the User Guide in the Help menu on the top-right hand of the Carbon Black Cloud console.
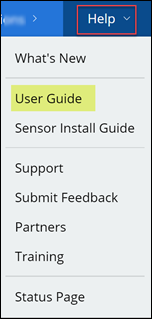
CBC user guide